Pre-installation Instructions
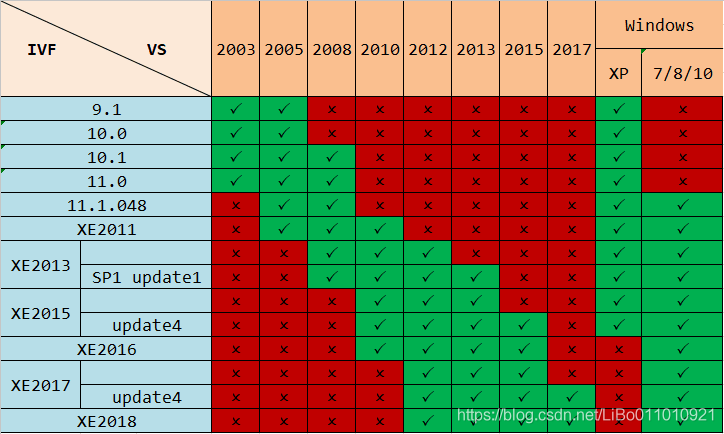
Before installation, it is necessary to determine whether your VS and IVF version matches, as shown in the figure below. Also, the MPICH version is very important, this article USES the 32-bit, if the installation of 64-bit cannot be configured, it will be mentioned later.
Install Visual Studio 2010
- download Visual studio 2010 unzip and double-click setup.exe “Next” until finished, select exit;
Install Intel Parallel Studio XE 2013
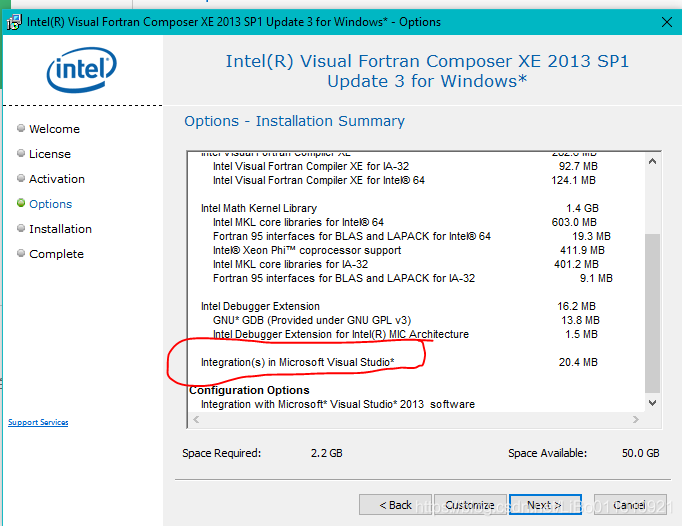
- close VS(otherwise cannot load ivf template) unzip w_fcompxe_novsshell_2013.2.149.zip double-click the installation file, open it, select license configuration, and select lic under the installation file; When it comes to Options, look at the Installation Summary list for instructions added to VS, which is the part with the red coil. If so, it means that after IVF you will be able to use Fortran in VS.
 starts the installation to check whether the FORTRAN module has been successfully added, as shown in the figure below
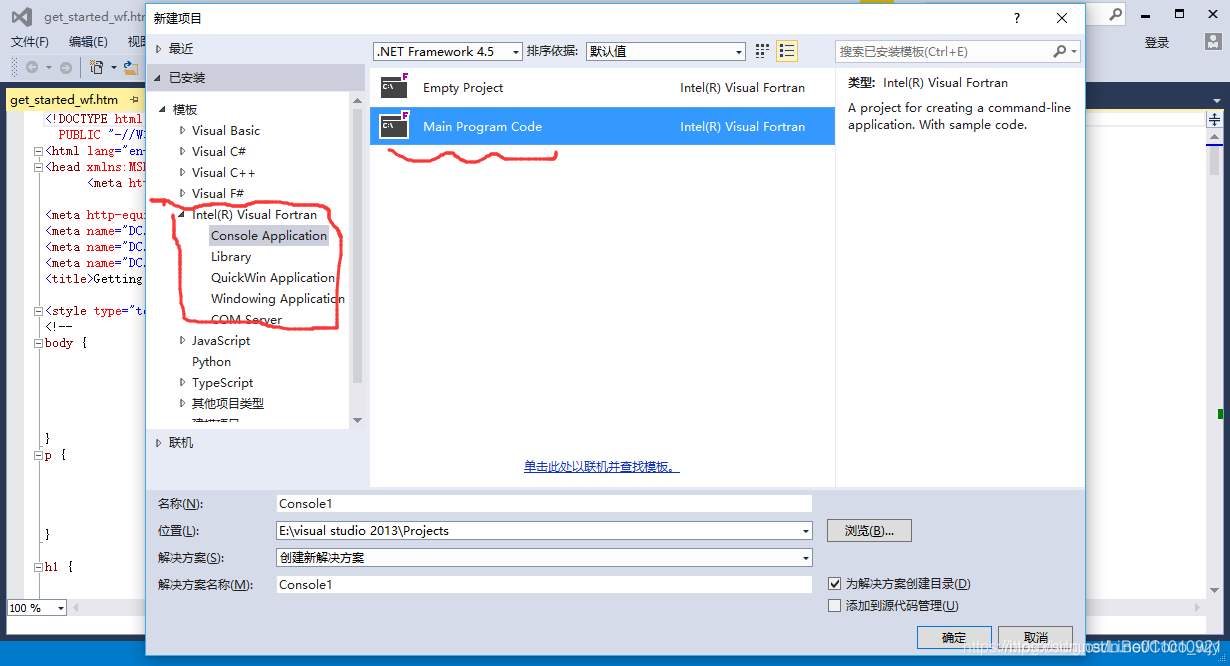
Install and configure MPICH2
- double-click and install mpich2-1.4.1p1-win-ia32.msi(the installation file provided in the network disk linked in this paper requires mpich of version 32, and the hosts of “Get setting” of the 64-bit version cannot be changed to green when wmpiconfig. Exe is used); After installation, strictly follow the configuration file (win7_vS2010_mpich2.pdf) given;
Read More:
- Configuring OpenGL in Visual Studio
- Configuring OpenGL in Visual Studio 2015
- Configuring OpenGL + glew in windows10 + Visual Studio 2017
- Visual studio 2017 experience
- Visual studio 2013 compiles vtk7.1.0
- Solution to CUDA installation failure problem visual studio integration failed
- Re installing Android studio always fails to install SDK when installing software (solution)
- Solve the problem of installing APK after Android studio compilation: error while installing apk
- CUDA Visual Studio Integration Installation failed
- Solution to the flash of visual studio 2017 running program
- Flash back when compiling Visual Studio
- Error occurred during Microsoft Visual Studio execution. Msb8020 reported an error
- Modify the custom keyboard shortcut of visual studio code
- Flashback problem of output window of visual studio 2017 console program
- Flash back of running program in Visual Studio 2017
- Solve the problem of visual studio console flashback
- Visual studio code shortcut
- Visual studio encountered an ambiguous printf
- Solution to the flash of visual studio console program output window
- Causes and solutions of black frame flashback after debugging visual studio 2017