Category Archives: Python

[Solved] bert_as_service startup error: Tensorflow 2.1.0 is not tested!

Error Messages:

bert_as_service + tensorflow 2.1.0
Tensorflow 2.1.0 is not tested!

So reinstalled the virtual environment

I:?[35mVENTILATOR?[0m:freeze, optimize and export graph, could take a while…
d:\anaconda\envs\tensorflow\lib\site-packages\bert_serving\server\helper.py:176: UserWarning: Tensorflow 2.1.0 is not tested! It may or may not work. Feel free to submit an i
ssue at https://github.com/hanxiao/bert-as-service/issues/
‘Feel free to submit an issue at https://github.com/hanxiao/bert-as-service/issues/’ % tf.version)
E:?[36mGRAPHOPT?[0m:fail to optimize the graph!
Traceback (most recent call last):
File “d:\anaconda\envs\tensorflow\lib\runpy.py”, line 193, in run_module_as_main
“main”, mod_spec)
File “d:\anaconda\envs\tensorflow\lib\runpy.py”, line 85, in run_code
exec(code, run_globals)
File "D:\Anaconda\envs\tensorflow\Scripts\bert-serving-start.exe_main.py", line 9, in
File "d:\anaconda\envs\tensorflow\lib\site-packages\bert_serving\server\cli_init.py", line 4, in main
with BertServer(get_run_args()) as server:
File “d:\anaconda\envs\tensorflow\lib\site-packages\bert_serving\server_init_.py”, line 71, in init
self.graph_path, self.bert_config = pool.apply(optimize_graph, (self.args,))
TypeError: ‘NoneType’ object is not iterable

It can be used by installing tensorflow1.10+python3.6.10

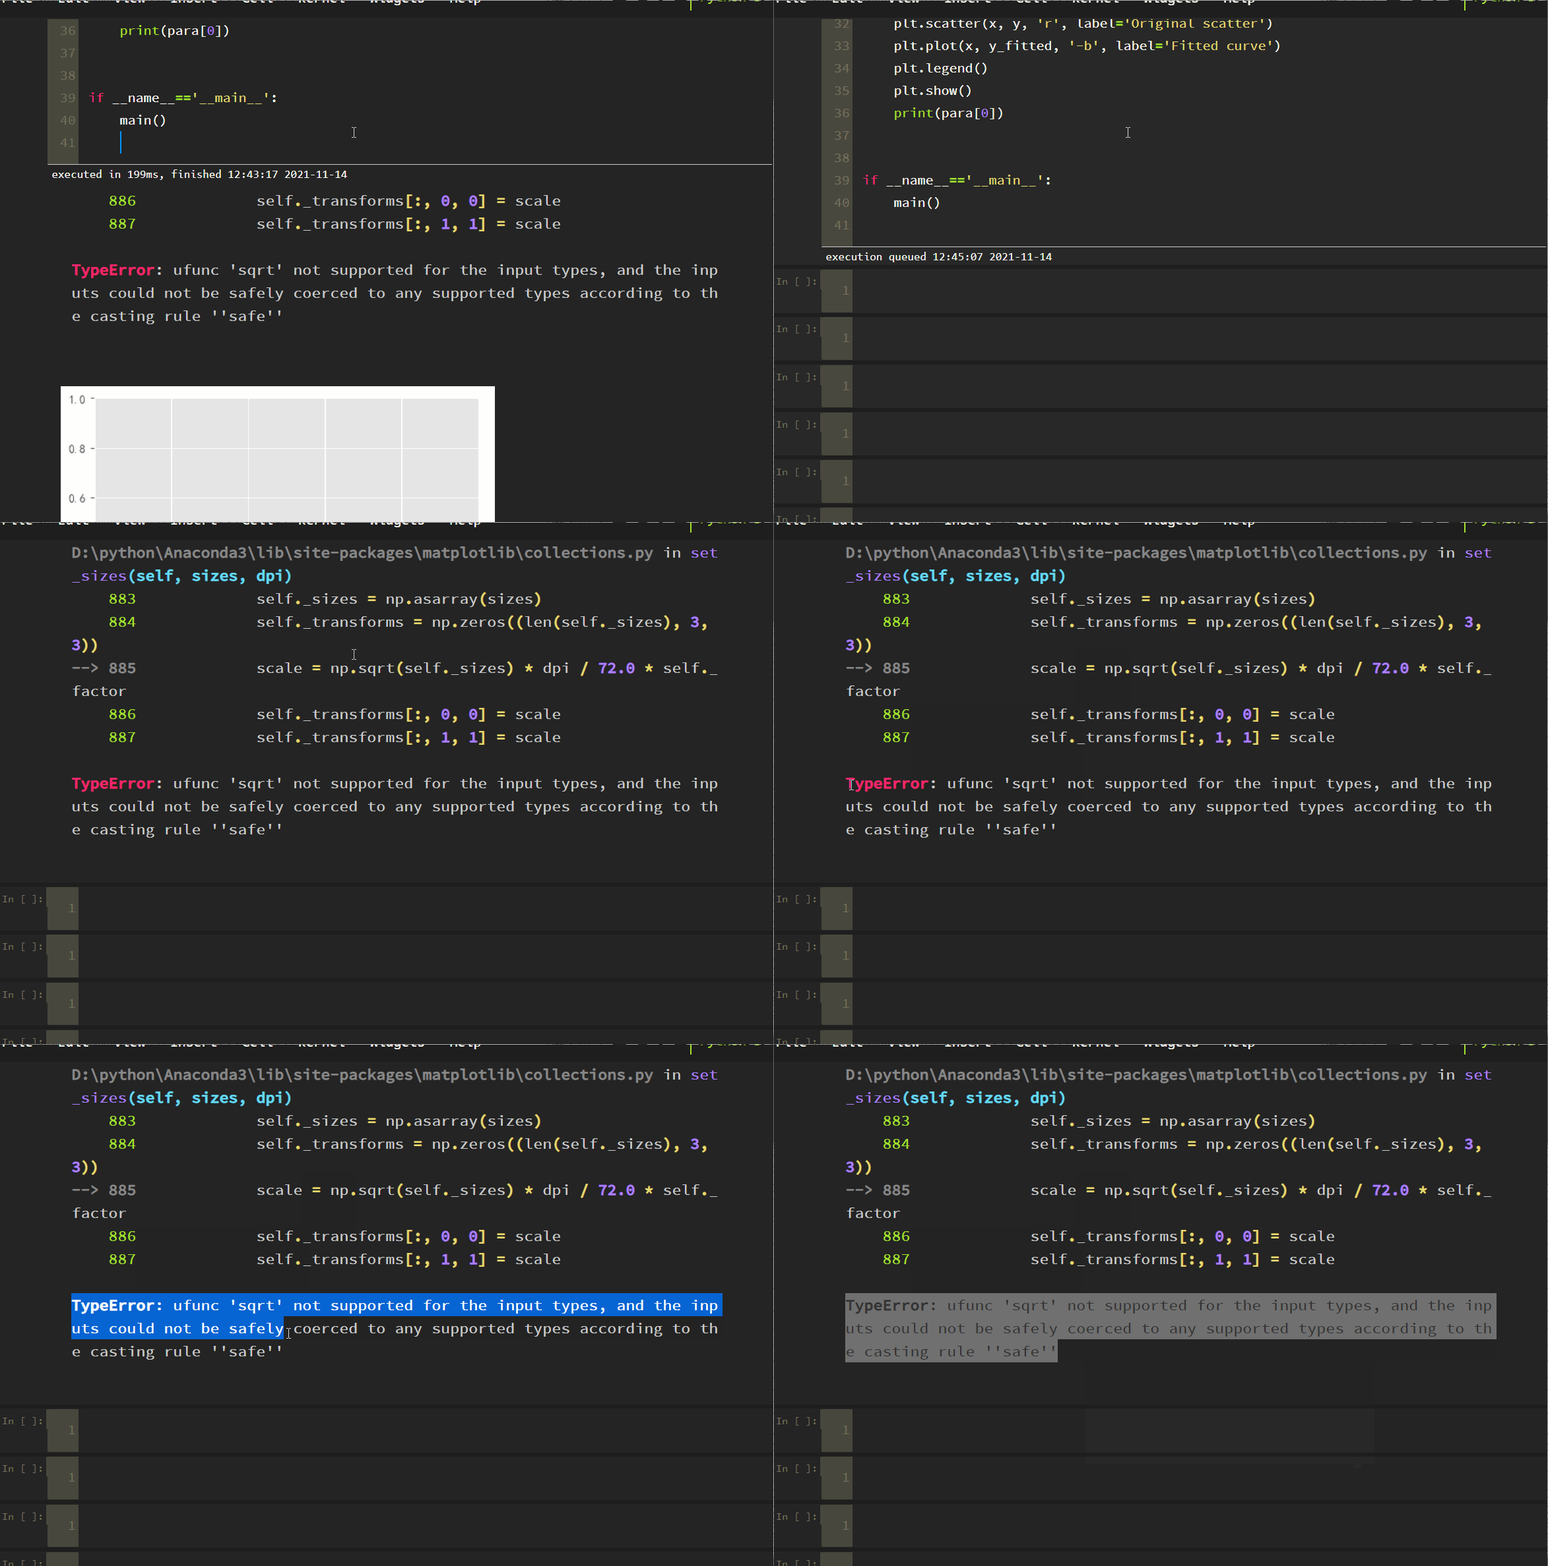
[Solved] Matplotlib scatter Draw Error: TypeError: ufunc ‘sqrt‘ not supported for the input types…rule ‘‘safe‘‘

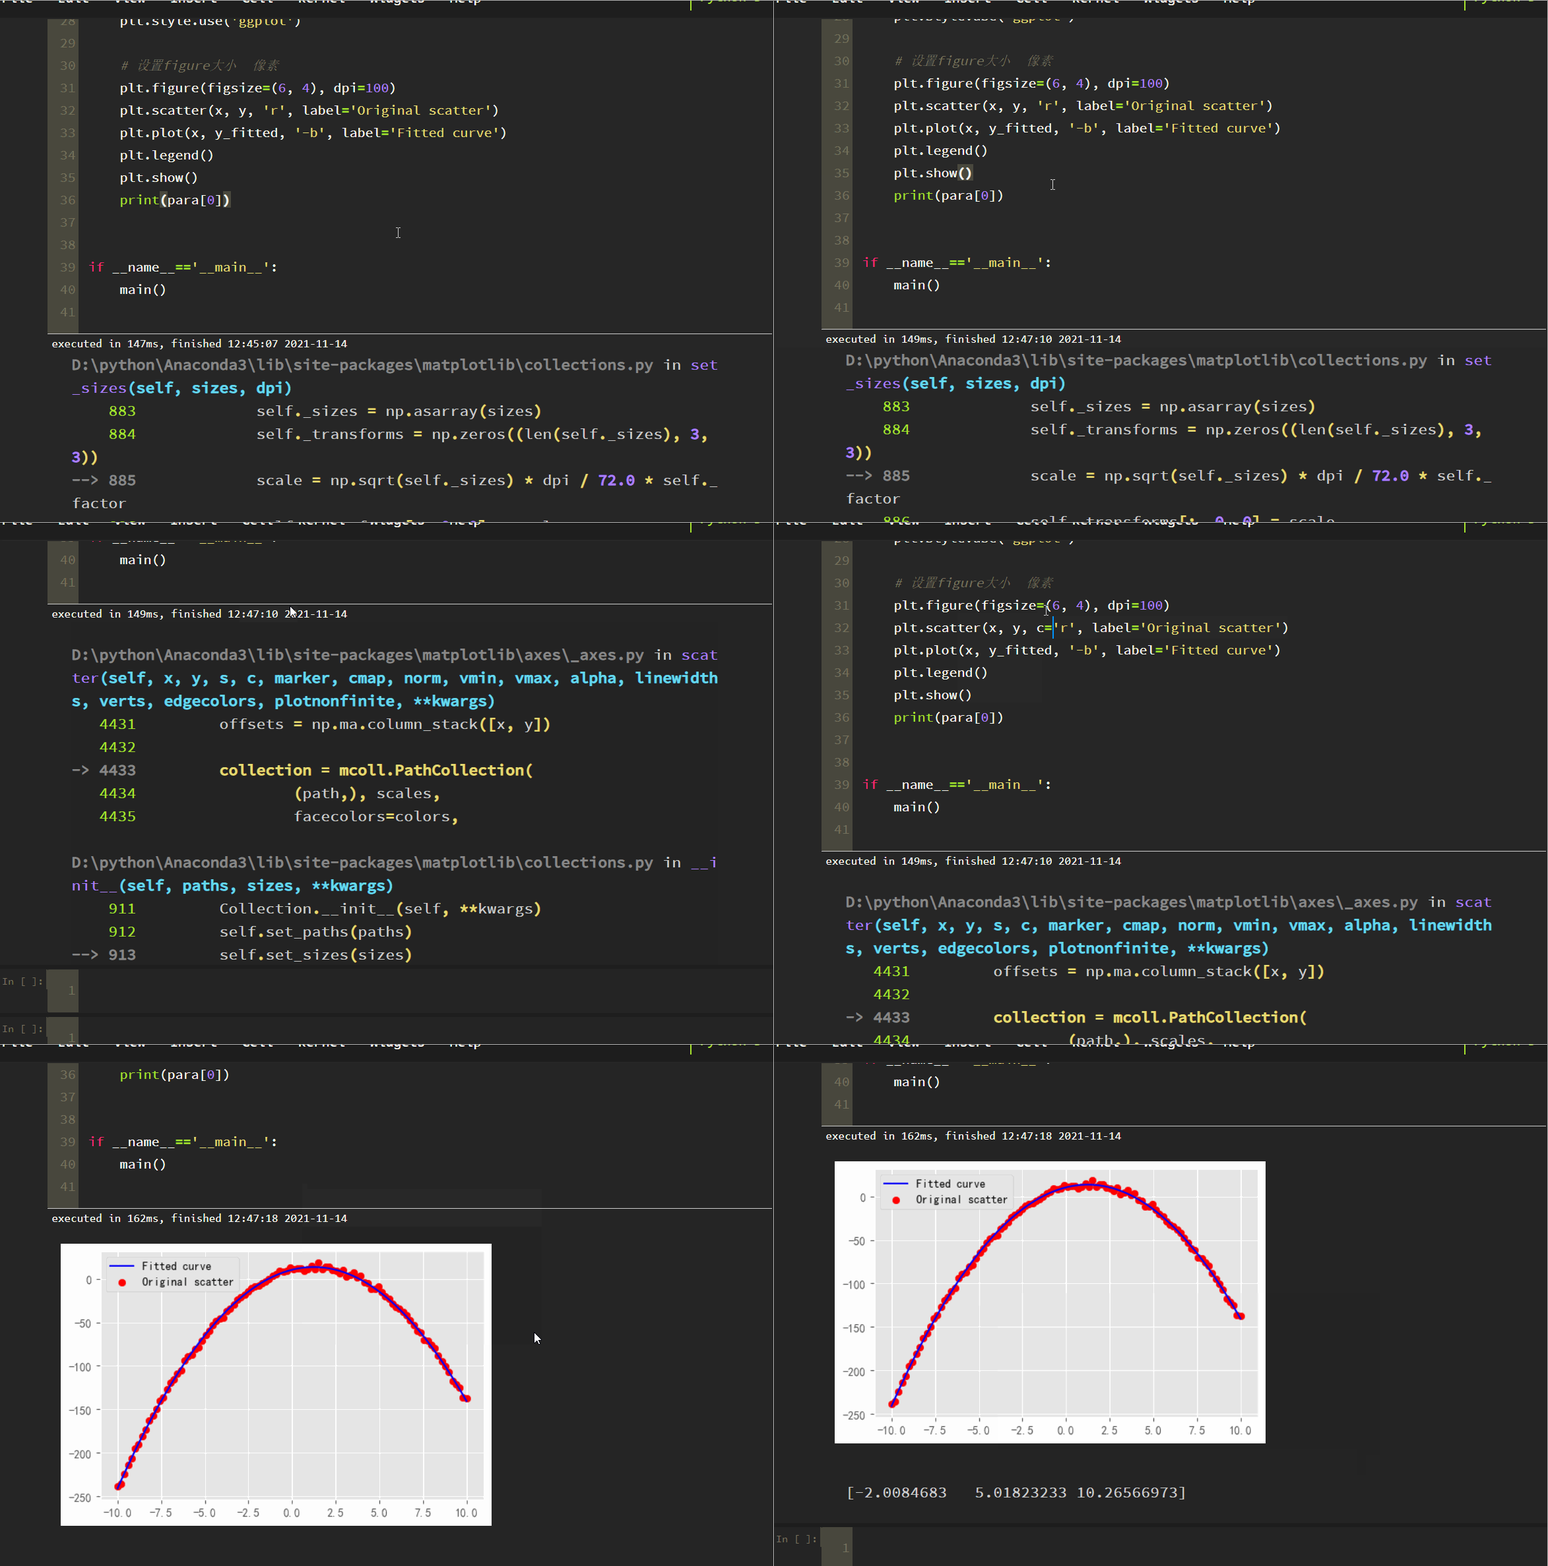
Errors are reported as follows:

The solution is as follows:

Original program:
plt.scatter (x, y, ‘R’, label =’original scatter ‘)
modified as:
plt.scatter (x, y, C =’r’, label =’original scatter ‘)

The color setting parameter is set to: C = ‘R’

The problem was successfully resolved as follows:

How to Solve pyqt5 imports module Error

Pyqt5 reports an error when importing the module:

1

ImportError: DLL load failed: Cannot find the specified program

2

ImportError: DLL load failed: Cannot find the specified program

3

ImportError: cannot import name 'QtCore'

The reason for the above error: the versions of pyqt5, pyqt5 SIP and pyqt5 stub modules are not interconnected

The solution is as follows:

    1. Open Win + R for operation, enter CMD to enter the terminal window, and enter it successively in the command line
pip uninstall PyQt5
pip uninstall PyQt5-sip
pip uninstall PyQt5-stubs

And the modules related to pyqt5 (such as pyqt5#u tools) are unloaded, and then input

pip install PyQt5

In this way, the installation already includes the corresponding versions of pyqt5 SIP and pyqt5 stubs. There is no need to install again, and then reinstall the modules related to pyqt5 (just uninstalled), such as PIP install pyqt5_tools

This will run successfully!

Python: How to Solve mysqlclient Install Error in Mac

It’s finally solved after many hardships. Please refer to the notes of Niu Ren and record it

Install brew

First, install brew and Baidu. There are many tutorials

Install MySQL

#Install
brew install mysql

#Configure environment variables
echo'export PATH="/opt/homebrew/opt/mysql-client/bin:$PATH"' >> ~/.bash_profile

#Make environment variables take effect
source ~/.bash_profile

#Start mysql service through script
mysql.server start

#Start mysql and set to boot
brew services start mysql

#Initialization, set password
mysql_secure_installation

ya..... bin% mysql_secure_installation
Enter password:

Securing the MySQL server deployment.


VALIDATE PASSWORD PLUGIN can be used to test passwords //Password verification plug-in, in order to improve security, you need to verify the password
and improve security. It checks the strength of password // It checks the strength of password
and allows the users to set only those passwords which are
secure enough. Would you like to setup VALIDATE PASSWORD plugin? //Prompt to install the password verification plugin

Press y|Y for Yes, any other key for No: y

There are three levels of password validation policy: //Three levels of password validation policy

LOW Length >= 8 //The minimum length is greater than or equal to 8 characters
MEDIUM Length >= 8, numeric, mixed case, and special characters //Numbers, letters, and special characters are mixed, the specific ones should be at least 1 number, 1 letter, 1 special character, and the length should not exceed 32 characters
STRONG Length >= 8, numeric, mixed case, special characters and dictionary file // The most stringent, plus, the dictionary file

Please enter 0 = LOW, 1 = MEDIUM and 2 = STRONG: 2 //Here I choose 2 MEDIUM
Using existing password for root.

Estimated strength of the password: 50 //Here is also the rating of password strength
Change the password for root ?((Press y|Y for Yes, any other key for No): y

New password: //Password

Re-enter new password:

Estimated strength of the password: 50
Do you wish to continue with the password provided? (Press y|Y for Yes, any other key for No): y //Prompt to use the password you just entered?
 ... Failed! Error: Your password does not satisfy the current policy requirements

New password: //Password

Re-enter new password:

Estimated strength of the password: 100
Do you wish to continue with the password provided?(Press y|Y for Yes, any other key for No): y
By default, a MySQL installation has an anonymous user, //By default, MySQL has an anonymous user,
allowing anyone to log into MySQL without having to have //This anonymous user does not have to be created for them by a user. An anonymous user allows anyone to log into MySQL,
a user account created for them. This is intended only for //This is just to facilitate test use
testing, and to make the installation go a bit smoother.
You should remove them before moving into a production //When using in a formal environment, it is recommended that you remove them
environment.

Remove anonymous users? (Press y|Y for Yes, any other key for No): y //Prompt to remove anonymous users
Success.

Normally, root should only be allowed to connect from //Under normal circumstances, root users are only allowed to log in using "localhost",
'localhost'. This ensures that someone cannot guess at // to ensure that someone cannot guess at
the root password from the network.

Disallow root login remotely? (Press y|Y for Yes, any other key for No): n //

 ... skipping.
By default, MySQL comes with a database named'test' that //By default, there is a test library in the MySQL database that can be accessed by any user.
anyone can access. This is also intended only for testing, //This is also intended only for testing
and should be removed before moving into a production // in a formal environment, should be removed
environment.

Remove test database and access to it?(Press y|Y for Yes, any other key for No) : y
 - Dropping test database...
Success.

 - Removing privileges on test database...
Success.

Reloading the privilege tables will ensure that all changes                       //Refresh the permission table to ensure that all modifications can take effect immediately
made so far will take effect immediately.

Reload privilege tables now?(Press y|Y for Yes, any other key for No) : y
Success.

All done! 

Install mysql-connector-c

brew install mysql-connector-c

Installing Xcode-

xcode-select --install

Install OpenSSL

brew install openssl

After installation, the terminal will display the method of configuring environment variables

If you need to have openssl@3 first in your PATH, run:
  echo 'export PATH="/opt/homebrew/opt/openssl@3/bin:$PATH"' >> ~/.zshrc

For compilers to find openssl@3 you may need to set:
  export LDFLAGS="-L/opt/homebrew/opt/openssl@3/lib"
  export CPPFLAGS="-I/opt/homebrew/opt/openssl@3/include"

Unlink MySQL and the linked MySQL connector mysql-connector-c

brew unlink mysql
brew link --overwrite mysql-connector-c

As shown in the figure, mysql-connector-c has a warning
warning: MySQL client is keg only and must be linked with -- force.
execute
brew link -- overwrite mysql-connector-c -- force

Install mysqlclient

Using PIP install mysqlclient will not cause any errors

Connect MySQL again

Do the opposite of unlinking MySQL and the linked MySQL connector mysql-connector-c:

brew unlink mysql-connector-c
brew link --overwrite mysql --force
Python: How to Solve multiprocessing module Error in Windows

[problem description]

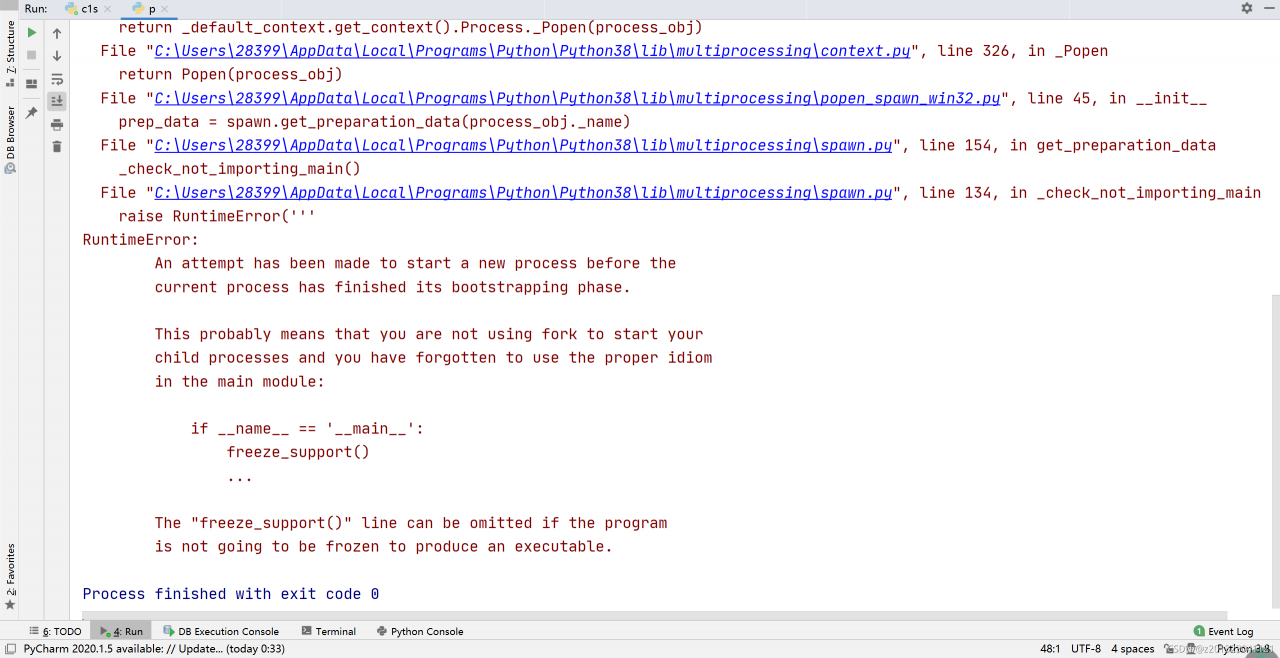
The following code can run normally in Linux, but an error is reported in windows.

import multiprocessing

def fun():  # Child process function
     print("child process execution")

p = multiprocessing .Process(target=fun) # Create process object

p.start() # Start the process

p.join() # Recycle process


[solution]

Add code as prompted:

if __name__ == '__main__':
    multiprocessing.freeze_support()

Adding only the above code will still report an error (the same error).

The code for creating process objects, starting processes, and recycling processes should also be placed in __ main__ protection

import multiprocessing

def fun():  # Child process function
     print("child process execution")

if __name__ =='__main__':
     multiprocessing.freeze_support() # Doesn't seem to be added?

     p = multiprocessing.Process(target=fun) # Create process object

     p.start() # Start the process

     p.join() # Recycle process

Done.

[Solved] Windows Configurate Python Environment error: Microsoft Visual C++ 14.0 or greater is required. Get it with “Microsoft

Problem description

An error occurs when configuring and installing pycotools package in Anaconda environment under Windows 10:

error: Microsoft Visual C++ 14.0 or greater is required. Get it with "Microsoft

Solution

The main reason is that my windows 10 lacks some environments and dependencies that require C + + compilation when installing Python packages, so it needs to be downloaded and installed.

Open the link and click the download generation tool:

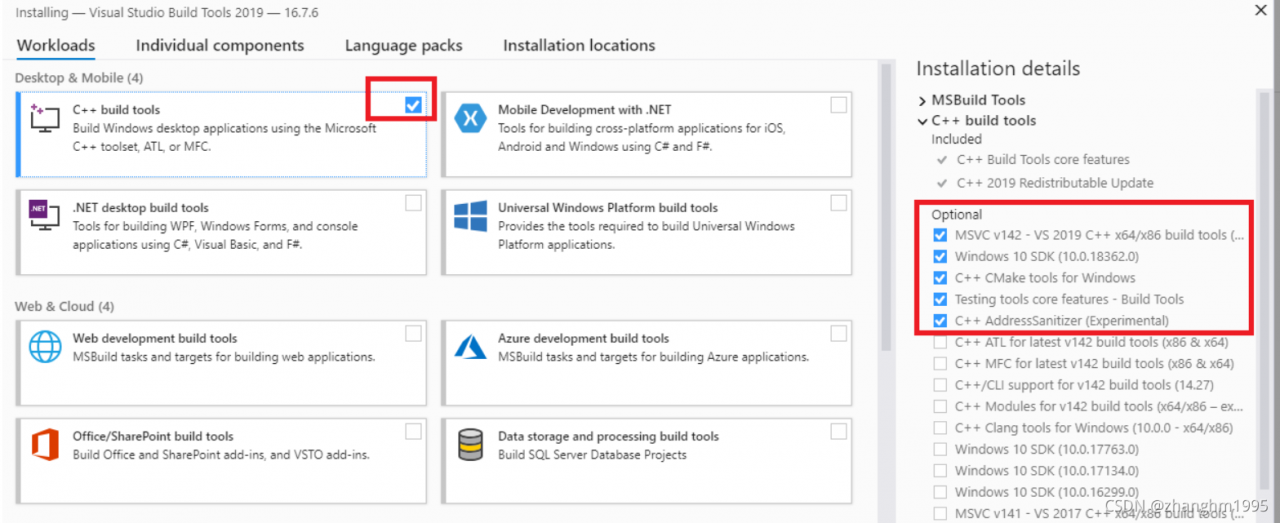
you will download a tool called vs_ buildtools__ 396764696.1636620081.exe , double-click the executable to download and install the library. Note that the following components are selected during the download process:

after the download and installation is completed, it takes effect after restarting the computer.

This completes the installation of environment dependencies such as C + +.

End.

[reference]
1 https://docs.microsoft.com/en-us/answers/questions/136595/error-microsoft-visual-c-140-or-greater-is-require.html

How to Solve Python Pandas Read or Import Files Error

1. File not found

Error: [Errno 2] No such file or directory: 'C:\\Users\\ssw0926\\Desktop.chengji.csv'

1. Wrong file path

Methods to avoid errors: do not manually enter the file address, select copy.

Select the file to be read, press shift and right mouse button, and copy file address will appear.

2. Remember to add the escape character R

For example:

df=pd.read_csv(r”C:\Users\ssw0926\Desktop\chengji.csv”,encoding=”utf-8″)

2. When the file contains Chinese, it is easy to have character coding problems.

1. Error message:

UnicodeDecodeError: 'utf-8' codec can't decode byte 0xd0 in position 0: invalid continuation byte

Solution: try to transform encoding. For example, change encoding = “UTF-8” to encoding = “GB2312” or other codes.

[Solved] conda install DBUtils Error: To search for alternate channels that may provide the conda package you’re looking for

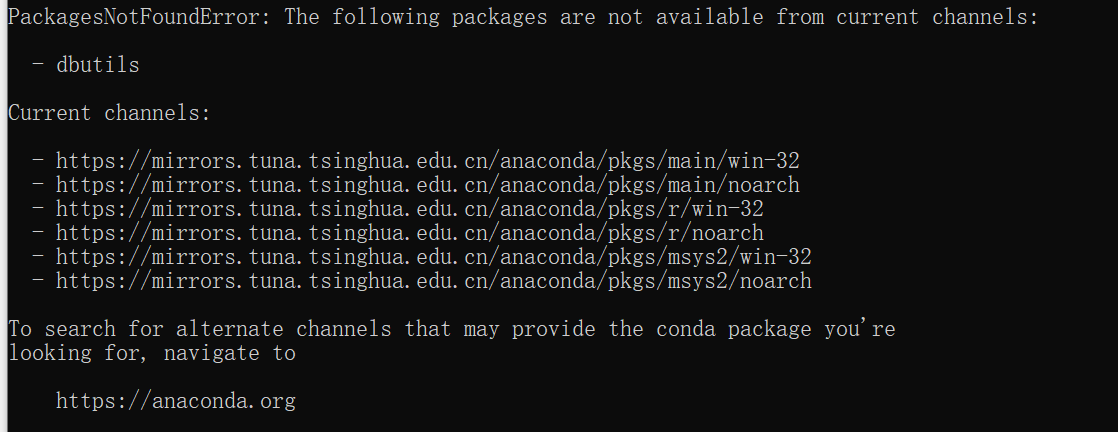
Error in CONDA install dbutils

To search for alternate channels that may provide the CONDA package you’re looking for

solution: </ font> switch to the environment to be installed in Anaconda prompt

[Solved] Pyinstaller package opencv error: ImportError: OpenCV loader: missing configuration file: [‘config.py’]. Check OpenCV installation.

Before packaging, it was OK. After upgrading pyinstaller and opencv, an error will be reported. I looked up a circle of information and found the answer on GitHub.

ImportError: OpenCV loader: missing configuration file: [‘config.py’]. Check OpenCV installation.

In

Pyinstaller 4.6
opencv Python 4.5.3.58
encountered a problem


Solution:

Solution 1

Reduce the opencv Python version to 4.5.3.56. This small version iteration actually changed something, resulting in packaging failure.

Solution 2

PS: I tried this method several times and failed

import cv2
print(cv2.__file__)

Execute these two sentences to find the path where CV2 is located:

D:\anaconda\64\lib\site-packages\cv2\cv2.cp38-win_ AMD64. PYD
this is my path
when packaging:

pyinstaller -F -w --key '12345678' --clean main.py --paths="D:\anaconda\64\lib\site-packages\cv2"

Remove the last file name from the path and keep the whole folder.

I suggest using the second scheme, because it is not constrained by the version, and this problem can be solved in a similar way in other packages in the future.

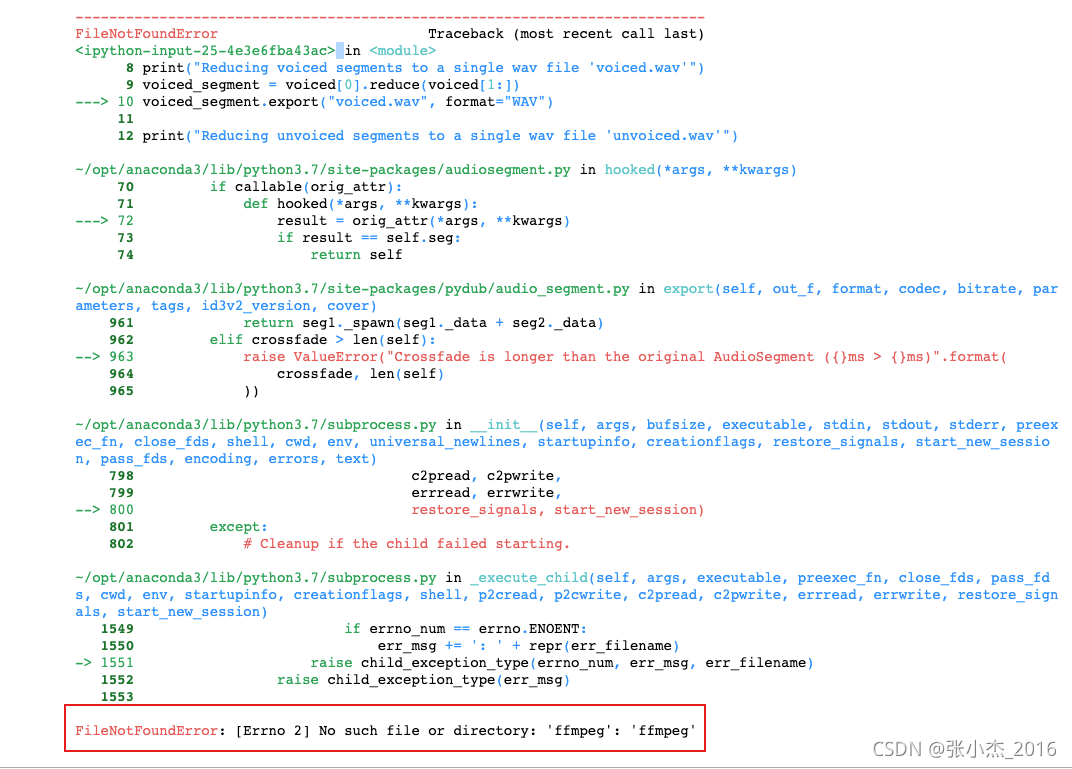
[Solved] Mac ffmpeg Install Error: filenotfounderror: [errno 2] no such file or directory: ‘ffmpeg’: ‘ffmpeg’

Audio processing error: filenotfounderror: [errno 2] no such file or directory: ‘ffmpeg’: ‘ffmpeg’

An error occurs when the following code is executed

import audiosegment

print("Reading in the wave file...")
seg = audiosegment.from_file("voice_data/out_11.wav")

print("Information:")
print("Channels:", seg.channels)
print("Bits per sample:", seg.sample_width * 8)
print("Sampling frequency:", seg.frame_rate)
print("Length:", seg.duration_seconds, "seconds")

print("Detecting voice...")
seg = seg.resample(sample_rate_Hz=32000, sample_width=2, channels=1)
results = seg.detect_voice()
voiced = [tup[1] for tup in results if tup[0] == 'v']
unvoiced = [tup[1] for tup in results if tup[0] == 'u']

print("Reducing voiced segments to a single wav file 'voiced.wav'")
voiced_segment = voiced[0].reduce(voiced[1:])
voiced_segment.export("voiced.wav", format="WAV")

print("Reducing unvoiced segments to a single wav file 'unvoiced.wav'")
unvoiced_segment = unvoiced[0].reduce(unvoiced[1:])
unvoiced_segment.export("unvoiced.wav", format="WAV")

Error content

Solution:
use the command: brew install ffmpeg installation. If the following problems occur, let’s continue brew install ffmpeg installation without turning off the error message.

==> Downloading from https://pkg-containers.githubusercontent.com/ghcr1/blobs/sha256:c16266957db69346464e39967d41d5198f3550423d6
############################                                              40.0%
curl: (92) HTTP/2 stream 0 was not closed cleanly: PROTOCOL_ERROR (err 1)
Error: ffmpeg: Failed to download resource "rav1e"
Download failed: https://ghcr.io/v2/homebrew/core/rav1e/blobs/sha256:c16266957db69346464e39967d41d5198f3550423d6aabfb62919975cf52ea19

After that, new error messages are found as follows:

Error: The `brew link` step did not complete successfully
The formula built, but is not symlinked into /usr/local
Could not symlink bin/2to3
Target /usr/local/bin/2to3
already exists. You may want to remove it:
  rm '/usr/local/bin/2to3'

To force the link and overwrite all conflicting files:
  brew link --overwrite [email protected]

To list all files that would be deleted:
  brew link --overwrite --dry-run [email protected]

Follow the prompts and execute the following statements:

 rm '/usr/local/bin/2to3'
 brew link --overwrite [email protected]
 brew link --overwrite --dry-run [email protected]

[Pytorch Error Solution] Pytorch distributed RuntimeError: Address already in use

The errors reported by pytoch are as follows:

Pytorch distributed RuntimeError: Address already in use

reason:

The port is occupied during model multi card training. Just change the port.

Solution:

Add a parameter — master before running the command_ For example:

 --master_port 29501

The following parameter 29501 can be set to any other port

be careful:

This parameter should be loaded in front of xxx.py, for example:

CUDA_VISIBLE_DEVICES=2,7 python3 -m torch.distributed.run /
--nproc_per_node 2  --master_port 29501  train.py