Category Archives: Linux

Latex: How to enter an underline

By default, latex sets the_ “As a part of the subscript representation in the mathematical model, this kind of processing is very unpleasant in many cases, such as the underlined variable: host in the code_ Name or something. Although you can use “host”\_ “Name” and so on, but it’s not easy to read. The following method can deal with most problems.


If not, please refer to http://www.tex.ac.uk/cgi-bin/texfaq2html?label=underscore


%%%%%%%Handling underlines._%%%%%%%%%
\usepackage{underscore}
%%%%%%%Handling underlines._%%%%%%%%%


Git: How to delete stash content

Delete the content of stash, feel the whole world is clean:

In fact, there are just a few commands:

Git stash list / / view the stash list

If you get this result, your stash has nothing
in it

This means that there is a queue
in the queue


Then you can execute git stash clear: note that this is to clear all your content

$ git stash drop stash@{0}  This is the first queue to be deleted


Linux: How to Fix undefined reference to `itoa’

I wrote a simple C program in Linux, which used Itoa. But when compiling, I prompted “undefined reference to ` Itoa ‘”, I thought it would be OK to add – LC, but the result was the same. Internet found that some people say that this function does not exist in Linux, generally use sprintf to replace it. Look at the following code and comments:

#include <stdio.h>
#include <stdlib.h>
//#include <unistd.h>
#include <string.h>

int num = 0;
char namebuf[100];
char prefix[] = "/tmp/tmp/p";

char* gentemp()
{
    int length, pid;

    pid = getpid();
    strcpy(namebuf, prefix);
    length = strlen(namebuf);
    //itoa(pid, &namebuf[length], 10);      // Unix version: itoa() does not exist in header file <stdlib.h>
    sprintf(namebuf+length, "%d", pid);     // Converting integers to strings using sprintf
    strcat(namebuf, ".");
    length = strlen(namebuf);
    printf("before do...while\n");
    char command[1024] = {0};
    do 
    {
        //itoa(num++, &namebuf[length], 10);
        sprintf(namebuf+length, "%d", num++);
        sprintf(command, "touch %s", namebuf);  // Creating files via touch
        system(command);
        printf("command = %s, namebuf[%d]=%d\n", command, num-1, num-1);
    } while (num < 50 && access(namebuf, 0) != -1); // access to determine whether a file exists
    printf("end of do...while\n");

    return namebuf;
}

int main( void )
{
    char *p = gentemp();
    printf("%s\n", p);

    return 0;
}

How to set fixed IP address for Raspberry Pie

Recently, we need to realize the communication between three raspberry pie terminals in an Internet composed of two switches

Because raspberry pie has a gigabit network port, we need to match the IP addresses of three raspberry pies in the same network segment. So we need to change the address.

Unlike the computer version of Ubuntu system, raspberry pie is not easy to implement interface settings. Under Ubuntu, you just need to click the network icon, and then edit the wired link in the edit link at the bottom.

The method of configuring IP address for raspberry pie is as follows:

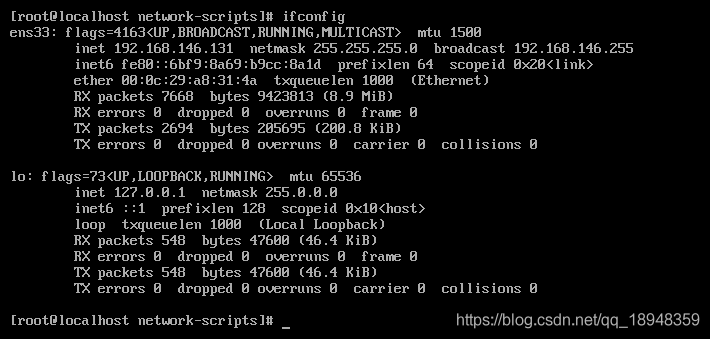
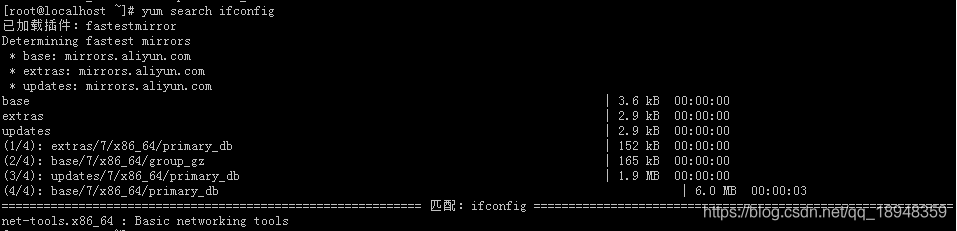
1. Now the terminal input ifconfig to view the local cable link interface

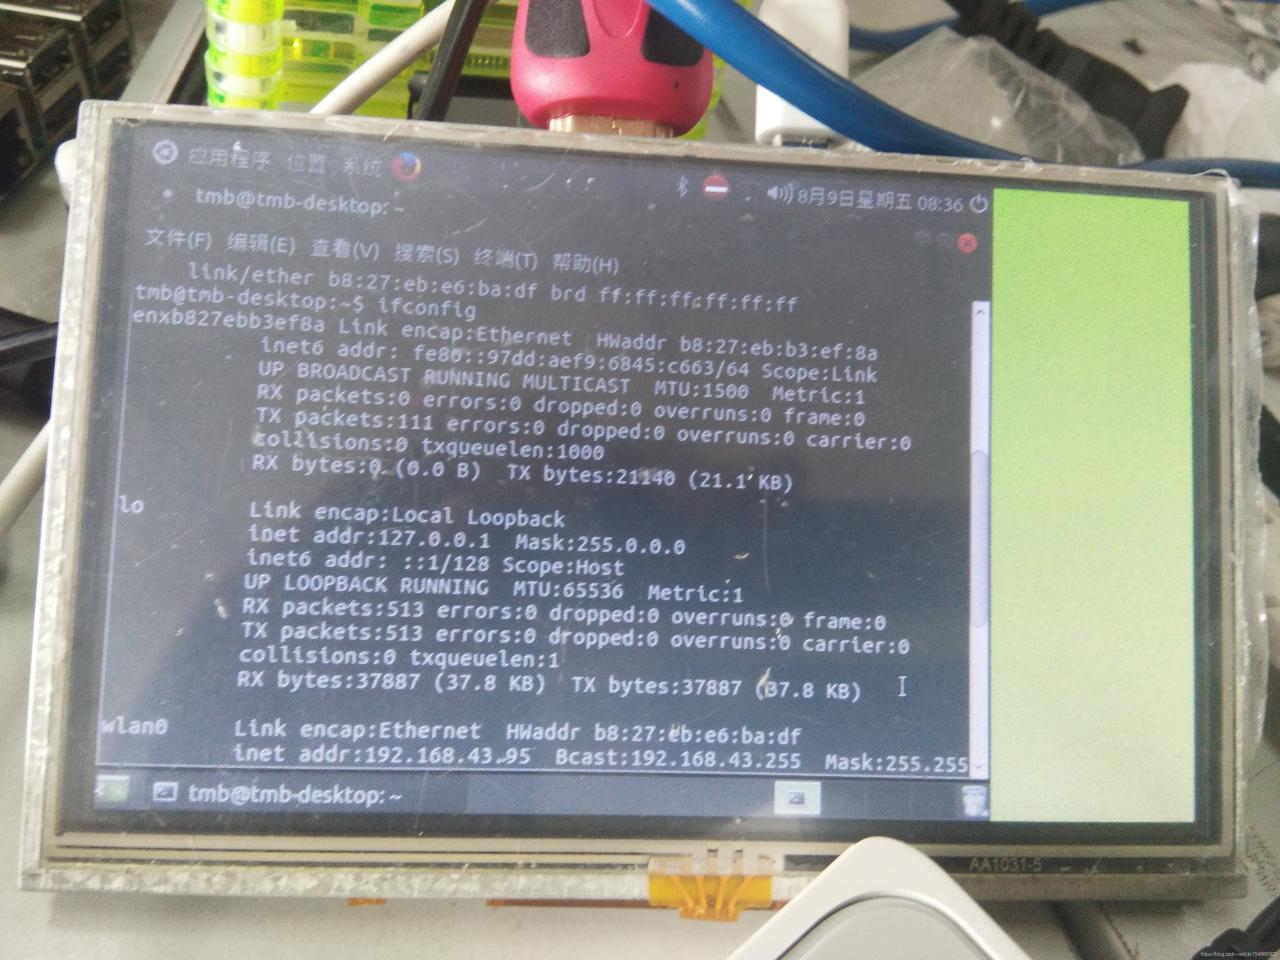
You can see that there is a wired connection port of enxb827bb3ef8a on the top, which is the name of the wired gateway. Or you can see it through the following of hwaddr

Remember the name

2. Terminal input:

sudo nano /etc/network/interfaces

Then a black interface (network configuration file) will be opened, which may display the following contents:

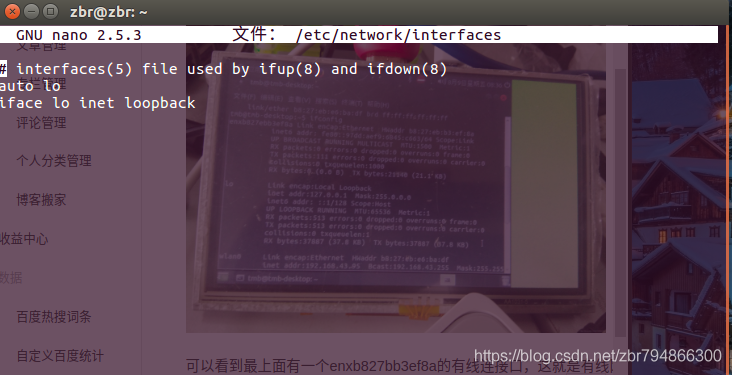
Then add the following:

auto lo
iface lo inet loopback
auto enxb827bb3ef8a  //It is the name of the previous view
iface enxb827bb3ef8a inet static
address 192.168.1.2    //IP address
netmask 255.255.255.0    //NetMask
gateway 192.168.1.1     //Gateway

Then press Ctrl + O to save, press enter to confirm, and press Ctrl + X to exit

Finally, use the sudo reboot command to restart

Hadoop 3.2.0 idea development environment construction and HDFS read write API operation

First of all, we need to build a Hadoop server

Please refer to: Hadoop 3.2.0 fully distributed cluster building and wordcount running

Create a new Maven project and add Hadoop related jar package

        <dependency>
            <groupId>org.apache.hadoop</groupId>
            <artifactId>hadoop-common</artifactId>
            <version>3.2.0</version>
        </dependency>
        <dependency>
            <groupId>org.apache.hadoop</groupId>
            <artifactId>hadoop-hdfs</artifactId>
            <version>3.2.0</version>
        </dependency>
        <dependency>
            <groupId>org.apache.hadoop</groupId>
            <artifactId>hadoop-client</artifactId>
            <version>3.2.0</version>
        </dependency>
        <dependency>
            <groupId>org.apache.hadoop</groupId>
            <artifactId>hadoop-mapreduce-client-core</artifactId>
            <version>3.2.0</version>
        </dependency>
        <dependency>
            <groupId>commons-logging</groupId>
            <artifactId>commons-logging</artifactId>
            <version>1.2</version>
        </dependency>

Write HDFS tool class

import org.apache.hadoop.conf.Configuration;
import org.apache.hadoop.fs.FSDataInputStream;
import org.apache.hadoop.fs.FSDataOutputStream;
import org.apache.hadoop.fs.FileSystem;
import org.apache.hadoop.fs.Path;

import java.net.URI;

/**
 * @author LionLi
 * @date 2019-2-7
 */
public class HDFSUtils {

    /** hdfs Server Address */
    private static final String hdfsUrl = "hdfs://192.168.0.200:8020/";
    /** Access users */
    private static final String username = "root";

    public static void main(String[] args) throws Exception {
        String filePath = "/user/root/demo.txt";
        StringBuilder sb = new StringBuilder();
        for (int i = 1; i < 100001; i++) {
            sb.append("hadoop demo " + i + "\r\n");
        }
        HDFSCreateAndWriteFileValue(hdfsUrl,username, filePath,sb.toString());
        HDFSReadFileValue(hdfsUrl,username, filePath);
    }

    /**
     * Read the contents of the file
     * @param url server address
     * @param user access user
     * @param filePath file path
     */
    private static void HDFSReadFileValue(
            String url,String user, String filePath) throws Exception {
        Configuration conf = new Configuration();
        try (FileSystem fileSystem = FileSystem.get(new URI(url), conf, user)) {
            Path demo = new Path(filePath);
            if (fileSystem.exists(demo)) {
                System.out.println("/user/root/demo.txt file exist");
                FSDataInputStream fsdis = fileSystem.open(demo);
                byte[] bytes = new byte[fsdis.available()];
                fsdis.readFully(bytes);
                System.out.println(new String(bytes));
            } else {
                System.out.println("/user/root/demo.txt file not exist");
            }
        }
    }

    /**
     * Create and write the contents of the file
     * @param url server address
     * @param user Access user
     * @param filePath The path to the file to be created
     * @param value The value to be written
     */
    private static void HDFSCreateAndWriteFileValue(
            String url,String user,String filePath,String value) throws Exception {
        Configuration conf = new Configuration();
        try (FileSystem fileSystem = FileSystem.get(new URI(url), conf, user)) {
            Path demo = new Path(filePath);
            if (fileSystem.exists(demo)) {
                System.out.println("/user/root/demo.txt file exist");
                if (fileSystem.delete(demo, false)) {
                    if (fileSystem.exists(demo)) {
                        System.out.println("/user/root/demo.txt failed to delete file");
                    } else {
                        System.out.println("/user/root/demo.txt success to delete file");
                        FSDataOutputStream fsdos = fileSystem.create(demo);
                        fsdos.write(value.getBytes());
                    }
                }
            } else {
                System.out.println("/user/root/demo.txt file not exist");
                FSDataOutputStream fsdos = fileSystem.create(demo);
                fsdos.write(value.getBytes());
            }
        }
    }
}

test run

The test was successful

Windows command execution bypass

"whoami"
("whoami")
who"a"mi
who"a"^mi

Double quotation marks. Brackets. The XOR combination can execute the command normally
and cannot add two. Will be treated as an escape character. Become a

Variable bypass

set a=1
echo a
echo %a%

set a=w
set b=ahomi
%a%%b%

Use environment variables to bypass.

All environment variables can be viewed via set
echo net%programfiles:~10,1%user
Takes the environment variables of programfiles starting with the 10th bit. Take one bit. It is a space. Then it becomes net user

C#: How to get the value or text value of the select drop-down list

Such as the following code

to obtain the value

The HTML code

<body>
    <form id="form1" runat="server">
        <div>
            <div>
            	<select id="select1" runat="server">
                	<option value ="video1" runat="server">video 1</option>
                	<option value ="video2" runat="server">video 2</option>
                	<option value="video3" runat="server">video 3</option>
            	</select>
            	<asp:Button ID="Button1" runat="server" OnClick="Button1_Click" Text="start" />
            </div>
            <asp:Label ID="Label1" runat="server" Text="Label"></asp:Label>
        </div>
    </form>
</body>

C # code

protected void Button1_Click(object sender, EventArgs e)
        {
        	String str = select1.Items[select1.SelectedIndex].Value;//Get the value of the drop-down list
        	Label1.Text = str;	// Display the values in the list through the Lable component
        }

String STR = select1.items [select1.selecteDindex].Value; in the select1 for HTML code to the select components id

get Text

Text>e> v> String STR = sel>.items [select1.selecteDindex].Value; in the Value instead. The Text

How to Skip testing when Maven is packaged

Development record
I have a Maven project and I will clone the latest code. The Maven Package is about to be packaged, but an error is reported during the TEST phase. Confused, I decided to skip testing to package and deploy.

Failed to execute goal org.apache.maven.plugins:maven-surefire-plugin:2.12.4:test

Skip Test when running MVN Install or MVN Package
Method 1: Modify the pOM.xml file

<project>  
  [...]  
  <build>  
    <plugins>  
      <plugin>  
        <groupId>org.apache.maven.plugins</groupId>  
        <artifactId>maven-surefire-plugin</artifactId>  
        <version>2.18.1</version>  
        <configuration>  
          <skipTests>true</skipTests>  
        </configuration>  
      </plugin>  
    </plugins>  
  </build>  
  [...]  
</project> 

Method 2: Execute the command in Terminal

mvn install -DskipTests

Method 3: Execute the command in Terminal

mvn install -Dmaven.test.skip=true

Method 4: Use the Spring Boot project
The spring-boot-maven-plugin is already integrated with the maven-surefire-plugin, which automatically runs JUnit test
. You just need to add the following configuration to your pom.xml:

<properties>
 	<!-- Skip Test -->
    <skipTests>true</skipTests>
</properties>

Error report when executing ifconfig under centos7

The paper
The problem I have encountered is that ifconfig is not installed. The specific operation process is as follows

// Step 1
yum search ifconfig

// Step 2
yum install net-tools.x86_64

// Step 3
ifconfig

Check the problem


sbin/ifconfig /sbin /sbin /sbin /sbin /sbin /sbin /sbin /sbin /sbin /sbin /sbin /sbin /sbin /sbin /sbin

sbin /sbin /sbin /sbin /sbin /sbin /sbin /sbin /sbin /sbin /sbin /sbin /sbin /sbin /sbin /sbin /sbin /sbin /sbin /sbin
Install the ifconfig
Install the inconfig command package using yum

yum search ifconfig


: If config is in the nettools.x86_64 package, install this package

yum install net-tools.x86_64

: