echarts.format.formatTime('yyyy-MM-dd', +new Date());
//"2021-02-25"
echarts.format.formatTime('yyyy-MM-dd', +new Date());
//"2021-02-25"
if "%1"=="hide" goto CmdBegin
start mshta vbscript:createobject("wscript.shell").run("""%~0"" hide",0)(window.close)&&exit
:CmdBegin
The Filter Filter
It is one of the three main components of JavaWeb. Three components are: Servlet program, Listener, Filter Filter. Filter Filter is the JavaEE specification. It’s also the interface. The Filter Filter is used to intercept requests and Filter responses. Common application scenarios for intercepting requests are:
Permission checking diary operation transaction management requirements: Under your web project, there is an admin directory. All resources in the admin directory (HTML pages, JPG images, JSP files, and so on) must be logged in by the user before they can be accessed.
import com.wz.userManager.pojo.User;
import javax.servlet.*;
import javax.servlet.annotation.WebFilter;
import javax.servlet.http.HttpServletRequest;
import javax.servlet.http.HttpServletResponse;
import javax.servlet.http.HttpSession;
import java.io.IOException;
@WebFilter(filterName = "UserCenterFilter",urlPatterns = {"/pages/*"})
public class UserCenterFilter implements Filter {

    @Override
    public void init(FilterConfig filterConfig) throws ServletException {

    }

    @Override
    public void doFilter(ServletRequest servletRequest, ServletResponse servletResponse, FilterChain filterChain) throws IOException, ServletException {
        HttpServletRequest req = (HttpServletRequest)servletRequest;
        HttpServletResponse resp= (HttpServletResponse)servletResponse;
        HttpSession session = req.getSession();
        User username = (User) session.getAttribute("user");
        if(username==null){
            servletRequest.getRequestDispatcher("/login.jsp").forward(servletRequest,servletResponse);
        }else{
            filterChain.doFilter(servletRequest,servletResponse);
        }

    }

    @Override
    public void destroy() {

    }
}
clc, clear
firstns = imread(‘Noisy_image1.jpg’);
% [M, N,L,P] = size(firstns)
% Ns = zeros(8,M,N,L);
% b =size(Ns);
for i = 1:8
tempname = strcat('Noisy_image',num2str(i),'.jpg');
Ns(i,:,:,:) = imread(tempname);
% N = imread(tempname);
% imshow (Ns (I, : 😅)
% end imge = squeeze (Ns (1, :, : 😅);
imshow(imge);
imshow(imge);
imshow(imge);
imshow(imge);
time_value. RTC_H12 = RTC_H12_AM; .
time_value RTC_Hours = t – & gt; h; .
time_value RTC_Minutes = t – & gt; m; .
time_value RTC_Seconds = t – & gt; s;
RTC_SetTime (RTC_Format_BIN, & amp; time_value); // Set time
}
Void get_time(struct time_st *t, struct time_st *t, struct time_st *t, struct time_st *t);
RTC_TimeTypeDef time_value;
RTC_GetTime (RTC_Format_BIN, & amp; time_value);
RTC_GetDate(RTC_Format_BIN,& date_value);
->; Y = date_value.RTC_Year;
t – & gt; M = date_value.RTC_Month;
t – & gt; D = date_value.RTC_Date;
t – & gt; W = date_value.RTC_WeekDay;
t – & gt; h = time_value.RTC_Hours;
t – & gt; m = time_value.RTC_Minutes;
t – & gt; s = time_value.RTC_Seconds;
}
 :
:
ah:
 :
:
As shown, the servlet needs to pay attention to its relative path to the Stumian.jsp in the View, which should be 
, or the relative path to the Stumian.jsp if the Stumian.jsp is in the WebContent directory.
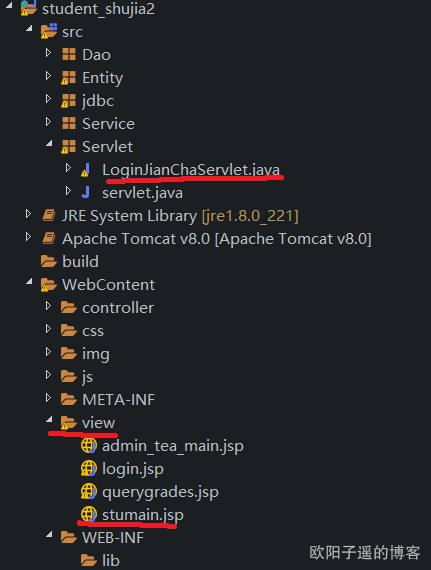
Idea to deploy the servlet submit page jump, error 500 page report
error message jar package not add
in fact has been added to the project required jars
solution: in the tomcat lib folder under the required jars are added
Mobile APP development: React Native installation and configuration
Node (version 12 above)
K (version 1.8)
y>(NPM install -g Yarn)
Android>dio (update)
Android SDK <>> Use stable scientif>eb tools
Node (version 12 or higher)
1. Double-click to run
. Enter node-verson on the console to see the current version
JDK (version 1.8)
(1.9 and higher is not currently supported. Note that 1.8 is also officially called 8).
JDK download https://www.oracle.com/java/technologies/javase-downloads.html
configuration JDK environment variables:
1, enter the system environment variables, a new environment variable, added to the Path.
2, enter the console, enter Java and javac respectively, to determine whether the installation is successful.
Android Studio (Update)
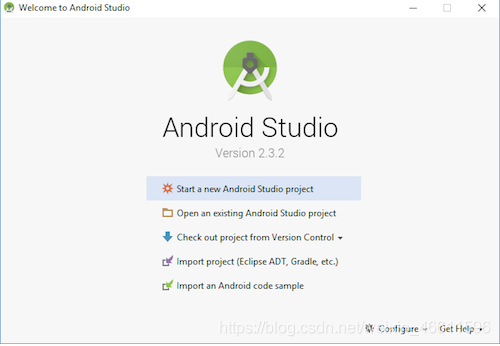
Update it to the latest by selecting the Updata update in Configure.
After the update:
select the “Custom” option in the installation screen and make sure the following items are selected:
Android SDK Platform
droid Virtual Device
T>click “Next” to install the selected component.
Android SDK
In SDK Manager, select the “SDK Platforms” TAB, and then check “Show Package Details” in the lower right corner. Expand the Android 10 (Q) option and make sure the following components are checked (again you must have a stable agent or you may not see the screen) :
Android SDK Platform 29
Intel x86 Atom_64 System Image (the official simulator Image file, use unofficial simulator does not need to install this component
then click on the “SDK Tools” TAB, the same hook in the lower right corner of “Show Package Details”. Expand the “Android SDK Build-Tools” option and make sure the React Native required version 29.0.2 is selected. You can install multiple other versions at the same time.
Then, again in the “SDK Tools” TAB, click “NDK (Side by Side)”, also check “Show Package Details” in the lower right corner, and select version 20.1.5948944 to install.
Finally, click “Apply” to download and install the components.
(For some reasons, there may not be an NDK (Side by Side). If there is no NDK, click to continue.)
Configure the Android_Home environment variable
to open the control panel ->; Systems and Security -> System – & gt; Advanced System Settings ->; Advanced – & gt; The environment variable, select the PATH variable, and then click Edit. Click New and add these tools directory paths: platform-tools, emulator, tools, tools/bin
%ANDROID_HOME%\platform-tools
%ANDROID_HOME%\emulator
%ANDROID_HOME%\tools
%ANDROID_HOME%\tools\bin