Error:
Android Studio 4 Error: The application could not be installed: INSTALL_FAILED_OLDER_SDK
Error:
Android Studio 4 Error: The application could not be installed: INSTALL_FAILED_OLDER_SDK
I. Error


Problem description:
Use pycharm to connect to the remote server. It has been working well before. Suddenly, there is a problem that cannot be uploaded. The problem prompt is as follows:
Upload to *** failed. Could not list the contents of folder “sftp:***”. (Timeout expired)
Analysis and Solution:
First, look at the sftp connection. It is found that it is normal
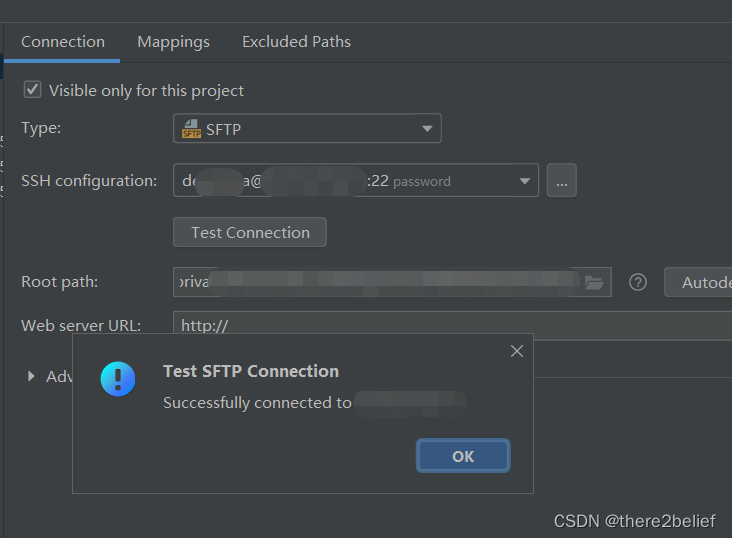
The problems may be caused by the lack of permissions on the remote server and the problem of path mapping. It is strange that there are no such problems after checking. I think the problem may case by the path.
In the path set before, Root path is / and Development path is the project path. Change it to Root path is the project path directly and Development path is /, then you can upload it normally.
Failed to execute goal org.apache.maven.plugins:maven-surefire-plugin:2.22.2:test
There is a mave aggregation project. The following error is reported when packaging through the maven command:
Failed to execute goal org.apache.maven.plugins:maven-surefire-plugin:2.22.2:test
The packaging command is as follows: clean package
Solution 1:
Click Toggle ‘Skip Tests’ mode in the maven panel in idea tools, and package it again and it works fine.
Solution 2:
Specify skipTests as true in the pom file to skip unit tests
	<build>
        <plugins>
            <plugin>
                <groupId>org.apache.maven.plugins</groupId>
                <artifactId>maven-surefire-plugin</artifactId>
                <version>2.22.2</version>
                <configuration>
                    <skipTests>true</skipTests>
                </configuration>
            </plugin>
        </plugins>
    </build>
Solution 3:
Execute the command at the Terminal
mvn install -DskipTests
Solution 4:
Execute the command at the Terminal
mvn install -Dmaven.test.skip=true
Solution 5:
In the springboot project, spring-boot-maven-plugin plugin has been integrated with the maven-surefire-plugin plugin, will automatically run junit test, you need to add the following configuration in the pom
<properties>
 	<!-- skip the test -->
    <skipTests>true</skipTests>
</properties>
Among them, -Dmaven.test.skip=true and -DskipTests have the following roles
Solution 1:
(1) Check the error.log in the nginx-1.19.2\logs directory, and learn that the error message is: bind() to 0.0.0.0:80 failed (10013: An attempt was made to access a socket in a way forbidden by its access permissions)
(2) Press win+r, type cmd, and open the administrator interface
(3) type netstat -aon|findstr :80, find the port number 0.0.0.0:80 is occupied, check the pid value of 4

(4) Enter tasklist | findstr “4” to find the name corresponding to port 4, which is System
![]()
(5) after viewing the System system occupancy can not be manually terminated, the reason is SQLServer Reporting Services, stop this service and set to start manually can, after starting nginx, need to restart SQLServer Reporting Services
Disadvantage: This approach requires you to stop SQLServer Reporting Services again after each boot, and then start nginx
Solution 2:
Modify the default port number under nginx.conf
(1) Open the nginx.conf file in the nginx directory with Notepad
(2) Press win+r, type cmd, open the administrator interface, type netstat -aon|findstr :expected port number to see if your expected port number is occupied
(3) Modify nginx.conf, and then save it
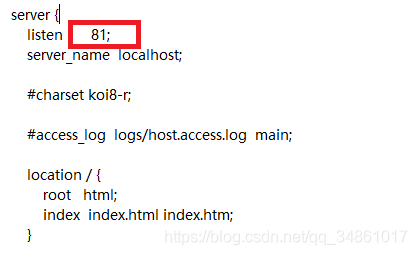
(4) At the command prompt, type nginx -s reload (an important step)
(5) Then type start nginx at the command prompt
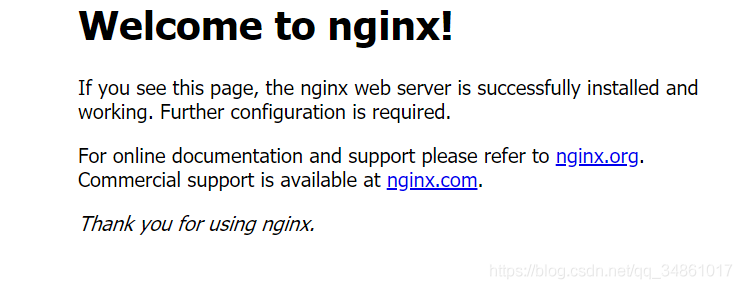
(6) in the browser localhost:81, if the following page appears in the modified successful
Error:couldn‘t connect to server 127.0.0.1:27017, connection attempt failed: SocketException: …
Problem Examples
Do you encounter the following problems when entering mongo at the terminal?
couldn’t connect to server 127.0.0.1:27017, connection attempt failed: SocketException: Error connecting to 127.0.0.1:27017 :: caused by :: ���� Ŀ ����������� ܾ ���� ���� ӡ �

Problem analysis
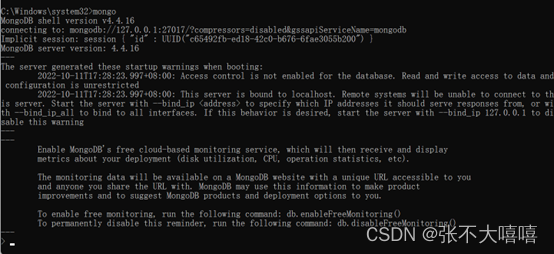
In fact, this problem is not complicated, just because your mongodb is not started. Just start it.
Problem-solving
Enter the bin directory of mongodb (enter the bin directory of mongodb you installed)

Input command (port number can be specified)
mongod –logpath “E:\professional_software\mongodb\data\log\mongodb.log” –dbpath “E:\professional_software\mongodb\data\db” –logappend
or
mongod –logpath “E:\professional_software\mongodb\data\log\mongodb.log” –dbpath “E:\professional_software\mongodb\data\db” –logappend –port 8888

In this way, the startup is successful and the next step is ready. Open another command prompt and enter mongo.
Failed to configure the data source: the “url” attribute is not specified, and there is no embedded data source coul
Two methods to solve this error:
The first is to cancel automatic database configuration
@SpringBootApplication(exclude = { DataSourceAutoConfiguration.class })Unconfigure the SpringBootApplication of the startup class
The second is to configure the database information on the configuration file
spring:
  datasource:
    url: jdbc:mysql://localhost:3306/xxxx
    username: root
    password: root
driver-class-name: com.mysql.jdbc.DriverFuseki failed with message “Parse error: [line:1, col: 1 ] Content is not allowed in prolog.“
Recently, when uploading an rdf file with fuseki, the following error code occurred:
failed with message "Parse error: [line:1, col: 1 ] Content is not allowed in prolog."
I went to Google and found a pdf. Here is the link. It means that the problem can be avoided by changing the file suffix to .ttl. But the reason is not clear yet.
Attached is the original content of test.rdf.
@prefix ns1: <http://test.com/> .

ns1:node1 ns1:born ns1:1964 ;
    ns1:labels ns1:Person ;
    ns1:name ns1:Keanu-Reeves .

ns1:node101 ns1:born ns1:1947 ;
    ns1:labels ns1:Person ;
    ns1:name ns1:Takeshi-Kitano .

ns1:node102 ns1:born ns1:1968 ;
    ns1:labels ns1:Person ;
    ns1:name ns1:Dina-Meyer .

ns1:node103 ns1:born ns1:1958 ;
    ns1:labels ns1:Person ;
    ns1:name ns1:Ice-T .

ns1:node104 ns1:born ns1:1953 ;
    ns1:labels ns1:Person ;
    ns1:name ns1:Robert-Longo .

ns1:node106 ns1:born ns1:1966 ;
    ns1:labels ns1:Person ;
    ns1:name ns1:Halle-Berry .

ns1:node107 ns1:born ns1:1949 ;
    ns1:labels ns1:Person ;
    ns1:name ns1:Jim-Broadbent .

ns1:node108 ns1:born ns1:1965 ;
    ns1:labels ns1:Person ;
    ns1:name ns1:Tom-Tykwer .
The reason may be that file format may be confused.
In the vue project, it is clear that the prompt information output on the console has been turned off through the following configuration, but it will still be printed?
Vue.config.productionTip = false

Vue.config.devtools= false

Vue.config.debug= false
1. Problem Analysis:
This is because after a vue project is packaged, the Javascript source code is usually merged and shrunk to optimize the site to load faster and reduce bandwidth usage. The compressed script is a file mapped from the transformed source to the original source, which allows the browser to reconstruct the original source and display the reconstructed original source to the debugger. In turn, to enable the debugger to use the source mapping, a source mapping file is generated and included in the converted file as a comment pointing to the source mapping file, as follows:
//# sourceMappingURL=http://example.com/path/to/your/sourcemap.mapAnd when our vue project index.html or other entry interfaces to load some scripts into the project and packaged, these scripts will not produce the corresponding source mapping, but the mapping file (sourceMappingURL) is declared in the script, at this time the browser naturally throws an exception, so the console prints not the output of the project itself, but Chrome’s prompt!
2. Solution:
We just need to remove the above mentioned //# sourceMappingURL= xxxxxxx line from the corresponding statically introduced script, or download the corresponding source mapping file and place it in the directory where the corresponding script is located, depending on the boot version.
Error indicating:
PluginlibFactory: The plugin for class 'rviz_imu_plugin/IMU' failed to load. Error: According to the loaded plugin descriptions the class rviz_imu_plugin/IMU with base class Rviz: :Display does not exist. Declared types are rviz/AccelStamped rviz/Axes rviz/Camera rviz/DepthCloud rviz/Effort rviz/FluidPressure rviz/Grid rviz/GridCells rviz/Illuminance rviz/Image rviz/InteractiveMarkers rviz/LaserScanrviz/Map rviz/Marker rviz/MarkerArray rviz/Odometry rviz/Path rviz/PointCloud rviz/PointCloud2 rviz/PointStamped rviz/Polygon rviz/Pose rviz/PoseArray rviz/PoseWithCovariance rviz/Range rviz/Relative Humidity rviz/RobotModel rvtz/TF rviz/Temperature rviz/TwistStamped rviz/WrenchStamped rvtz_plugin_tutorials/Imu
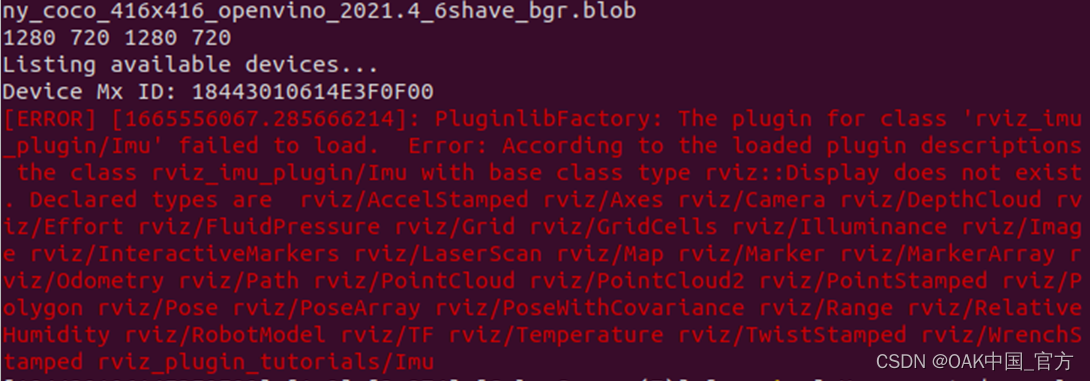
Solution:
Install ros-rviz-imu-plugin library
Small technologies: Whether to install the corresponding database containing error checks!”.
When running the installation:
pip install faissreport errors:
ERROR: Could not find a version that satisfies the requirement faiss (from versions: none)
ERROR: No matching distribution found for faiss
When installing with conda:
conda install faissreport errors:
PackagesNotFoundError: The following packages are not available from current channels:

  - faiss
Faiss on Pypi is just a collection of pre built binary files of MacOS and Linux, and is only applicable to these Python versions:
Python :: 2.7
Python :: 3.5
Python :: 3.6
Python :: 3.7
Your settings do not seem to match these specifications
For conda, it does not exist in the std channel, but can be installed in the following ways (Linux and MacOS only):
Install CPU version
conda install -c pytorch faiss-cpuInstall GPU version
conda install -c pytorch faiss-gpu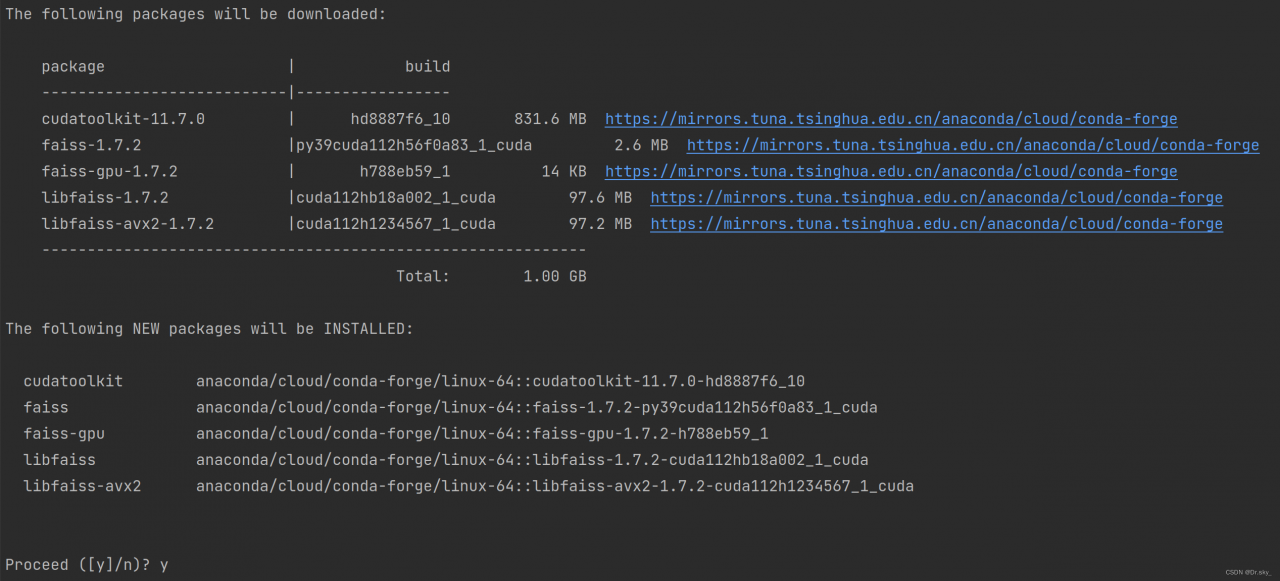
Install fail on Windows. Go to the conda prompt and enter:
conda install -c conda-forge faiss-cpuIn the process of program synthesis using Vivado, errors are reported in full compilation, as shown below:

[Chipscope 16-302]Could not generate core for dbg_hub.Aborting IP Generate operaion.The current Vivado temporary directory path.

............
Error reason: 
The project folder name is too long. Shorten the project folder name as shown in the following figure.
![]()
Solution:
Shorten the project folder name and recompile it.