Phenomenon
When doing a position search using elasticsearch, an error is reported.
ElasticsearchStatusException[Elasticsearch exception [type=search_phase_execution_exception, reason=all shards failed]]
I am using GeoDistanceQueryBuilder for ElasticSearch’s geolocation search and sorting
Searching
Later, I logged in to the elasticsearch server to check the error logs and found the following errors.
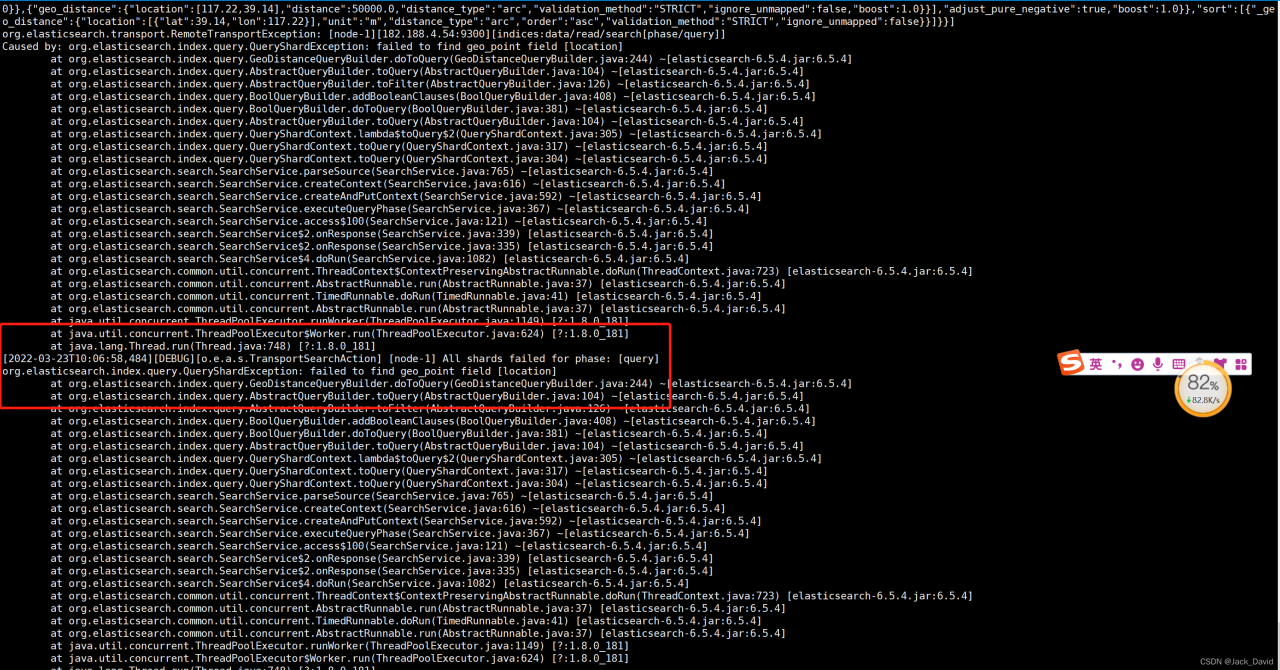
That is, my location is not of the geo_point type, and this problem has been troubleshooting for quite a while.
The reason for the problem is simple, it is because my index is automatically created by IndexRequest and there will be problems.
For example.
 String string = JSONObject.fromObject(entity).toString();
            IndexRequest indexRequest = new IndexRequest(INDEX).type(DOC).id(INDEX + "_" + entity.getId()).source(string, XContentType.JSON);

            bulkRequest.add(indexRequest);
Solution:
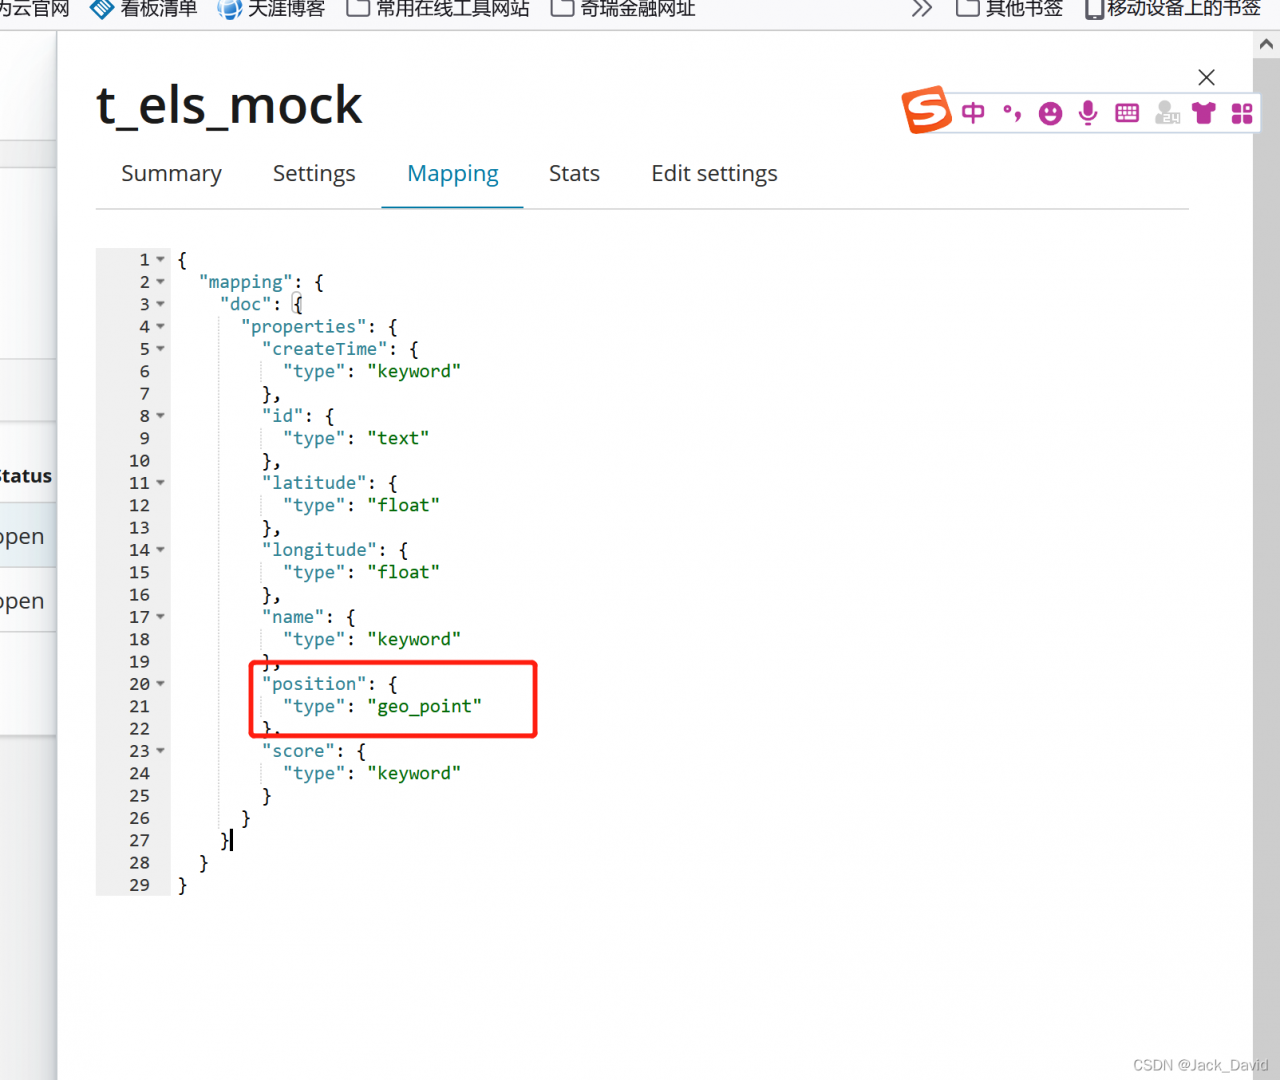
Create the index manually, or through Java code. Be sure to note that the type of the attribute corresponding to the mapping must be geo_point to work
Here I change the index, position means position information
 # use java to manually create the index
public class CreateElsIndexMain {

    static final String INDEX_NAME = "t_els_mock";

    @Test
    public void test() throws Exception {
        RestHighLevelClient client = new RestHighLevelClient(RestClient.builder(
                new HttpHost(
                        "127.0.0.1",
                        9200,
                        "http"
                )));
        boolean exists = checkExists(client);
        if (exists) {
            deleteIndex(client);
        }
        createIndex(client);

    }

    public static boolean checkExists(RestHighLevelClient client) throws Exception {
        GetIndexRequest existsRequest = new GetIndexRequest();
        existsRequest.indices(INDEX_NAME);
        boolean exists = client.indices().exists(existsRequest, RequestOptions.DEFAULT);
        return exists;
    }

    public static void createIndex(RestHighLevelClient client) throws Exception {
        Settings.Builder setting = Settings.builder().put("number_of_shards", "5").put("number_of_replicas", 1);
        XContentBuilder mappings = JsonXContent.contentBuilder().
                startObject().startObject("properties").startObject("id").field("type", "text").endObject().
                startObject("name").field("type", "keyword").endObject().
                startObject("createTime").field("type", "keyword").endObject().
                startObject("score").field("type","keyword").endObject().
                startObject("longitude").field("type","float").endObject().
                startObject("latitude").field("type","float").endObject().
                startObject("position").field("type","geo_point").endObject().endObject().endObject();
        CreateIndexRequest request = new CreateIndexRequest(INDEX_NAME).settings(setting).mapping("doc",mappings);
        CreateIndexResponse createIndexResponse = client.indices().create(request, RequestOptions.DEFAULT);
        System.out.println(createIndexResponse);
    }


    public static void deleteIndex(RestHighLevelClient client) throws Exception {
        DeleteIndexRequest deleteIndexRequest = new DeleteIndexRequest();//To delete an index, also create an object to accept the index name
        deleteIndexRequest.indices(INDEX_NAME);//pass the index name
        //execute the delete method for deletion.
        AcknowledgedResponse delete = client.indices().delete(deleteIndexRequest, RequestOptions.DEFAULT);
    }

}
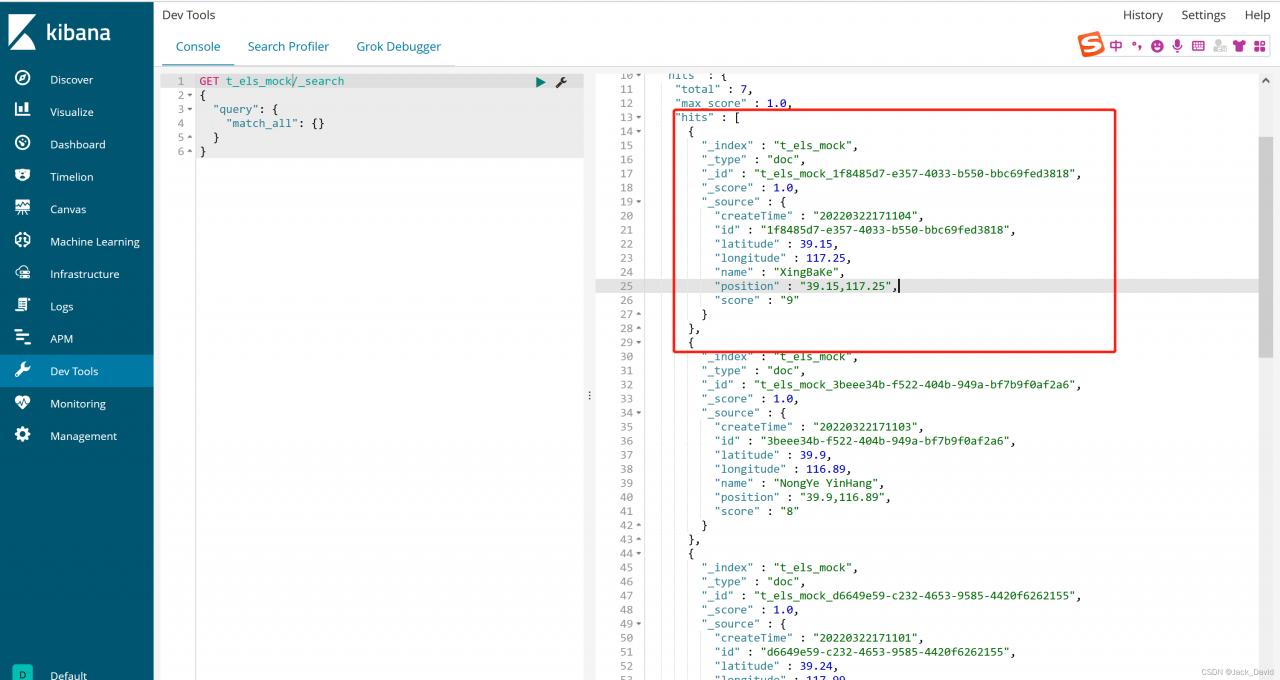
Kibana data
We can use the test data to put the data into es and view the data of the index through kibana’s dev tools, as shown in the following example:
Code to add data to es
 @Autowired
    private RestHighLevelClient client;

    private static final String INDEX = "t_els_mock";

    String DOC = "doc";

public void addData(){
        BulkRequest bulkRequest = new BulkRequest();
        List<MockLocationEntity> entities = getEntities();
        for (MockLocationEntity entity : entities){
            String string = JSONObject.fromObject(entity).toString();
            IndexRequest indexRequest = new IndexRequest(INDEX).type(DOC).id(INDEX + "_" + entity.getId()).source(string, XContentType.JSON);

            bulkRequest.add(indexRequest);
        }
        try {
            BulkResponse bulk = client.bulk(bulkRequest, RequestOptions.DEFAULT);

        } catch (IOException e) {
        }
    }

    private static List<MockLocationEntity> getEntities(){
        List<MockLocationEntity> list = new ArrayList<>();

        MockLocationEntity one = new MockLocationEntity();
        one.setId(UUID.randomUUID().toString());
        one.setName("YuanYan GuoJi");
        one.setScore("10");
        one.setCreateTime("20220322145900");
        one.setLongitude(117.20);
        one.setLatitude(38.14);
        one.setPosition(one.getLatitude() + "," +one.getLongitude());


        MockLocationEntity two = new MockLocationEntity();
        two.setId(UUID.randomUUID().toString());
        two.setName("WenGuang DaSha");
        two.setScore("9");
        two.setCreateTime("20220322171100");
        two.setLongitude(116.01);
        two.setLatitude(38.89);
        two.setPosition(two.getLatitude() + "," +two.getLongitude());


        MockLocationEntity three = new MockLocationEntity();
        three.setId(UUID.randomUUID().toString());
        three.setName("NeiMengGu JiuDian");
        three.setScore("8");
        three.setCreateTime("20220322171101");
        three.setLongitude(117.99);
        three.setLatitude(39.24);
        three.setPosition(three.getLatitude() + "," +three.getLongitude());


        MockLocationEntity four = new MockLocationEntity();
        four.setId(UUID.randomUUID().toString());
        four.setName("GuoXianSheng");
        four.setScore("10");
        four.setCreateTime("20220322171102");
        four.setLongitude(117.20);
        four.setLatitude(39.50);
        four.setPosition(four.getLatitude() + "," +four.getLongitude());
        Location fourLocation = new Location();


        MockLocationEntity five = new MockLocationEntity();
        five.setId(UUID.randomUUID().toString());
        five.setName("NongYe YinHang");
        five.setScore("8");
        five.setCreateTime("20220322171103");
        five.setLongitude(116.89);
        five.setLatitude(39.90);
        five.setPosition(five.getLatitude() + "," +five.getLongitude());
        Location fiveLocation = new Location();

        MockLocationEntity six = new MockLocationEntity();
        six.setId(UUID.randomUUID().toString());
        six.setName("XingBaKe");
        six.setScore("9");
        six.setCreateTime("20220322171104");
        six.setLongitude(117.25);
        six.setLatitude(39.15);
        six.setPosition(six.getLatitude() + "," +six.getLongitude());


        MockLocationEntity seven = new MockLocationEntity();
        seven.setId(UUID.randomUUID().toString());
        seven.setName("JuFuYuan");
        seven.setScore("6");
        seven.setCreateTime("20220322171104");
        seven.setLongitude(117.30);
        seven.setLatitude(39.18);
        seven.setPosition(seven.getLatitude() + "," +seven.getLongitude());

        list.add(one);
        list.add(two);
        list.add(three);
        list.add(four);
        list.add(five);
        list.add(six);
        list.add(seven);

        return list;
    }