Author Archives: Robins

Solve ssh error: shell request failed on channel 0

Problem: When building Jenkins task, it was found that the target host could not be connected. After manually executing SSH command on the command line, an error was reported: Shell Request failed on channel 0
Cause: The number of system processes on the target host is too small to connect
Solution: need to modify the/etc/security/limits. D/20 – nproc. The values in the conf file, change the 4096 older, such as 65535

[zhangsan@note1 /]$ cat /etc/security/limits.d/20-nproc.conf

*          soft    nproc     4096
root       soft    nproc     unlimited

Re-ssh, and you are done.
 

ERR_CONTENT_DECODING_FAILED error occurs in PHP program, summary of solutions

The problem background
When a new project is deployed to a new server, colleagues can run on Windows without any problems, but when migrating to a Liinux server, they find the following error.
chrome prompt: ERR_CONTENT_DECODING_FAILED
as follows:

Screening method
Check whether the nginx.conf of Nginx opens gzip; if it opens gzip, close it and reload to check whether the zlib.output_compression is open; if it is not opened, use zlib.output_compression = On
The solution
In the php.ini configuration file, the following configuration is found to be off. Open it and restart PHP-FPM

; http://php.net/zlib.output-compression
zlib.output_compression = On


Reference links:
https://stackoverflow.com/questions/14039804/error-330-neterr-content-decoding-failed

The most complete solution for service network restart failure under CENTOS 7

Often, after changing the static IP under centOS 7, someone would find that the network service could not be restarted, so they searched the network, tried various methods and finally solved the problem.
is now a summary of various solutions, I hope to let you walk less crooked road.

First things first:
After executing the Service Network Restart command, the following error occurs:

Restarting network (via systemctl): Job for network. Service failed because the control process exited with error code.
See “systemctl status network. Service” and “journalctl-xe” for details.

After input systemctl status network. Service command, the following error message appears:

network.service - LSB: Bring up/down networking
   Loaded: loaded (/etc/rc.d/init.d/network; bad; vendor preset: disabled)
   Active: failed (Result: exit-code) since 三 2018-09-05 13:01:47 CST; 1min 16s ago
     Docs: man:systemd-sysv-generator(8)
  Process: 4681 ExecStart=/etc/rc.d/init.d/network start (code=exited, status=1/FAILURE)
   CGroup: /system.slice/network.service
           └─1192 /sbin/dhclient -H mini1 -1 -q -lf /var/lib/dhclient/dhclient--ens33.lease -pf /v...
9月 05 13:01:47 mini1 network[4681]: RTNETLINK answers: File exists
9月 05 13:01:47 mini1 systemd[1]: network.service: control process exited, code=exited status=1
9月 05 13:01:47 mini1 systemd[1]: Failed to start LSB: Bring up/down networking.
9月 05 13:01:47 mini1 systemd[1]: Unit network.service entered failed state.
9月 05 13:01:47 mini1 systemd[1]: network.service failed.

The network service cannot be started!! First of all, make sure that ifCFg-XXX (each machine is not the same) in /etc/sysconfig/network-scripts directory is free of errors (if you have made any changes), which refer to things like typing the wrong letters by hand during the change process.
The most common methods on the Internet are as follows:
1, and the NetworkManager service conflict, directly close the NetworkManager service, service NetworkManager stop, and forbid starting chkconfig NetworkManager off, finally restart it.
2. If it does not match the MAC address of the configuration file, use IP ADDR (or IFconfig) to check the MAC address

1: lo: <LOOPBACK,UP,LOWER_UP> mtu 65536 qdisc noqueue state UNKNOWN qlen 1
    link/loopback 00:00:00:00:00:00 brd 00:00:00:00:00:00
    inet 127.0.0.1/8 scope host lo
       valid_lft forever preferred_lft forever
    inet6 ::1/128 scope host 
       valid_lft forever preferred_lft forever
2: ens33: <BROADCAST,MULTICAST,UP,LOWER_UP> mtu 1500 qdisc pfifo_fast state UP qlen 1000
    link/ether 00:0c:29:b8:e7:21 brd ff:ff:ff:ff:ff:ff
    inet 192.168.65.141/24 brd 192.168.65.255 scope global dynamic ens33
       valid_lft 1193sec preferred_lft 1193sec
    inet6 fe80::cca2:d835:f93:e637/64 scope link 
       valid_lft forever preferred_lft forever

00:0 C :29:b8:e7:21 is the MAC address, change HWADDR in /etc/sysconfig/ net-scripts/ifCFg-XXX to this MAC address
3. Set up and start a service named networkmanager-waiting-online . The command is: systemctl enable networkmanager-waiting-online-service
4, see /etc/sysconfig/network - scripts , will the rest of the network card position papers all deleted, avoid unnecessary influence, is only a file, starting with ifcfg leave that one should use IP addr command to check the IP the second identical at the beginning of (see above for my ens33, I posted the IP addr command execution results), so I only left a ifcfg - ens33. (That's how two of my machines worked, because I made a backup before changing it, so just delete it...)
5. Comment out the DEVICE line in IFCFG-XXX file.
6. Change the NAME in IFCFG-XXX to be the same as the file NAME.
7. Change the network mode to bridge in VMWare edit-Virtual Network Editor.
8. Check whether the network adapter at the bottom right corner of VMWare is connected or not. If it is not connected, it will be connected.

(note: click the network adapter - Settings, and try to change the NAT mode to bridge. After I changed the bridge mode, I could restart the network service, but I could not connect to the network. After restarting,
and then change the bridge mode to NAT mode, and I found that I could both surf the Internet and restart the network service.)
9. Check to see if VMware DHCP Service and VMware NAT Service are disabled on your computer. If so, turn them on.
10. If you change to static IP don't forget to change BOOTPROTO to static.
11,, if the above is not resolved, there is a final move - restart to see if there is a miracle!! (A lot of times you just restart it.)
I have tried almost all of the above methods, some of which are useful or not useful for my machine, but some people have solved them with these methods, and recorded them together for future use

How to Fix gdb error: Failed to import the site module,No module named ‘_sysconfigdata_m’

GDB has been used recently and has been reporting errors:
Failed to import the site module
Traceback (the most recent call last) :
the File “/ usr/lib/python3.5/site. Py”, line 580, in & lt; module>

the main () the File “/ usr/lib/python3.5/site. Py”, line 566, in the main
known_paths = addusersitepackages (known_paths)
the File “/ usr/lib/python3.5/site. Py”, line 287, In addusersitepackages
user_site = getusersitepackages ()
the File “/ usr/lib/python3.5/site. Py”, line 263, In getusersitepackages
user_base = getuserbase # () this will also set user_base
the File “/ usr/lib/python3.5/site. Py”, line 253, In getuserbase
USER_BASE = get_config_var (‘ userbase)
the File “/ usr/lib/python3.5/sysconfig py”, line 595, In get_config_var
return get_config_vars () get (name)
the File “/ usr/lib/python3.5/sysconfig py”, line 538, In get_config_vars
_init_posix (_CONFIG_VARS)
the File “/ usr/lib/python3.5/sysconfig py”, line 410, In _init_posix
from _sysconfigdata import build_time_vars
File “/usr/lib/python3.5/_sysconfigdata.py”, line 6, in < module>
from _sysconfigdata_m import *
ImportError: No module named ‘_sysconfigdata_m’
I only searched the beginning one, which said it had to do with Python. Later, a colleague searched for the last sentence error and found a solution:

# cd /usr/lib/python3.4

# ln  -s /usr/lib/python3.4/plat-i386-linux-gnu/_sysconfigdata_m.py .


One of the configured repositories failed (Unknown), and yum doesn’t have enough cached data to cont

The Esaote installation dependency report error message is as follows
One of the configured repositories failed (unknown).
and yum doesn’t have enough cached data to continue. At this point, the only thing yum can do is
The safe thing to do is to fail. There are ways to “fix” this..:

 1. Contact the upstream for the repository and get them to fix the problem.

 2. Reconfigure the baseurl/etc. for the repository, to point to a working
    upstream. This is most often useful if you are using a newer
    distribution release than is supported by the repository (and the
    packages for the previous distribution release still work).

 3. Run the command with the repository temporarily disabled
        yum --disablerepo=<repoid> ...

 4. Disable the repository permanently, so yum won't use it by default. Yum
    will then just ignore the repository until you permanently enable it
    again or use --enablerepo for temporary usage:

        yum-config-manager --disable <repoid>
    or
        subscription-manager repos --disable=<repoid>

 5. Configure the failing repository to be skipped, if it is unavailable.
    Note that yum will try to contact the repo. when it runs most commands,
    so will have to try and fail each time (and thus. yum will be be much
    slower). If it is a very temporary problem though, this is often a nice
    compromise:

        yum-config-manager --save --setopt=<repoid>.skip_if_unavailable=true

Solution
can start by configuring yum sources

    1. is generally a network problem, check whether the network is unobvious. Secondly, if you use the company’s internal network, there will be restrictions, it is recommended to change the agent (there may be several agents in the company, but one happens to be limited, so you need to change the agent), you can ask colleagues to. Proxy parameter name error: yum’s proxy should use

proxy

    1. , instead of

http_proxy</code b> or https_proxy, but it is recommended to write all three, which must be correct.

For example: yum install-y XXX –proxy IP –http_proxy IP –https_proxy

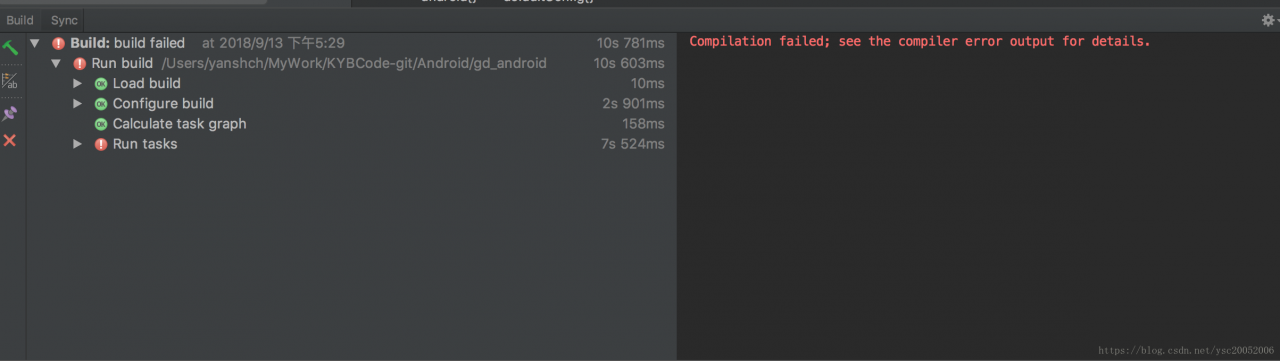
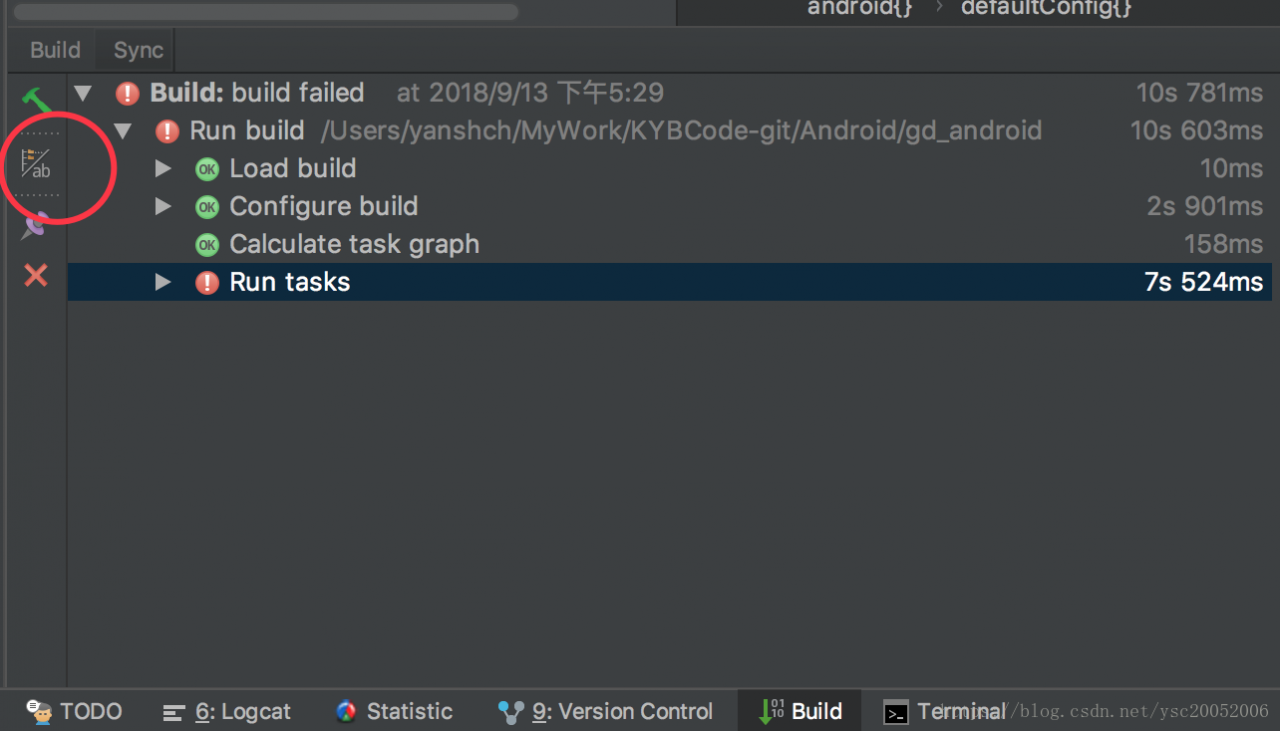
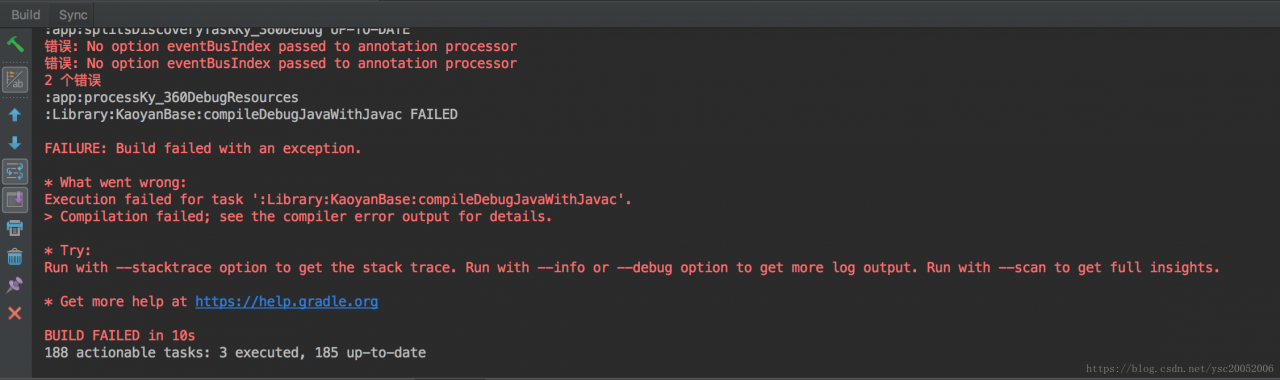
Error:Execution failed for task’:app:processDebugResources’. Personally resolved

 
Personal problem scenario: While compiling the ListView list, R reported an error while initializing data in the main class, and the resource file could not be found
Personal problem: There is a problem with the image placed in the Drawable folder under the RES resource. (Goole took a look and realized that everyone has different questions.)
Drawable official document
 
Drawable Resources
SEE ALSO

    2D Graphics

A drawable resource is A general concept for A graphic that can be drawn to the screen and which you can retrieve with APIs such as getDrawable(int) or apply to another XML resource with Attributes such as android:drawable and android:icon. There are several different types of drawables:
 
Bitmap: the simplest Drawable, a PNG or JPEG image.Nine Patch: an extension to the PNG format allows it to specify information about how to stretch it and place things inside of it.Shape: contains simple drawing commands instead of a raw bitmap, allowing it to resize better in some cases.Layers: a compound drawable, which draws multiple underlying drawables on top of each other.States: a compound drawable that selects one of a set of drawables based on its state.Levels: a compound drawable that selects one of a set of drawables based on its level.Scale: a compound drawable with a single child drawable, whose overall size is modified based on the current level.
 
(1) person when writing code is in a hurry, there is no ready ahead of the corresponding image, to find the pictures of a few Zhang Xihuan in computer, copy and paste under the drawable, R resource file in your code, display, the introduction of resource R file error, an error found reasons: after examining locat drawable image size is too large;
(2) and remove the big picture, and try to find a few icon in the diagram, the result still R file Error, locat in display Error: Execution failed for task ‘: app: processDebugResources’. The official document was searched with the problem and it was finally found that the image resource file under the Drawable folder was incorrect. After the deletion, the program runs normally and the list shows success.
Error: Execution failed for task ‘: app: processDebugResources’ – the cause of the problem may be different, everyone for locat hints, in combination with the official API documentation, to find the corresponding solution.
 
Appendix summary of solutions to problems occurring in the build project (long-term update)
1) third-party dependency conflict the | dependency library version is inconsistent with the SDK version
Solution – Add to build.gradle:

android{
	configurations.all {
        resolutionStrategy.eachDependency { DependencyResolveDetails details ->
            def requested = details.requested
            if (requested.group == 'com.android.support') {
                if (requested.name.startsWith("appcompat-v7")) {
                    details.useVersion '25.3.0'
                }
                if (requested.name.startsWith("appcompat-v4")) {
                    details.useVersion '25.3.0'
                }

                if (requested.name.startsWith("recyclerview-v7")) {
                    details.useVersion '25.3.0'
                }
            }
        }
    }

}

Force all dependent libraries to use the same version without having to look up each one.
2) Mandatory version number
Sometimes a third-party Lib USES a higher version of support package, and there may be a problem with it. You don’t want to introduce a problem because of this Lib, and you don’t want to automatically upgrade the current support package because of it.
Gradle’s default mechanism, however, is to use the higher version if it has a higher version, which puts it in a dilemma: using the Lib will upgrade the Supprot package, but not using it will make it impossible to implement certain functions. Fortunately, Configations provides the ability to force a version specified.
First, configure a Task in root build.Gradle to view the current version information of the support library.

subprojects {
    task allDeps(type: DependencyReportTask) { }
}

Now force the version number of the Support library:

    configurations.all {
        // 指定某个库的版本
        resolutionStrategy.force "com.android.support:appcompat-v7:26.1.0"
    }

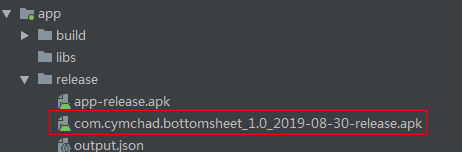
3) Change the name of the output APK

static def releaseTime() {
    return new Date().format("yyyy-MM-dd", TimeZone.getTimeZone("UTC"))
}
android {
        ... ...
    buildTypes {
        ... ...
    }
    android.applicationVariants.all { variant ->
        variant.outputs.all { output ->
            def outputFile = output.outputFile
            if (outputFile != null && outputFile.name.endsWith('.apk')) {
                def fileName = outputFile.name.replace("app",
                        "${defaultConfig.applicationId}_${defaultConfig.versionName}_${releaseTime()}" )
                outputFileName = fileName
            }
        }
    }

}

The Task above can name APK as “package name + version name + production time”.


Cocoapods- ERROR: Error installing cocoapods: ERROR: Failed to build gem native extension.

Update CocoapoDS with the following error message
ERROR: ERROR installing cocoapods:
ERROR: Failed to build gem native extension.
The current directory:/Library/Ruby/Gems/2.3.0/Gems/ffi – 1.12.2/ext/ffi_c
/ System/Library/Frameworks/Ruby framework Versions/2.3/usr/bin/Ruby – I/Library/Ruby/Site/2.3.0 – r. cf9u3w/siteconf20200303-68332-1. The rb extconf. Rb
MKMF. Rb can ‘t find the header files for the ruby at/System/Library/Frameworks/ruby framework Versions/2.3/usr/lib/ruby/include/ruby. H
extconf failed, exit code 1
Gem files will remain installed in/Library/Ruby/Gems/2.3.0/Gems/ffi – 1.12.2 for inspection.
Results logged to/Library/Ruby/Gems/2.3.0/extensions/universal – Darwin – 18/2.3.0 ffi – 1.12.2/gem_make. Out
Trying to upgrade CocoapoDS requires a correct operation flow and the following command
1. Update GEM: Sudo GEM update — System
Remove gem Sources –remove https://ruby.taobao.org/
3. Modify gem sources: gem Sources -a https://gems.ruby-china.com
4, check whether the gem source is the latest: gem Sources – L
5. Update Cocoapods: Sudo Gem Install -n /usr/local/bin Cocoapods
6. Check the updated CocoapoDS version: POD — Version
Still no success.

wangpeideMacBook-Pro:~ wangpei$ rvm -v
-bash: rvm: command not found

Use the command RVM command to find the problem as follows: -bash: RVM: Command Not Found
Execute \curl -sSL https://get.rvm.io | basket-s stable –ruby

wangpeideMacBook-Pro:~ wangpei$ \curl -sSL https://get.rvm.io | bash -s stable --ruby
Downloading https://github.com/rvm/rvm/archive/1.29.9.tar.gz
Downloading https://github.com/rvm/rvm/releases/download/1.29.9/1.29.9.tar.gz.asc
Found PGP signature at: 'https://github.com/rvm/rvm/releases/download/1.29.9/1.29.9.tar.gz.asc',
but no GPG software exists to validate it, skipping.
Upgrading the RVM installation in /Users/wangpei/.rvm/
    RVM PATH line found in /Users/wangpei/.mkshrc /Users/wangpei/.profile /Users/wangpei/.bashrc /Users/wangpei/.zshrc.
    RVM sourcing line found in /Users/wangpei/.profile /Users/wangpei/.bash_profile /Users/wangpei/.zlogin.
Upgrade of RVM in /Users/wangpei/.rvm/ is complete.

Thanks for installing RVM 🙏
Please consider donating to our open collective to help us maintain RVM.

👉  Donate: https://opencollective.com/rvm/donate


Ruby enVironment Manager 1.29.9 (latest) (c) 2009-2017 Michal Papis, Piotr Kuczynski, Wayne E. Seguin

ruby-2.6.3 - #removing src/ruby-2.6.3..
Searching for binary rubies, this might take some time.
No binary rubies available for: osx/10.14/x86_64/ruby-2.6.3.
Continuing with compilation. Please read 'rvm help mount' to get more information on binary rubies.
Checking requirements for osx.

Perform source/Users/XXXXXX. RVM/scripts/RVM RVM started


  * To start using RVM you need to run `source /Users/wangpei/.rvm/scripts/rvm`
    in all your open shell windows, in rare cases you need to reopen all shell windows.
wangpeideMacBook-Pro:huobicloud_ios wangpei$ source /Users/wangpei/.rvm/scripts/rvm

RVM use ruby – 2.6.3
Execute the install command Sudo gem install Cocoapods or Sudo gem install -n /usr/local/bin cocoapods

ERROR:  Could not find a valid gem 'cocoapods' (>= 0), here is why:
          Unable to download data from https://gems.ruby-china.com/ - no such name (https://gems.ruby-china.com/specs.4.8.gz)
ERROR:  Possible alternatives: cocoapods
wangpeideMacBook-Pro:~ wangpei$ gem sources -l
*** CURRENT SOURCES ***

https://gems.ruby-china.com/
wangpeideMacBook-Pro:~ wangpei$ sudo gem update --system
Latest version already installed. Done.
wangpeideMacBook-Pro:~ wangpei$ sudo gem install -n /usr/local/bin cocoapods
Successfully installed cocoapods-1.9.2
Parsing documentation for cocoapods-1.9.2
Done installing documentation for cocoapods after 1 seconds
1 gem installed
wangpeideMacBook-Pro:~ wangpei$ pod --version
1.9.2


[Transfer] mdt wds deployment windows Litetouch deployment failed, Return Code = -2147467259 0x80004005 solution…

Combination chemotherapy wds deployment windows Litetouch deployment failed,return code = -2147467259 0 x80004005 resolution

Mark.

http://isee131.blog.51cto.com/619759/518771

It’s deployments that turn out to be wrong.

Litetouch deployment failed, return code = -2147467259 0x80004005

It’s been a long day, but I finally got the results back. Write it down.

Method 1

On your Windows 7 reference PC, open the registry editor. Navigate to the HKLM \ system \ settings. Look for a multi-string value called “CloneTag”. I’m guessing it’s not there. Add a new multistring value named “CloneTag”. The actual value doesn’t matter. I’m not sure if the case on the name matters, so I mimicked the error message. Export the HKLM\system\settings key and save it to the .reg file. Edit the .reg file and remove all other entries except for the CloneTag value.

Run cscript to start the task sequence selector. Select your Sysprep and capture the Task Sequence. Enter your credentials and start.

When it gets to the part where the sysprep is executed, run the .reg file to quickly import the CloneTag multi-string value. If you see that it continues to sport, then you should be clear.

Method 2

Go to the Scripts folder in your DS box and create a backup of the LTISysprep file somewhere on your desktop so you will have a copy and if anything goes wrong open the LTISysprep file with Notepad and remove osshell. MACHINE\System\Setup\CloneTag’ line off and save the file to update your deployment share continues by logging in to the referenced computer and on your DS machine.

Run the LiteTouch script to capture p_w_picpath on

Method 3.

The reason for this failure is that the registry key CloneTag under HKLM\system\settings was deleted during sysprep startup:

1.
Enter your sysprep and capture the task sequence, execute sysprep, Options tab, Add, Registry Settings. Enter “System\Settings” in the “Key” box, and enter the CloneTag in the “Value Name” box, and place the “Value” in the CloneTag. ” box is left blank. The whole step is to add the registry entry back to the HKLM\system\setup after the sysprep is complete.

2. (Same approach as suggested by Jimmy lami)
You can also modify the script to prevent deletion of registry entries. Go to the deploymentshare folder and look for the script named LITSysprep in the scripts folder. Right-click on edit to make changes in the script. You can remove the oShell.RegDelete “HKEY_LOCAL_MACHINE\SystemSetup\CloneTag” or you may want to add. // infront to convert it to a comment.


vscode import numpy error:DLL load failed: The specific module could not be found

An error description

    anaconda prompt, import numpy in normal vscode, import numpy error: DLL load failed

Error reason
Vscode failed to properly initialize the environment variable
The solution
Open the vscodesettings.json file

(type)               CTRL + SHIFT + P
(search for:)        open settings
(click:)             Preferences: Open Settings (JSON)

Add three lines

{
    ... # any other settings you have already added (remove this line)

    "terminal.integrated.shell.windows": "C:\\WINDOWS\\System32\\cmd.exe",
    "terminal.integrated.shellArgs.windows": ["/K", "x:\\xxx\\Anaconda3\\Scripts\\activate.bat x:\\xxx\\Anaconda3"],
    "python.condaPath": "x:\\xxx\\Anaconda3\\Scripts\\conda.exe"
}

Under Linux, git cannot be used, prompt sign_and_send_pubkey: signing failed: agent refused operation

Under Linux, Git cannot be used if the server has already added a public key
Git Clone and other functions cannot be used under Linux. Prompt:

sign_and_send_pubkey: signing failed: agent refused operation

In turn (if no public key is added) :

ssh-add
eval $(ssh-agent -s)

Execute (public key has been added) :

eval $(ssh-agent -s)

Eval $(sSH-Agent-s) system runs at startup
Obviously, the above method requires executing eval $(sSH-agent-s) before using Git for the first time. Otherwise, it is not friendly to use an error. We want to avoid the trouble of eval $(ssh-agent-s) once and for all, which is unlikely to be remembered. Therefore, I need to initialize this command when the system boot, help me to execute this command.
Current user (if you prefer “any configuration is for users”)
modify ~/.bashrc, vim ~/.bashrc
add this line (suggested at the end) :

# 启动 ssh-agent,“> .null”是为了解决在终端喊一嗓子的问题(其实就是将它输出到一个.null文件中去了)
eval $(ssh-agent) > .null

All users (recommended)
modify (may need sudo, add it yourself as necessary) /etc/bashrc, vim /etc/bashrc
add this line (it is recommended to add it at the end) :

# 启动 ssh-agent,“> .null”是为了解决在终端喊一嗓子的问题(其实就是将它输出到一个.null文件中去了)
eval $(ssh-agent) > .null