Python using QT5 development interface of a demo development process summary
1. Current python version:

2. Use PIP to install QT5:
pip install pyqt5

Pyqt5-tools: PIP install pyqt5-tools

4. Check whether QT was installed successfully:

from PyQt5 import QtWidgets, QtGui
import sys

app = QtWidgets.QApplication(sys.argv)
window = QtWidgets.QWidget();
window.show()
sys.exit(app.exec_())
pops out the following interface :

Pycharm related configuration :
1. Add external Tools
open Settings – & gt; Tools-> External Tools click “+”

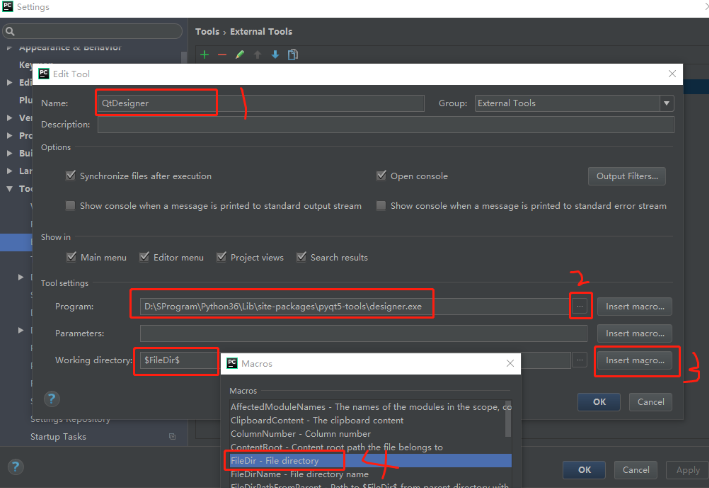
2. Add QtDesigner
set
as shown below
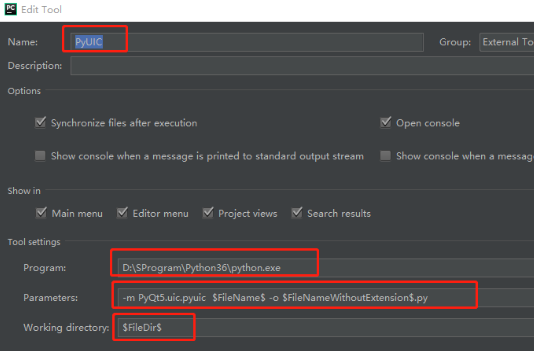
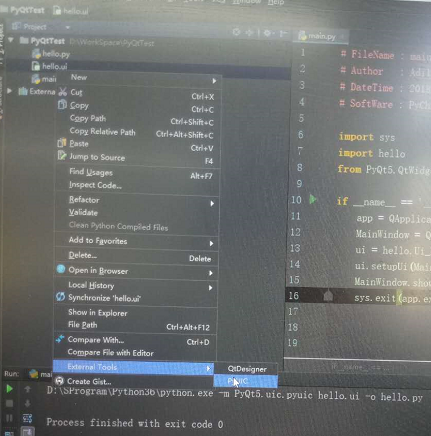
3. Add PyUIC
is set as shown below.
Parameters: -m pyqt5.uic. Pyuic $FileName$-o $FileNameWithoutExtension$.py
Parameters: -m pyqt5.uic. Pyuic $FileName$-o $FileNameWithoutExtension$.py
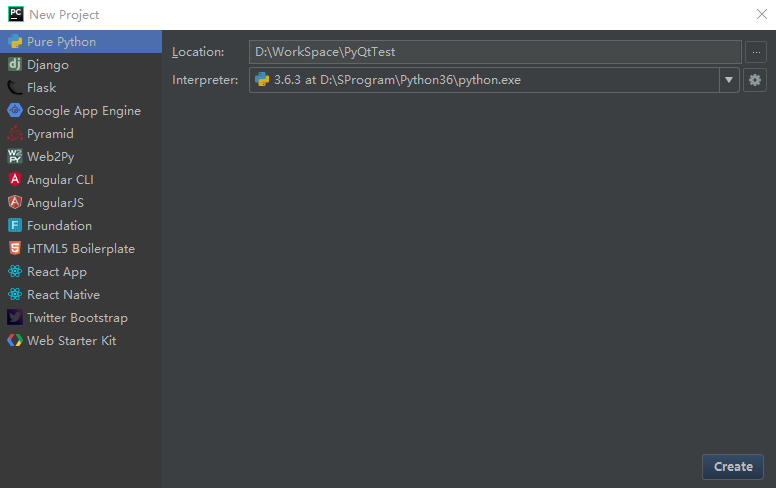
3. Create a new PyQt demo and create a project
as shown below
Open QtDesigner
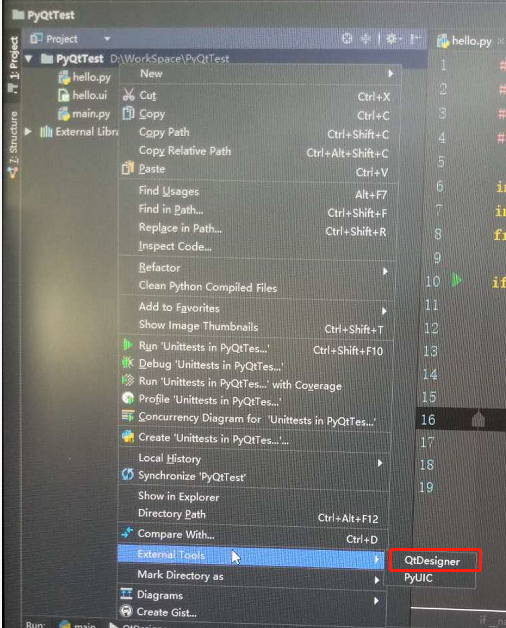
open Qt interface as shown in the figure below
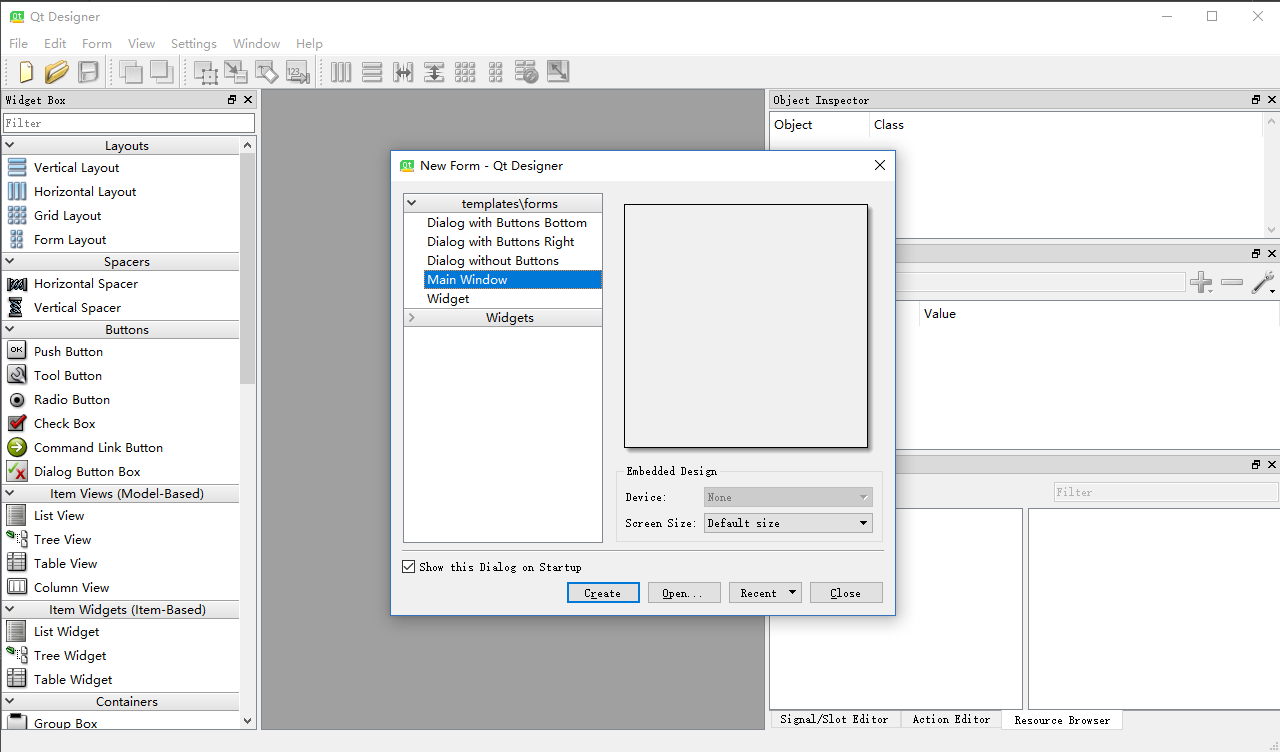
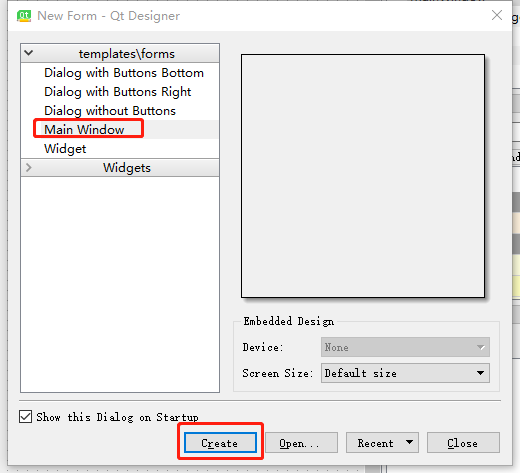
create a Main Window
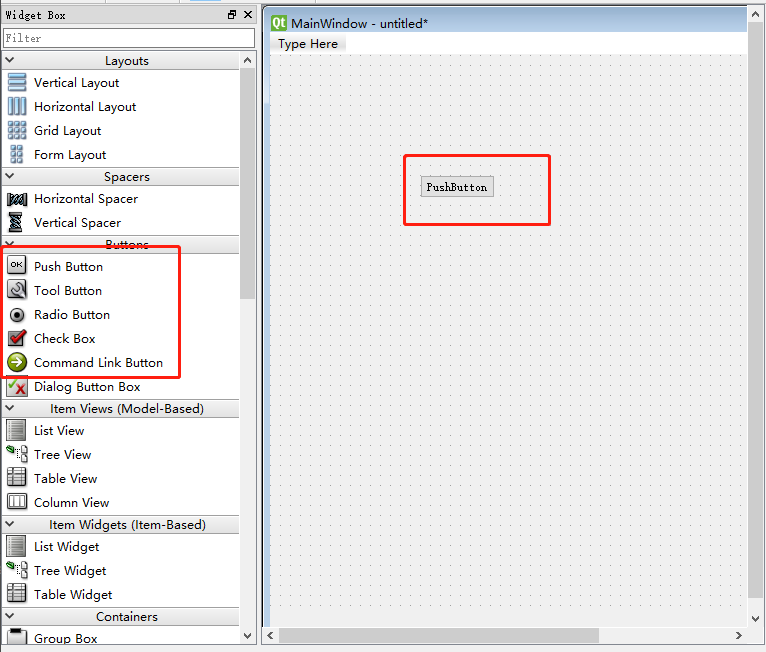
as shown in the figure, you can add your own component
as needed
save
as shown
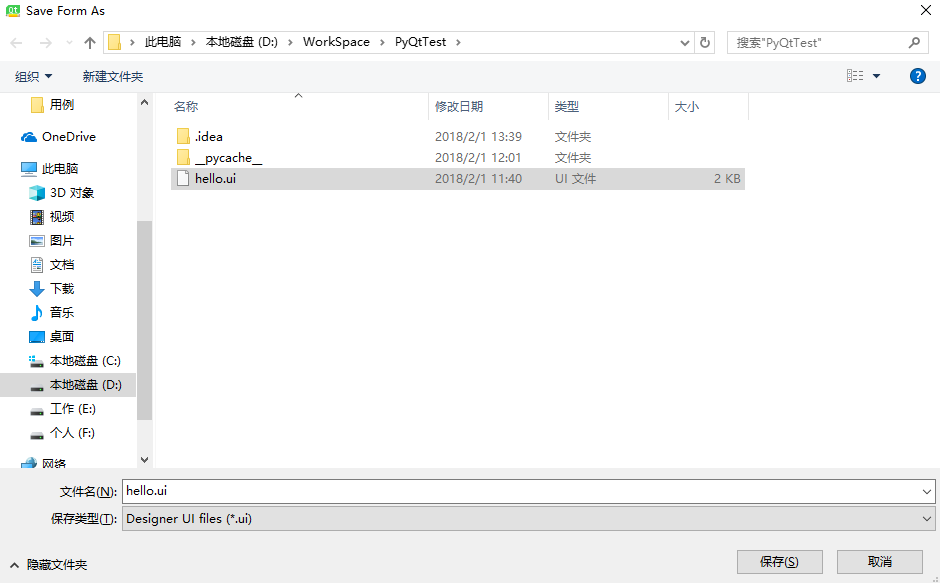
as shown below, use PyUIC to convert hello. UI file to hello.py
and here’s what I did:
# -*- coding: utf-8 -*-
from helloworld import Ui_MainWindow
from PyQt5 import QtCore, QtGui, QtWidgets
import sys


class query_window(QtWidgets.QMainWindow):
    def __init__(self):
        QtWidgets.QMainWindow.__init__(self)
        self.ui = Ui_MainWindow()
        self.ui.setupUi(self)
        self.ui.pushButton.clicked.connect(self.query_formula)
        # 给button 的 点击动作绑定一个事件处理函数


    def query_formula(self):
        pass
        # 此处编写具体的业务逻辑

if __name__ == '__main__':
    app = QtWidgets.QApplication(sys.argv)
    window = query_window()
    window.show()
    sys.exit(app.exec_())
Read More:
- [Solved] Odrive gui Error: Do not use the development server in a productioun and supported version of the Socket
- The automatic token of Python interface is passed into the header
- [Solved] AttributeError: module ‘tensorboard.summary._tf.summary‘ has no attribute ‘merge‘
- Python + Requests +Excel+Jenkins interface automation
- [Solved] Python Error: An attempt has been made to start a new process before the current process has finished …
- Python3 Fatal error in launcher: Unable to create process using ‘”‘
- Python PIP Fatal error in launcher: Unable to create process using ‘“e:\program files\programdata
- Python Error: Process finished with exit code -1073740791 (0xC0000409)
- Python asynchronous co process crawler error: [aiohttp. Client]_ Exceptions: serverdisconnected error: Server Disconnected]
- Invalid python sd, Fatal Python error: init_fs_encoding: failed to get the Python cod [How to Solve]
- [Solved] NPM install Error: check python checking for Python executable python2 in the PATH
- [Solved] Using summary to View network parameters Error: RuntimeError: Input type (torch.cuda.FloatTensor)
- Not find or load Qt Platform plugin “windows“ [How to Solve]
- How to Solve Python WARNING: Ignoring invalid distribution -ip (e:\python\python_dowmload\lib\site-packages)
- [Solved] opencv-python: recipe for target ‘modules/python3/CMakeFiles/opencv_python3.dir/all‘ failed
- Python Error: pip install mysql-connector-python failed
- Python pyqt5 ui Generate .py File Error [How to Solve]
- Failed to establish a new connection: [winerror 10048] in the requests thread pool, the interface is called circularly to get the datagram error
- [Solved] Error running process: CreateProcess failed. Code 2
- Linux installs Python and upgrades Python