1, the preface
The version of PyQt should be the same as the version of Python. The version of PyQt I use here is PyQT5-5.6-GPL-Py3.5-QT5.6.0-x64.exe. For details, please search directly. Since this version requires the V3.5 version of Python, you need to install Python3.5 first and then PyQt. To make it easier to write code, you install PyCharm (version: PyCharm-Community-2017.3.2.exe). PyCharm +Python3.5+ PyQT5.6 is a Python visual programming tool that allows you to install and download Python Charm, Python3.5 and PyQT5.6. Visual programming in Python based on the latest version of PyChart 2018.3+Python3.7+ PyQT5.11 will also be introduced at the end of this article.
2, start
1) Open PyCharm and configure the relevant Settings
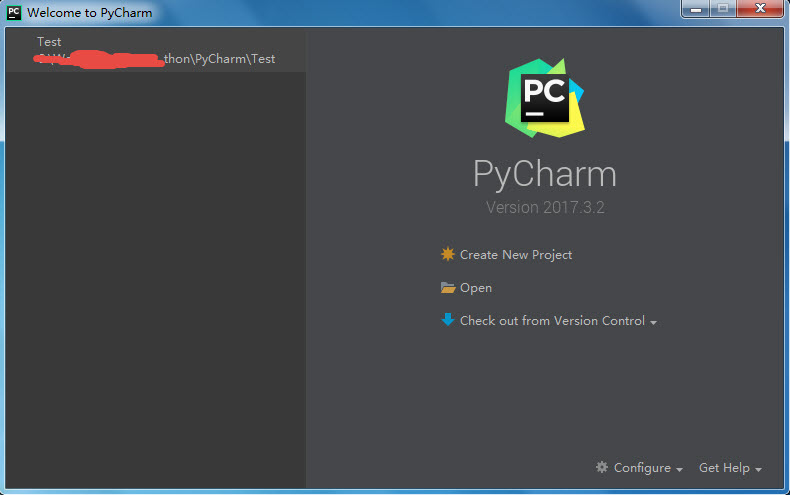
Open the PyCharm interface as follows:
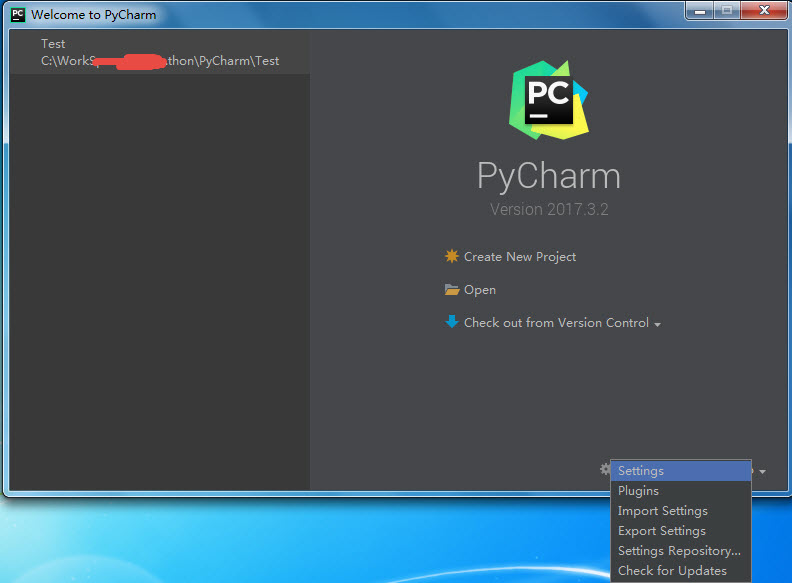
Click the “Configure” drop-down button at the bottom right of the screen and select “Settings”, as shown below:
Open the following setting interface:
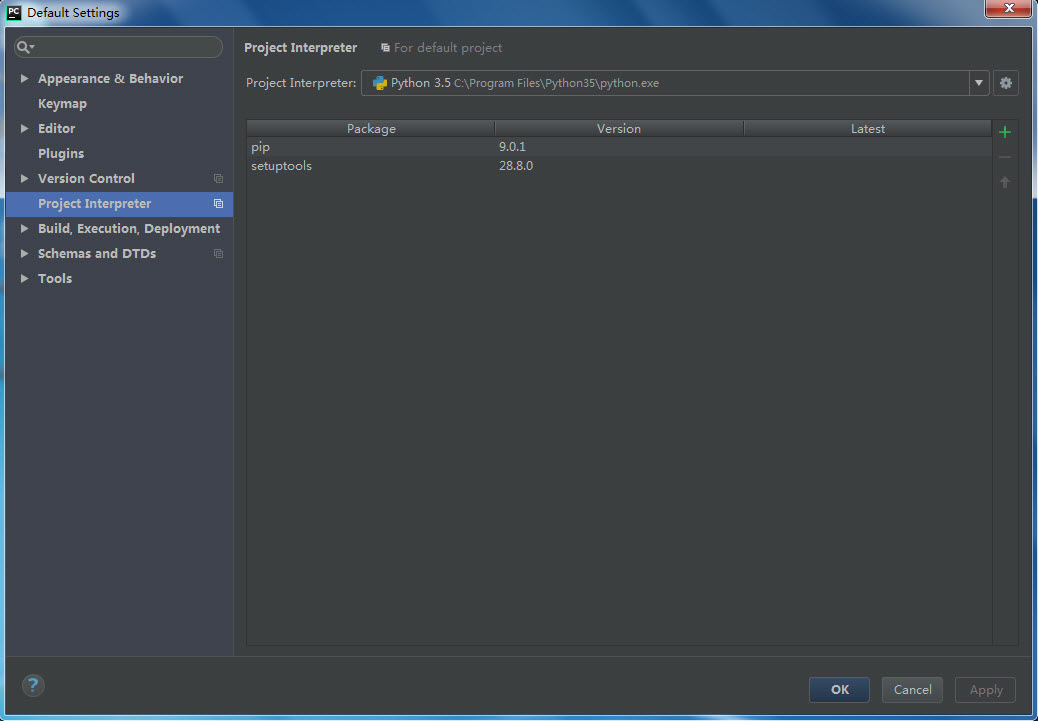
As shown above, select the Python version installed on this machine from the “Project Interpreter” graphics card. Normally, it will automatically recognize the Python version installed on this machine, as shown in Figure 3.5;
After the configuration is completed, click “OK” to return to the Start screen.
Select “Create New Project “, select the Project path and Project name, then click “Create”, and the following interface will pop up:
At this point, the working environment is ready;
3, write,
1) First, create a.py file, tentatively named pyqt.py
Next, the file you need to import PyQt is as follows:
import sys
from PyQt5.QtWidgets import QWidget, QApplication
Note that if the prompt fails to find the corresponding file, make sure the PyQT5 installation path is in the environment variable!
Then add the main function first:
if __name__ == "__main__":
    app = QApplication(sys.argv)
    sys.exit(app.exec_())
The next step is to add interface-related functions:
#class Example
class Example(QWidget):
def __init__(self):
super(Example, self).__init__()
self.InitUI()
def InitUI(self):
self.btn = QPushButton("Dialog", self)
self.btn.move(20, 20)
self.btn.clicked.connect(self.ShowDialog)
self.le = QLineEdit(self)
self.le.move(130, 22)
self.setWindowTitle("Input Dialog")
self.show()
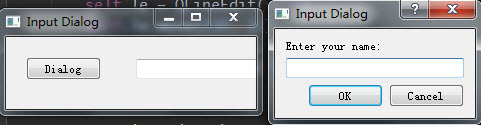
def ShowDialog(self):
text,ok = QInputDialog.getText(self, "Input Dialog", "Enter your name:")
if ok:
self.le.setText(str(text))As shown in the code above, in Python, the interface is mainly generated by the class. In the class, you can generate the interface, create the control, create the control’s response function, connect the control and the control’s response function.
The function __init__(self) can be understood as the constructor of this class, where the initialization of the interface is performed.
The function initUI (self) is mainly used to generate interface controls;
When the class is created, you simply call the class in the main function. This is as follows:
if __name__ == "__main__":
app = QApplication(sys.argv)
ex = Example()
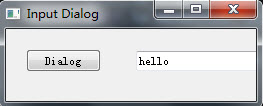
sys.exit(app.exec_())In the above code, a button (BTN), an edit box (le) and a button response function (showDialog) are mainly added in the interface, in which a standard input window is opened in the showDialog response function, and the value entered in the standard input window is displayed in the edit box (le).
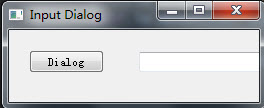
Results:
4, extension,
In the following, I made a more complex example, mainly to simulate the solution of exchange rate. The interface is mainly shown as follows:
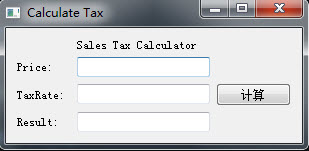
It mainly involves button, edit box, Label, layout, etc.
This is written in the same file as the first example, and can be downloaded by following the link:
http://download.csdn.net/download/bailang_zhizun/10249579
5. The latest version configuration method
Configure the visual programming environment with the latest versions of Python, PyQt, and PyCharm.
First install Python3.7, then install PyChart 2018.3, configure the Python interpreter to the local directory of Python3.7, and then install PyQT5.11.
Install PyQt5.11 is in the form of PIP + wheel files installed, download url: https://pypi.org/project/PyQt5/#files
About the installation of the PIP please refer to https://blog.csdn.net/bailang_zhizun/article/details/84563095
Put the downloaded pyqt5-5.11.3-5.11.2-cp35.cp36.cp37.cp38-none-win_amd64.whl file in the appropriate location.
Open CMD and enter the installation command as follows:

Enter and the PIP will automatically install the file:
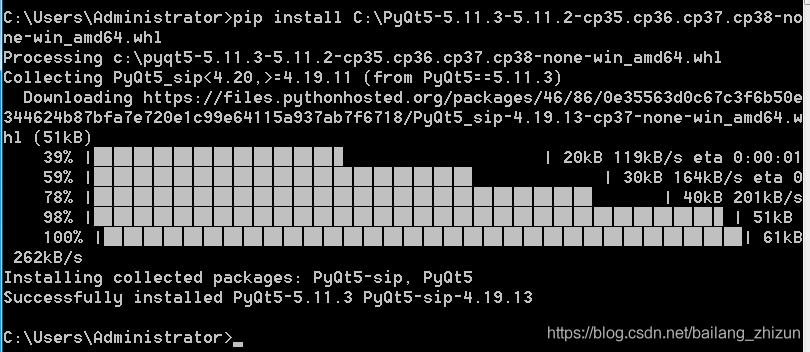
At this point, PyQT5.11 is installed successfully.
You can test it with the code above.
6. Install PyQT5 in Python 2.7 under Ubuntu
These are all documented installments of PyQT5 on Windows + Python 3. According to the official website of pyqt5, pyqt5 is only available for python3, but not for python2.7, so you can install pyqt5 online. Here is how to install pyqt5 in Ubuntu+python2.7:
Open a terminal in Ubuntu and type:
$sudo apt-get install python-pyqt5After the installation is completed, you can directly import PyQt5 on the code editing page, and it is available for personal testing.
In addition, it seems that the above method can also be used to install PyQT5 in Ubuntu + Python 3 environment, also through the command installation:
$sudo apt-get install python3-pyqt5It’s untested, but it should work.