Tag Archives: python

Common configuration methods of nginx

nginx.conf

server 
   max-content-length

site-avalables site-enabled

The file name of this sample configuration file is Default
edit file: /etc/nginx/sites available/default

# If there are multiple servers, configure them here, and modify the proxy_pass 
upstream flask {
        server 127.0.0.1:5000;
        server 127.0.0.1:5001;
}
server {

        listen 80 default_server;
        listen [::]:80 default_server;
		
		# Set the maximum upload data size allowed by nginx service for users
		# Adjust the upload file size limit setting parameter according to business requirements
		client_max_body_size 10m;
		
        # Cache file size setting 0 means no limit
        # Use the default configuration, exceeding the size will result in an error.net::ERR_INCOMPLETE_CHUNKED_ENCODING error
        proxy_max_temp_file_size 0;

        root /var/www/html;

        index index.html index.htm index.nginx-debian.html;

        server_name _;

        location/{
                # Requests are forwarded to the gunicorn server
                proxy_pass http://127.0.0.1:5000;
                
                # Requests are forwarded to multiple gunicorn servers
                # proxy_pass http://flask;
                
                # Set the request header and pass the header information to the server side 
                proxy_set_header Host $host;
                
                # Set request header and pass original request ip to gunicorn server
                proxy_set_header X-Real-IP $remote_addr;
        }
}

Another way of writing

Modify the nginx configuration file so that nginx receives the request and forwards it to the uwsgi server


upstream test_server{
	server 10.211.55.2:8000;
}

#gzip  on;
server {
	listen  8000;
	server_name api.baidu.site;

	location/{
		include uwsgi_params;
		uwsgi_pass test_server;
	}

}

server {
	listen       80;
	server_name  www.baidu.site;

	#charset koi8-r;

	#access_log  logs/host.access.log  main;
	location /xadmin {
		include uwsgi_params;
		uwsgi_pass test_server;
 	}

	location /ckeditor {
		include uwsgi_params;
		uwsgi_pass test_server;
	}

	location/{
		root   /home/python/Desktop/front_end_pc;
		index  index.html index.htm;
	}

	error_page   500 502 503 504  /50x.html;
	location = /50x.html {
		root   html;
	}

}

[solution] pyinnstaller package EXE file tutorial

In business scenarios, Python is often required to develop some small programs/scripts/GUI interfaces, which can be delivered to Xiaobai or partners who do not have Python installed
Deng Deng Deng Deng
pyinstaler

Scene description

Use pyinnstaller to package Python scripts or projects to generate executable. Exe files. Pyinstaller is a very good free packaging tool, supports windows, Linux and MacOS, and perfectly supports 32-bit and 64 bit systems. In addition to pyinstaller, you can also use py2exe for packaging

Pyinstaller installation

pip install pyinstaller

Packing parameters

# Common packing parameters
# -F -D mutually exclusive parameters
-F package into an exe file, small projects can be used, slow to open, multiple .py package can not be used
-D default parameter, package the result into the created folder, you can see a lot of dependency files inside

# -w -c mutually exclusive parameters
-w use the project GUI interface, no cmd console
-c default parameter, use cmd console If the execution of the package file reports an error, you can try to use -c to show the console

-n the name of the execution project, default .py file name
-i package ico icon into exe file

--hidden-import package information when packaging
# It is highly recommended to package PyQt projects with the following parameters
--hidden-import PyQt5.sip

# Example package command
# Execute the package command in the root directory of the project
pyinstaller -w xxx.py --hidden-import PyQt5.sip
 
# The output of the package is in the dist folder in the project's root directory
# It is not recommended to use -F to package into an exe file as the saying goes: package for a while, open for 5 seconds
# Non-F command, static resources, built Sqlite database can be put directly into the dist generated folder

explain

Pyinstaller just packages Python interpreter and script into an executable file, which is different from compiling into real machine code. So the efficiency of the code is reduced, only to solve the operation difficulty of Xiaobai users. When packaging, we will analyze the project dependencies, package the related dependencies, and encrypt them. Different operating systems need to be packaged in different operating systems


Summary of solutions to packaging problems

Console debug
runs successfully locally. It is recommended to use the - C command when the EXE is packaged for the first time, so that possible error messages can be displayed in the console
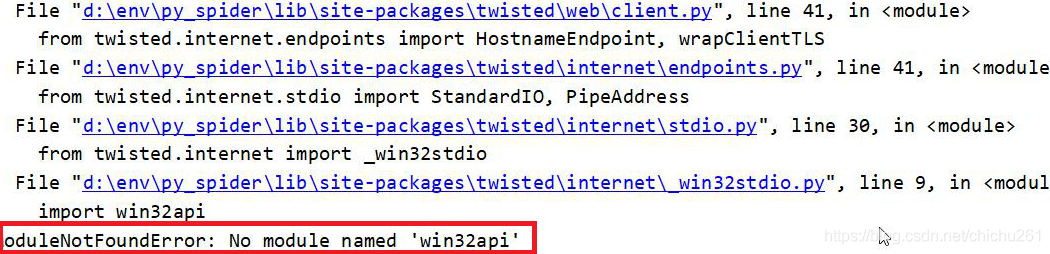
if the - C is not used during packaging, the console will not appear or the console will flash by and the error message will not be seen, you can execute the EXE file fatal error failed to execute script file in the CMD command line window
pyinstaller. Some libraries are not packaged during packaging, The library in error reporting information can be packaged by -- hidden import error reporting package

Solutions to various errors in pyinstall packaging python3.6 + pyqt5

The result file is too large

Parameters in help

>>> pyinstaller -h
usage: pyinstaller [-h] [-v] [-D] [-F] [--specpath DIR] [-n NAME]
                   [--add-data <SRC;DEST or SRC:DEST>]
                   [--add-binary <SRC;DEST or SRC:DEST>] [-p DIR]
                   [--hidden-import MODULENAME]
                   [--additional-hooks-dir HOOKSPATH]
                   [--runtime-hook RUNTIME_HOOKS] [--exclude-module EXCLUDES]
                   [--key KEY] [-d {all,imports,bootloader,noarchive}] [-s]
                   [--noupx] [--upx-exclude FILE] [-c] [-w]
                   [-i <FILE.ico or FILE.exe,ID or FILE.icns>]
                   [--version-file FILE] [-m <FILE or XML>] [-r RESOURCE]
                   [--uac-admin] [--uac-uiaccess] [--win-private-assemblies]
                   [--win-no-prefer-redirects]
                   [--osx-bundle-identifier BUNDLE_IDENTIFIER]
                   [--runtime-tmpdir PATH] [--bootloader-ignore-signals]
                   [--distpath DIR] [--workpath WORKPATH] [-y]
                   [--upx-dir UPX_DIR] [-a] [--clean] [--log-level LEVEL]
                   scriptname [scriptname ...]

positional arguments:
  scriptname            name of scriptfiles to be processed or exactly one
                        .spec-file. If a .spec-file is specified, most options
                        are unnecessary and are ignored.

optional arguments:
  -h, --help            show this help message and exit
  -v, --version         Show program version info and exit.
  --distpath DIR        Where to put the bundled app (default: .\dist)
  --workpath WORKPATH   Where to put all the temporary work files, .log, .pyz
                        and etc. (default: .\build)
  -y, --noconfirm       Replace output directory (default:
                        SPECPATH\dist\SPECNAME) without asking for
                        confirmation
  --upx-dir UPX_DIR     Path to UPX utility (default: search the execution
                        path)
  -a, --ascii           Do not include unicode encoding support (default:
                        included if available)
  --clean               Clean PyInstaller cache and remove temporary files
                        before building.
  --log-level LEVEL     Amount of detail in build-time console messages. LEVEL
                        may be one of TRACE, DEBUG, INFO, WARN, ERROR,
                        CRITICAL (default: INFO).

What to generate:
  -D, --onedir          Create a one-folder bundle containing an executable
                        (default)
  -F, --onefile         Create a one-file bundled executable.
  --specpath DIR        Folder to store the generated spec file (default:
                        current directory)
  -n NAME, --name NAME  Name to assign to the bundled app and spec file
                        (default: first script's basename)

What to bundle, where to search:
  --add-data <SRC;DEST or SRC:DEST>
                        Additional non-binary files or folders to be added to
                        the executable. The path separator is platform
                        specific, ``os.pathsep`` (which is ``;`` on Windows
                        and ``:`` on most unix systems) is used. This option
                        can be used multiple times.
  --add-binary <SRC;DEST or SRC:DEST>
                        Additional binary files to be added to the executable.
                        See the ``--add-data`` option for more details. This
                        option can be used multiple times.
  -p DIR, --paths DIR   A path to search for imports (like using PYTHONPATH).
                        Multiple paths are allowed, separated by ';', or use
                        this option multiple times
  --hidden-import MODULENAME, --hiddenimport MODULENAME
                        Name an import not visible in the code of the
                        script(s). This option can be used multiple times.
  --additional-hooks-dir HOOKSPATH
                        An additional path to search for hooks. This option
                        can be used multiple times.
  --runtime-hook RUNTIME_HOOKS
                        Path to a custom runtime hook file. A runtime hook is
                        code that is bundled with the executable and is
                        executed before any other code or module to set up
                        special features of the runtime environment. This
                        option can be used multiple times.
  --exclude-module EXCLUDES
                        Optional module or package (the Python name, not the
                        path name) that will be ignored (as though it was not
                        found). This option can be used multiple times.
  --key KEY             The key used to encrypt Python bytecode.

How to generate:
  -d {all,imports,bootloader,noarchive}, --debug {all,imports,bootloader,noarchive}
                        Provide assistance with debugging a frozen
                        application. This argument may be provided multiple
                        times to select several of the following options.

                        - all: All three of the following options.

                        - imports: specify the -v option to the underlying
                          Python interpreter, causing it to print a message
                          each time a module is initialized, showing the
                          place (filename or built-in module) from which it
                          is loaded. See
                          https://docs.python.org/3/using/cmdline.html#id4.

                        - bootloader: tell the bootloader to issue progress
                          messages while initializing and starting the
                          bundled app. Used to diagnose problems with
                          missing imports.

                        - noarchive: instead of storing all frozen Python
                          source files as an archive inside the resulting
                          executable, store them as files in the resulting
                          output directory.

  -s, --strip           Apply a symbol-table strip to the executable and
                        shared libs (not recommended for Windows)
  --noupx               Do not use UPX even if it is available (works
                        differently between Windows and *nix)
  --upx-exclude FILE    Prevent a binary from being compressed when using upx.
                        This is typically used if upx corrupts certain
                        binaries during compression. FILE is the filename of
                        the binary without path. This option can be used
                        multiple times.

Windows and Mac OS X specific options:
  -c, --console, --nowindowed
                        Open a console window for standard i/o (default). On
                        Windows this option will have no effect if the first
                        script is a '.pyw' file.
  -w, --windowed, --noconsole
                        Windows and Mac OS X: do not provide a console window
                        for standard i/o. On Mac OS X this also triggers
                        building an OS X .app bundle. On Windows this option
                        will be set if the first script is a '.pyw' file. This
                        option is ignored in *NIX systems.
  -i <FILE.ico or FILE.exe,ID or FILE.icns>, --icon <FILE.ico or FILE.exe,ID or FILE.icns>
                        FILE.ico: apply that icon to a Windows executable.
                        FILE.exe,ID, extract the icon with ID from an exe.
                        FILE.icns: apply the icon to the .app bundle on Mac OS
                        X

Windows specific options:
  --version-file FILE   add a version resource from FILE to the exe
  -m <FILE or XML>, --manifest <FILE or XML>
                        add manifest FILE or XML to the exe
  -r RESOURCE, --resource RESOURCE
                        Add or update a resource to a Windows executable. The
                        RESOURCE is one to four items,
                        FILE[,TYPE[,NAME[,LANGUAGE]]]. FILE can be a data file
                        or an exe/dll. For data files, at least TYPE and NAME
                        must be specified. LANGUAGE defaults to 0 or may be
                        specified as wildcard * to update all resources of the
                        given TYPE and NAME. For exe/dll files, all resources
                        from FILE will be added/updated to the final
                        executable if TYPE, NAME and LANGUAGE are omitted or
                        specified as wildcard *.This option can be used
                        multiple times.
  --uac-admin           Using this option creates a Manifest which will
                        request elevation upon application restart.
  --uac-uiaccess        Using this option allows an elevated application to
                        work with Remote Desktop.

Windows Side-by-side Assembly searching options (advanced):
  --win-private-assemblies
                        Any Shared Assemblies bundled into the application
                        will be changed into Private Assemblies. This means
                        the exact versions of these assemblies will always be
                        used, and any newer versions installed on user
                        machines at the system level will be ignored.
  --win-no-prefer-redirects
                        While searching for Shared or Private Assemblies to
                        bundle into the application, PyInstaller will prefer
                        not to follow policies that redirect to newer
                        versions, and will try to bundle the exact versions of
                        the assembly.

Mac OS X specific options:
  --osx-bundle-identifier BUNDLE_IDENTIFIER
                        Mac OS X .app bundle identifier is used as the default
                        unique program name for code signing purposes. The
                        usual form is a hierarchical name in reverse DNS
                        notation. For example:
                        com.mycompany.department.appname (default: first
                        script's basename)

Rarely used special options:
  --runtime-tmpdir PATH
                        Where to extract libraries and support files in
                        `onefile`-mode. If this option is given, the
                        bootloader will ignore any temp-folder location
                        defined by the run-time OS. The ``_MEIxxxxxx``-folder
                        will be created here. Please use this option only if
                        you know what you are doing.
  --bootloader-ignore-signals
                        Tell the bootloader to ignore signals rather than
                        forwarding them to the child process. Useful in
                        situations where e.g. a supervisor process signals
                        both the bootloader and child (e.g. via a process
                        group) to avoid signalling the child twice.

[example multitasking] Python multithreading module

Python has built-in threading module, which encapsulates the lower level thread module
for built-in methods, see the official document: threading – thread based parallelism

Multithreading execution

The main thread will wait for all the child threads to finish

#coding=utf-8
import threading
import time

def thread_test():
    print("test.")
    time.sleep(1)

if __name__ == "__main__":
    for i in range(5):
        t = threading.Thread(target=thread_test)
        t.start() 

View the number of threads

#coding=utf-8
import threading
from time import sleep, ctime

def a():
    for i in range(3):
        print("a...%d"%i)
        sleep(1)

def bbbbb():
    for i in range(3):
        print("bbbbb...%d"%i)
        sleep(1)

if __name__ == '__main__':
    print('---start---:%s'%ctime())
    t1 = threading.Thread(target=a)
    t2 = threading.Thread(target=bbbbb)

    t1.start()
    t2.start()

    while True:
        length = len(threading.enumerate())
        # length = threading.active_count()
        print('The number of threads currently running is: %d'%length)
        if length<=1:
            break

        sleep(0.5)

Encapsulating the threading. Thread class

Inherit threading. Thread and override run method

#coding=utf-8
import threading
import time

class MyThread(threading.Thread):

    def run(self):
        for i in range(3):
            time.sleep(1)
            msg = "I'm "+self.name+' @ '+str(i) The name of the current thread is stored in the #name attribute
            print(msg)


if __name__ == '__main__':
    t = MyThread()
    t.start()

Thread execution order

Each thread runs a complete run function, but the start order of the thread and the execution order of each loop in the run function cannot be determined.

Sharing global variables and passing parameters

# Shared global variables
from threading import Thread
import time

g_num = 100

def work1():
    global g_num
    for i in range(3):
        g_num += 1
    print("----in work1, g_num is %d---"%g_num)


def work2():
    global g_num
    print("----in work2, g_num is %d---"%g_num)


print("---Before the thread is created g_num is %d---"%g_num)

t1 = Thread(target=work1)
t1.start()

#Delay for a while to make sure things are done in thread t1
time.sleep(1)

t2 = Thread(target=work2)
t2.start()

All threads in a process share global variables, which is very convenient to share data among multiple threads. Disadvantages: threads change global variables randomly, which may cause confusion among multiple threads (that is, threads are not safe)

from threading import Thread
import time

def work1(nums):
    nums.append(44)
    print("----in work1---",nums)


def work2(nums):
    #Delay for a while to make sure things are done in thread t1
    time.sleep(1)
    print("----in work2---",nums)

g_nums = [11,22,33]

t1 = Thread(target=work1, args=(g_nums,))
t1.start()

t2 = Thread(target=work2, args=(g_nums,))
t2.start()

Mutex

When multiple threads modify a shared data almost at the same time, synchronization control is needed.
when a thread wants to change the shared data, lock it first. At this time, the resource status is “locked”, and other threads cannot change it; Until the thread releases the resource and changes its state to “non locked”, other threads can lock the resource again. Mutex ensures that only one thread can write each time, so as to ensure the correctness of data in the case of multithreading.

Advantages ensure that a piece of key code can only be completely executed by one thread from beginning to end. Disadvantages 1 prevent the concurrent execution of multiple threads. In fact, a piece of code containing locks can only be executed in single thread mode, which greatly reduces the efficiency. Disadvantages 2 because there can be multiple locks, different threads hold different locks, and try to obtain the lock held by the other party, Deadlock may occur

import threading
import time

g_num = 0

def test1(num):
    global g_num
    for i in range(num):
        mutex.acquire()  
        g_num += 1
        mutex.release()  

    print("---test1---g_num=%d"%g_num)

def test2(num):
    global g_num
    for i in range(num):
        mutex.acquire()  
        g_num += 1
        mutex.release()  

    print("---test2---g_num=%d"%g_num)

# Create a mutually exclusive lock
# Default is the unlocked state
mutex = threading.Lock()

# Create 2 threads and have them each add 1000000 times to g_num
p1 = threading.Thread(target=test1, args=(1000000,))
p1.start()

p2 = threading.Thread(target=test2, args=(1000000,))
p2.start()

# Wait for the calculation to complete
while len(threading.enumerate()) ! = 1:
    time.sleep(1)

print("The final result after 2 threads operate on the same global variable is:%s" % g_num)

Mutex can use context manager
to use lock, condition and semaphore in with statement
the object with acquire() and release() method provided by this module can be used as context manager of with statement. When entering a statement block, the acquire () method will be called, and when exiting a statement block, release () will be called. Therefore, the following fragments:

with some_lock:
    # do something...

# Equivalent to :

some_lock.acquire()
try:
    # do something...
finally:
    some_lock.release()

Lock, RLOCK, condition, semaphore, and boundedsemaphore objects can now be used as context managers for the with statement.

Multithreading case [chat]

Write a program with two threads
thread 1 is used to receive data and then display
thread 2 is used to detect keyboard data and then send data through UDP

import socket
import threading


def send_msg(udp_socket):
    """Get the keyboard data and send it to the other side """
    while True:
        # 1. input data from keyboard
        msg = input("\nPlease enter the data to be sent:")
        # 2. enter the ip address of the other party
        dest_ip = input("\nPlease enter the other party's ip address:")
        # 3. enter the other party's port
        dest_port = int(input("\nPlease enter the other party's port:"))
        # 4. send data
        udp_socket.sendto(msg.encode("utf-8"), (dest_ip, dest_port))


def recv_msg(udp_socket):
    """Receive data and display """
    while True:
        # 1. receive data
        recv_msg = udp_socket.recvfrom(1024)
        # 2. decode
        recv_ip = recv_msg[1]
        recv_msg = recv_msg[0].decode("utf-8")
        # 3. display the received data
        print(">>>%s:%s" % (str(recv_ip), recv_msg))


def main():
    # 1. Create a socket
    udp_socket = socket.socket(socket.AF_INET, socket.SOCK_DGRAM)
    # 2. bind local information
    udp_socket.bind(("", 7890))

    # 3. create a child thread to receive data
    t = threading.Thread(target=recv_msg, args=(udp_socket,))
    t.start()
    # 4. let the main thread detect the keyboard data and send
    send_msg(udp_socket)


if __name__ == "__main__":
    main()

[problem solving] the problem of err returned non zero status 1 or status 2 is solved after upgrading python3 in Ubuntu

Problem scenario
ubuntn originally has Python 3.5. Now, after upgrading and installing Python 3.7, the following problems appear in multiple scenarios:
problem 1 status 1

subprocess.CalledProcessError: Command '('lsb_release', '-a')' returned non-zero exit status 1.

Question 2 status 2

returned non-zero exit status 2.

resolvent

# Find the lsb_release file first, you may need to add sudo
find/-name lsb_release
# Delete when found
rm -rf /usr/bin/lsb_release

Attachment:
I refer to the process notes of upgrading python3.7.1 under Ubuntu (recommended)

[solution] Python flash database migrate error type error: option values must be strings

Problem situation:

After the database has been configured in the Python Flask project and the model class has been defined, execute the command.
# Note: The db in the command is the name of one of the commands for the database defined in the configuration
$ python manage.py db init
$ python manage.py db migrate -m "initial"
Execute to migrate, followed by an error reporting.

File “C:\Python36\lib\configparser.py”, line 1177, in _validate_value_types raise TypeError(“option values must be strings”)
TypeError: <flask_script.commands.Command object at 0x000000F01214E6D8>: option values must be strings

Solution.
Check the configuration file of the database.

 # Configuration information for the database
    SQLALCHEMY_DATABASE_URL = "mysql://root:[email protected]:3306/databasename"

Note: Here’s sqllchemy_ DATABASE_ URL , correct writing: Sqlalchemy_ DATABASE_ URI
URI > I

Please change the name of the configuration.

you can also read the contents of stckoverflow: https://stackoverflow.com/questions/49472259/python-manage-py-db-migrate-makesoption-values-must-be-strings-in-flask-mi

Ngnix+gunicorn+Flag project deployment in Ubuntu

Related environment installation

The following operations are performed on the remote server (ubuntu 16.04)

Update apt related source first

	sudo apt-get update

MySQL installation

	apt-get install mysql-server
	apt-get install libmysqlclient-dev

Redis installation

sudo apt-get install redis-server

Install virtual environment

pip install virtualenv
pip install virtualenvwrapper

Make the installed virtualenvwrapper effective. Edit the ~ /. Bashrc file as follows:

export WORKON_HOME=$HOME/.virtualenvs
export PROJECT_HOME=$HOME/workspace

source /usr/local/bin/virtualenvwrapper.sh

Make the edited document effective

source ~/.bashrc
requirements file

A python project can contain a requirements.txt file to record all dependent packages and their exact version numbers for deployment in a new environment.

In the virtual environment, use the following command to generate the dependent package in the current virtual environment to the file with version number:
PIP free > Requirements. TXT
when you need to create a full copy of this virtual environment, you can create a new virtual environment and run the following command on it:
PIP install - R requirements. TXT
when you install flash MySQL DB, you may report an error, which may be because the dependent package is not installed, Execute the following command to install the dependency package:
sudo apt get build dep Python mysqldb to install the dependency package

Nginx

The program is written in C language
to realize the shunting, forwarding and load balancing
related operations
installation
$sudo apt get install nginx
running and stopping

/etc/init.d/nginx start #start
/etc/init.d/nginx stop  #stop

Configuration file
edit file/etc/nginx/sites available/default

If there are multiple servers, configure them here and modify the proxy under the location node_ pass

upstream flask {
        server 127.0.0.1:5000;
        server 127.0.0.1:5001;
}
server {
        # Listening on port 80
        listen 80 default_server;
        listen [::]:80 default_server;

        root /var/www/html;

        index index.html index.htm index.nginx-debian.html;

        server_name _;

        location/{
                # Requests are forwarded to the gunicorn server
                proxy_pass http://127.0.0.1:5000;
                # Requests are forwarded to multiple gunicorn servers
                # proxy_pass http://flask;
                # Set the request header and pass the header information to the server side 
                proxy_set_header Host $host;
                # Set request header and pass original request ip to gunicorn server
                proxy_set_header X-Real-IP $remote_addr;
        }
}

Gunicorn

Gunicorn (green Unicorn) is a HTTP server for Python WSGI
transplanted from Ruby’s Unicorn project
the gunicorn server is compatible with various web frameworks, with very simple implementation and lightweight resource consumption
gunicorn starts directly with commands, There is no need to write configuration files
related operations
install
PIP install gunicorn
view options
gunicorn - H
run

-w: Indicates a process (worker)
-b: indicates bind ip address and port number (bind) 
-D: daemon
--reload: auto refresh (update code, auto refresh available when debug)

gunicorn - W 2 - B 127.0.0.1:7000 running file name: Flash program instance name
for example:
gunicorn - W 2 - B 0.0.0.0:7000 app:app -D --Reload

copy local code to remote
SCP – R local file path [email protected] : remote save path

Python flash project to obtain the request user IP address addr

Direct deployment of flash on server

import logging
from flask import Flask, render_template, request

# Initialize the Flask application
app = Flask(__name__)

# Default route, print user's IP
@app.route('/')
def index():
	 ip = request.remote_addr
	 logging.debug(ip)
	 return render_template('index.html', user_ip=ip)


if __name__ == '__main__':
	 app.run(host="0.0.0.0", port=80)

Nginx agent in docker and flash in gunicorn

In this case, according to the above code can only get to the server address. You need to use werkzeug.middleware.proxy_ fix

import logging
from flask import Flask, render_template, request
from werkzeug.middleware.proxy_fix import ProxyFix

# Initialize the Flask application
app = Flask(__name__)
app.wsgi_app = ProxyFix(app.wsgi_app, num_proxies=1)


# Default route, print user's IP
@app.route('/')
def index():
	 ip = request.remote_addr
	 logging.debug(ip)
	 return render_template('index.html', user_ip=ip)

What can I do if I find IP

Flag gets the user’s IP, queries the user’s login times, and seals the IP

Several implementation methods of Python timing task

Recently, we need to deal with timing tasks, and the implementation schemes of timing tasks are sorted out
let’s take it for ourselves. The link is the official sample
todo provides the implementation scheme of the sample

sched Python built in Library

https://docs.python.org/zh-cn/3/library/sched.html

schedule

https://pypi.org/project/schedule/

crontab

https://pypi.org/project/python-crontab/

Django-crontab

https://pypi.org/project/django-crontab/

Celery crontab

The asynchronous timing task is realized through the cell timing task
TODO

Linux Crontab

This blog: Linux timing task command crontab detailed explanation and examples

Sample GitHub link

TODO

[HTML] Python extracts HTML text to TXT

Regular debarking method

# -*- coding: utf-8 -*-
import re

def html_tag_rm(content: str):
	dr = re.compile(r'<[^>]+>',re.S)
	return dr.sub('',content)

nltk

It’s cumbersome
needs to install nltk, numpy, pyyaml

# -*- coding: utf-8 -*-
import nltk


def html_tag_rm(content: str):
	return nltk.clean_html(content)

htmlParser

import re
from sys import stderr 
from traceback import print_exc
from HTMLParser import HTMLParser

 
class _DeHTMLParser(HTMLParser): 
    def __init__(self): 
        HTMLParser.__init__(self) 
        self.__text = [] 
 
    def handle_data(self, data): 
        text = data.strip() 
        if len(text) > 0: 
            text = re.sub('[ \t\r\n]+', ' ', text) 
            self.__text.append(text + ' ') 
 
    def handle_starttag(self, tag, attrs): 
        if tag == 'p': 
            self.__text.append('\n\n') 
        elif tag == 'br': 
            self.__text.append('\n') 
 
    def handle_startendtag(self, tag, attrs): 
        if tag == 'br': 
            self.__text.append('\n\n') 
 
    def text(self): 
        return ''.join(self.__text).strip() 
 
 
def dehtml(text): 
    try: 
        parser = _DeHTMLParser() 
        parser.feed(text) 
        parser.close() 
        return parser.text() 
    except: 
        print_exc(file=stderr) 
        return text 
 
 
def main(): 
    text = r'''''
        <html>
            <body>
                <b>Project:</b> DeHTML<br>
                <b>Description</b>:<br>
                This small script is intended to allow conversion from HTML markup to 
                plain text.
            </body>
        </html>
    ''' 
    print(dehtml(text)) 
 
 
if __name__ == '__main__': 
    main()

Python Grpc Error: A file with this name is already in the pool

1.Error:
rank.proto: A file with this name is already in the pool.

[E 210422 14:48:32 flask_server:87] grpc request execution failed, details: Couldn't build proto file into descriptor pool!
    Invalid proto descriptor for file "rank.proto":
      rank.proto: A file with this name is already in the pool.

2. Solutions

(1) Check the current protobuf version, assuming it is 3.12.2
pip3 show protobuf

(2)Uninstall this version
pip uninstall protobuf

(3)Use the following to reinstall the corresponding version
pip install --no-binary protobuf protobuf==3.12.2

Appium step pit summary — solution

1. There are appium command version and appium desktop version in the computer, After opening appium desktop version, the script will run with an error:
selenium.common.exceptions.webdriverexception: Message: an unknown server-side error occurred while processing the command. Original error: cannot start the ‘com. XXXX’ application.
main meaning: an unknown server-side error occurred while processing the command

Check:
I found that the command line version (1.20.2) is inconsistent with the desktop version (1.14.1), appium – V, view version

Solution:
close the desktop version, enter appium in the CMD to execute the command line version, execute the script, and it can run successfully
solution 2: upgrade the desktop appium version or reduce the appium command line version