Tag Archives: eclipse

Nanny level solutions use the enterprise version of MyEclipse to show the MyEclipse trial expired solution and activation

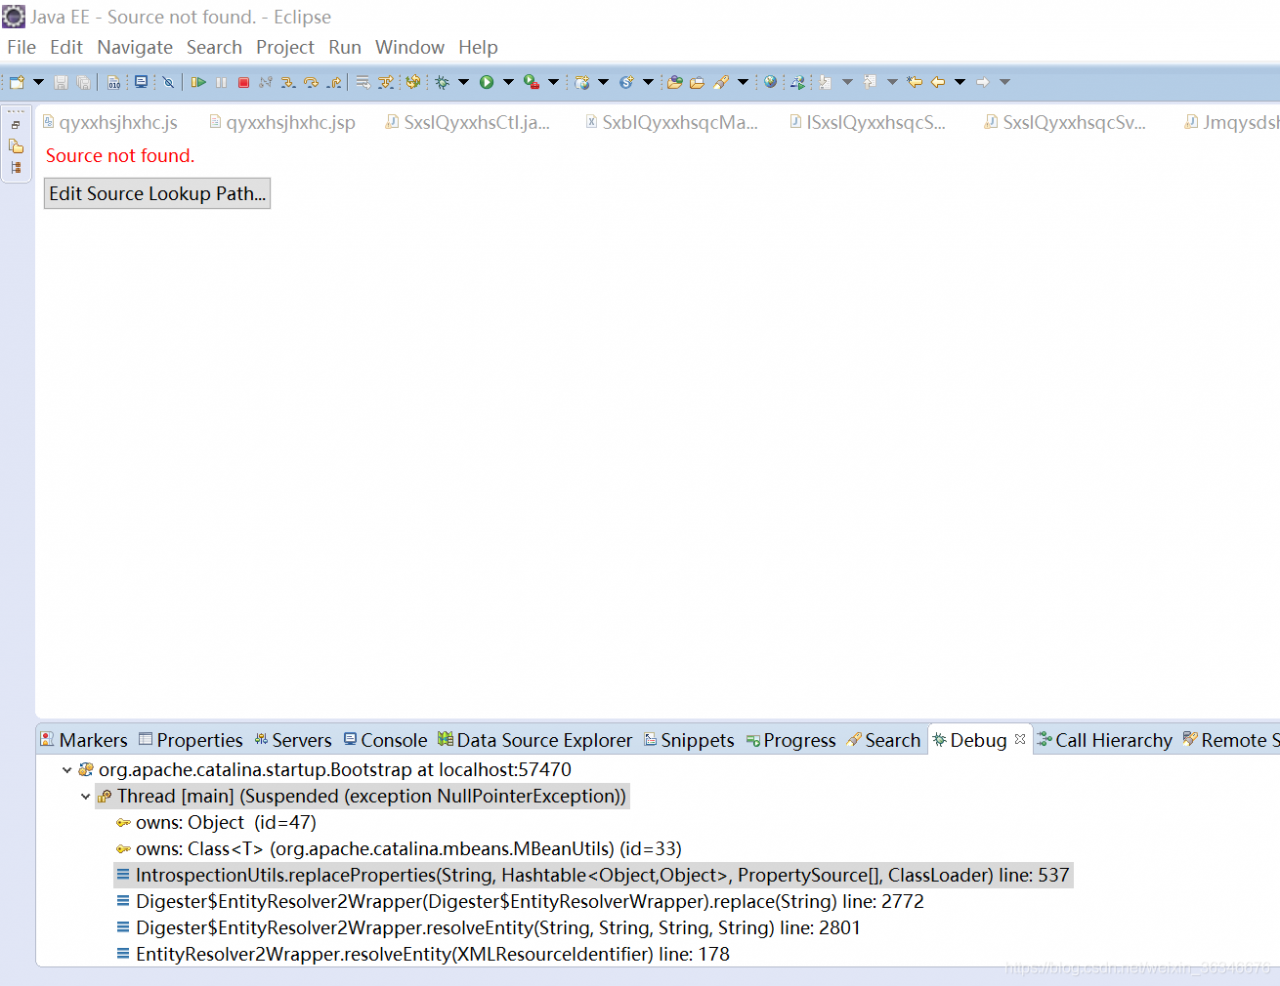
When we use the most commonly used enterprise development tools, we often report an error of MyEclipse trial expired, that is, MyEclipse is expired. We can solve this problem by doing the following operations;

If your MyEclipse doesn’t work, you need to operate with another MyEclipse that can be used.

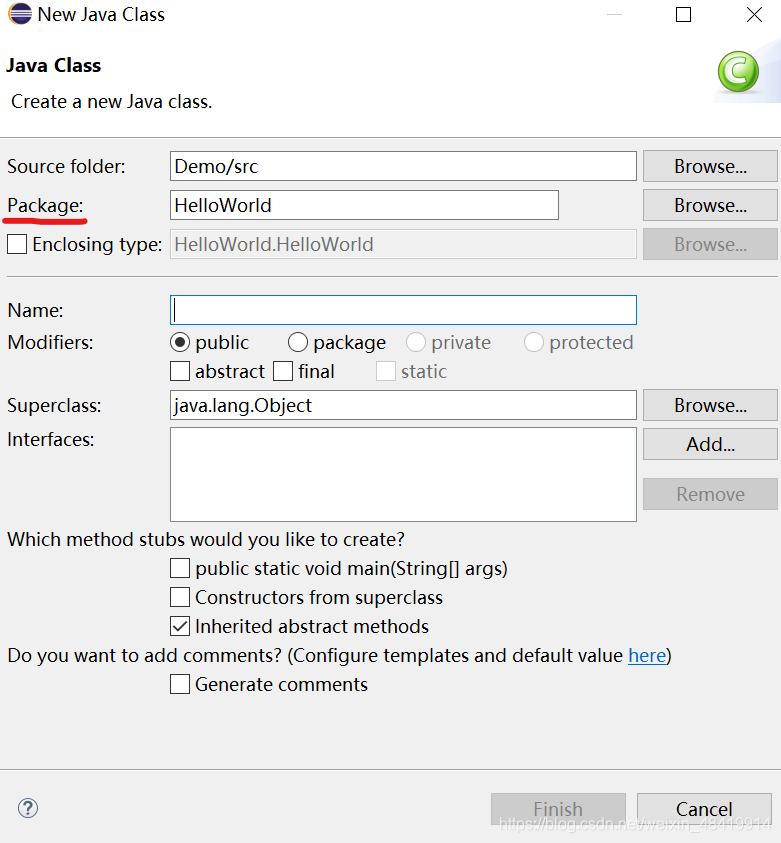
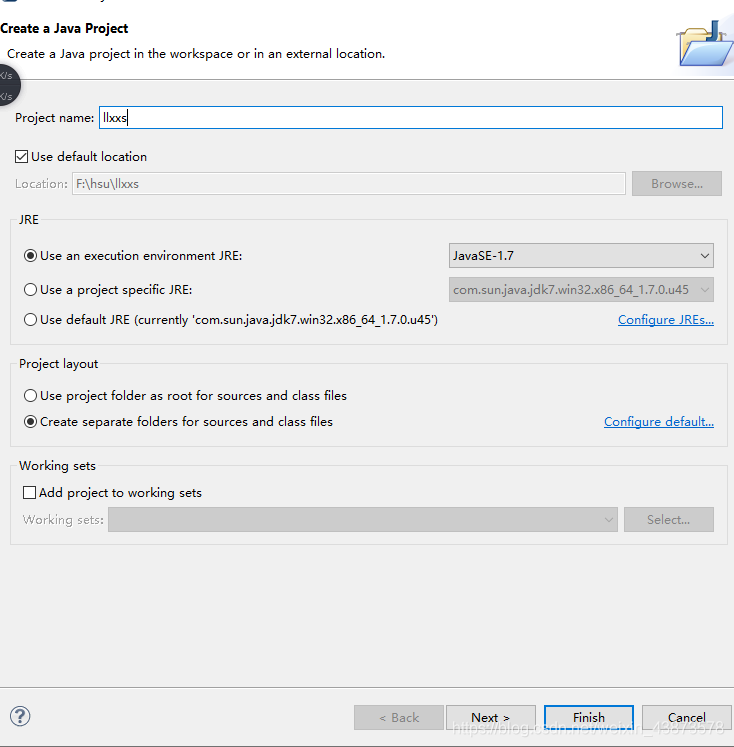
Create a java project casually, as shown in the screenshot. Name it casually,

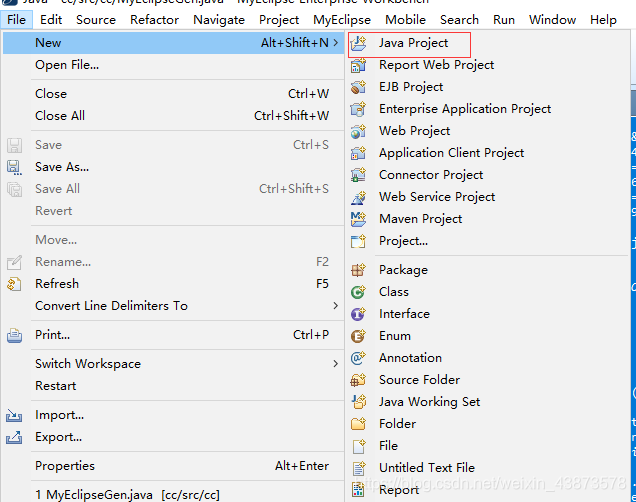
You can name it casually here, and then finish it.

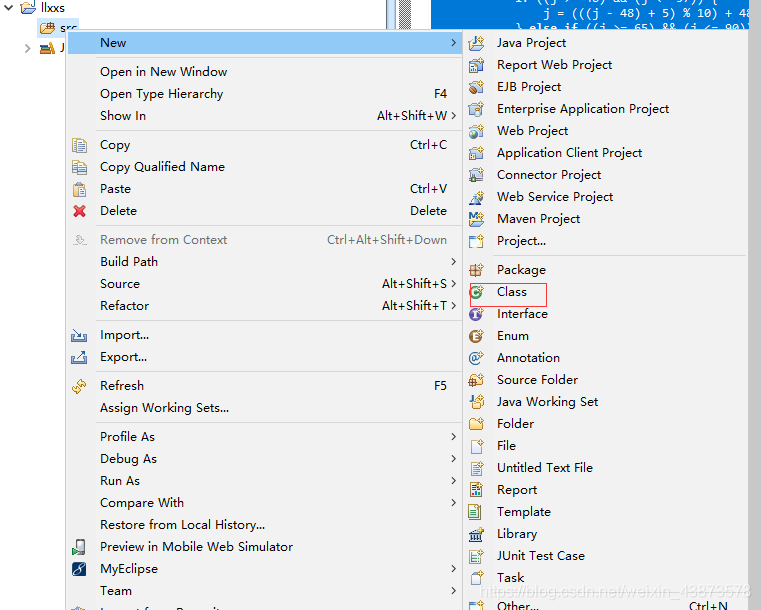
  After creation, the SRC file will be generated, and then a new class file will be created, as shown in the figure below. The name of the class must be myeclipsegen

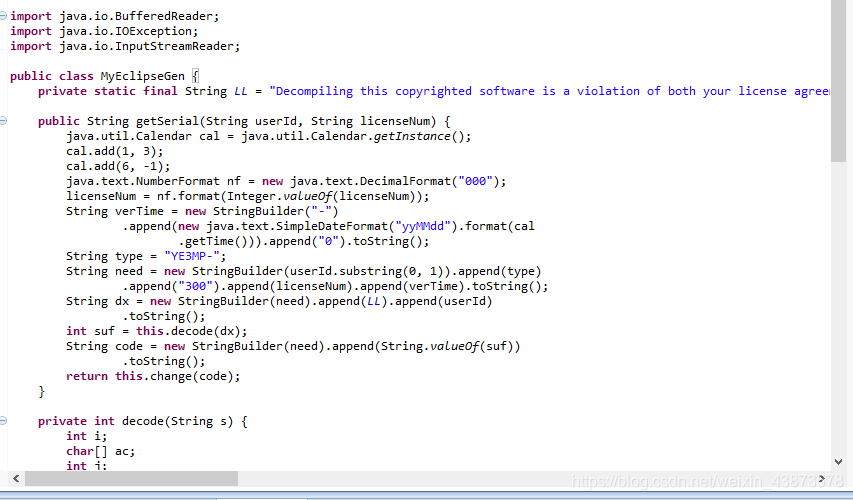
Then copy the corresponding code:

import java.io.BufferedReader;
import java.io.IOException;
import java.io.InputStreamReader;

public class MyEclipseGen {
    private static final String LL = "Decompiling this copyrighted software is a violation of both your license agreement and the Digital Millenium Copyright Act of 1998 (http://www.loc.gov/copyright/legislation/dmca.pdf). Under section 1204 of the DMCA, penalties range up to a $500,000 fine or up to five years imprisonment for a first offense. Think about it; pay for a license, avoid prosecution, and feel better about yourself.";

    public String getSerial(String userId, String licenseNum) {
        java.util.Calendar cal = java.util.Calendar.getInstance();
        cal.add(1, 3);
        cal.add(6, -1);
        java.text.NumberFormat nf = new java.text.DecimalFormat("000");
        licenseNum = nf.format(Integer.valueOf(licenseNum));
        String verTime = new StringBuilder("-")
                .append(new java.text.SimpleDateFormat("yyMMdd").format(cal
                        .getTime())).append("0").toString();
        String type = "YE3MP-";
        String need = new StringBuilder(userId.substring(0, 1)).append(type)
                .append("300").append(licenseNum).append(verTime).toString();
        String dx = new StringBuilder(need).append(LL).append(userId)
                .toString();
        int suf = this.decode(dx);
        String code = new StringBuilder(need).append(String.valueOf(suf))
                .toString();
        return this.change(code);
    }

    private int decode(String s) {
        int i;
        char[] ac;
        int j;
        int k;
        i = 0;
        ac = s.toCharArray();
        j = 0;
        k = ac.length;
        while (j < k) {
            i = (31 * i) + ac[j];
            j++;
        }
        return Math.abs(i);
    }

    private String change(String s) {
        byte[] abyte0;
        char[] ac;
        int i;
        int k;
        int j;
        abyte0 = s.getBytes();
        ac = new char[s.length()];
        i = 0;
        k = abyte0.length;
        while (i < k) {
            j = abyte0[i];
            if ((j >= 48) && (j <= 57)) {
                j = (((j - 48) + 5) % 10) + 48;
            } else if ((j >= 65) && (j <= 90)) {
                j = (((j - 65) + 13) % 26) + 65;
            } else if ((j >= 97) && (j <= 122)) {
                j = (((j - 97) + 13) % 26) + 97;
            }
            ac[i] = (char) j;
            i++;
        }
        return String.valueOf(ac);
    }

    public MyEclipseGen() {
        super();
    }

    public static void main(String[] args) {
        try {
            System.out.println("Please input your name:");
            BufferedReader reader = new BufferedReader(new InputStreamReader(
                    System.in));
            String userId = null;
            userId = reader.readLine();
            MyEclipseGen myeclipsegen = new MyEclipseGen();
            String res = myeclipsegen.getSerial(userId, "20");
            System.out.println("The corresponding sequence is:" + res);
            reader.readLine();
        } catch (IOException ex) {
        }
    }
 }

As shown in the figure:

Just run the program.

After running, the following message will appear:

At this time, just enter a few English characters for the registration name.

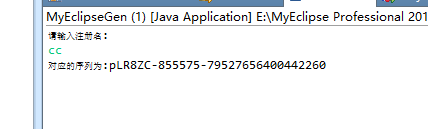
Then press enter and the corresponding sequence will appear. Copy the name and serial number directly and you can use it!

[Solved] Java Error: Must declare a named package because this compilation unit is associated to the named module

Using the latest version of eclipse, you may encounter such a problem (error report)

“Must declare a named package because this compilation unit is associated to the named module ‘xxx'”
the reason for this is that in the latest version of eclipse, the package needs to be defined while defining a class.

How to define a package:

In the eclipse menu bar, select File – & gt; New-> Class command, in the Import dialog box, find the package, and then name it( The position of the red line cannot be empty)

Run Python file for the first time with eclipse / pydev: “UTF-8 ‘codec can’t decode byte 0xc4 in position

Today, after successfully installing pydev with eclipse, try to run it. Since the creation date of the file contains Chinese characters by default, the Unicode error as shown in the figure appears after running  

Online solutions to find two, and then I have derived a third (focus). The method is as follows

Method 1: File & gt& gt; Properties>& gt; Text file encoding>& gt; O ther:utf-8

After completing the above steps, there will be garbled code, delete and re-enter Chinese characters can be normal operation!

 
Method 2: edit & gt& gt; Set Encoding  & gt;& gt; O ther:utf-8 (the same as the method one by one, there will be garbled codes. Just delete them and input them again.)

 
Method 3: right click on the python project/Package & gt& gt; Properties and method 1 are similar operations

The first two methods are both temporary but not permanent, that is, they can only solve the Unicode error of the current file, and a new Python file will still have a Unicode error; After using method 3, as long as the file is created under the project, its encoding is UTF-8, and there will be no Unicode   It solves the problem from the root.

Method 3: discovery process

In method 1, in properties & gt& gt; In run/debug setting, I found that the current code setting object is only the current file, so I thought of giving it to the whole python   Project to set the encoding, so right-click the mouse on the project, found the projperties option, according to the operation of method 1 to try, successfully solved the Unicode problem   So there is method 3

Tomcat memory overflow in Eclipse: Java. Lang. outofmemoryerror: permgen space solution:

1. Configure the size of this part of heap memory through the JVM parameter – XX: maxpermsize = 256M.  

2. How to configure the memory size of Tomcat in eclipse?

First, you need to double-click Tomcat server, as shown in the figure below:

Double click the figure above to display the Tomcat configuration interface

Then, click the link in the red rectangular box in the figure above, and the node of Tomcat parameter configuration will pop up. To select the arguments parameter box:

As shown in the figure above, you can set the value of – XX: maxpermsize = 256M in the VM arguments text box. Of course, you can add other JVM parameters, such as maximum memory, minimum memory, etc.

[Solved] Tomcat7 Start Error: Failed to start component [StandardEngine[Catalina].StandardHost[localhost].StandardCon

When transforming a project in eclipse, tomcat7 is always started

Failed to start component [StandardEngine[Catalina].StandardHost[localhost].StandardContext[/AtomLocal]]

terms of settlement:

Right click project properties, find deployment assembly, add Java build path entries and Maven dependencies

Two methods of fixing WPF menu bar after scrolling to the top

Recently, there is a requirement in the project:

The menu bar is fixed at the top after scrolling to the top.. This is quite common on the mobile end

Look at the effect:

Let’s take a look at the code. There are not many codes

The first method is as follows:

Write a menu as like as two peas, and hide it on top of the window. When the menu is rolled up to the top, it will be displayed, otherwise hidden. br>

Mainwindow1.xaml is as follows:

<Window x:Class="wpfcore.MainWindow1"
        xmlns="http://schemas.microsoft.com/winfx/2006/xaml/presentation"
        xmlns:x="http://schemas.microsoft.com/winfx/2006/xaml"
        xmlns:d="http://schemas.microsoft.com/expression/blend/2008"
        xmlns:mc="http://schemas.openxmlformats.org/markup-compatibility/2006"
        xmlns:local="clr-namespace:wpfcore"
        mc:Ignorable="d"
        Title="MainWindow1" Height="450" Width="800">
    <Grid>
        <ScrollViewer ScrollChanged="ScrollViewer_ScrollChanged">
            <Grid>
                <Grid.RowDefinitions>
                    <RowDefinition Height="200"/>
                    <RowDefinition Height="auto"/>
                    <RowDefinition Height="*"/>
                </Grid.RowDefinitions>
                <Grid Grid.Row="0" x:Name="banner">
                    <Image Source="D:\bizhi\123\2-9.jpg" Stretch="UniformToFill" HorizontalAlignment="Center" VerticalAlignment="Center"/>
                    <TextBlock HorizontalAlignment="Center" VerticalAlignment="Center" FontSize="30" Foreground="White" Text="这是顶部Banner"/>
                </Grid>
                <StackPanel Grid.Row="1" Panel.ZIndex="100" x:Name="menu" Orientation="Horizontal" TextBlock.FontSize="18" Background="LightBlue">
                    <TextBlock Text="Home" Margin="10"></TextBlock>
                    <TextBlock Text="Editor" Margin="10"></TextBlock>
                    <TextBlock Text="Viewer" Margin="10"></TextBlock>
                    <TextBlock Text="Debug" Margin="10"></TextBlock>
                    <TextBlock Text="WPF UI" Margin="10"></TextBlock>
                </StackPanel>
                <Border Height="1000" Grid.Row="22">
                    <Border.Background>
                        <LinearGradientBrush>
                            <GradientStop Color="Red" Offset="0"/>
                            <GradientStop Color="Green" Offset="0.5"/>
                            <GradientStop Color="Blue" Offset="1"/>
                        </LinearGradientBrush>
                    </Border.Background>
                    <TextBlock HorizontalAlignment="Center" VerticalAlignment="Center" FontSize="30" Foreground="White" Text="这是顶部Banner"/>
                </Border>
            </Grid>
        </ScrollViewer>
        <StackPanel x:Name="topMenu" VerticalAlignment="Top" Visibility="Hidden" Orientation="Horizontal" TextBlock.FontSize="18" Background="LightBlue">
            <TextBlock Text="Home" Margin="10"></TextBlock>
             <TextBlock Text="Editor" Margin="10"></TextBlock>
             <TextBlock Text="Viewer" Margin="10"></TextBlock>
             <TextBlock Text="Debug" Margin="10"></TextBlock>
            <TextBlock Text="WPF UI" Margin="10"></TextBlock>
        </StackPanel>
    </Grid>
</Window>

Mainwindow1.cs Code:

using System.Windows;


namespace wpfcore
{
    public partial class MainWindow1 : Window
    {
        public MainWindow1()
        {
            InitializeComponent();
        }
        private void ScrollViewer_ScrollChanged(object sender, System.Windows.Controls.ScrollChangedEventArgs e)
        {
            if (e.VerticalOffset > banner.ActualHeight)
            {
                 topMenu.Visibility = Visibility.Visible;
            }
            else
            {
                topMenu.Visibility = Visibility.Hidden;
            }
        }
    }
}

—————Dividing line——————

Second method:

Add render transform to the menu bar. When the menu scrolls to the top, set translatetransform. Yproperty   The same effect was achieved

Mainwindow.xaml code is as follows:

<Window x:Class="wpfcore.MainWindow"
        xmlns="http://schemas.microsoft.com/winfx/2006/xaml/presentation"
        xmlns:x="http://schemas.microsoft.com/winfx/2006/xaml"
        xmlns:d="http://schemas.microsoft.com/expression/blend/2008"
        xmlns:mc="http://schemas.openxmlformats.org/markup-compatibility/2006"
        xmlns:local="clr-namespace:wpfcore" 
        xmlns:controls="http://metro.mahapps.com/winfx/xaml/controls"
        mc:Ignorable="d"
        UseLayoutRounding="True"
        Title="MainWindow" Width="600" Height="340">
    <Grid>
        <ScrollViewer ScrollChanged="ScrollViewer_ScrollChanged">
            <Grid>
            <Grid.RowDefinitions>
                <RowDefinition Height="200"/>
                <RowDefinition Height="auto"/>
                <RowDefinition Height="*"/>
            </Grid.RowDefinitions>
            <Grid Grid.Row="0" x:Name="banner">
                <Image Source="D:\bizhi\123\2-9.jpg" Stretch="UniformToFill" HorizontalAlignment="Center" VerticalAlignment="Center"/>
                <TextBlock HorizontalAlignment="Center" VerticalAlignment="Center" FontSize="30" Foreground="White" Text="这是顶部Banner"/>
            </Grid>
            <StackPanel Grid.Row="1" Panel.ZIndex="100" x:Name="menu" Orientation="Horizontal" TextBlock.FontSize="18" Background="LightBlue">
                    <StackPanel.RenderTransform>
                        <TranslateTransform x:Name="menuTranslate" Y="0.0"/>
                    </StackPanel.RenderTransform>
                    <TextBlock Text="Home" Margin="10"></TextBlock>
                    <TextBlock Text="Editor" Margin="10"></TextBlock>
                    <TextBlock Text="Viewer" Margin="10"></TextBlock>
                    <TextBlock Text="Debug" Margin="10"></TextBlock>
                    <TextBlock Text="WPF UI" Margin="10"></TextBlock>
                </StackPanel>
            <Border Height="1000" Grid.Row="22">
                <Border.Background>
                    <LinearGradientBrush>
                        <GradientStop Color="Red" Offset="0"/>
                        <GradientStop Color="Green" Offset="0.5"/>
                        <GradientStop Color="Blue" Offset="1"/>
                    </LinearGradientBrush>
                </Border.Background>
                    <TextBlock HorizontalAlignment="Center" VerticalAlignment="Center" FontSize="30" Foreground="White" Text="这是顶部Banner"/>
                </Border>
        </Grid>
    </ScrollViewer>
        <StackPanel x:Name="topMenu" VerticalAlignment="Top" Visibility="Hidden" Orientation="Horizontal" TextBlock.FontSize="18" Background="LightBlue">
            <TextBlock Text="Home" Margin="10"></TextBlock>
            <TextBlock Text="Editor" Margin="10"></TextBlock>
            <TextBlock Text="Viewer" Margin="10"></TextBlock>
            <TextBlock Text="Debug" Margin="10"></TextBlock>
            <TextBlock Text="WPF UI" Margin="10"></TextBlock>
        </StackPanel>
    </Grid>
</Window>


Mainwindow.cs Code:

using System.Windows;
using System.Windows.Media;


namespace wpfcore
{
    public partial class MainWindow : Window
    {
        public MainWindow()
        {
            InitializeComponent();
        }


        private void ScrollViewer_ScrollChanged(object sender, System.Windows.Controls.ScrollChangedEventArgs e)
        {
            menuTranslate.SetValue(TranslateTransform.YProperty, e.VerticalOffset);
            if (e.VerticalOffset > banner.ActualHeight)
            {
                menuTranslate.SetValue(TranslateTransform.YProperty, e.VerticalOffset-banner.ActualHeight);
            }
            else
            {
                menuTranslate.SetValue(TranslateTransform.YProperty, 0.0);
            }
        }
    }
}


Solution to error reporting in Java @ override

 
Sometimes when the eclipse project of Java is compiled on a different computer, the @ override always reports an error. Just remove the @ override, but it can’t fundamentally solve the problem, because sometimes there are too many @ override places.

This is a problem with JDK. We already have @ override for jdk5, but we don’t support the implementation of the interface. We think it’s not override and report an error. JDK6 fixed this bug. You can add @ override to both the method coverage of the parent class and the implementation of the interface.

To solve this problem, first make sure that JDK 1.6 is installed on the machine,

Then, select the eclipse menu windows – & gt; Preferences–> java-> Compiler–> Select 1.6 for compiler compliance level, refresh the project and recompile.

If the problem is not solved, right-click the project that reported the error and select properties — & gt; Java Compiler–> Select 1.6 from compiler compliance level to refresh the project and recompile.


Can not create the Java virtual machine

After the system was reinstalled, a lot of software was installed, including eclipse. However, an error occurred when opening eclipse after installation  

Click OK to show the following:

 
I found the reason on the Internet, because I generated three files java.exe, javaw.exe and javaws.exe in the file C: [windows] system32 when I installed JDK; As shown in the figure:


Delete the three marked exe files. Be careful not to delete them wrong. Restart eclipse again, and you can run it successfully!

Hope to help you!!!  

The solution of eclipse code automatic prompt function

Eclipse IDE for Java developers version: 2019-03 (4.11.0), there is no automatic prompt function, that is, when an object can’t point out its related methods. Later, I searched the Internet, and the summary method is.

1. My window – & gt; Preferences-> Java-> Editor-> content assist  
put   Enable auto activation   Check the options: (as shown in the figure below)

And add. Abcdefghijklmnopqrstuvwxyz after the point

At this point, the restart of eclipse is not successful, and then the second step


2. Tick the bucket that should be checked

My own eclipse was successful without a restart.

To sum up, the role of the first step is that when you enter a letter, eclipse will immediately associate the relevant words and display them, and those associated words will always follow. If you feel bored, change to the default dot. The second step is the key, the role is when you use Alt +/shortcut key will associate.

When SSM + Maven project is running, it is prompted that org.springframework.web.servlet.dispatcherserservlet cannot be found

When SSM + Maven project is running, it is prompted that org.springframework.web.servlet.dispatcherserservlet cannot be found

When running SSM project today, an error is reported:
HTTP status 500 – error identifying servlet class org. Springframework. Web. Servlet. Dispatcherservlet
java. Lang. classnotfoundexception: org. Springframework. Web. Servlet. Dispatcherservlet

You can confirm that org. Springframework. Web. Servlet. Dispatcherservlet exists and Maven is imported normally

Problem solving method:
select item – & gt; Right click Properties – & gt; Select deployment asset – & gt; Select Add – & gt; Select Java build path entries – & gt; Next-> Select Maven dependencies – & gt; Finish-> Apply-> OK

It can solve the problem

————————————————
Link to the original text: https://blog.csdn.net/cd19930508/article/details/80256595