Category Archives: How to Install

How to Revert Your File & Folder by “FOUND.000”

How do you feel when you copy files between partitions, when you download software when you write in Word when you suddenly have a power failure, Windows fails to respond, or the system automatically reboots? How do you feel when the screen goes black? We can only hope that important text will not be lost after the reboot. However, many times things don’t go according to plan. After rebooting, your original files have been “lost” except one by one in the folder “FOUND.000” similar to “file0001.chk”. Don’t worry, there’s a good chance that these files will contain the important data you’re looking for, just restore them to their original state (restore CHK files to different types of files that you can recognize).

Tools/Materials

Windows 2000/XP

Microsoft.net Framework V2.0 and above

CHKResume software

Methods/Steps

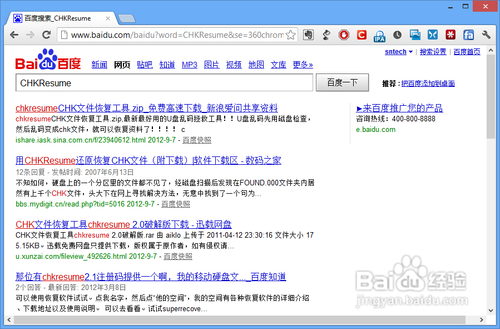
Search Baidu for a software download called “CHKResume.” CHKResume does not need to be installed, just run it.

By default, CHKResume can restore MP3, JPG, BMP, MPG, DOC, and GIF file types, but since the author has taken the software into account, you can manually add your own file types that can be restored. Next, we add support for RAR compression files for CHKResume and use it to restore CHK files.
Use Notepad to open the file.type file in CHKResume directory, and add the file type according to the rule of “the first six bytes of file header + space + file extension”. For example, add RAR file to support “526172 RAR”, and save the modified file.type file.

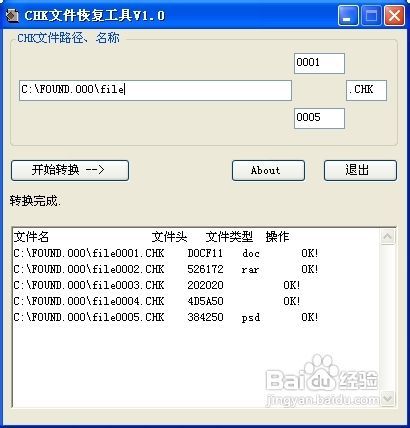
Run CHKResume, select the directory where you want to save the CHK files, enter the file naming rules (automatically generated CHK files are usually named after the “File + four-digit. CHK” rule), fill in the start and end Numbers of the file in the two numeric input boxes next to it, and click the “Start Conversion” button to restore the file.

END

Matters needing attention

Installation of Microsoft.net Framework V2.0 or above is required.

Windows 7 is already integrated with Microsoft.NET Framework V2.0.

Conclusion:

The method of operation is as follows.
  1. First of all, click Tools - Folder Options and go to Folder Options Settings.
  In Folder Options, select the View tab to find the option to show system files and the option to show hidden files to show all files.
  3. Then find the folder found.000 on the USB flash drive. Of course, this one is numbered and may appear as found.
  XXX. 4, you can see the size of the files inside. If you want to recover the files inside, you need to know the approximate file information, such as file format. For example, here are some photo files, if they are JPG then modify their file extension to jpg.
  5, copy all the files to the hard drive, then right-click and select Rename File. Change the suffix from chk to the file format to be recovered (you can use the bulk renaming tool, there will be a lot of modified useless things do not care, find the desired file can be). 6.
  6, and then keep the recovered file to the specified location on the hard disk can be. This method can save some data. Of course, if the data is precious, you can go for professional data recovery personnel.

If you are willing to pay a few yuan to buy me a cup of tea, you can use your mobile phone to scan the QR code below and donate through Alipay. I will try to write better articles.
(donation does not display the personal information of the donor. If necessary, please indicate your contact information)
Thank you for your kindly donation!!


How To Install WordPress with LAMP on Ubuntu 16.04

Introduction
WordPress is the most popular CMS (content management system) on the internet. It allows you to easily set up flexible blogs and websites on top of a MySQL backend with PHP processing. WordPress has seen incredible adoption and is a great choice for getting a website up and running quickly. After setup, almost all administration can be done through the web frontend.
In this guide, we’ll focus on getting a WordPress instance set up on a LAMP stack (Linux, Apache, MySQL, and PHP) on an Ubuntu 16.04 server.Prerequisites
In order to complete this tutorial, you will need access to an Ubuntu 16.04 server.
You will need to perform the following tasks before you can start this guide:
Create a sudo user on your server: We will be completing the steps in this guide using a non-root user with sudo privileges. You can create a user with sudo privileges by following our Ubuntu 16.04 initial server setup guide. Install a LAMP stack: WordPress will need a web server, a database, and PHP in order to correctly function. Setting up a LAMP stack (Linux, Apache, MySQL, and PHP) fulfills all of these requirements. Follow this guide to install and configure this software. Secure your site with SSL: WordPress serves dynamic content and handles user authentication and authorization. TLS/SSL is the technology that allows you to encrypt the traffic from your site so that your connection is secure. The way you set up SSL will depend on whether you have a domain name for your site.
If you have a domain name…  the easiest way to secure your site is with Let’s Encrypt, which provides free, trusted certificates. Follow our Let’s Encrypt guide for Apache to set this up. If you do not have a domain…  and you are just using this configuration for testing or personal use, you can use a self-signed certificate instead. This provides the same type of encryption, but without the domain validation. Follow our self-signed SSL guide for Apache to get set up.
When you are finished the setup steps, log into your server as your sudo user and continue below.Step 1: Create a MySQL Database and User for WordPress
The first step that we will take is a preparatory one. WordPress uses MySQL to manage and store site and user information. We have MySQL installed already, but we need to make a database and a user for WordPress to use.
To get started, log into the MySQL root (administrative) account by issuing this command:

mysql -u root -p

You will be prompted for the password you set for the MySQL root account when you installed the software.
First, we can create a separate database that WordPress can control. You can call this whatever you would like, but we will be using wordpress in this guide to keep it simple. You can create the database for WordPress by typing:

CREATE DATABASE wordpress DEFAULT CHARACTER SET utf8 COLLATE utf8_unicode_ci;

Note: Every MySQL statement must end in a semi-colon (;). Check to make sure this is present if you are running into any issues.
Next, we are going to create a separate MySQL user account that we will use exclusively to operate on our new database. Creating one-function databases and accounts is a good idea from a management and security standpoint. We will use the name wordpressuser in this guide. Feel free to change this if you’d like.
We are going to create this account, set a password, and grant access to the database we created. We can do this by typing the following command. Remember to choose a strong password here for your database user:

GRANT ALL ON wordpress. * TO ‘wordpressuser’@’localhost’ IDENTIFIED BY ‘password’;

You now have a database and user account, each made specifically for WordPress. We need to flush the privileges so that the current instance of MySQL knows about the recent changes we’ve made:

FLUSH PRIVILEGES;

Exit out of MySQL by typing:

EXIT;

Step 2: Install Additional PHP Extensions
When setting up our LAMP stack, we only required a very minimal set of extensions in order to get PHP to communicate with MySQL. WordPress and many of its plugins leverage additional PHP extensions.
We can download and install some of the most popular PHP extensions for use with WordPress by typing:

sudo apt-get updatesudo apt-get install php-curl php-gd php-mbstring php-mcrypt php-xml php-xmlrpc

Note

Each WordPress plugin has its own set of requirements. Some may require additional PHP packages to be installed. Check your plugin documentation to discover its PHP requirements. If they are available, they can be installed with apt-get as demonstrated above.
We will restart Apache to leverage these new extensions in the next section. If you are returning here to install additional plugins, you can restart Apache now by typing:

sudo systemctl restart apache2

Step 3: Adjust Apache’s Configuration to Allow for .htaccess Overrides and Rewrites
Next, we will be making a few minor adjustments to our Apache configuration. Currently, the use of . htaccess files is disabled. WordPress and many WordPress plugins use these files extensively for in-directory tweaks to the web server’s behavior.
Additionally, we will enable mod_rewrite, which will be needed in order to get WordPress permalinks to function correctly.
Enable .htaccess Overrides
Open the primary Apache configuration file to make our first change:

sudo nano /etc/apache2/apache2.conf

To allow . htaccess files, we need to set the AllowOverride directive within a Directory block pointing to our document root. Towards the bottom of the file, add the following block:

/etc/apache2/apache2.conf

. . .

<Directory /var/www/html/>
    AllowOverride All
</Directory>

. . .

When you are finished, save and close the file.
Enable the Rewrite Module
Next, we can enable mod_rewrite so that we can utilize the WordPress permalink feature:

sudo a2enmod rewrite

Enable the Changes
Before we implement the changes we’ve made, check to make sure we haven’t made any syntax errors:

sudo apache2ctl configtest

The output might have a message that looks like this:

Output

AH00558: apache2: Could not reliably determine the server's fully qualified domain name, using 127.0.1.1. Set the 'ServerName' directive globally to suppress this message
Syntax OK

If you wish to suppress the top line, just add a ServerName directive to the /etc/apache2/apache2. conf file pointing to your server’s domain or IP address. This is just a message however and doesn’t affect the functionality of our site. As long as the output contains Syntax OK, you are ready to continue.
Restart Apache to implement the changes:

sudo systemctl restart apache2

Step 4: Download WordPress
Now that our server software is configured, we can download and set up WordPress. For security reasons in particular, it is always recommended to get the latest version of WordPress from their site.
Change into a writable directory and then download the compressed release by typing:

cd /tmpcurl -O https://wordpress.org/latest.tar.gz

Extract the compressed file to create the WordPress directory structure:

tar xzvf latest.tar.gz

We will be moving these files into our document root momentarily. Before we do, we can add a dummy . htaccess file and set its permissions so that this will be available for WordPress to use later.
Create the file and set the permissions by typing:

touch /tmp/wordpress/.htaccesschmod 660 /tmp/wordpress/.htaccess

We’ll also copy over the sample configuration file to the filename that WordPress actually reads:

cp /tmp/wordpress/wp-config-sample.php /tmp/wordpress/wp-config.php

We can also create the upgrade directory, so that WordPress won’t run into permissions issues when trying to do this on its own following an update to its software:

mkdir /tmp/wordpress/wp-content/upgrade

Now, we can copy the entire contents of the directory into our document root. We are using the -a flag to make sure our permissions are maintained. We are using a dot at the end of our source directory to indicate that everything within the directory should be copied, including hidden files (like the . htaccessfile we created):

sudo cp -a /tmp/wordpress/. /var/www/html

Step 5: Configure the WordPress Directory
Before we do the web-based WordPress setup, we need to adjust some items in our WordPress directory.
Adjusting the Ownership and Permissions
One of the big things we need to accomplish is setting up reasonable file permissions and ownership. We need to be able to write to these files as a regular user, and we need the web server to also be able to access and adjust certain files and directories in order to function correctly.
We’ll start by assigning ownership over all of the files in our document root to our username. We will use sammy as our username in this guide, but you should change this to match whatever your sudo user is called. We will assign group ownership to the www-data group:

sudo chown -R sammy:www-data /var/www/html

Next, we will set the setgid bit on each of the directories within the document root. This causes new files created within these directories to inherit the group of the parent directory (which we just set to www-data) instead of the creating user’s primary group. This just makes sure that whenever we create a file in the directory on the command line, the web server will still have group ownership over it.
We can set the setgid bit on every directory in our WordPress installation by typing:

sudo find /var/www/html -type d -exec chmod g+s {} \;

There are a few other fine-grained permissions we’ll adjust. First, we’ll give group write access to the wp-content directory so that the web interface can make theme and plugin changes:

sudo chmod g+w /var/www/html/wp-content

As part of this process, we will give the web server write access to all of the content in these two directories:

sudo chmod -R g+w /var/www/html/wp-content/themessudo chmod -R g+w /var/www/html/wp-content/plugins

This should be a reasonable permissions set to start with. Some plugins and procedures might require additional tweaks.
Setting up the WordPress Configuration File
Now, we need to make some changes to the main WordPress configuration file.
When we open the file, our first order of business will be to adjust some secret keys to provide some security for our installation. WordPress provides a secure generator for these values so that you do not have to try to come up with good values on your own. These are only used internally, so it won’t hurt usability to have complex, secure values here.
To grab secure values from the WordPress secret key generator, type:

curl -s https://api.wordpress.org/secret-key/1.1/salt/

You will get back unique values that look something like this:
Warning!  It is important that you request unique values each time. Do NOT copy the values shown below!

Output

define('AUTH_KEY',         '1jl/vqfs<XhdXoAPz9 DO NOT COPY THESE VALUES c_j{iwqD^<+c9.k<J@4H');
define('SECURE_AUTH_KEY',  'E2N-h2]Dcvp+aS/p7X DO NOT COPY THESE VALUES {Ka(f;rv?Pxf})CgLi-3');
define('LOGGED_IN_KEY',    'W(50,{W^,OPB%PB<JF DO NOT COPY THESE VALUES 2;y&,2m%3]R6DUth[;88');
define('NONCE_KEY',        'll,4UC)7ua+8<!4VM+ DO NOT COPY THESE VALUES #`DXF+[$atzM7 o^-C7g');
define('AUTH_SALT',        'koMrurzOA+|L_lG}kf DO NOT COPY THESE VALUES  07VC*Lj*lD&?3w!BT#-');
define('SECURE_AUTH_SALT', 'p32*p,]z%LZ+pAu:VY DO NOT COPY THESE VALUES C-?y+K0DK_+F|0h{!_xY');
define('LOGGED_IN_SALT',   'i^/G2W7!-1H2OQ+t$3 DO NOT COPY THESE VALUES t6**bRVFSD[Hi])-qS`|');
define('NONCE_SALT',       'Q6]U:K?j4L%Z]}h^q7 DO NOT COPY THESE VALUES 1% ^qUswWgn+6&xqHN&%');

These are configuration lines that we can paste directly in our configuration file to set secure keys. Copy the output you received now.
Now, open the WordPress configuration file:

nano /var/www/html/wp-config.php

Find the section that contains the dummy values for those settings. It will look something like this:

/var/www/html/wp-config.php

. . .

define('AUTH_KEY',         'put your unique phrase here');
define('SECURE_AUTH_KEY',  'put your unique phrase here');
define('LOGGED_IN_KEY',    'put your unique phrase here');
define('NONCE_KEY',        'put your unique phrase here');
define('AUTH_SALT',        'put your unique phrase here');
define('SECURE_AUTH_SALT', 'put your unique phrase here');
define('LOGGED_IN_SALT',   'put your unique phrase here');
define('NONCE_SALT',       'put your unique phrase here');

. . .

Delete those lines and paste in the values you copied from the command line:

/var/www/html/wp-config.php

. . .

define('AUTH_KEY',         'VALUES COPIED FROM THE COMMAND LINE');
define('SECURE_AUTH_KEY',  'VALUES COPIED FROM THE COMMAND LINE');
define('LOGGED_IN_KEY',    'VALUES COPIED FROM THE COMMAND LINE');
define('NONCE_KEY',        'VALUES COPIED FROM THE COMMAND LINE');
define('AUTH_SALT',        'VALUES COPIED FROM THE COMMAND LINE');
define('SECURE_AUTH_SALT', 'VALUES COPIED FROM THE COMMAND LINE');
define('LOGGED_IN_SALT',   'VALUES COPIED FROM THE COMMAND LINE');
define('NONCE_SALT',       'VALUES COPIED FROM THE COMMAND LINE');

. . .

Next, we need to modify some of the database connection settings at the beginning of the file. You need to adjust the database name, the database user, and the associated password that we configured within MySQL.
The other change we need to make is to set the method that WordPress should use to write to the filesystem. Since we’ve given the web server permission to write where it needs to, we can explicitly set the filesystem method to “direct”. Failure to set this with our current settings would result in WordPress prompting for FTP credentials when we perform some actions.
This setting can be added below the database connection settings, or anywhere else in the file:

/var/www/html/wp-config.php

. . .

define('DB_NAME', 'wordpress');

/** MySQL database username */
define('DB_USER', 'wordpressuser');

/** MySQL database password */
define('DB_PASSWORD', 'password');

. . .

define('FS_METHOD', 'direct');

Save and close the file when you are finished.

Step 6: Complete the Installation Through the Web Interface
Now that the server configuration is complete, we can complete the installation through the web interface.
In your web browser, navigate to your server’s domain name or public IP address:

http://server_domain_or_IP

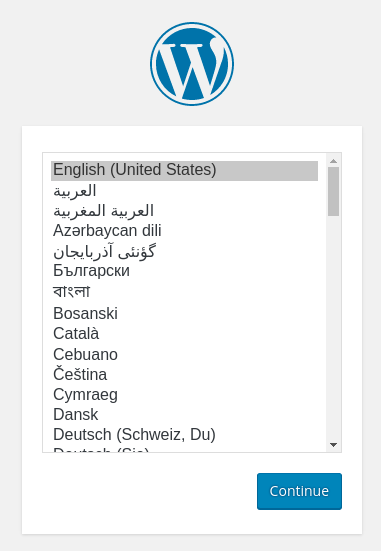
Select the language you would like to use:
Next, you will come to the main setup page.
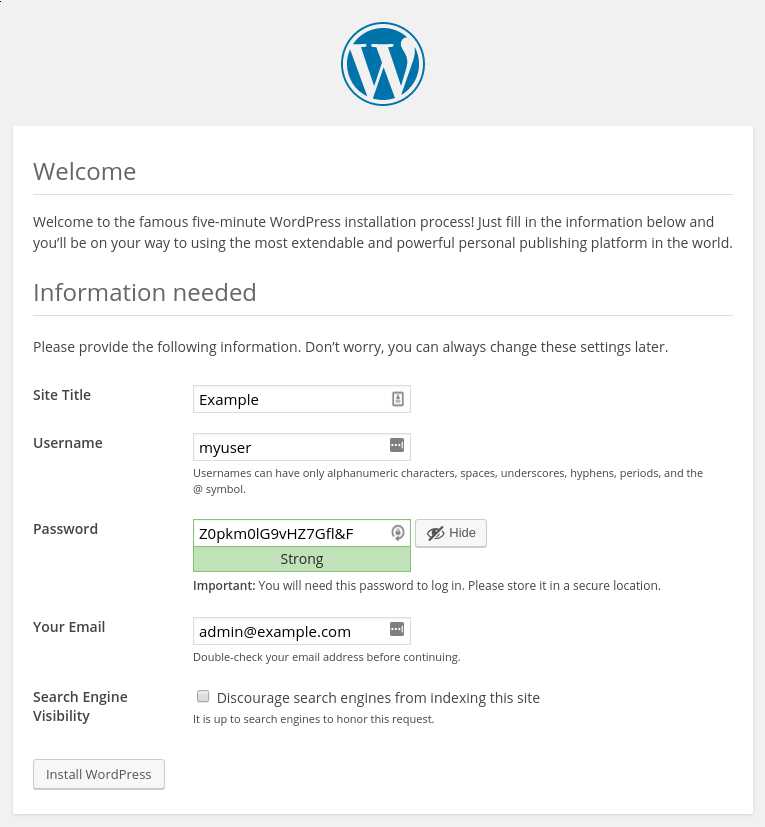
Select a name for your WordPress site and choose a username (it is recommended not to choose something like “admin” for security purposes). A strong password is generated automatically. Save this password or select an alternative strong password.
Enter your email address and select whether you want to discourage search engines from indexing your site:
When you click ahead, you will be taken to a page that prompts you to log in:
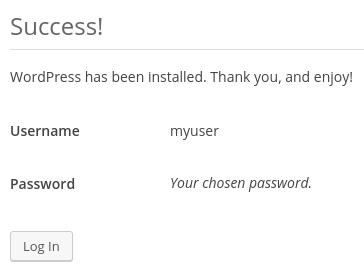
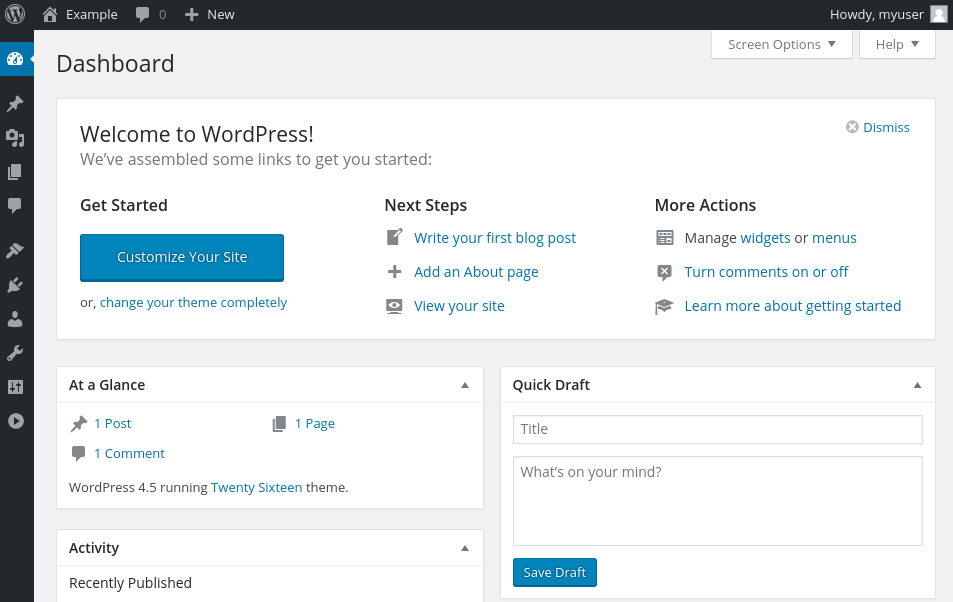
Once you log in, you will be taken to the WordPress administration dashboard:
Upgrading WordPress
As WordPress upgrades become available, you will be unable in install them through the interface with the current permissions.
The permissions we selected here are meant to provide a good balance between security and usability for the 99% of times between upgrading. However, they are a bit too restrictive for the software to automatically apply updates.
When an update becomes available, log back into your server as your sudo user. Temporarily give the web server process access to the whole document root:

sudo chown -R www-data /var/www/html

Now, go back the WordPress administration panel and apply the update.
When you are finished, lock the permissions down again for security:

sudo chown -R sammy /var/www/html

This should only be necessary when applying upgrades to WordPress itself.

Conclusion
WordPress should be installed and ready to use! Some common next steps are to choose the permalinks setting for your posts (can be found in Settings > Permalinks) or to select a new theme (in Appearance > Themes). If this is your first time using WordPress, explore the interface a bit to get acquainted with your new CMS.

How to Install MongoDB Community Edition Manually on mac and linux

Install MongoDB Community Edition Manually
Only install MongoDB Community Edition using this procedure if you cannot use homebrew.

1

Download the binary files for the desired release of MongoDB.
Download the binaries from https://www.mongodb.org/downloads.
For example, to download the latest release through the shell, issue the following:

curl -O https://fastdl.mongodb.org/osx/mongodb-osx-x86_64-3.2.19.tgz

2

Extract the files from the downloaded archive.
For example, from a system shell, you can extract through the tar command:

tar -zxvf mongodb-osx-x86_64-3.2.19.tgz

3

Copy the extracted archive to the target directory.
Copy the extracted folder to the location from which MongoDB will run.

mkdir -p mongodb
cp -R -n mongodb-osx-x86_64-3.2.19/ mongodb

4

Ensure the location of the binaries is in the PATH variable.
The MongoDB binaries are in the bin/ directory of the archive. To ensure that the binaries are in your PATH, you can modify your PATH.
For example, you can add the following line to your shell’s rc file (e.g. ~/.bashrc):

export PATH=<mongodb-install-directory>/bin:$PATH

Replace <mongodb-install-directory> with the path to the extracted MongoDB archive.

Run MongoDB

1

Create the data directory.
Before you start MongoDB for the first time, create the directory to which the mongod process will write data. By default, the mongod process uses the /data/db directory. If you create a directory other than this one, you must specify that directory in the dbpath option when starting the mongod process later in this procedure.
The following example command creates the default /data/db directory:

mkdir -p /data/db

2

Set permissions for the data directory.
Before running mongod for the first time, ensure that the user account running mongod has read and write permissions for the directory.

3

Run MongoDB.
To run MongoDB, run the mongod process at the system prompt. If necessary, specify the path of the mongod or the data directory. See the following examples.

Run without specifying paths
If your system PATH variable includes the location of the mongod binary and if you use the default data directory (i.e., /data/db), simply enter mongod at the system prompt:

mongod

Specify the path of the mongod
If your PATH does not include the location of the mongod binary, enter the full path to the mongodbinary at the system prompt:

<path to binary>/mongod

Specify the path of the data directory
If you do not use the default data directory (i.e., /data/db), specify the path to the data directory using the --dbpath option:

mongod --dbpath <path to data directory>

4

Begin using MongoDB.
To help you start using MongoDB, MongoDB provides Getting Started Guides in various driver editions. See Getting Started for the available editions.
Before deploying MongoDB in a production environment, consider the Production Notes document.
Later, to stop MongoDB, press Control+C in the terminal where the mongod instance is running.


Install MongoDB Community Edition on Red Hat Enterprise or CentOS Linux
Version 3.2 url: https://docs.mongodb.com/v3.2/tutorial/install-mongodb-on-red-hat/

On this page
OverviewPackagesInit ScriptsInstall MongoDB Community EditionRun MongoDB Community EditionUninstall MongoDB Community Edition

Overview
Use this tutorial to install MongoDB Community Edition on Red Hat Enterprise Linux or CentOS Linux versions 6 and 7 using .rpm packages. While some of these distributions include their own MongoDB packages, the official MongoDB Community Edition packages are generally more up to date.

PLATFORM SUPPORT
This installation guide only supports 64-bit systems. See Platform Support for details.
MongoDB 3.2 deprecates support for Red Hat Enterprise Linux 5.

Packages
MongoDB provides officially supported packages in their own repository. This repository contains the following packages:

mongodb-org metapackage that will automatically install the four component packages listed below.
mongodb-org-server Contains the mongod daemon and associated configuration and init scripts.
mongodb-org-mongos Contains the mongos daemon.
mongodb-org-shell Contains the mongo shell.
mongodb-org-tools Contains the following MongoDB tools: mongoimport bsondumpmongodumpmongoexportmongofilesmongooplogmongoperfmongorestoremongostat, and mongotop.

The default /etc/mongod. conf configuration file supplied by the packages have bind_ip set to 127.0.0.1 by default. Modify this setting as needed for your environment before initializing a replica set.

Init Scripts
The mongodb-org package includes various init scripts, including the init script /etc/rc.d/init.d/mongod. You can use these scripts to stop, start, and restart daemon processes.
The package configures MongoDB using the /etc/mongod. conf file in conjunction with the init scripts. See the Configuration File reference for documentation of settings available in the configuration file.
There are no init scripts for mongos. You can use the mongod init script to derive your own mongos init script for use in such environments. See the mongos reference for configuration details.
The default /etc/mongod. conf configuration file supplied by the packages have bind_ip set to 127.0.0.1 by default. Modify this setting as needed for your environment before initializing a replica set.

Install MongoDB Community Edition

NOTE
To install a version of MongoDB prior to 3.2, please refer to that version’s documentation. For example, see version 3.0.

This installation guide only supports 64-bit systems. See Platform Support for details.

1

Configure the package management system (yum).
Create a /etc/yum.repos.d/mongodb-org-3.2. repo file so that you can install MongoDB directly, using yum.

Changed in version 3.0: MongoDB Linux packages are in a new repository beginning with 3.0.

For the latest stable release of MongoDB
Use the following repository file:

[mongodb-org-3.2]
name=MongoDB Repository
baseurl=https://repo.mongodb.org/yum/redhat/$releasever/mongodb-org/3.2/x86_64/
gpgcheck=1
enabled=1
gpgkey=https://www.mongodb.org/static/pgp/server-3.2.asc

For versions of MongoDB earlier than 3.0
To install the packages from an earlier release series, such as 2.4 or 2.6, you can specify the release series in the repository configuration. For example, to restrict your system to the 2.6 release series, create a /etc/yum.repos.d/mongodb-org-2.6. repo file to hold the following configuration information for the MongoDB 2.6 repository:

[mongodb-org-2.6]
name=MongoDB 2.6 Repository
baseurl=http://downloads-distro.mongodb.org/repo/redhat/os/x86_64/
gpgcheck=0
enabled=1

You can find . repo files for each release in the repository itself. Remember that odd-numbered minor release versions (e.g. 2.5) are development versions and are unsuitable for production use.

2

Install the MongoDB packages and associated tools.
When you install the packages, you choose whether to install the current release or a previous one. This step provides the commands for both.
To install the latest stable version of MongoDB, issue the following command:

sudo yum install -y mongodb-org

To install a specific release of MongoDB, specify each component package individually and append the version number to the package name, as in the following example:

sudo yum install -y mongodb-org-3.2.19 mongodb-org-server-3.2.19 mongodb-org-shell-3.2.19 mongodb-org-mongos-3.2.19 mongodb-org-tools-3.2.19

You can specify any available version of MongoDB. However yum will upgrade the packages when a newer version becomes available. To prevent unintended upgrades, pin the package. To pin a package, add the following exclude directive to your /etc/yum.conf file:

exclude=mongodb-org,mongodb-org-server,mongodb-org-shell,mongodb-org-mongos,mongodb-org-tools

Run MongoDB Community Edition

Prerequisites

Configure SELinux

IMPORTANT
If you are using SELinux, you must configure SELinux to allow MongoDB to start on Red Hat Linux-based systems (Red Hat Enterprise Linux or CentOS Linux).

To configure SELinux, administrators have three options:
If SELinux is in enforcing mode, enable access to the relevant ports that the MongoDB deployment will use (e.g. 27017). See Default MongoDB Port for more information on MongoDB’s default ports. For default settings, this can be accomplished by running

semanage port -a -t mongod_port_t -p tcp 27017

Disable SELinux by setting the SELINUX setting to disabled in /etc/selinux/config.

SELINUX=disabled

You must reboot the system for the changes to take effect. Set SELinux to permissive mode in /etc/selinux/config by setting the SELINUX setting to permissive.

SELINUX=permissive

You must reboot the system for the changes to take effect. You can instead use setenforce to change to permissive mode.  setenforce does not require a reboot but is not persistent.
Alternatively, you can choose not to install the SELinux packages when you are installing your Linux operating system, or choose to remove the relevant packages. This option is the most invasive and is not recommended.

Data Directories and Permissions

WARNING
On RHEL 7.0, if you change the data path, the default SELinux policies will prevent mongod from having write access on the new data path if you do not change the security context.

The MongoDB instance stores its data files in /var/lib/mongo and its log files in /var/log/mongodb by default, and runs using the mongod user account. You can specify alternate log and data file directories in /etc/mongod.conf. See systemLog.path and storage. dbPath for additional information.
If you change the user that runs the MongoDB process, you must modify the access control rights to the /var/lib/mongo and /var/log/mongodb directories to give this user access to these directories.

Procedure

1

Start MongoDB.
You can start the mongod process by issuing the following command:

sudo service mongod start

2

Verify that MongoDB has started successfully
You can verify that the mongod process has started successfully by checking the contents of the log file at /var/log/mongodb/mongod. log for a line reading

[initandlisten] waiting for connections on port <port>

where <port> is the port configured in /etc/mongod. conf27017 by default.
You can optionally ensure that MongoDB will start following a system reboot by issuing the following command:

sudo chkconfig mongod on

3

Stop MongoDB.
As needed, you can stop the mongod process by issuing the following command:

sudo service mongod stop

4

Restart MongoDB.
You can restart the mongod process by issuing the following command:

sudo service mongod restart

You can follow the state of the process for errors or important messages by watching the output in the /var/log/mongodb/mongod.log file.

5

Begin using MongoDB.
To help you start using MongoDB, MongoDB provides Getting Started Guides in various driver editions. See Getting Started for the available editions.
Before deploying MongoDB in a production environment, consider the Production Notes document.
Later, to stop MongoDB, press Control+C in the terminal where the mongod instance is running.

Uninstall MongoDB Community Edition
To completely remove MongoDB from a system, you must remove the MongoDB applications themselves, the configuration files, and any directories containing data and logs. The following section guides you through the necessary steps.

WARNING
This process will completely remove MongoDB, its configuration, and all databases. This process is not reversible, so ensure that all of your configuration and data is backed up before proceeding.

1

Stop MongoDB.
Stop the mongod process by issuing the following command:

sudo service mongod stop

2

Remove Packages.
Remove any MongoDB packages that you had previously installed.

sudo yum erase $(rpm -qa | grep mongodb-org)

3

Remove Data Directories.
Remove MongoDB databases and log files.

sudo rm -r /var/log/mongodb
sudo rm -r /var/lib/mongo

How To Install Java with Apt-Get on Ubuntu 16.04

Introduction
Java and the JVM (Java’s virtual machine) are widely used and required for many kinds of software. This article will guide you through the process of installing and managing different versions of Java using apt-get.Prerequisites
To follow this tutorial, you will need:
One Ubuntu 16.04 server. A sudo non-root user, which you can set up by following the Ubuntu 16.04 initial server setup guide.

Installing the Default JRE/JDK
The easiest option for installing Java is using the version packaged with Ubuntu. Specifically, this will install OpenJDK 8, the latest and recommended version.
First, update the package index.

sudo apt-get update

Next, install Java. Specifically, this command will install the Java Runtime Environment (JRE).

sudo apt-get install default-jre

There is another default Java installation called the JDK (Java Development Kit). The JDK is usually only needed if you are going to compile Java programs or if the software that will use Java specifically requires it.
The JDK does contain the JRE, so there are no disadvantages if you install the JDK instead of the JRE, except for the larger file size.
You can install the JDK with the following command:

sudo apt-get install default-jdk

Installing the Oracle JDK
If you want to install the Oracle JDK, which is the official version distributed by Oracle, you will need to follow a few more steps. If you need Java 6 or 7, which are not available in the default Ubuntu 16.04 repositories (not recommended), this installation method is also available.
First, add Oracle’s PPA, then update your package repository.

sudo add-apt-repository ppa:webupd8team/java
sudo apt-get update

Then, depending on the version you want to install, execute one of the following commands:
Oracle JDK 6 or 7
These are very old versions of Java which reached end of life in February 2013 and April 2015 respectively. It’s not recommended to use them, but they might still be required for some programs.
To install JDK 6, use the following command:

sudo apt-get install oracle-java6-installer

To install JDK 7, use the following command:

sudo apt-get install oracle-java7-installer

Oracle JDK 8
This is the latest stable version of Java at time of writing, and the recommended version to install. You can do so using the following command:

sudo apt-get install oracle-java8-installer

Oracle JDK 9
This is a developer preview and the general release is scheduled for March 2017. It’s not recommended that you use this version because there may still be security issues and bugs. There is more information about Java 9 on the official JDK 9 website.
To install JDK 9, use the following command:

sudo apt-get install oracle-java9-installer

Managing Java
There can be multiple Java installations on one server. You can configure which version is the default for use in the command line by using update-alternatives, which manages which symbolic links are used for different commands.

sudo update-alternatives –config java

The output will look something like the following. In this case, this is what the output will look like with all Java versions mentioned above installed.

Output

There are 5 choices for the alternative java (providing /usr/bin/java).

  Selection    Path                                            Priority   Status
------------------------------------------------------------
* 0            /usr/lib/jvm/java-8-openjdk-amd64/jre/bin/java   1081      auto mode
  1            /usr/lib/jvm/java-6-oracle/jre/bin/java          1         manual mode
  2            /usr/lib/jvm/java-7-oracle/jre/bin/java          2         manual mode
  3            /usr/lib/jvm/java-8-openjdk-amd64/jre/bin/java   1081      manual mode
  4            /usr/lib/jvm/java-8-oracle/jre/bin/java          3         manual mode
  5            /usr/lib/jvm/java-9-oracle/bin/java              4         manual mode

Press <enter> to keep the current choice[*], or type selection number:

You can now choose the number to use as a default. This can also be done for other Java commands, such as the compiler (javac), the documentation generator (javadoc), the JAR signing tool (jarsigner), and more. You can use the following command, filling in the command you want to customize.

sudo update-alternatives –config command

Setting the JAVA_HOME Environment Variable
Many programs, such as Java servers, use the JAVA_HOME environment variable to determine the Java installation location. To set this environment variable, we will first need to find out where Java is installed. You can do this by executing the same command as in the previous section:

sudo update-alternatives –config java

Copy the path from your preferred installation and then open /etc/environment using nano or your favorite text editor.

sudo nano /etc/environment

At the end of this file, add the following line, making sure to replace the highlighted path with your own copied path.

/etc/environment

JAVA_HOME="/usr/lib/jvm/java-8-oracle"

Save and exit the file, and reload it.

source /etc/environment

You can now test whether the environment variable has been set by executing the following command:

echo $JAVA_HOME

This will return the path you just set.

Conclusion
You have now installed Java and know how to manage different versions of it. You can now install software which runs on Java, such as Tomcat, Jetty, Glassfish, Cassandra, or Jenkins.


How to Install FFmpeg on Linux

How to Install FFmpeg on Linux
FFmpeg is an all in one multimedia codex which can convert audio and video into different formats. It is available as a command line tool. FFmpeg supports most audio and video formats. It can also edit and stream multimedia files. Here’s how you can install it onto your Linux based machine or VPS.
Here are some other FFmpeg features you can look forward to:
Extract audio from a series of video filesExtract only video with no audioResize video filesCut existing video into a smaller clipMerge videosConvert audio and video
Protip: If you want to install FFmpeg on your Linux VPS, connect to your machine via ssh before proceeding further.

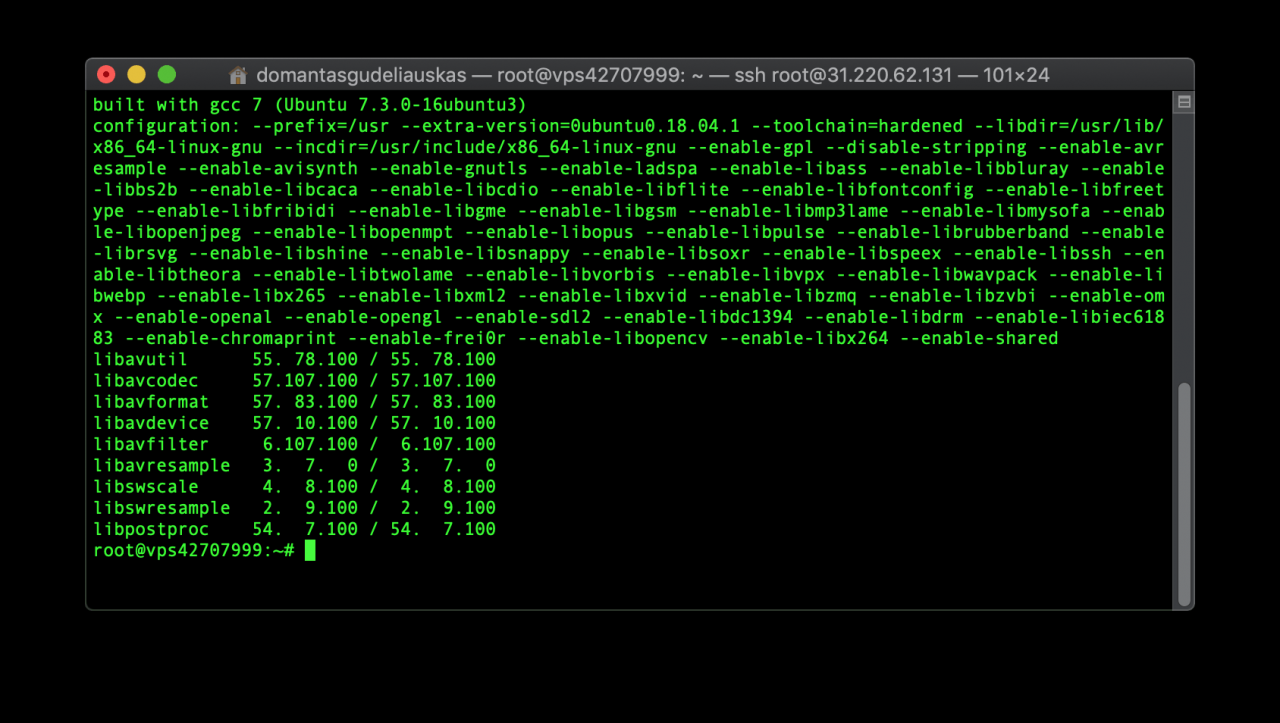
Remember, whatever version of Linux you use, you can check if FFmpeg is installed, or what version it’s running with the following command:

ffmpeg -version

A typical output of this command would look as shown below:

Install FFmpeg on Ubuntu
Installing FFmpeg 4 – the latest version – on Ubuntu 14. x and above is easy.
We will install FFmpeg from the mc3man ppa. PPA stands for Personal Package Archives which are supported by the Ubuntu community.
To add this PPA we need to execute:

sudo apt-get install -y software-properties-common
add apt-repository ppa:mc3man/trusty-media

Once the PPA is installed, move on to updating the repository by executing:

apt-get update
apt-get dist-upgrade

Lastly, to install ffmpeg we need to execute:

apt-get install ffmpeg

This completes the ffmpeg installation. To verify the version check using the following command:

ffmpeg -version

Install FFmpeg on Debian
To install FFmpeg on Debian 9 – Stretch, you need to be logged in as a root user. The FFmpeg package uses the apt package manager for installation. It’s available in the official Debian repository.
First, update the package list using:

apt update

After this we can execute the following command to install FFmpeg:

apt install ffmpeg

If you’re using Debian 8 – Jessie, FFmpeg won’t be available in the official repository. However, the Debian multimedia repository can be used to install the codex.
We will have to add the Debian multimedia repository. To add this, we need to edit the file /etc/apt/sources.list. This file contains the list of repositories APT uses. To edit this file, you can use a terminal editor such as nano or vi.
Open the file using the following command and press I (Insert) to start editing:

vi /etc/apt/sources.list

Add the lines listed below to the file:

deb http://www.deb-multimedia.org jessie main non-free

deb-src http://www.deb-multimedia.org jessie main non-free

# jessie-backports

deb http://ftp.debian.org/debian/ jessie-backports main

To save your edit on the vi editor press Esc. To exit the editor press : and execute q!
Next we will have to install the deb-multimedia-keyring package. First, we will update, then install, and update one more time. This makes sure that all the changes are correctly updated and noted.

apt update
apt install deb-multimedia-keyring
apt update

Once you’re done, install the FFmpeg package using:

apt install ffmpeg

To validate the installation on Debian use the following command:

ffmpeg -version

Install FFmpeg on CentOS, Fedora, and RHEL
CentOS does not provide an official repository for FFmpeg installation. This can be installed using third party nux dextop yum repo.
To install using CentOS 7 or 6, update the system using:

yum install epel-release -y
yum update -y

On CentOS 7 and RHEL 7 use the following command:

rpm --import http://li.nux.ro/download/nux/RPM-GPG-KEY-nux.ro
rpm -Uvh http://li.nux.ro/download/nux/dextop/el7/x86_64/nux-dextop-release-0-5.el7.nux.noarch.rpm

On CentOS/RHEL 6/5, the command is slightly different and refers to a different repository.

rpm --import http://li.nux.ro/download/nux/RPM-GPG-KEY-nux.ro
rpm -Uvh http://li.nux.ro/download/nux/dextop/el6/x86_64/nux-dextop-release-0-2.el6.nux.noarch.rpm

Next, we can install FFmpeg and its development packages using:

yum install ffmpeg ffmpeg-devel -y

This completes the installation.
To install FFmpeg on Fedora, use the RPMfusion repository. If you don’t have it installed use this command:

dnf install https://download1.rpmfusion.org/free/fedora/rpmfusion-free-release-$(rpm -E %fedora).noarch.rpm
dnf install https://download1.rpmfusion.org/nonfree/fedora/rpmfusion-nonfree-release-$(rpm -E %fedora).noarch.rpm

Next, we can install FFmpeg and its development package using a DNF package manager.

dnf install ffmpeg ffmpeg-devel

That’s it, you successfully added FFmpeg to your Fedora virtual machine.
Install FFmpeg on Arch Linux
For Arch Linux, we need to use the Pacman package manager. This is an Arch Linux repository. The official repository will give details of which version is available.
To update the DB, we can use the following command:

pacman -Sy vlc

Next, we can install FFmpeg using:

pacman -R ffmpeg4.0

To reflect these changes, update the system using:

pacman -Su

And you’re done! FFmpeg should be successfully added to your Arch Linux machine. To verify the installation, execute:

ffmpeg -version

Conclusion
Installing FFmpeg on a Linux machine is easy, and takes only a few minutes. Just log in as a root user and follow the guidelines for your OS. Each flavor of Linux – Ubuntu, Arch Linux, Debian, CentOS/RHEL, Fedora – have slight differences when installing FFmpeg. Start using this powerful codex!

How to uninstall Maya on a Mac

How to uninstall Maya on a Mac

Products and versions covered

By: 
Support

Jun 15 2018

SHARE

ADD TO COLLECTION

Issue: You want to know how to uninstall Maya from a Macintosh computer.

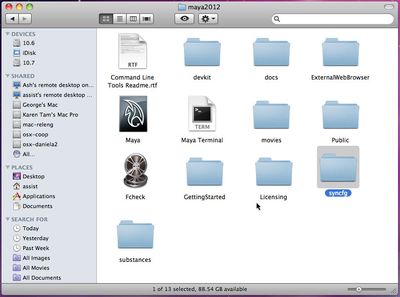
Solution: Maya doesn’t have an uninstall tool so you will need to manually delete it. You can use a Terminal with the Open command to easily delete files and folders as noted in the videos below:

    1. Delete the main Application. [Drag the folder into the trash. ]
    1. Maya includes Matchmover and Composite.  These applications are in:
    1. /Applications/Autodesk
    1.  Delete Backburner by removing these folders:
    1. /usr/discreet/backburner
    1. /usr/discreet/lib32/backburner
    1. Video:   Open-delete-hidden-folders
    1. /Library/LaunchDaemons/com.autodesk. *
    1.  Delete Network License Manager [NLM]:
    1. /usr/local/flexnetserver
    1. Video:   Open-delete-flexnetfolder
    1. /Library/StartupItems/adsknlm
    1.  Delete and backup licensing files/folders. You need to follow only one of the steps below depending on your type of install.
    1. Network:
    1. /var/flexlm/maya. lic or adsk_server. lic
    1. Standalone:
    1. /Library/Application Support/Autodesk/Adlm
    1. /Library/Preferences/FLEXnet Publisher/FLEXnet/adskflex_00691b00_tsf. data
    1. /Library/Preferences/FLEXnet Publisher/FLEXnet/adskflex_00691b00_tsf.data_backup. 001
    The Library folders in Mac OS 10.7 and higher is completely hidden so you can use the Go > Go to folder to access it.  You can also view the videos in steps 2 and 3 for further instructions.

Note: Deleting the standalone licensing files can affect AutoCAD and Smoke installation. If you delete these files, you will need to uninstall and reinstall AutoCAD and Smoke as well.
This method is easier than using adlmreg noted in the documentation, Maya_Install_FAQ_en.pdf >  [2012], on page 23. If you want to use the Terminal, the path to adlmreg is: /usr/bin/adlmreg.
When adlmreg does not found, see also Where is adlmreg for Maya?

See Also:
Autodesk BackBurner – Mac and VMWare Fusion – IP ConflictAutoCAD [2013-2012] for Mac: Where is the licpath. lic file?Reset Standalone licensing on the Mac [Time Machine]

Raspberry PI install VIM editor


Raspberry Pi installs the ViM editor

1. Delete default VI editor
sudo apt-get remove vim-common

[setupvars.sh] OpenVINO environment initialized
pi@raspberrypi:~ $ sudo apt-get remove vim-common
Reading the package list... Finished...
Dependency tree of the package being analyzed        
Reading status information... Finished...       
The following packages were automatically installed and are no longer required.
  vim-runtime
Use 'sudo apt autoremove' to uninstall it (them).
The following packages will be [uninstalled].
  vim vim-common vim-tiny
0 packages upgraded, 0 new packages installed, 3 packages to uninstall, and 0 packages not upgraded.
After unzipping, 3,053 kB of space will be free.
Do you wish to continue? [Y/n] Y
(Reading the database ... There are currently 84686 files and directories installed on the system).
Uninstalling vim (2:8.0.0197-4+deb9u1) ...
update-alternatives: Use /usr/bin/vim.tiny to provide /usr/bin/vi (vi) in automatic mode.
update-alternatives: Use /usr/bin/vim.tiny to provide /usr/bin/view (view) in automatic mode.
update-alternatives: Use /usr/bin/vim.tiny to provide /usr/bin/ex (ex) in automatic mode.
update-alternatives: Use /usr/bin/vim.tiny to provide /usr/bin/rview (rview) in automatic mode.
Uninstalling vim-tiny (2:8.0.0197-4+deb9u1) ...
Uninstalling vim-common (2:8.0.0197-4+deb9u1) ...
Working with triggers for mime-support (3.60) ...
Processing triggers for desktop-file-utils (0.23-1) ...
Processing triggers for man-db (2.7.6.1-2) ...
Working with triggers for gnome-menus (3.13.3-9) ...
Processing triggers for hicolor-icon-theme (0.15-1) ...
pi@raspberrypi:~ $ 

2. Install the VIm editor
sudo apt-get install vim

pi@raspberrypi:~ $ sudo apt-get install vim
Reading the package list... Finished...
Dependency tree of the package being analyzed        
Reading status information... Finished...       
The following software will be installed at the same time.
  vim-common
Recommended Installation.
  ctags vim-doc vim-scripts
The following [new] packages will be installed.
  vim vim-common
0 packages upgraded, 2 new packages installed, 0 packages to uninstall, 0 packages not upgraded.
Need to download 159 kB/949 kB of archives.
Decompression consumes 2,203 kB of extra space.
Do you wish to continue? [Y/n] Y
Get:1 http://mirrors.tuna.tsinghua.edu.cn/raspbian/raspbian stretch/main armhf vim-common all 2:8.0.0197-4+deb9u1 [159 kB]                                                
Downloaded 159 kB in 20 seconds (7,672 B/s)           
The unselected package vim-common is being selected.
(Reading database ... The system currently has 84619 files and directories installed.)
Preparing to unpack ... /vim-common_2%3a8.0.0197-4+deb9u1_all.deb ...
Unpacking vim-common (2:8.0.0197-4+deb9u1) ...
Unselected package vim is being selected.
Preparing to unpack ... /vim_2%3a8.0.0197-4+deb9u1_armhf.deb ...
Unpacking vim (2:8.0.0197-4+deb9u1) ...
Working with triggers for mime-support (3.60) ...
Working with triggers for desktop-file-utils (0.23-1) ...
Working on vim-common (2:8.0.0197-4+deb9u1) ...
Working with triggers for man-db (2.7.6.1-2) ...
Working with triggers for gnome-menus (3.13.3-9) ...
Working with triggers for hicolor-icon-theme (0.15-1) ...
Setting up vim (2:8.0.0197-4+deb9u1) ...
update-alternatives: Use /usr/bin/vim.basic to provide /usr/bin/vim (vim) in automatic mode.
update-alternatives: Use /usr/bin/vim.basic to provide /usr/bin/vimdiff (vimdiff) in automatic mode.
update-alternatives: Use /usr/bin/vim.basic to provide /usr/bin/rvim (rvim) in automatic mode.
update-alternatives: Use /usr/bin/vim.basic to provide /usr/bin/rview (rview) in automatic mode.
update-alternatives: Use /usr/bin/vim.basic to provide /usr/bin/vi (vi) in automatic mode.
update-alternatives: Use /usr/bin/vim.basic to provide /usr/bin/view (view) in automatic mode.
update-alternatives: Use /usr/bin/vim.basic to provide /usr/bin/ex (ex) in automatic mode.
pi@raspberrypi:~ $

How to install PIL in Python 3

About Pillow and PIL

PIL (Python Imaging Library) is a powerful and convenient image processing library for Python, and is relatively well known. However, it is only supported up to Python 2.7.

PIL official website: http://www.pythonware.com/products/pil/

Pillow is a derivative of PIL, but has evolved into a more dynamic image processing library than PIL itself. The latest version is currently 3.0.0.

Pillow's Github page: https://github.com/python-pillow/Pillow
Pillow's documentation (corresponding to v3.0.0): https://pillow.readthedocs.org/en/latest/handbook/index.html
Chinese translation of Pillow's documentation (for version v2.4.0):http://pillow-cn.readthedocs.org/en/latest/

Python 3.x Installing Pillow

Installing Pillow for Python is very simple, using pip or easy_install with just one line of code.

To install using PIP from the command line.
pip install Pillow

Or use easy_install on the command line to install.
easy_install Pillow

After installation, using from PIL import Image references the library. For example.
from PIL import Image
im = Image.open("bride.jpg")
im.rotate(45).show()

Solution to the problem of installing Tkinter module in MAC

The article directories
1 solution 1.1 first make sure to uninstall python31.2 and then install xcode1.3 instead of ruby script 1.4 to install python1.5 validation

I’m going to put the 0 first
Environment:
MAC Catalina 10.15.1 Python 3.7.5 Tkinter 8.6
1. Problem Description
When I run the following demo,

import tkinter as tk # Python 3.x Version
root = tk.Tk()

label = tk.Label(root, text="Hello World!") # Create a text label
label.pack(padx=20, pady=20) # Pack it into the window

root.mainloop()

The following problems may occur,

The system version of Tk is deprecated and may be removed in a future release. Please don't rely on it. Set TK SILENCE DEPRECATION=1 to suppress this warning.

This is because the version does not correspond to the original TCL/TK version of the MAC. The corresponding version is shown in link 1
1 Solutions
For python3 installed by homebrew, the following command is no longer supported

brew install python3 --with-tcl-tk

There are also ways

brew install tcl-tk

Or you can download avtiveTcl, but python3 will still be connected to the MAC version of catalina 10.15.1 (tcl8.5)
So it took a lot of effort to find a solution
1.1 first ensure that python3 is uninstalled

brew uninstall python3
brew cleanup

1.2 Then install Xcode

xcode-select --install
brew update

1.3 Replace Ruby scripts
Will “/ usr/local/Homebrew/Library/Taps/Homebrew/Homebrew – core/Formula/python. Rb” path replaced with the following script, remember to backup

class Python < Formula
  desc "Interpreted, interactive, object-oriented programming language"
  homepage "https://www.python.org/"
  url "https://www.python.org/ftp/python/3.7.5/Python-3.7.5.tar.xz"
  sha256 "e85a76ea9f3d6c485ec1780fca4e500725a4a7bbc63c78ebc44170de9b619d94"
  head "https://github.com/python/cpython.git"

  bottle do
    sha256 "25e0099852136c4ef1efd221247d0f67aa71f7b624211b98898f8b46c612f40d" => :mojave
    sha256 "b65fecb4bb8350359488d6ca4c0a5a343f658f424d101a45e28d5a72de7f455c" => :high_sierra
    sha256 "b07ec3a40f58fa317e1bb937992dc0dca7d60812c60de99bde14fbadb6c27cc5" => :sierra
  end

  # setuptools remembers the build flags python is built with and uses them to
  # build packages later. Xcode-only systems need different flags.
  pour_bottle?do
    reason <<~EOS
      The bottle needs the Apple Command Line Tools to be installed.
        You can install them, if desired, with:
          xcode-select --install
    EOS
    satisfy { MacOS::CLT.installed?}
  end

  depends_on "pkg-config" => :build
  depends_on "gdbm"
  depends_on "openssl"
  depends_on "readline"
  depends_on "sqlite"
  depends_on "xz"
  depends_on "tcl-tk"  # as apple's one is shiiiiite

  skip_clean "bin/pip3", "bin/pip-3.4", "bin/pip-3.5", "bin/pip-3.6", "bin/pip-3.7"
  skip_clean "bin/easy_install3", "bin/easy_install-3.4", "bin/easy_install-3.5", "bin/easy_install-3.6", "bin/easy_install-3.7"

  resource "setuptools" do
    url "https://files.pythonhosted.org/packages/c2/f7/c7b501b783e5a74cf1768bc174ee4fb0a8a6ee5af6afa92274ff964703e0/setuptools-40.8.0.zip"
    sha256 "6e4eec90337e849ade7103723b9a99631c1f0d19990d6e8412dc42f5ae8b304d"
  end

  resource "pip" do
    url "https://files.pythonhosted.org/packages/36/fa/51ca4d57392e2f69397cd6e5af23da2a8d37884a605f9e3f2d3bfdc48397/pip-19.0.3.tar.gz"
    sha256 "6e6f197a1abfb45118dbb878b5c859a0edbdd33fd250100bc015b67fded4b9f2"
  end

  resource "wheel" do
    url "https://files.pythonhosted.org/packages/b7/cf/1ea0f5b3ce55cacde1e84cdde6cee1ebaff51bd9a3e6c7ba4082199af6f6/wheel-0.33.1.tar.gz"
    sha256 "66a8fd76f28977bb664b098372daef2b27f60dc4d1688cfab7b37a09448f0e9d"
  end

  # Homebrew's tcl-tk is built in a standard unix fashion (due to link errors)
  # so we have to stop python from searching for frameworks and linking against
  # X11.
  patch :DATA

  def install
    # Unset these so that installing pip and setuptools puts them where we want
    # and not into some other Python the user has installed.
    ENV["PYTHONHOME"] = nil
    ENV["PYTHONPATH"] = nil

    xy = (buildpath/"configure.ac").read.slice(/PYTHON_VERSION, (3\.\d)/, 1)
    lib_cellar = prefix/"Frameworks/Python.framework/Versions/#{xy}/lib/python#{xy}"

    args = %W[
      --prefix=#{prefix}
      --enable-ipv6
      --datarootdir=#{share}
      --datadir=#{share}
      --enable-framework=#{frameworks}
      --enable-loadable-sqlite-extensions
      --without-ensurepip
      --with-dtrace
      --with-openssl=#{Formula["openssl"].opt_prefix}
    ]

    args << "--without-gcc" if ENV.compiler == :clang

    cflags   = []
    ldflags  = []
    cppflags = []

    if MacOS.sdk_path_if_needed
      # Help Python's build system (setuptools/pip) to build things on SDK-based systems
      # The setup.py looks at "-isysroot" to get the sysroot (and not at --sysroot)
      cflags  << "-isysroot #{MacOS.sdk_path}" << "-I#{MacOS.sdk_path}/usr/include"
      ldflags << "-isysroot #{MacOS.sdk_path}"
      # For the Xlib.h, Python needs this header dir with the system Tk
      # Yep, this needs the absolute path where zlib needed a path relative
      # to the SDK.
      # as external tck is added later on uncomment this
      # cflags << "-I#{MacOS.sdk_path}/System/Library/Frameworks/Tk.framework/Versions/8.5/Headers"
    end
    # Avoid linking to libgcc https://mail.python.org/pipermail/python-dev/2012-February/116205.html
    args << "MACOSX_DEPLOYMENT_TARGET=#{MacOS.version}"

    # We want our readline! This is just to outsmart the detection code,
    # superenv makes cc always find includes/libs!
    inreplace "setup.py",
      "do_readline = self.compiler.find_library_file(lib_dirs, 'readline')",
      "do_readline = '#{Formula["readline"].opt_lib}/libhistory.dylib'"

    inreplace "setup.py" do |s|
      s.gsub! "sqlite_setup_debug = False", "sqlite_setup_debug = True"
      s.gsub! "for d_ in inc_dirs + sqlite_inc_paths:",
              "for d_ in ['#{Formula["sqlite"].opt_include}']:"
    end

    # Allow python modules to use ctypes.find_library to find homebrew's stuff
    # even if homebrew is not a /usr/local/lib. Try this with:
    # `brew install enchant && pip install pyenchant`
    inreplace "./Lib/ctypes/macholib/dyld.py" do |f|
      f.gsub! "DEFAULT_LIBRARY_FALLBACK = [", "DEFAULT_LIBRARY_FALLBACK = [ '#{HOMEBREW_PREFIX}/lib',"
      f.gsub! "DEFAULT_FRAMEWORK_FALLBACK = [", "DEFAULT_FRAMEWORK_FALLBACK = [ '#{HOMEBREW_PREFIX}/Frameworks',"
    end

    # ADD tcl-tk include/lib paths
    tcl_tk = Formula["tcl-tk"].opt_prefix
    cppflags << "-I#{tcl_tk}/include"
    ldflags  << "-L#{tcl_tk}/lib"

    args << "CFLAGS=#{cflags.join(" ")}" unless cflags.empty?
    args << "LDFLAGS=#{ldflags.join(" ")}" unless ldflags.empty?
    args << "CPPFLAGS=#{cppflags.join(" ")}" unless cppflags.empty?

    system "./configure", *args
    system "make"

    ENV.deparallelize do
      # Tell Python not to install into /Applications (default for framework builds)
      system "make", "install", "PYTHONAPPSDIR=#{prefix}"
      system "make", "frameworkinstallextras", "PYTHONAPPSDIR=#{pkgshare}"
    end

    # Any .app get a " 3" attached, so it does not conflict with python 2.x.
    Dir.glob("#{prefix}/*.app") { |app| mv app, app.sub(/\.app$/, " 3.app") }

    # Prevent third-party packages from building against fragile Cellar paths
    inreplace Dir[lib_cellar/"**/_sysconfigdata_m_darwin_darwin.py",
                  lib_cellar/"config*/Makefile",
                  frameworks/"Python.framework/Versions/3*/lib/pkgconfig/python-3.?.pc"],
              prefix, opt_prefix

    # Help third-party packages find the Python framework
    inreplace Dir[lib_cellar/"config*/Makefile"],
              /^LINKFORSHARED=(.*)PYTHONFRAMEWORKDIR(.*)/,
              "LINKFORSHARED=\\1PYTHONFRAMEWORKINSTALLDIR\\2"

    # Fix for https://github.com/Homebrew/homebrew-core/issues/21212
    inreplace Dir[lib_cellar/"**/_sysconfigdata_m_darwin_darwin.py"],
              %r{('LINKFORSHARED': .*?)'(Python.framework/Versions/3.\d+/Python)'}m,
              "\\1'#{opt_prefix}/Frameworks/\\2'"

    # A fix, because python and python3 both want to install Python.framework
    # and therefore we can't link both into HOMEBREW_PREFIX/Frameworks
    # https://github.com/Homebrew/homebrew/issues/15943
    ["Headers", "Python", "Resources"].each { |f| rm(prefix/"Frameworks/Python.framework/#{f}") }
    rm prefix/"Frameworks/Python.framework/Versions/Current"

    # Symlink the pkgconfig files into HOMEBREW_PREFIX so they're accessible.
    (lib/"pkgconfig").install_symlink Dir["#{frameworks}/Python.framework/Versions/#{xy}/lib/pkgconfig/*"]

    # Remove the site-packages that Python created in its Cellar.
    (prefix/"Frameworks/Python.framework/Versions/#{xy}/lib/python#{xy}/site-packages").rmtree

    %w[setuptools pip wheel].each do |r|
      (libexec/r).install resource(r)
    end

    # Install unversioned symlinks in libexec/bin.
    {
      "idle"          => "idle3",
      "pydoc"         => "pydoc3",
      "python"        => "python3",
      "python-config" => "python3-config",
    }.each do |unversioned_name, versioned_name|
      (libexec/"bin").install_symlink (bin/versioned_name).realpath => unversioned_name
    end
  end

  def post_install
    ENV.delete "PYTHONPATH"

    xy = (prefix/"Frameworks/Python.framework/Versions").children.min.basename.to_s
    site_packages = HOMEBREW_PREFIX/"lib/python#{xy}/site-packages"
    site_packages_cellar = prefix/"Frameworks/Python.framework/Versions/#{xy}/lib/python#{xy}/site-packages"

    # Fix up the site-packages so that user-installed Python software survives
    # minor updates, such as going from 3.3.2 to 3.3.3:

    # Create a site-packages in HOMEBREW_PREFIX/lib/python#{xy}/site-packages
    site_packages.mkpath

    # Symlink the prefix site-packages into the cellar.
    site_packages_cellar.unlink if site_packages_cellar.exist?
    site_packages_cellar.parent.install_symlink site_packages

    # Write our sitecustomize.py
    rm_rf Dir["#{site_packages}/sitecustomize.py[co]"]
    (site_packages/"sitecustomize.py").atomic_write(sitecustomize)

    # Remove old setuptools installations that may still fly around and be
    # listed in the easy_install.pth. This can break setuptools build with
    # zipimport.ZipImportError: bad local file header
    # setuptools-0.9.8-py3.3.egg
    rm_rf Dir["#{site_packages}/setuptools*"]
    rm_rf Dir["#{site_packages}/distribute*"]
    rm_rf Dir["#{site_packages}/pip[-_.][0-9]*", "#{site_packages}/pip"]

    %w[setuptools pip wheel].each do |pkg|
      (libexec/pkg).cd do
        system bin/"python3", "-s", "setup.py", "--no-user-cfg", "install",
               "--force", "--verbose", "--install-scripts=#{bin}",
               "--install-lib=#{site_packages}",
               "--single-version-externally-managed",
               "--record=installed.txt"
      end
    end

    rm_rf [bin/"pip", bin/"easy_install"]
    mv bin/"wheel", bin/"wheel3"

    # Install unversioned symlinks in libexec/bin.
    {
      "easy_install" => "easy_install-#{xy}",
      "pip"          => "pip3",
      "wheel"        => "wheel3",
    }.each do |unversioned_name, versioned_name|
      (libexec/"bin").install_symlink (bin/versioned_name).realpath => unversioned_name
    end

    # post_install happens after link
    %W[pip3 pip#{xy} easy_install-#{xy} wheel3].each do |e|
      (HOMEBREW_PREFIX/"bin").install_symlink bin/e
    end

    # Help distutils find brewed stuff when building extensions
    include_dirs = [HOMEBREW_PREFIX/"include", Formula["openssl"].opt_include,
                    Formula["sqlite"].opt_include]
    library_dirs = [HOMEBREW_PREFIX/"lib", Formula["openssl"].opt_lib,
                    Formula["sqlite"].opt_lib]

    # Again tcl-tk
    include_dirs << Formula["tcl-tk"].opt_include
    library_dirs << Formula["tcl-tk"].opt_lib


    cfg = prefix/"Frameworks/Python.framework/Versions/#{xy}/lib/python#{xy}/distutils/distutils.cfg"

    cfg.atomic_write <<~EOS
      [install]
      prefix=#{HOMEBREW_PREFIX}

      [build_ext]
      include_dirs=#{include_dirs.join ":"}
      library_dirs=#{library_dirs.join ":"}
    EOS
  end

  def sitecustomize
    xy = (prefix/"Frameworks/Python.framework/Versions").children.min.basename.to_s

    <<~EOS
      # This file is created by Homebrew and is executed on each python startup.
      # Don't print from here, or else python command line scripts may fail!
      # <https://docs.brew.sh/Homebrew-and-Python>
      import re
      import os
      import sys

      if sys.version_info[0] != 3:
          # This can only happen if the user has set the PYTHONPATH for 3.x and run Python 2.x or vice versa.
          # Every Python looks at the PYTHONPATH variable and we can't fix it here in sitecustomize.py,
          # because the PYTHONPATH is evaluated after the sitecustomize.py. Many modules (e.g. PyQt4) are
          # built only for a specific version of Python and will fail with cryptic error messages.
          # In the end this means: Don't set the PYTHONPATH permanently if you use different Python versions.
          exit('Your PYTHONPATH points to a site-packages dir for Python 3.x but you are running Python ' +
               str(sys.version_info[0]) + '.x!\\n     PYTHONPATH is currently: "' + str(os.environ['PYTHONPATH']) + '"\\n' +
               '     You should `unset PYTHONPATH` to fix this.')

      # Only do this for a brewed python:
      if os.path.realpath(sys.executable).startswith('#{rack}'):
          # Shuffle /Library site-packages to the end of sys.path
          library_site = '/Library/Python/#{xy}/site-packages'
          library_packages = [p for p in sys.path if p.startswith(library_site)]
          sys.path = [p for p in sys.path if not p.startswith(library_site)]
          # .pth files have already been processed so don't use addsitedir
          sys.path.extend(library_packages)

          # the Cellar site-packages is a symlink to the HOMEBREW_PREFIX
          # site_packages; prefer the shorter paths
          long_prefix = re.compile(r'#{rack}/[0-9\._abrc]+/Frameworks/Python\.framework/Versions/#{xy}/lib/python#{xy}/site-packages')
          sys.path = [long_prefix.sub('#{HOMEBREW_PREFIX/"lib/python#{xy}/site-packages"}', p) for p in sys.path]

          # Set the sys.executable to use the opt_prefix, unless explicitly set
          # with PYTHONEXECUTABLE:
          if 'PYTHONEXECUTABLE' not in os.environ:
              sys.executable = '#{opt_bin}/python#{xy}'
    EOS
  end

  def caveats
    if prefix.exist?
      xy = (prefix/"Frameworks/Python.framework/Versions").children.min.basename.to_s
    else
      xy = version.to_s.slice(/(3\.\d)/) || "3.7"
    end
    <<~EOS
      Python has been installed as
        #{HOMEBREW_PREFIX}/bin/python3

      Unversioned symlinks `python`, `python-config`, `pip` etc. pointing to
      `python3`, `python3-config`, `pip3` etc., respectively, have been installed into
        #{opt_libexec}/bin

      If you need Homebrew's Python 2.7 run
        brew install python@2

      You can install Python packages with
        pip3 install <package>
      They will install into the site-package directory
        #{HOMEBREW_PREFIX/"lib/python#{xy}/site-packages"}

      See: https://docs.brew.sh/Homebrew-and-Python
    EOS
  end

  test do
    xy = (prefix/"Frameworks/Python.framework/Versions").children.min.basename.to_s
    # Check if sqlite is ok, because we build with --enable-loadable-sqlite-extensions
    # and it can occur that building sqlite silently fails if OSX's sqlite is used.
    system "#{bin}/python#{xy}", "-c", "import sqlite3"
    # Check if some other modules import. Then the linked libs are working.
    system "#{bin}/python#{xy}", "-c", "import tkinter; root = tkinter.Tk()"
    system "#{bin}/python#{xy}", "-c", "import _gdbm"
    system "#{bin}/python#{xy}", "-c", "import zlib"
    system bin/"pip3", "list", "--format=columns"
  end
end

__END__
diff --git a/setup.py b/setup.py
index 2779658..902d0eb 100644
--- a/setup.py
+++ b/setup.py
@@ -1699,9 +1699,6 @@ class PyBuildExt(build_ext):
         # Rather than complicate the code below, detecting and building
         # AquaTk is a separate method. Only one Tkinter will be built on
         # Darwin - either AquaTk, if it is found, or X11 based Tk.
-        if (host_platform == 'darwin' and
-            self.detect_tkinter_darwin(inc_dirs, lib_dirs)):
-            return

         # Assume we haven't found any of the libraries or include files
         # The versions with dots are used on Unix, and the versions without
@@ -1747,22 +1744,6 @@ class PyBuildExt(build_ext):
             if dir not in include_dirs:
                 include_dirs.append(dir)

-        # Check for various platform-specific directories
-        if host_platform == 'sunos5':
-            include_dirs.append('/usr/openwin/include')
-            added_lib_dirs.append('/usr/openwin/lib')
-        elif os.path.exists('/usr/X11R6/include'):
-            include_dirs.append('/usr/X11R6/include')
-            added_lib_dirs.append('/usr/X11R6/lib64')
-            added_lib_dirs.append('/usr/X11R6/lib')
-        elif os.path.exists('/usr/X11R5/include'):
-            include_dirs.append('/usr/X11R5/include')
-            added_lib_dirs.append('/usr/X11R5/lib')
-        else:
-            # Assume default location for X11
-            include_dirs.append('/usr/X11/include')
-            added_lib_dirs.append('/usr/X11/lib')
-
         # If Cygwin, then verify that X is installed before proceeding
         if host_platform == 'cygwin':
             x11_inc = find_file('X11/Xlib.h', [], include_dirs)
@@ -1786,10 +1767,6 @@ class PyBuildExt(build_ext):
         if host_platform in ['aix3', 'aix4']:
             libs.append('ld')

-        # Finally, link with the X11 libraries (not appropriate on cygwin)
-        if host_platform != "cygwin":
-            libs.append('X11')
-
         ext = Extension('_tkinter', ['_tkinter.c', 'tkappinit.c'],
                         define_macros=[('WITH_APPINIT', 1)] + defs,
                         include_dirs = include_dirs,

This is python3.7.5 installed, replacing the url on line 4 first for different versions such as version 3.7.4

url "https://www.python.org/ftp/python/3.7.5/Python-3.7.5.tar.xz"
url "https://www.python.org/ftp/python/3.7.4/Python-3.7.4.tar.xz"//针对python3.7.4

Then enter the url “https://www.python.org/ftp/python/3.7.4/Python-3.7.4.tar.xz” to download xz file to the desktop,
The terminal then runs as follows to get the sha256 value matching the corresponding Python version

openssl dgst -sha256 /Desktop/Python-3.7.4.tar.xz

Then replace the 5 sha256 "e85a76ea9f3d6c485ec1780fca4e500725a4a7bbc63c78ebc44170de9b619d94 </ code>"
1.4 install python
The terminal input the following command and wait for the completion of installation

HOMEBREW_NO_AUTO_UPDATE=1 brew install --build-from-source python

1.5 inspection
Remember to set the default Python path for brew installation, and the terminal therefore enters the following command

python3
import tkinter
tkinter.TkVersion

You should see the tcl8.6 version of output python3

How to Use pychar to run tensorflow and virtualenv (How to install tensorflow)

Run TensorFlow using Pycharm, and Virtualenv installs TensorFlow
@(Machine Learning with Python)
System: MacOS 10.13
This section focuses on two issues:
Create a virtual environment with virtualenv and install TensorFlow in this environment to configure the interpreter under Pycharm and run the training code under Pycharm
Virtualenv + Tensorflow
TensorFlow can be installed under the Virtualenv virtual environment, or under the Anaconda virtual environment, or under Docker. The specific installation can be found on the TF official website, but the TF official website can be accessed only by scientific surfing on the Internet.
Here’s an excerpt of how Virtualenv is installed.

virtualenv --system-site-packages ~/tensorflow # Create a new virtual environment called tensorflow in your personal home directory.

source tensorflow/bin/activate # Enter the virtual environment.

easy_install -U pip # This step can be omitted if you already have a pip tool.

pip install --upgrade tensorflow # pip install tensorflow

deactivate # Exit the virtual environment

Pycharm configuration
Python script code needs to be executed under the interpreter, so we need to perform the following steps:
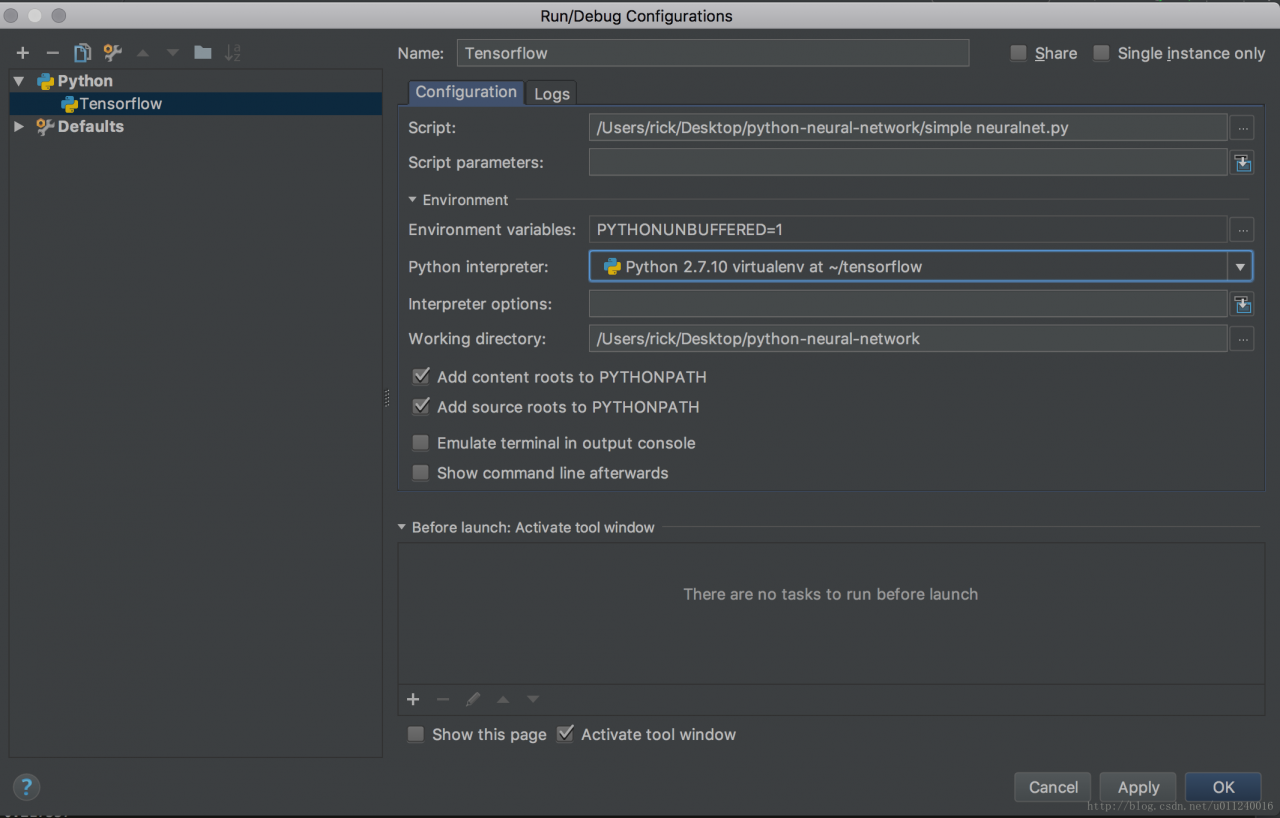
Pycharm -> Preference -> Project: Project Interpreter below Project Name click the lower triangle arrow to the right of the selection bar -> show all -> Click on the “+” – & gt; Add Local selects “~/tensorflow /bin/Python” and waits for loading
After loading, the red wavy line below the import tensorflow as tf in the code disappears, but the buttons in the column where the code runs are all gray.
Don’t understand why at first, then understand, the most critical place is here…
This is because there is no optional execution configuration, so you need to manually edit it.

If there is no configuration, there is a Default. Clicking the “+” at the top will generate an interpretation environment configuration that can be used to execute the code based on the Default configuration.
Specifies that the script to be executed (entry) selects the interpreter
The previous set of the interpreter, here can also be re-selected, choose not installed TF interpreter, the code containing TF code will not be interpreted correctly.
As for the choice of the Python interpreter under the Anaconda virtual environment, there is no difference between Virtualenv and Virtualenv.
For example, I use Virtualenv in ~/</ code> to create the virtual environment, called tensorflow Anaconda is /Applications/Anaconda envs/python27 </ code>, as well as the choice of approach: is to find the bin/python </ code>.
As I understand it, the Python interpreter in the virtual environment is configured independently, but you can also use some of the tools of the global installation. With this independent interpreter, you can isolate the installation of some differentiated things, such as different versions of software packages, etc.
conda env list
Lists the virtual environment installed by Anaconda.
source activate envname
source deactivate

Ubuntu install psycopg2 times: fatal error: libpq Fe. H: there is no solution to that file or directory

Said the postgres installation on a blog, try to use python operation below, according to the net friend introduction, the need to install psycopg2:https://www.jianshu.com/p/646f4c19b0f3?utm_campaign=haruki

pip install psycopg2

But it said wrong:

./psycopg/psycopg.h:36:10: fatal error: libpq-fe.h: There's no such file or directory.
   #include <libpq-fe.h>
            ^~~~~~~~~~~~
  compilation terminated.

Hehehehehehe, these people are not tested?
Search a netizen’s solution:

sudo apt-get install libpq-dev

Then it can be normally installed, ha ha ha, really let a person speechless.

How to Fix creating process error during software installation

This is caused by inconsistency between the system environment variables and the settings in the software.
Solution: "Right-click my computer → Properties → Advanced → Environment variables", if the following environment variable value is: %USERPROFILE%\AppData\Local\Temp, then change all the values to C:\AppData\Local\Temp, and then change the value to C:\AppData\Local\Temp, and then change the value to C:\AppData\Local\Temp. Run the installer once, basically without a problem.