preface
When learning graphics programming, in fact, in MacOS programming environment is the default Xcode, Windows and often use Visual Studio. But since I often have to switch programming between Windows and MacOS, occasionally switch to Ubuntu, and don’t want to switch between different IDEs repeatedly, I chose CLion. The nice thing about CLion is that it’s cross-platform.
Today, I spent several hours configuring the development environment of CLion +Vulkan on MacOS, which paved the way for learning Vulkan later. Those who know CLion know that C/C++ programming of CLion uses CMAKE to do engineering construction, which can force me to use a cross-platform architecture scheme, so that I can know the underlying engineering construction like the palm of my hand, and can also promote me to further understand and learn CMAKE.
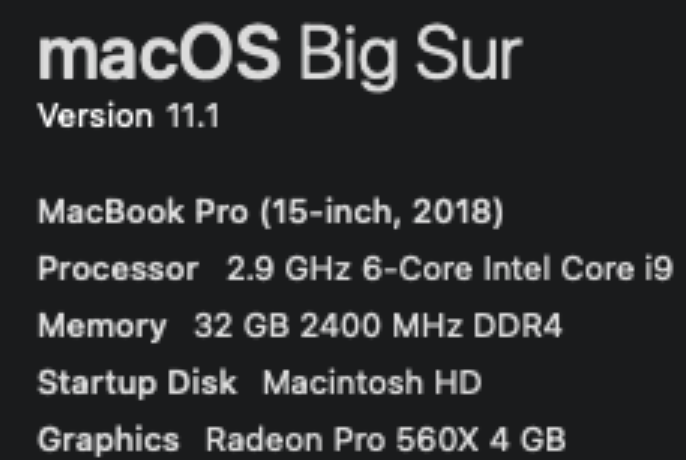
My work environment
MacOS: Big Sur
gcc version
~/C/V/shaders ❯❯❯ gcc --versionConfigured with: --prefix=/Applications/Xcode.app/Contents/Developer/usr --with-gxx-include-dir=/Library/Developer/CommandLineTools/SDKs/MacOSX.sdk/usr/include/c++/4.2.1Apple clang version 12.0.0 (clang-1200.0.32.27)Target: x86_64-apple-darwin20.2.0Thread model: posixInstalledDir: /Applications/Xcode.app/Contents/Developer/Toolchains/XcodeDefault.xctoolchain/usr/bin
Configure the Lib required by Vulkan
Vulkan MacOS configuration mainly refers to the Vulkan Tutorial Development Environment. However, many MacOS articles only provide Xcode configuration, but the dependency on the file package is the same. Three main things are needed: Vulkan SDK, GLFW, and GLM.
Let’s take a look at how to install each of these.
Vulkan SDK installation
Vulkan SDK can be downloaded from https://vulkan.lunarg.com/sdk/home directly. See Getting Started with the MacOS Vulkan SDK for details on the installation process. In the process of specific installation, I adopted the step of Install the SDK-alternate method using system paths. Run the Python installation script that comes with the SDK to install:
sudo ./install_vulkan.py
The script is to install the Vulkan SDK libraries and header files in /usr/local.
/usr/local/lib is one of the directories that linker searches for required libraries. The lib installed by the user is stored in the /usr/local folder. The CLion search library is based mainly on the directories specified by the include_directories defined by Cmake.
Copying /Volumes/vulkansdk-macos-1.2.162.0/macOS/bin/spirv-opt to /usr/local/binCopying /Volumes/vulkansdk-macos-1.2.162.0/macOS/bin/vkvia to /usr/local/binCopying /Volumes/vulkansdk-macos-1.2.162.0/macOS/lib/cmake/SPVRemapperTargets-release.cmake to /usr/local/lib/cmake/vulkanCopying /Volumes/vulkansdk-macos-1.2.162.0/macOS/lib/cmake/SPIRV-Tools to /usr/local/lib/cmake/vulkan/SPIRV-ToolsCopying /Volumes/vulkansdk-macos-1.2.162.0/macOS/bin/spirv-link to /usr/local/binCopying /Volumes/vulkansdk-macos-1.2.162.0/macOS/bin/spirv-cfg to /usr/local/binCopying /Volumes/vulkansdk-macos-1.2.162.0/macOS/lib/libspirv-cross-c-shared.0.44.0.dylib to /usr/local/libCopying /Volumes/vulkansdk-macos-1.2.162.0/macOS/bin/spirv-val to /usr/local/binCopying /Volumes/vulkansdk-macos-1.2.162.0/macOS/include/vulkan to /usr/local/include/vulkanCopying /Volumes/vulkansdk-macos-1.2.162.0/macOS/lib/cmake/SPIRVTargets.cmake to /usr/local/lib/cmake/vulkanCopying /Volumes/vulkansdk-macos-1.2.162.0/macOS/lib/libSPIRV.a to /usr/local/libCopying /Volumes/vulkansdk-macos-1.2.162.0/macOS/bin/MoltenVKShaderConverter to /usr/local/binCopying /Volumes/vulkansdk-macos-1.2.162.0/macOS/lib/cmake/glslangTargets-release.cmake to /usr/local/lib/cmake/vulkanCopying /Volumes/vulkansdk-macos-1.2.162.0/macOS/share/vulkan to /usr/local/share/vulkanCopying /Volumes/vulkansdk-macos-1.2.162.0/macOS/lib/libshaderc_util.a to /usr/local/libCopying /Volumes/vulkansdk-macos-1.2.162.0/macOS/lib/libSPIRV-Tools.a to /usr/local/libCopying /Volumes/vulkansdk-macos-1.2.162.0/macOS/bin/vulkaninfo to /usr/local/binCopying /Volumes/vulkansdk-macos-1.2.162.0/macOS/bin/spirv-as to /usr/local/binCopying /Volumes/vulkansdk-macos-1.2.162.0/macOS/lib/libSPIRV-Tools-opt.a to /usr/local/libCopying /Volumes/vulkansdk-macos-1.2.162.0/macOS/lib/cmake/SPIRVTargets-release.cmake to /usr/local/lib/cmake/vulkanCopying /Volumes/vulkansdk-macos-1.2.162.0/Applications/vkconfig.app to /Applications/vkconfig.appCopying /Volumes/vulkansdk-macos-1.2.162.0/macOS/lib/cmake/glslangValidatorTargets.cmake to /usr/local/lib/cmake/vulkanCopying /Volumes/vulkansdk-macos-1.2.162.0/macOS/lib/cmake/OGLCompilerTargets.cmake to /usr/local/lib/cmake/vulkanCopying /Volumes/vulkansdk-macos-1.2.162.0/macOS/lib/libspirv-cross-c-shared.dylib to /usr/local/libCopying /Volumes/vulkansdk-macos-1.2.162.0/macOS/lib/libspirv-cross-cpp.a to /usr/local/libCopying /Volumes/vulkansdk-macos-1.2.162.0/macOS/bin/glslc to /usr/local/binCopying /Volumes/vulkansdk-macos-1.2.162.0/macOS/lib/cmake/HLSLTargets.cmake to /usr/local/lib/cmake/vulkanCopying /Volumes/vulkansdk-macos-1.2.162.0/Applications/vkcubepp.app to /Applications/vkcubepp.appCopying /Volumes/vulkansdk-macos-1.2.162.0/macOS/lib/libGenericCodeGen.a to /usr/local/libCopying /Volumes/vulkansdk-macos-1.2.162.0/macOS/lib/libspirv-cross-c-shared.0.dylib to /usr/local/libCopying /Volumes/vulkansdk-macos-1.2.162.0/macOS/lib/libspirv-cross-glsl.a to /usr/local/libCopying /Volumes/vulkansdk-macos-1.2.162.0/macOS/lib/libspirv-cross-msl.a to /usr/local/libCopying /Volumes/vulkansdk-macos-1.2.162.0/macOS/bin/spirv-remap to /usr/local/binCopying /Volumes/vulkansdk-macos-1.2.162.0/macOS/bin/spirv-dis to /usr/local/binCopying /Volumes/vulkansdk-macos-1.2.162.0/macOS/include/spirv_cross to /usr/local/include/spirv_crossCopying /Volumes/vulkansdk-macos-1.2.162.0/macOS/lib/cmake/SPIRV-Tools-link to /usr/local/lib/cmake/vulkan/SPIRV-Tools-linkCopying /Volumes/vulkansdk-macos-1.2.162.0/macOS/lib/cmake/SPVRemapperTargets.cmake to /usr/local/lib/cmake/vulkanCopying /Volumes/vulkansdk-macos-1.2.162.0/macOS/bin/dxc-3.7 to /usr/local/binCopying /Volumes/vulkansdk-macos-1.2.162.0/macOS/lib/cmake/SPIRV-Tools-opt to /usr/local/lib/cmake/vulkan/SPIRV-Tools-optCopying /Volumes/vulkansdk-macos-1.2.162.0/macOS/lib/cmake/OGLCompilerTargets-release.cmake to /usr/local/lib/cmake/vulkanCopying /Volumes/vulkansdk-macos-1.2.162.0/macOS/bin/glslangValidator to /usr/local/binCopying /Volumes/vulkansdk-macos-1.2.162.0/macOS/bin/spirv-lesspipe.sh to /usr/local/binCopying /Volumes/vulkansdk-macos-1.2.162.0/Applications/vkcube.app to /Applications/vkcube.appCopying /Volumes/vulkansdk-macos-1.2.162.0/macOS/lib/cmake/HLSLTargets-release.cmake to /usr/local/lib/cmake/vulkanCopying /Volumes/vulkansdk-macos-1.2.162.0/macOS/lib/cmake/spirv-remapTargets.cmake to /usr/local/lib/cmake/vulkanCopying /Volumes/vulkansdk-macos-1.2.162.0/macOS/lib/cmake/glslangValidatorTargets-release.cmake to /usr/local/lib/cmake/vulkanCopying /Volumes/vulkansdk-macos-1.2.162.0/macOS/lib/libSPIRV-Tools-link.a to /usr/local/libCopying /Volumes/vulkansdk-macos-1.2.162.0/macOS/lib/libspirv-cross-c.a to /usr/local/libCopying /Volumes/vulkansdk-macos-1.2.162.0/macOS/bin/spirv-reflect to /usr/local/binCopying /Volumes/vulkansdk-macos-1.2.162.0/Applications/vulkaninfo.app to /Applications/vulkaninfo.appCopying /Volumes/vulkansdk-macos-1.2.162.0/macOS/lib/libspirv-cross-hlsl.a to /usr/local/libCopying /Volumes/vulkansdk-macos-1.2.162.0/macOS/include/shaderc to /usr/local/include/shadercCopying /Volumes/vulkansdk-macos-1.2.162.0/macOS/lib/libSPIRV-Tools-reduce.a to /usr/local/libCopying /Volumes/vulkansdk-macos-1.2.162.0/macOS/lib/libshaderc_combined.a to /usr/local/libCopying /Volumes/vulkansdk-macos-1.2.162.0/macOS/lib/libspirv-cross-util.a to /usr/local/libCopying /Volumes/vulkansdk-macos-1.2.162.0/macOS/lib/libvulkan.1.2.162.dylib to /usr/local/libCopying /Volumes/vulkansdk-macos-1.2.162.0/macOS/lib/libOGLCompiler.a to /usr/local/libCopying /Volumes/vulkansdk-macos-1.2.162.0/macOS/lib/libshaderc_shared.1.dylib to /usr/local/libCopying /Volumes/vulkansdk-macos-1.2.162.0/macOS/lib/libSPIRV-Tools-shared.dylib to /usr/local/libCopying /Volumes/vulkansdk-macos-1.2.162.0/macOS/lib/libvulkan.dylib to /usr/local/libCopying /Volumes/vulkansdk-macos-1.2.162.0/macOS/lib/libOSDependent.a to /usr/local/libCopying /Volumes/vulkansdk-macos-1.2.162.0/macOS/lib/libshaderc.a to /usr/local/libCopying /Volumes/vulkansdk-macos-1.2.162.0/macOS/include/spirv-tools to /usr/local/include/spirv-toolsCopying /Volumes/vulkansdk-macos-1.2.162.0/macOS/lib/cmake/SPIRV-Tools-reduce to /usr/local/lib/cmake/vulkan/SPIRV-Tools-reduceCopying /Volumes/vulkansdk-macos-1.2.162.0/macOS/lib/libglslang.a to /usr/local/libCopying /Volumes/vulkansdk-macos-1.2.162.0/macOS/lib/libdxcompiler.3.7.dylib to /usr/local/libCopying /Volumes/vulkansdk-macos-1.2.162.0/macOS/lib/libMoltenVK.dylib to /usr/local/libCopying /Volumes/vulkansdk-macos-1.2.162.0/macOS/lib/libspirv-cross-reflect.a to /usr/local/libCopying /Volumes/vulkansdk-macos-1.2.162.0/macOS/lib/libHLSL.a to /usr/local/libCopying /Volumes/vulkansdk-macos-1.2.162.0/macOS/lib/libdxcompiler.dylib to /usr/local/libCopying /Volumes/vulkansdk-macos-1.2.162.0/macOS/bin/spirv-cross to /usr/local/binCopying /Volumes/vulkansdk-macos-1.2.162.0/macOS/lib/libVkLayer_khronos_validation.dylib to /usr/local/libCopying /Volumes/vulkansdk-macos-1.2.162.0/macOS/include/glslang to /usr/local/include/glslangCopying /Volumes/vulkansdk-macos-1.2.162.0/macOS/bin/spirv-reduce to /usr/local/binCopying /Volumes/vulkansdk-macos-1.2.162.0/macOS/lib/cmake/OSDependentTargets.cmake to /usr/local/lib/cmake/vulkanCopying /Volumes/vulkansdk-macos-1.2.162.0/macOS/bin/dxc to /usr/local/binCopying /Volumes/vulkansdk-macos-1.2.162.0/macOS/lib/libspirv-cross-core.a to /usr/local/libCopying /Volumes/vulkansdk-macos-1.2.162.0/macOS/lib/libSPVRemapper.a to /usr/local/libCopying /Volumes/vulkansdk-macos-1.2.162.0/macOS/lib/libVkLayer_api_dump.dylib to /usr/local/libCopying /Volumes/vulkansdk-macos-1.2.162.0/macOS/lib/cmake/spirv-remapTargets-release.cmake to /usr/local/lib/cmake/vulkanCopying /Volumes/vulkansdk-macos-1.2.162.0/macOS/lib/cmake/OSDependentTargets-release.cmake to /usr/local/lib/cmake/vulkanCopying /Volumes/vulkansdk-macos-1.2.162.0/macOS/lib/libvulkan.1.dylib to /usr/local/libCopying /Volumes/vulkansdk-macos-1.2.162.0/macOS/lib/cmake/glslangTargets.cmake to /usr/local/lib/cmake/vulkanCopying /Volumes/vulkansdk-macos-1.2.162.0/macOS/lib/libshaderc_shared.dylib to /usr/local/libCopying /Volumes/vulkansdk-macos-1.2.162.0/macOS/lib/libMachineIndependent.a to /usr/local/lib
Install GLFW
GLFW is used to create Windows, which supports different operating systems. Both OpenGL and Vulkan are only responsible for rendering graphics to the desktop in memory for display on the screen. As for the final creation of the desktop for each operating system, GL and Vulkan are not responsible for it. That’s what GLFW does. On Apple, GLFW can be installed through BREW. My Mac already had BREW installed, so I simply installed GLFW directly through BREW.
brew install glfw
Install the GLM
Vulkan also does not contain a mathematical library for linear algebra. So we’re going to have to use GLM when we change the graph. He can also install it through BREW.
brew install glm
After installing all the required libs above, we can set our own environment variables in a shell profile. These set environment variables will be used to indicate the path to which libraries to search when I use the CMAKE configuration file in the CLion IDE. Since I’m using ZSH, I added the GLFW and GLM lib paths to ~/.zprofile.
export GLFW_HOME="/usr/local/Cellar/glfw/3.3.2"export GLM_HOME="/usr/local/include/glm"
Note: BREW will place all installations in a directory called CELLAR, and then create soft links in /usr/local to connect to these directories under CELLAR.
And then we’re going to reroute my.zprofile.
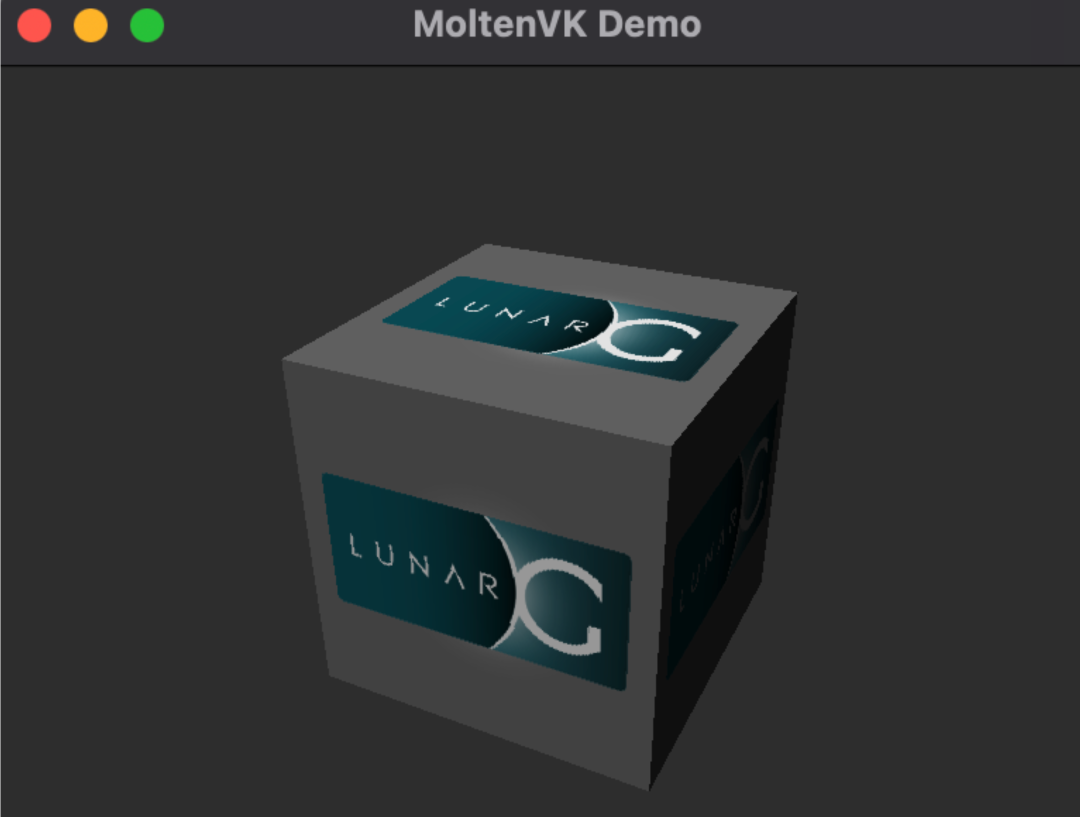
When everything is configured, you can call the VKSDK command vkvia</code bbb> check if Vulkan was successfully installed.
You can also run the Vulkan SDK's Cube app to check it out.
Create the CLion project
Let's create a Vulkandemo project. Once created, the project is very simple, with a single HelloWorld code for main.cpp.
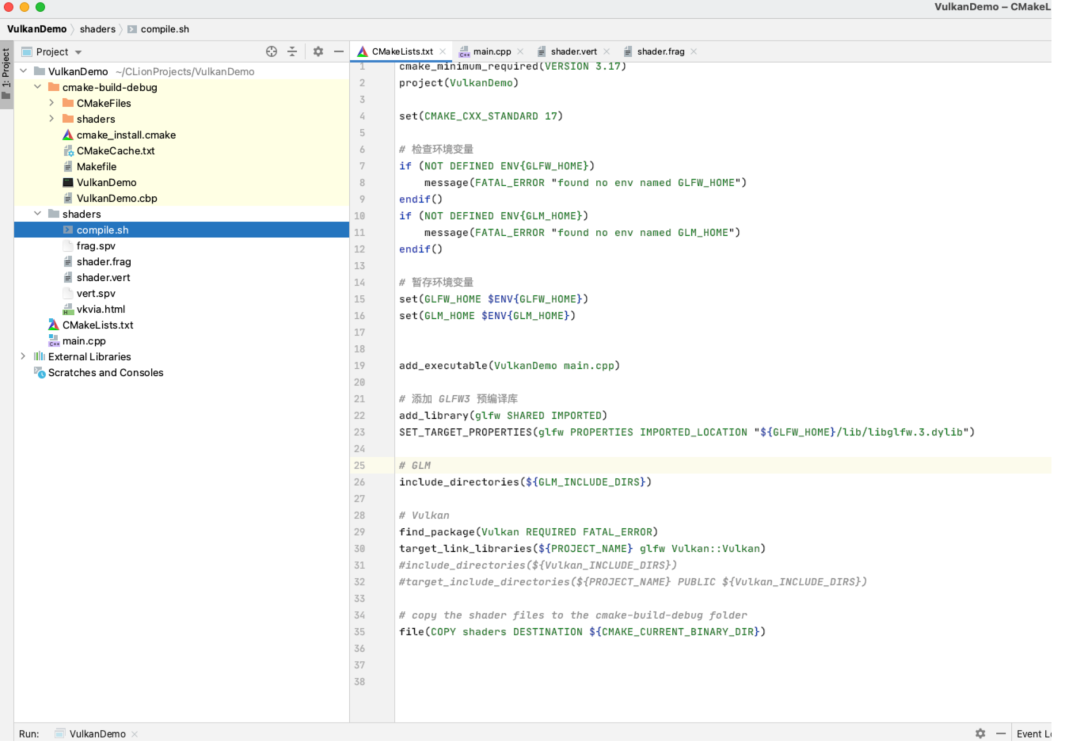
Let's draw a triangle here, so let's configure cmake file to make sure that all the header files and libraries we need are loaded correctly.
cmake_minimum_required(VERSION 3.17)project(VulkanDemo)set(CMAKE_CXX_STANDARD 17)# Check environment variables if (NOT DEFINED ENV{GLFW_HOME}) message(FATAL_ERROR "found no env named GLFW_HOME")endif()if (NOT DEFINED ENV{GLM_HOME}) message(FATAL_ERROR "found no env named GLM_HOME")endif()# 暂存环境变量set(GLFW_HOME $ENV{GLFW_HOME})set(GLM_HOME $ENV{GLM_HOME})add_executable(VulkanDemo main.cpp)# 添加 GLFW3 预编译库add_library(glfw SHARED IMPORTED)SET_TARGET_PROPERTIES(glfw PROPERTIES IMPORTED_LOCATION "${GLFW_HOME}/lib/libglfw.3.dylib")# GLMinclude_directories(${GLM_INCLUDE_DIRS})# Vulkanfind_package(Vulkan REQUIRED FATAL_ERROR)target_link_libraries(${PROJECT_NAME} glfw Vulkan::Vulkan)#include_directories(${Vulkan_INCLUDE_DIRS})#target_include_directories(${PROJECT_NAME} PUBLIC ${Vulkan_INCLUDE_DIRS})# copy the shader files to the cmake-build-debug folderfile(COPY shaders DESTINATION ${CMAKE_CURRENT_BINARY_DIR})
Once cmake is configured we start drawing our triangle. This article uses the Vulkan Tutorial code directly. Copy the code to main.cpp</code bbb> We're going to use two shaders here because we're drawing triangles. The code for shader comes from this section. So we need to add two shader files and a compile script to help us generate the spir-v files.
file(COPY shaders DESTINATION ${CMAKE_CURRENT_BINARY_DIR})</code bbb>because calling openfile in main needs to open our shader file. When Clion runs the binaries of the project, it assumes that the resource files are in the cmake-build-debug</code bbb>lder. So we must copy the shader folder to cmake-build-debug</code bbb>
Take a look at what your project as a whole looks like:
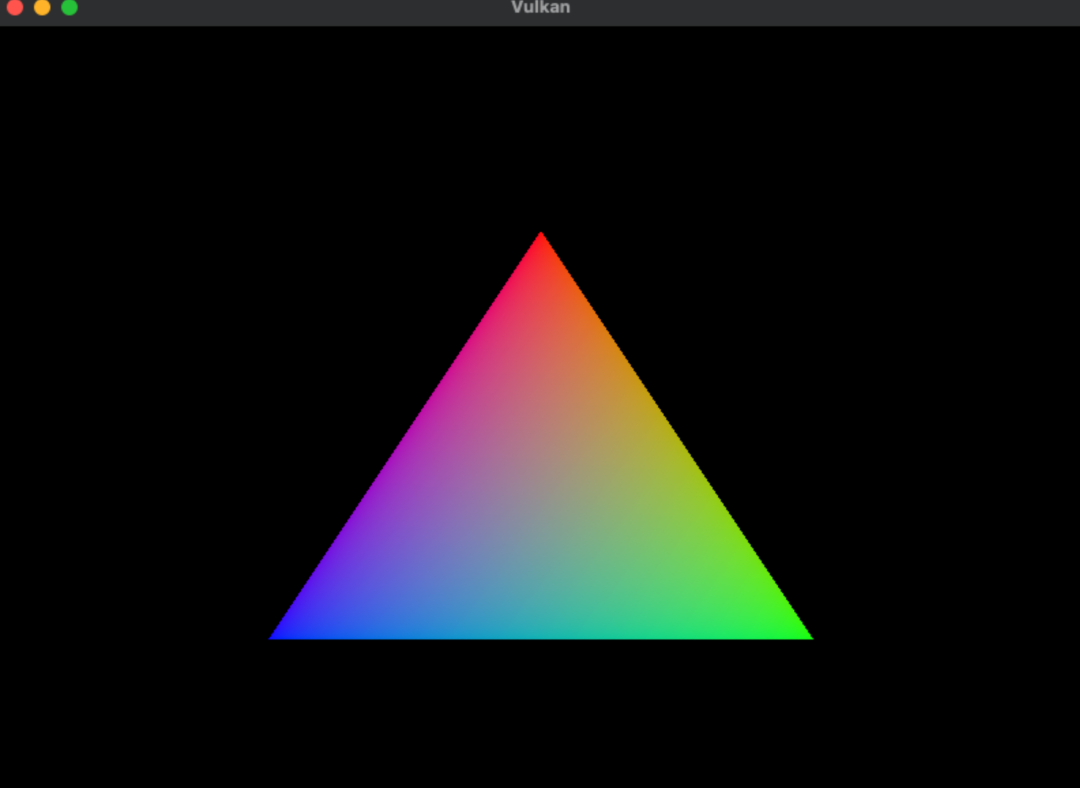
Okay, finally, let's run our Vulkandemo program in CLion. A triangle was born!