This article is written by XHZ1234 (Xu Hongzhi), reprint please indicate the source.
http://blog.csdn.net/xhz1234/article/details/38349623
Recently in the OpenGL super bible fifth edition, the system for Ubuntu, want to pass the Codeblocks running instance of the book, encountered many problems, have been solved, now share operation steps are as follows:
1. Establish a basic compilation environment
sudo apt-getinstall build-essential
2. Install OpenGL Library
sudo apt-getinstall libgl1-mesa-dev
Install OpenGL Utilities
sudo apt-getinstall libglu1-mesa-dev
4. Install OpenGL Utility Toolkit
sudo apt-get installfreeglut3-dev
5. Install the Codeblocks
Install the Code::Blocks IDE in the Ubuntu Software Center
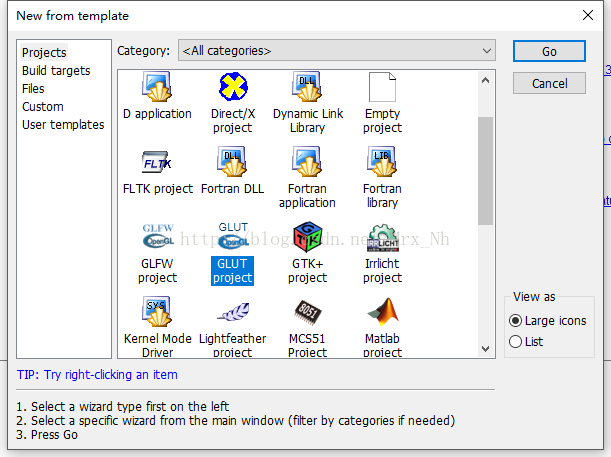
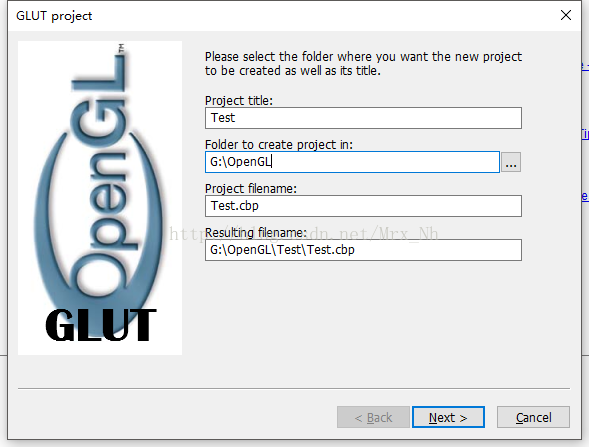
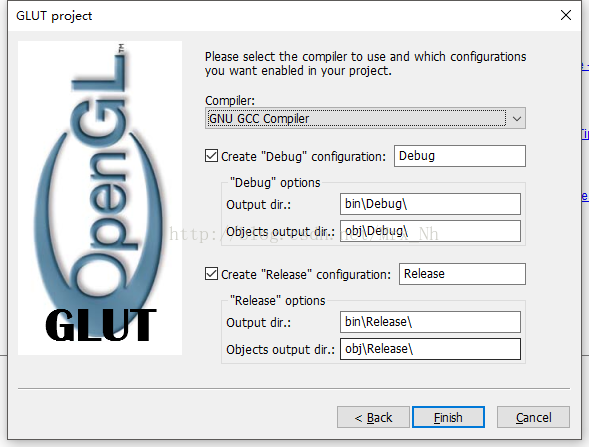
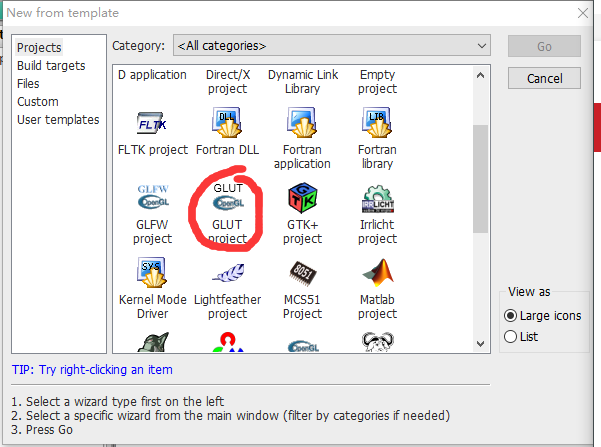
6. Create a new Codeblocks project
New Console Application Project –>; Select C++ Language, such as the project name HelloWorld
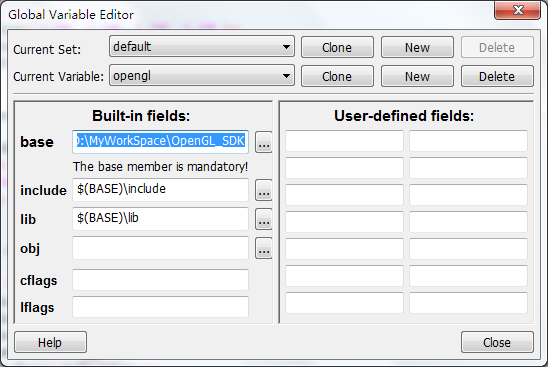
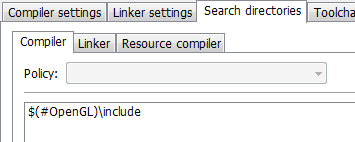
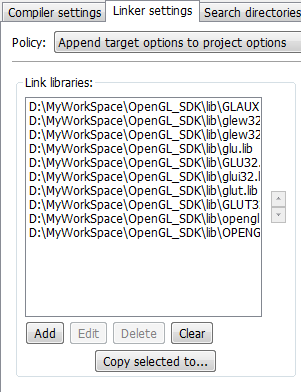
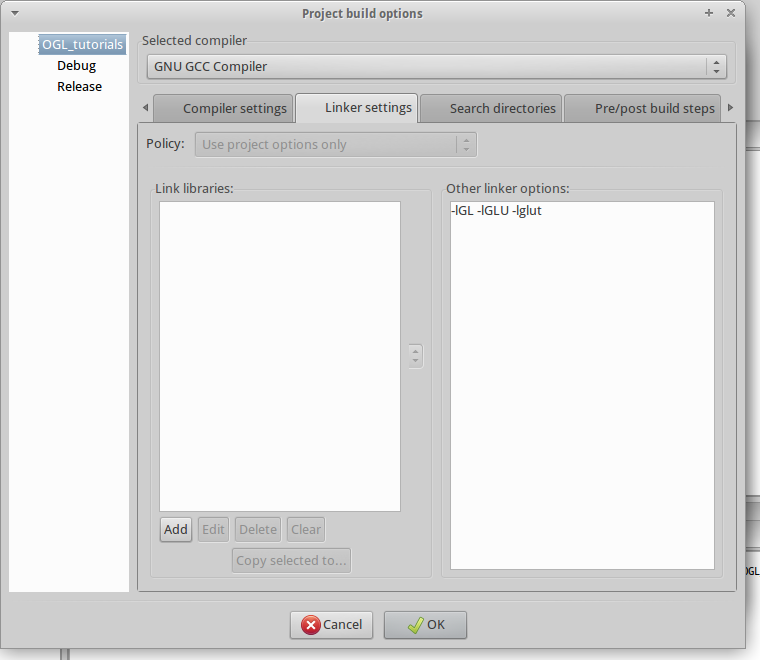
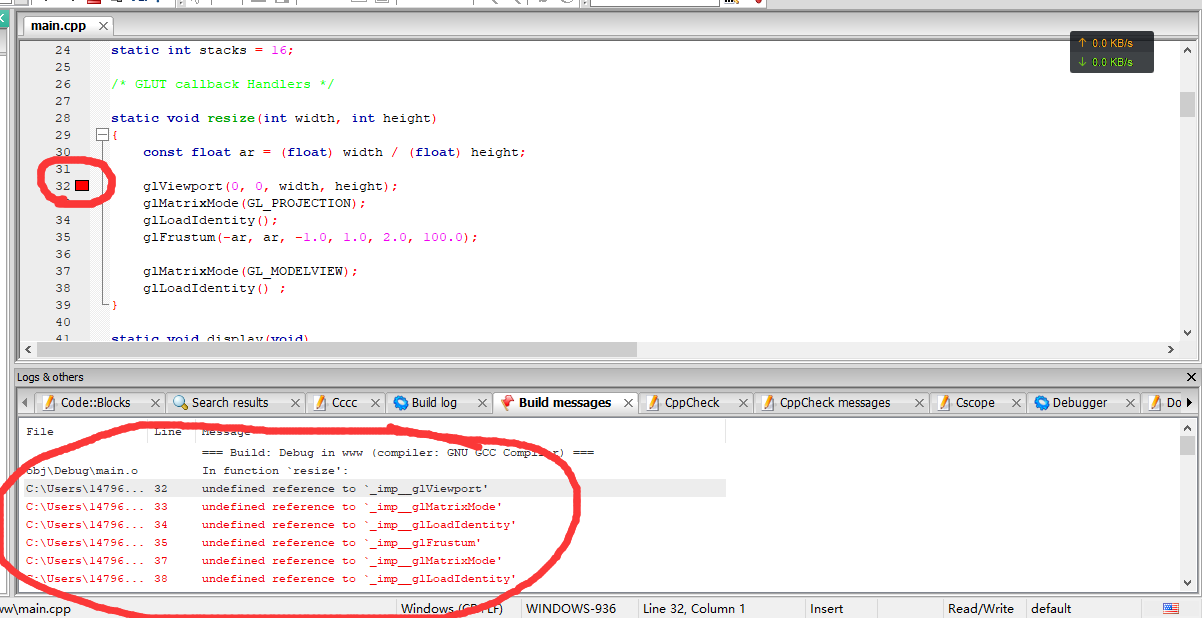
7. Include OpenGL/ GLUT related link libraries
Project a Build Options a linkerSettings
Add file: libgl. so libGlut.so libGlut.so
[1 ~ 7 steps can refer to blog http://blog.csdn.net/jarvischu/article/details/8226938, step 6 must establish the Console application and is a c + + language]
8. Download freeglutAndGLTools
The address is: http://download.csdn.net/detail/xhz1234/7707213,
. Will download GLToolsandFreeglut. Tar. Xz decompression freeglut – server and GLTools, these two files in the directory and copy the HelloWorld directory to the new project.
9. Add the example code
In the case of SphereWorld4 in the OpenGL Superbib (Version 5), copy the contents of SphereWorld4.cpp to main.cpp in the new project (or you can remove main.cpp and copy SphereWorld4.cpp directly to the HelloWorld project), and then Codeblocks adds these files.
10. The modified SphereWorld4. CPP
The code is shown in red:
// SphereWorld.cpp
// OpenGL SuperBible
// New and improved (performance) sphere world
// Program by Richard S. Wright Jr.
// SphereWorld.cpp
// OpenGL SuperBible
// New and improved (performance) sphere world
// Program by Richard S. Wright Jr.
<span style="color:#FF0000;">#include "./GLTools/include/GL/glew.h"
#include "./GLTools/include/GLTools.h"
#include "./GLTools/include/GLShaderManager.h"
#include "./GLTools/include/GLFrustum.h"
#include "./GLTools/include/GLBatch.h"
#include "./GLTools/include/GLMatrixStack.h"
#include "./GLTools/include/GLGeometryTransform.h"
#include "./GLTools/include/GLTools.h"
#include "./GLTools/include/StopWatch.h"
</span>
#include <math.h>
#include <stdio.h>
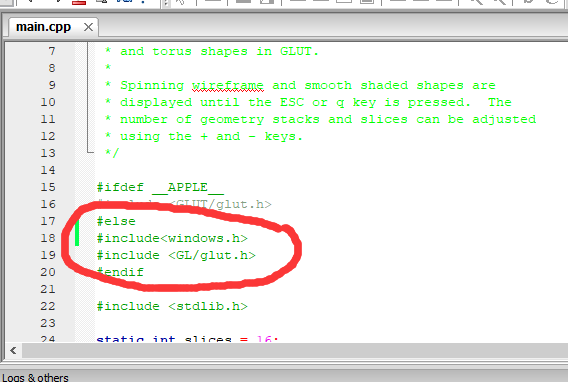
#ifdef __APPLE__
#include <glut/glut.h>
#else
#define FREEGLUT_STATIC
#include <GL/glut.h>
#endif
#define NUM_SPHERES 50
GLFrame spheres[NUM_SPHERES];
GLShaderManager shaderManager; // Shader Manager
GLMatrixStack modelViewMatrix; // Modelview Matrix
GLMatrixStack projectionMatrix; // Projection Matrix
GLFrustum viewFrustum; // View Frustum
GLGeometryTransform transformPipeline; // Geometry Transform Pipeline
GLTriangleBatch torusBatch;
GLBatch floorBatch;
GLTriangleBatch sphereBatch;
GLFrame cameraFrame;
//
// This function does any needed initialization on the rendering
// context.
void SetupRC()
{
// Initialze Shader Manager
shaderManager.InitializeStockShaders();
glEnable(GL_DEPTH_TEST);
glClearColor(0.0f, 0.0f, 0.0f, 1.0f);
// This makes a torus
gltMakeTorus(torusBatch, 0.4f, 0.15f, 30, 30);
// This make a sphere
gltMakeSphere(sphereBatch, 0.1f, 26, 13);
floorBatch.Begin(GL_LINES, 324);
for(GLfloat x = -20.0; x <= 20.0f; x+= 0.5) {
floorBatch.Vertex3f(x, -0.55f, 20.0f);
floorBatch.Vertex3f(x, -0.55f, -20.0f);
floorBatch.Vertex3f(20.0f, -0.55f, x);
floorBatch.Vertex3f(-20.0f, -0.55f, x);
}
floorBatch.End();
// Randomly place the spheres
for(int i = 0; i < NUM_SPHERES; i++) {
GLfloat x = ((GLfloat)((rand() % 400) - 200) * 0.1f);
GLfloat z = ((GLfloat)((rand() % 400) - 200) * 0.1f);
spheres[i].SetOrigin(x, 0.0f, z);
}
}
///
// Screen changes size or is initialized
void ChangeSize(int nWidth, int nHeight)
{
glViewport(0, 0, nWidth, nHeight);
// Create the projection matrix, and load it on the projection matrix stack
viewFrustum.SetPerspective(35.0f, float(nWidth)/float(nHeight), 1.0f, 100.0f);
projectionMatrix.LoadMatrix(viewFrustum.GetProjectionMatrix());
// Set the transformation pipeline to use the two matrix stacks
transformPipeline.SetMatrixStacks(modelViewMatrix, projectionMatrix);
}
// Called to draw scene
void RenderScene(void)
{
// Color values
static GLfloat vFloorColor[] = { 0.0f, 1.0f, 0.0f, 1.0f};
static GLfloat vTorusColor[] = { 1.0f, 0.0f, 0.0f, 1.0f };
static GLfloat vSphereColor[] = { 0.0f, 0.0f, 1.0f, 1.0f };
// Time Based animation
static CStopWatch rotTimer;
float yRot = rotTimer.GetElapsedSeconds() * 60.0f;
// Clear the color and depth buffers
glClear(GL_COLOR_BUFFER_BIT | GL_DEPTH_BUFFER_BIT);
// Save the current modelview matrix (the identity matrix)
modelViewMatrix.PushMatrix();
M3DMatrix44f mCamera;
cameraFrame.GetCameraMatrix(mCamera);
modelViewMatrix.PushMatrix(mCamera);
// Transform the light position into eye coordinates
M3DVector4f vLightPos = { 0.0f, 10.0f, 5.0f, 1.0f };
M3DVector4f vLightEyePos;
m3dTransformVector4(vLightEyePos, vLightPos, mCamera);
// Draw the ground
shaderManager.UseStockShader(GLT_SHADER_FLAT,
transformPipeline.GetModelViewProjectionMatrix(),
vFloorColor);
floorBatch.Draw();
for(int i = 0; i < NUM_SPHERES; i++) {
modelViewMatrix.PushMatrix();
modelViewMatrix.MultMatrix(spheres[i]);
shaderManager.UseStockShader(GLT_SHADER_POINT_LIGHT_DIFF, transformPipeline.GetModelViewMatrix(),
transformPipeline.GetProjectionMatrix(), vLightEyePos, vSphereColor);
sphereBatch.Draw();
modelViewMatrix.PopMatrix();
}
// Draw the spinning Torus
modelViewMatrix.Translate(0.0f, 0.0f, -2.5f);
// Save the Translation
modelViewMatrix.PushMatrix();
// Apply a rotation and draw the torus
modelViewMatrix.Rotate(yRot, 0.0f, 1.0f, 0.0f);
shaderManager.UseStockShader(GLT_SHADER_POINT_LIGHT_DIFF, transformPipeline.GetModelViewMatrix(),
transformPipeline.GetProjectionMatrix(), vLightEyePos, vTorusColor);
torusBatch.Draw();
modelViewMatrix.PopMatrix(); // "Erase" the Rotation from before
// Apply another rotation, followed by a translation, then draw the sphere
modelViewMatrix.Rotate(yRot * -2.0f, 0.0f, 1.0f, 0.0f);
modelViewMatrix.Translate(0.8f, 0.0f, 0.0f);
shaderManager.UseStockShader(GLT_SHADER_POINT_LIGHT_DIFF, transformPipeline.GetModelViewMatrix(),
transformPipeline.GetProjectionMatrix(), vLightEyePos, vSphereColor);
sphereBatch.Draw();
// Restore the previous modleview matrix (the identity matrix)
modelViewMatrix.PopMatrix();
modelViewMatrix.PopMatrix();
// Do the buffer Swap
glutSwapBuffers();
// Tell GLUT to do it again
glutPostRedisplay();
}
// Respond to arrow keys by moving the camera frame of reference
void SpecialKeys(int key, int x, int y)
{
float linear = 0.1f;
float angular = float(m3dDegToRad(5.0f));
if(key == GLUT_KEY_UP)
cameraFrame.MoveForward(linear);
if(key == GLUT_KEY_DOWN)
cameraFrame.MoveForward(-linear);
if(key == GLUT_KEY_LEFT)
cameraFrame.RotateWorld(angular, 0.0f, 1.0f, 0.0f);
if(key == GLUT_KEY_RIGHT)
cameraFrame.RotateWorld(-angular, 0.0f, 1.0f, 0.0f);
}
int main(int argc, char* argv[])
{
gltSetWorkingDirectory(argv[0]);
glutInit(&argc, argv);
glutInitDisplayMode(GLUT_DOUBLE | GLUT_RGB | GLUT_DEPTH);
glutInitWindowSize(800,600);
glutCreateWindow("OpenGL SphereWorld");
glutSpecialFunc(SpecialKeys);
glutReshapeFunc(ChangeSize);
glutDisplayFunc(RenderScene);
GLenum err = glewInit();
if (GLEW_OK != err) {
fprintf(stderr, "GLEW Error: %s\n", glewGetErrorString(err));
return 1;
}
SetupRC();
glutMainLoop();
return 0;
}
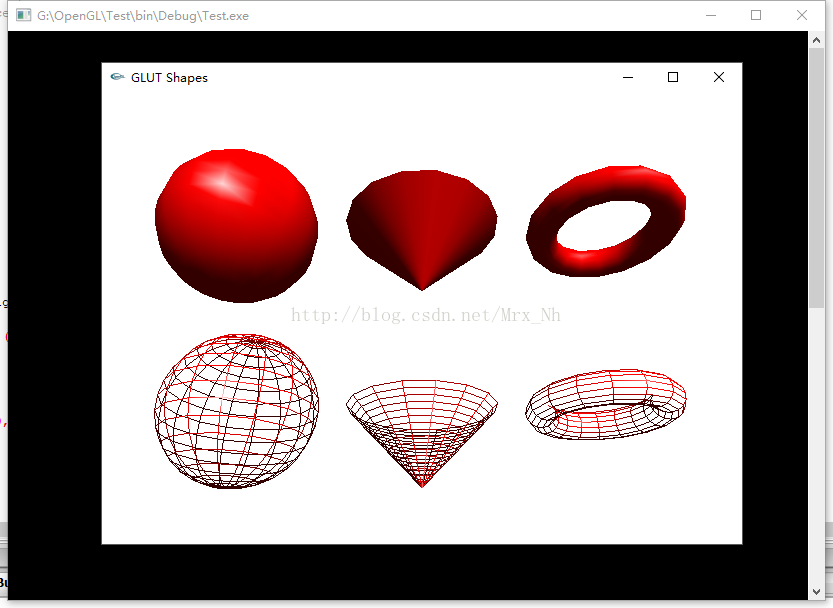
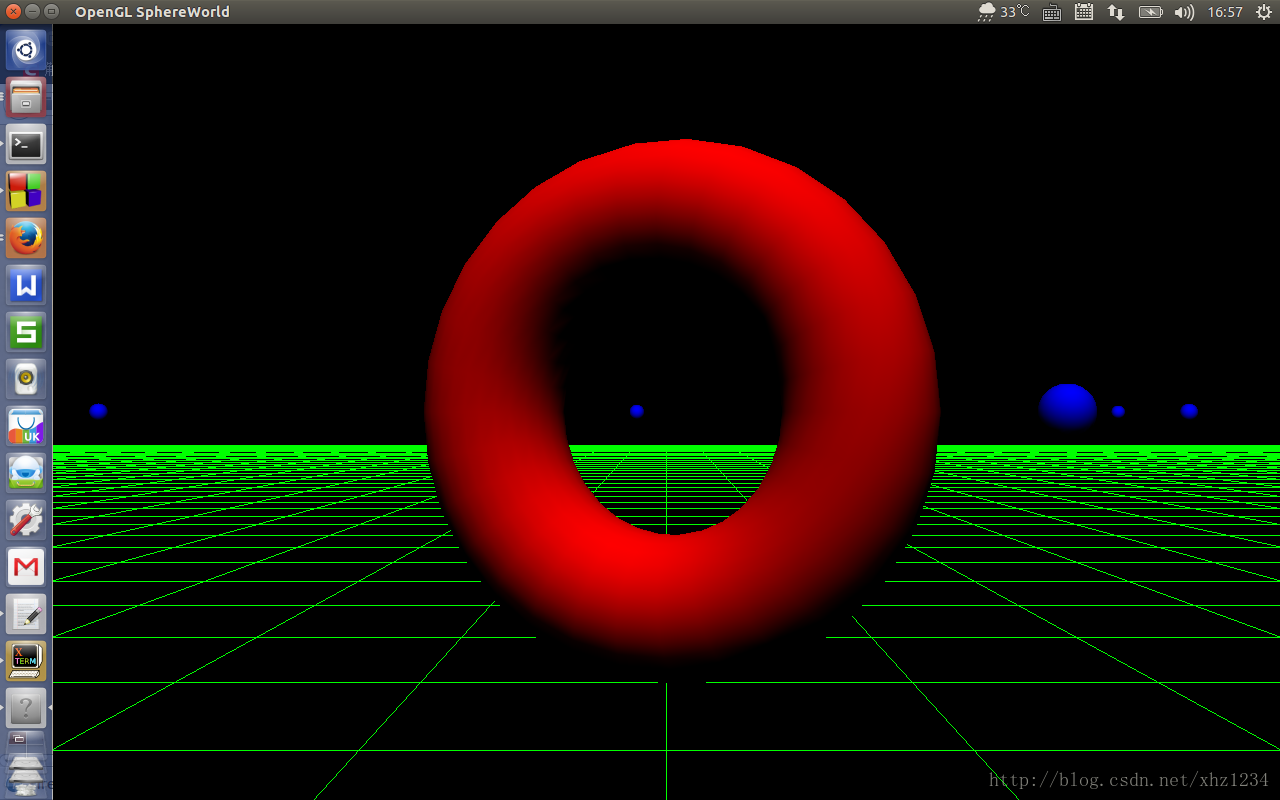
11. Compile and run as follows:
End of text!
Add:
1) OpenGL super bible code download address: http://www.starstonesoftware.com/files/
Code that uses Super Bibliodek directly will not compile at Codeblocks. The above steps will work fine.
2) During compilation, there are many alarms, which fall into two categories:
2-1)
||=== Build: Debug in TestForLove2 (compiler: GNU GCC Compiler) ===|
/home/xhz/Program/TestForLove2/GLTools/src/GLTools.cpp||In function ‘GLbyte* gltReadBMPBits(const char*, int*, int*)’:|
/home/xhz/Program/TestForLove2/GLTools/src/GLTools.cpp|1062|warning: converting ‘false’ to pointer type ‘GLbyte* {aka signed char*}’ [-Wconversion-null]|
/home/xhz/Program/TestForLove2/GLTools/src/GLTools.cpp|1074|warning: converting ‘false’ to pointer type ‘GLbyte* {aka signed char*}’ [-Wconversion-null]|
||=== Build finished: 0 error(s), 2 warning(s) (0 minute(s), 3 second(s)) ===|
Change false to NULL in the corresponding location of gltools.cpp
2-2)
||=== Build: Debug in TestForLove2 (compiler: GNU GCC Compiler) ===|
/home/xhz/Program/TestForLove2/GLTools/src/../include/GLBatch.h||In constructor ‘GLBatch::GLBatch()’:|
/home/xhz/Program/TestForLove2/GLTools/src/../include/GLBatch.h|127|warning: ‘GLBatch::nNumTextureUnits’ will be initialized after [-Wreorder]|
/home/xhz/Program/TestForLove2/GLTools/src/../include/GLBatch.h|126|warning:   ‘GLuint GLBatch::nNumVerts’ [-Wreorder]|
/home/xhz/Program/TestForLove2/GLTools/src/GLBatch.cpp|57|warning:   when initialized here [-Wreorder]|
/home/xhz/Program/TestForLove2/GLTools/src/../include/GLBatch.h|135|warning: ‘GLBatch::pTexCoords’ will be initialized after [-Wreorder]|
/home/xhz/Program/TestForLove2/GLTools/src/../include/GLBatch.h|119|warning:   ‘GLuint GLBatch::uiVertexArray’ [-Wreorder]|
/home/xhz/Program/TestForLove2/GLTools/src/GLBatch.cpp|57|warning:   when initialized here [-Wreorder]|
/home/xhz/Program/TestForLove2/GLTools/src/../include/GLBatch.h|129|warning: ‘GLBatch::bBatchDone’ will be initialized after [-Wreorder]|
/home/xhz/Program/TestForLove2/GLTools/src/../include/GLBatch.h|125|warning:   ‘GLuint GLBatch::nVertsBuilding’ [-Wreorder]|
/home/xhz/Program/TestForLove2/GLTools/src/GLBatch.cpp|57|warning:   when initialized here [-Wreorder]|
/home/xhz/Program/TestForLove2/GLTools/src/../include/GLBatch.h|125|warning: ‘GLBatch::nVertsBuilding’ will be initialized after [-Wreorder]|
/home/xhz/Program/TestForLove2/GLTools/src/../include/GLBatch.h|122|warning:   ‘GLuint* GLBatch::uiTextureCoordArray’ [-Wreorder]|
/home/xhz/Program/TestForLove2/GLTools/src/GLBatch.cpp|57|warning:   when initialized here [-Wreorder]|
||=== Build finished: 0 error(s), 12 warning(s) (0 minute(s), 4 second(s)) ===|
The reason for the warning is
constructor variables are initialized in a different order than the member variable is defined in class GLBatch
The order of member variables in the GLBatch definition in the code is as follows:
class GLBatch : public GLBatchBase
{
          ...
    protected:
	GLenum		primitiveType;		// What am I drawing....

	GLuint		uiVertexArray;
	GLuint      uiNormalArray;
	GLuint		uiColorArray;
	GLuint		*uiTextureCoordArray;
	GLuint		vertexArrayObject;

        GLuint nVertsBuilding;			// Building up vertexes counter (immediate mode emulator)
        GLuint nNumVerts;				// Number of verticies in this batch
        GLuint nNumTextureUnits;		// Number of texture coordinate sets

        bool	bBatchDone;				// Batch has been built


	M3DVector3f *pVerts;
	M3DVector3f *pNormals;
	M3DVector4f *pColors;
	M3DVector2f **pTexCoords;

};
and in the class initializer list defined as follows:
GLBatch::GLBatch(void): nNumTextureUnits(0), nNumVerts(0), pVerts(NULL), pNormals(NULL), pColors(NULL), pTexCoords(NULL), uiVertexArray(0),
	uiNormalArray(0), uiColorArray(0), vertexArrayObject(0), bBatchDone(false), nVertsBuilding(0), uiTextureCoordArray(NULL)
in order to eliminate the above alarm, only the two order is unified, I will be the order of the member variables in a GLBatch made changes.
With the above changes are synchronized to the freeglutAndGLTools, address is: http://download.csdn.net/detail/xhz1234/7707213 compressed package in the corresponding files.