Category Archives: How to Fix

Configuring OpenGL development environment in win10 + vs2015 (including the method of installing 32-bit and 64 bit libraries)

In order to learn OpenGL, I wanted to configure both 32-bit and 64-bit development environments in VS, but I didn’t find a solution to this problem on the web. Maybe everyone knows that, so I don’t think it’s a problem… I was suffering from one night and one morning, make a headache, asked the teacher, the method does not work, finally is their own try out, remember this, for other small white point of reference, the following began to systematically introduce the configuration process)
Here’s the file I packed. The Glew library (which has been compiled) can also be downloaded from the official website. I have also given the download address of the official website in the following content.
A, OpenGL library
1. The GLUT libraries

GLUT (OpenGL Utility Toolkit) is a cross-platform tool library that can only be used under Win32, does not provide a 64-bit development environment, and has not been updated since 1998
2. Freeglut library
This library, a modification of the original GLUT library, provides both 32-bit and 64-bit build environments, and is better maintained.
3. The GLEW libraries
Glew (OpenGL Extension Wrangler) is another helper library.
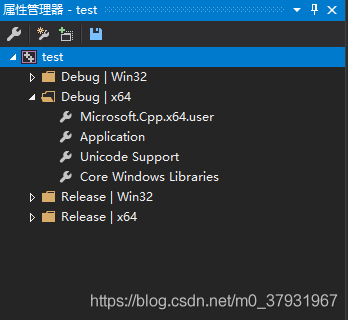
II. Configuration process
1. Configuration of the FreeGLUT library

Download link

Freeglut freeglut 3.0.0 (download you need to download other versions into freeglut version)

OpenGL + VS2015 + Win10 64-bit development environment configuration. OpenGL + VS2015 + Win10 64-bit development environment configuration. OpenGL + VS2015 + Win10

I just want to add two caveats

When using CMAKE to extract a FreeGlut, Configure

32-bit pick 64 choose

store 32-bit generated file folder named freeglut – x86 (can be any name, here only to illustrate behind)
store 32-bit generated file folder named freeglut – x64

SLN generates the solution in the x64 environment in debug mode and release mode respectively.

SLN generates the solution in the x86 environment in debug mode and release mode, respectively
2, 32-bit and 64-bit environment configuration focus!!

32 –

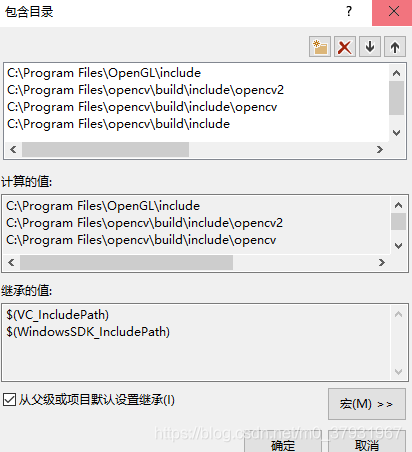
    under the installation path of VS2015 the include file to create a new GL folder will download freeglut – 3.0.0 freeglut 3.0.0 \ freeglut – 3.0.0/include/GL. H header file
    in the C: \ Program Files \ Microsoft Visual Studio (x86) 14.0\VC\ Include \GL (that is, the GL folder created in step 1)
    Put the FreeGlutd. DLL in FreeGlut-x86 \bin\Debug and the FreeGlut-x86 \bin\Release FreeGlut. DLL
    C:\Program Files (x86)\Microsoft Visual Studio
    in 14.0\VC\bin (you may find that the names of the two DLLs are different) Put the.lib file
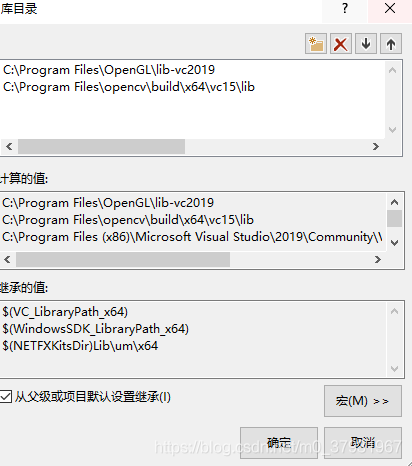
    FreeGlut-x86\ lib and in RealEase

i>: \Program Files (x86)\Microsoft Visual Studio 14.0\VC\lib

64

    Put the FreeGlutd. DLL from FreeGlut-x64 \bin\Debug and the FreeGlut-x64 \bin\Release FreeGlut. DLL
    C: Program Files (x86)\Microsoft Visual Studio VC 14.0 \ \ bin \ amd64
    will freeglut – x64 \ lib in the Debug and Realease..lib file
    in the C: \ Program Files \ Microsoft Visual Studio (x86) in VC 14.0 \ \ lib \ amd64 note: 32-bit and 64 – bit libraries. H header file is the same as

So now the FreeGLUT library is configured

2. Configuration of GLEW library

2.1 Download and compile source code

Download link

GLEW GLEW – 2.1.0. Zip

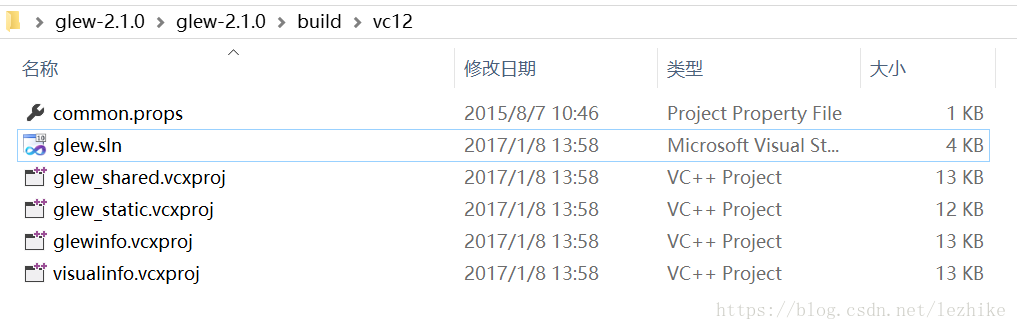
Unzip and open glew.sln in glew-2.1.0\glew-2.1.0\build\vc12

The solution is generated in Debug mode in x86 environment, and the 32-bit Debug library is obtained. Generate the solution in Release mode in x86 environment, and get the 32-bit Release library; Build the solution under Debug mode in x64 environment, and get 64-bit Debug library; Generate the solution in Release mode in the x64 environment, resulting in a 64-bit Release library.

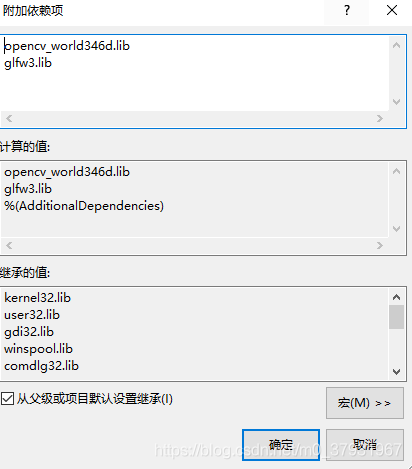
2.2 configuration GLEW32 a

    will glew – 2.1.0 \ glew – 2.1.0 \ include \ GL. H header file
    in the C: \ Program Files \ Microsoft Visual Studio (x86) in VC 14.0 \ \ include \ GL

    will
    Glew 2.1.0 \ glew – 2.1.0 \ bin \ Debug \ Win32
    Glew32d. DLL and

    Glew 2.1.0 \ glew – 2.1.0 \ bin \ Release \ Win32
    glew32.dll
    In C: \ Program Files \ Microsoft Visual Studio (x86)
    in the VC 14.0 \ \ bin to glew 2.1.0 \ glew – 2.1.0 \ lib \ Debug \ Win32 2. Under the lib Files and
    glew 2.1.0 \ glew – 2.1.0 \ lib \ Release 2 \ Win32..lib file
    in the C: \ Program Files (x86)\Microsoft Visual Studio 14.0\VC\lib

    64-bit

      will
      Glew 2.1.0 \ glew – 2.1.0 \ bin \ Debug \ x64
      Glew32d. DLL and

      Glew 2.1.0 \ glew – 2.1.0 \ bin \ Release \ x64
      glew32.dll
      In C: \ Program Files \ Microsoft Visual Studio (x86) VC 14.0 \ \ bin \ amd64
      will glew 2.1.0 \ glew – 2.1.0 \ lib \ Debug \ x64 2. Under the lib Files and
      glew 2.1.0 \ glew – 2.1.0 \ lib \ Release \ x64 under 2..lib file
      in the C: \ Program Files (x86)\Microsoft Visual Studio 14.0\VC\ Lib \ AMD64

So far, it is done ~

Put 32-bit DLLs and lib files in the corresponding VS folder, and 64-bit DLLs and lib files in the corresponding VS folder \amd64
if you think these compilation or configuration steps special trouble, you can see my another article, one minute can be configured to start OpenGL programming. (I’ll write another day.)

Configuration of OpenGL development environment under Windows environment, win10 + vs2019 + glfw + glad

GLFW library configuration 1. The first step, look up a lot of tutorials are selected directly on the web site to download GLFW source code, and then use CMake program compiled, but I don’t know why I always make mistakes during compilation, so finally give up this way, choose directly on the website to download the 64 – bit Windows precompiled binary 】, the diagram below

After you download it, copy the included file and the corresponding version of the library (because mine is vs2019) lib-vc2019 and place it in a fixed location (create a new folder to put both of them in it), such as my location under the path C: Program Files\OpenGL
2. The second step is the configuration of GLAD. Go to the GLAD online service page and select the corresponding options after entering it, as shown in the picture

You will get a Glad. Zip file. Download it and unzip it. Copy the two Files Glad and Khr in the include folder and place them in the C:\Program Files\OpenGL\ Include folder in the path of our first step

Copy the SRC folder to the path C: Program Files\OpenGL, as shown in the figure

3. Next, open VS2019 and create a new blank item. Click “Other Window” in “View” in the menu bar to find “Property Manager”, as shown in the figure below

Double click the Debug | x64 “folder” Microsoft. Cpp. X64. User], click on the vc + + directories add directory contains 】 【 in 】 directory, add, the following figure, OpenCV everyone here don’t tube, just add the OpenGL.

Configuration engineering library catalog, is also a double click the Debug | x64 】 in the folder. Microsoft. Cpp x64. User 】 【, click on the vc + + library directory 】 【 in 】 to add, as shown, also don’t tube of OpenCV.

Link library configuration, is also a double click the Debug | x64 】 in the folder. Microsoft. Cpp x64. User 】 【, click on the “input” of the “connector”, is added in the “additional dependencies” library Files and library Files in the C: \ Program Files \ OpenGL \ lib – vc2019, copy and paste the name to the “additional dependencies”, as shown in figure

At this point, our OpenGL environment is configured, but each time we create a new project, we need to add the glad.c file under the path C: Program Files\OpenGL\ SRC to the source of our project, and that’s it.
4. Test
The code is as follows:

#include <glad/glad.h>
#include <GLFW/glfw3.h>
#include <iostream>
using namespace std;

void framebuffer_size_callback(GLFWwindow* window, int width, int height);

int main() {
	glfwInit();
	//glfwWindowHint(GLFW_CONTEXT_VERSION_MAJOR, 3);
	//glfwWindowHint(GLFW_CONTEXT_VERSION_MINOR, 1);
	//glfwWindowHint(GLFW_OPENGL_PROFILE, GLFW_OPENGL_CORE_PROFILE);

	GLFWwindow* window = glfwCreateWindow(800, 600, "LearnOpenGL", NULL, NULL);
	if (window == NULL) {
		cout << "Failed to create GLFW window" << endl;
		glfwTerminate();
		return -1;
	}
	glfwMakeContextCurrent(window);

	if (!gladLoadGLLoader((GLADloadproc)glfwGetProcAddress)) {
		std::cout << "Failed to initialize GLAD" << std::endl;
		return -1;
	}

	glViewport(0, 0, 800, 600);

	glfwSetFramebufferSizeCallback(window, framebuffer_size_callback);

	while (!glfwWindowShouldClose(window)) {
		glfwSwapBuffers(window);
		glfwPollEvents();
	}

	glfwTerminate();
	return 0;
}

void framebuffer_size_callback(GLFWwindow* window, int width, int height) {
	glViewport(0, 0, width, height);
}

The results show that the configuration was successful.


The problem of window flash after C + + program is compiled and run

Unicorns are hiring Python engineers in 2019. > >

Problem: When you first learn C++ to write Win32 Console Application using a different compiler, the resulting window may flash and disappear.
Some compilers are very good, and there are similar solutions in the example program. For example, in DevC ++, when creating a new non-empty C++ class, return 0; Before this: system(“PAUSE”); In Visual Studio there is no flash if you follow the steps, but when we press the shortcut key F5, the result will still flash. We can do this in return 0; STD ::cin.ignore(STD ::cin.rdbuf()->; in_avail()+1); That way it will show up, not just go over it. If you just want to see the result, there’s another way, and that’s in return 0; I’m going to say while(1);
Thank you @IM Xinye for reminding me. My posture has risen. When compiling, if you press F5 directly for debugging, there will be a flash of the situation. If Ctrl +F5 is not debugging, then there will be no flash.

Reproduced in: https://my.oschina.net/u/734295/blog/160510

use cin.get () instead of system (“pause”) to avoid the flash of C + + programs

C + + compiled in a separate console program execution time, often a flash, can’t see the output results, in order to solve this problem, there are a lot of people use the system (” pause “) to suspend, but so are a lot of disadvantages, there are two reasons for
a: poor portability
2: consume resources is very big, in both Windows and Linux

Instead of using system(“pause”) to pause, you can use STD ::cin.get() or getchar()
. Why not system(“pause”)?


Let’s take a look at the flow of system(“pause”)
1: Pause your program
: Start the Shell in the sub-process
3>ind commands to execute and allocate memory for them
4: Wai>r input
5: Recluse m>y
6: End the Shell <>> 7: Continue your program>

To summarize, use STD ::cin.get() or getchar() to pause the execution of a C ++ program

PS: the original http://www.gidnetwork.com/b-61.html

Reproduced in: https://blog.51cto.com/zhanggx/1305045

The problem of C + + compile result window flash by

Problem: When you first learn C++ to write Win32 Console Application using a different compiler, the resulting window may flash and disappear.
Some compilers are very good, and there are similar solutions in the example program. For example, in DevC ++, when creating a new non-empty C++ class, return 0; Before this: system(“PAUSE”); In Visual Studio there is no flash if you follow the steps, but when we press the shortcut key F5, the result will still flash. We can do this in return 0; STD ::cin.ignore(STD ::cin.rdbuf()->; in_avail()+1); That way it will show up, not just go over it. If you just want to see the result, there’s another way, and that’s in return 0; I’m going to say while(1);

The solution of console flash in C + +

When you write a C ++ program in VS, you will find that when you run the program, the console will flash by and you will not see the results of the program. Therefore, you need to find a way to make the screen or console pause.
 

    method one: increase the input statement at the end of program, this will require the user to input before the end of the program runs, the console will stay there, specific code as shown in the figure below
    alternative Rich two alternatives: in C: printf (” press any key to continue…” );
    getchar(); 12 In C++ : Cout<; <" Press any key to continue..." ;
    cin.clear();
    cin.sync();
    cin.get(); 1234 plus cin. The clear (), cin. The sync () these two words, is to empty the cache area, let cin. The get () to receive your real keyboard input method
    2: add the statement at the end of the program: system (” pause “); 
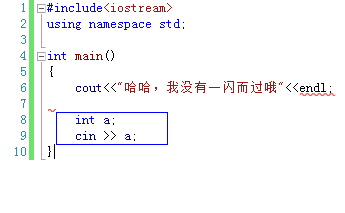
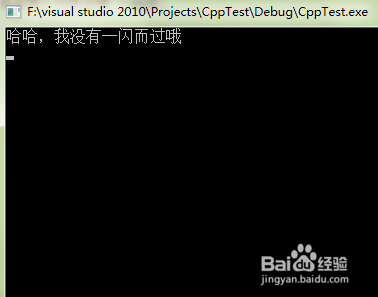
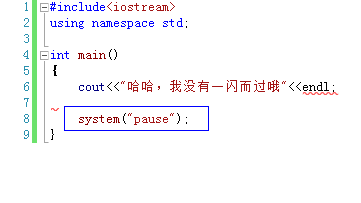
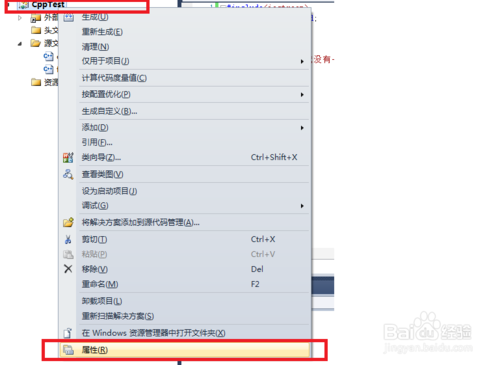
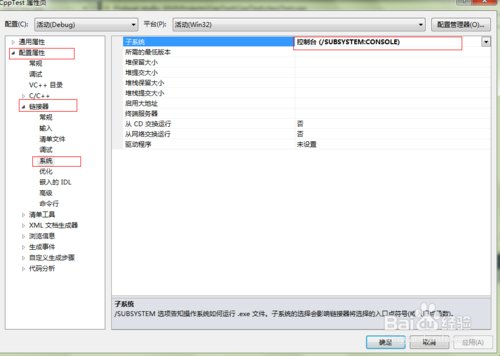
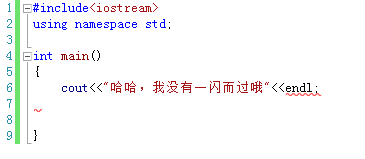
Things to Avoid in C/C++ — system(“pause”) is not recommended because:
    is not portable: only for DOS or Windows, not Linux, etc.
    consumes system resources: Calling the system command system() to “suspend the program” is overkill.
    must add a header file: stdlib.h or cstdlib. There are many header files in C ++ that already contain this file, so it is sometimes possible to use this function without the header stdlib.h, but it is better to add it for safety reasons. Method 3: To modify the project configuration, right-click on the project, select Properties from the right-click menu, and then select “Configuration Properties” from the list on the left of the pop-up dialog box –>; ‘Linker’ –>; “System”, then in the list on the right, in the first “subsystem” value, select “Console” (/SUBSUSTEM:CONSOLE) “as shown in the figure below

Solution of flash screen caused by OpenGL in MFC environment

Since OpenGL has its own background refresh function, glClear, Windows should not be allowed to refresh a window background. Otherwise, when the window needs to be redrawn, Windows automatically sends WM_ERASEBKGND first, and the default handler uses a white background brush. When the background color used by OpenGL is not white, there is a flicker of white in the drawing. This is especially true when doing animation.

Activate the WM_ERASEBKGND message handler in the MFC program to disable message processing of the parent window class, and simply return a TRUE. Return CView::OnEraseBkgnd(PDC). Now change this to return TRUE. This will solve the flash screen problem.

Drawing function of GLUT

void glutWireSphere(GLdouble radius, GLint slices, GLint stacks); br> v>glutSolidSphere (glDouble radius, GLint Slices, GLint Stacks); Solid sphere
void glutWireCube(GLdouble size);
void GlutSolidCube (GlDouble Size); Solid cube
void glutWireTorus(GLdouble innerRadius, GLdouble outerRadius, GLint nsides, GLint rings);
void GlutSolidTorus (glDouble InnerRadius, glDouble OuterRadius, GLint nsides, GLint rings);
void GlutSolidTorus (glDouble InnerRadius, glDouble OuterRadius, GLint nsides, GLint rings) Solid circle
void glutWireIcosahedron(void);
void glutsolidosahedron (void); Solid 20-hedron
void glutWireOctahedron(void);
void glutsolidOctahedron (void);
void glutsolidOctahedron (void); Solid 8-hedron
void glutWireTetrahedron(void);
void glutsolidTrahedron (void);
void glutsolidTrahedron (void); Solid 4-hedron
void glutWireDodecahedron(GLdouble radius);
void glutSolidDoDecaHedron (glDouble radius); Solid 12-hedron
void glutWireCone(GLdouble radius, GLdouble height, GLint slices, GLint stacks);
void glutSolidCone(glDouble radius, glDouble height, GLint Slices, GLint stacks); A solid cone
void glutWireTeapot(GLdouble size);
void glutSolidTeapot(glDouble Size); Solid teapot