Author Archives: Robins

XNA 4 project running error: no suitable graphics card found

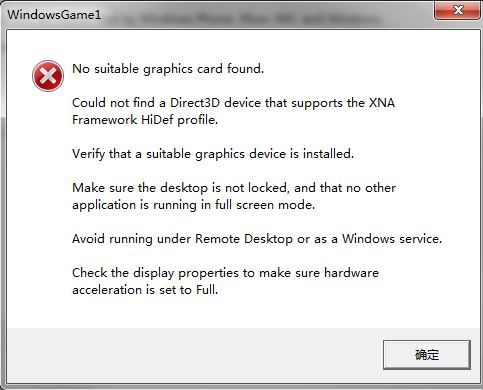
Today, I started to learn about the development of XNA Games. I created a new project to run directly and reported an error.
The error screenshot is as follows:

Later, I found a solution on the Internet. It turned out that my graphics card did not support DirectX 10. I only needed to change the GAME profile in XNA GAME Studio in the project property from Hidef to Reach, hoping that it could be helpful to friends who met the same problem with me.


QuickFIX/J100% Java Open Source FIX Engine

http://www.quickfixj.org/
The Financial Information eXchange (FIX) protocol is a messaging standard developed specifically for the real-time electronic exchange of securities transactions. FIX is a public-domain specification owned and maintained by FIX Protocol, Ltd (FPL).
QuickFIX/J is a full featured messaging engine for the FIX protocol. It is a 100% Java open source implementation of the popular C++ QuickFIX engine.
Features:
Free! It costs nothing and has a very liberal open source licence. Full source code available (also at no cost). Supports FIX versions 4.0 – 4.4, 5.0/FIXT1.1. Runs on any hardware and operating system supported by 1.4+ Java SE or compatible VM. Compatibility with QuickFIX C++ Java Native Wrapper API (easy to upgrade)Java NIO asynchronous network communications for scalability (using Apache MINA)Supports embedded SSL with Java 5+Provides standard JMX MBeans for FIX engine management Easy to embed in existing Java applications.
Choice of message processing threading strategiesCommunication transports for TCP sockets and VM pipes. Metadata-driven parsing and validation. Metadata-driven code generation of type-safe FIX message-related classes. Metadata API for use at application level (for example, FIX messaging UI). Support for protocol customizations (new messages, fields, constraints). Session state storage plugins: JDBC, File, SleepyCat/JE, In memoryLogging plugins: JDBC, File, SFL4J (supports JDK1.4 logging, Log4J, Commons Logging), Console, Composite
Failover and High Availability. Scheduling of session connections. Many automated unit and acceptance tests. Example applications: Simple Swing order entry UI and a console-based order execution simulator. Commercial support available from multiple sources.
 
About QuickFIX/J…
The Financial Information eXchange (FIX) protocol is a messaging standard developed specifically for the real-time electronic exchange of securities transactions. FIX is a public-domain specification owned and maintained by FIX Protocol, Ltd (FPL). The FPL mission is to improve the global trading process by defining, managing, and promoting an open protocol for real-time, electronic communication between industry participants, while complementing industry standards.
QuickFIX/J is a full featured messaging engine for the FIX protocol. It is a 100% Java open source implementation of the popular C++ QuickFIX engine. For more information see the QuickFIX/J web site.
Features:
Free! It costs nothing and has a very liberal open source licence. Full source code available (also at no cost). Supports FIX versions 4.0 – 4.4. Runs on any hardware and operating system supported by 1.4+ Java SE or compatible VM. Compatibility with QuickFIX C++ Java Native Wrapper API (easy to upgrade) Java NIO asynchronous network communications for scalability (using Apache MINA) Easy to embed in existing Java applications.
Choice of message processing threading strategies Communication transports for TCP sockets and VM pipes. Metadata-driven parsing and validation. Metadata-driven code generation of type-safe FIX message-related classes. Metadata API for use at application level (for example, FIX messaging UI). Support for protocol customizations (new messages, fields, constraints). Session state storage plugins: JDBC, File, SleepyCat/JE, In memory Logging plugins: JDBC, File, SFL4J (supports JDK1.4 logging, Log4J, Commons Logging), Console Failover and High Availability. Scheduling of session connections. Many automated unit and acceptance tests. Integrated SSL communications Example applications: Simple Swing order entry UI and a console-based order execution simulator. Commercial support available from multiple sources.
Building and Testing QuickFIX/J
Dependencies Building QuickFIX/J Generating the database for JDBC based store and log Testing QuickFIX/J
Using QuickFIX/J
Creating Your Application Configuration Acceptor Failover Support Dynamic Acceptor Session Definition Receiving Messages Sending Messages Repeating Groups User Defined Fields Validation Secure communications using SSL Managing QFJ Applications With JMX Configuring character sets. Customizing Message Code Generation. Example Applications Determining your QFJ version.
 

Microsoft fix 50688 [Windows 7 event ID10, WMI error resolution

The Windows7 event record has the following error message:

“Event filter with query” SELECT * FROM __InstanceModificationEvent WITHIN 60 WHERE TargetInstance ISA “Win32_Processor AND TargetInstance. LoadPercentage & gt;” ” 99″ Could not be reactivated in namespace “//./root/CIMV2″ because of error 0x80041003. Events cannot be delivered through this filter until the problem is corrected.”

as shown in the figure below:

the problem occurred after manual integration of SP1. There is a problem in the creation process caused by WMI registration left in DVD/ ISO. Microsoft says these incidents do not represent any problems in the system and can be safely ignored.

Microsoft has issued a fix “Microsoft fixit 50688.msi” for this issue.

ridicule CSDN recently came aunt zha, can not send the link, you brothers baidu download this patch bar

Reproduced in: https://www.cnblogs.com/ziyeqingshang/p/3769487.html

What can I learn from Kenshi

A two-person production team spent 12 years developing a hardcore game for a sandbox. The gameplay is still so much fun.
 
What are the implications?
Kenshi can be approximated as a combination of Riding and Chopping, the SIMS, Radiation, and The Gods: Original Sin. But I can say that there is no game like Kenshi on the market, because it is so unique.
So is there a lesson to be learned from making similar, relevant games?
 
What the hell is playfulness?
 
Open world
There is no complete goal, depending on the type, can be a lone Wolf, can be anyone you want to be. There are only hints for basic operations. The only way to upgrade skills and acquire powerful equipment is through community communication.
 
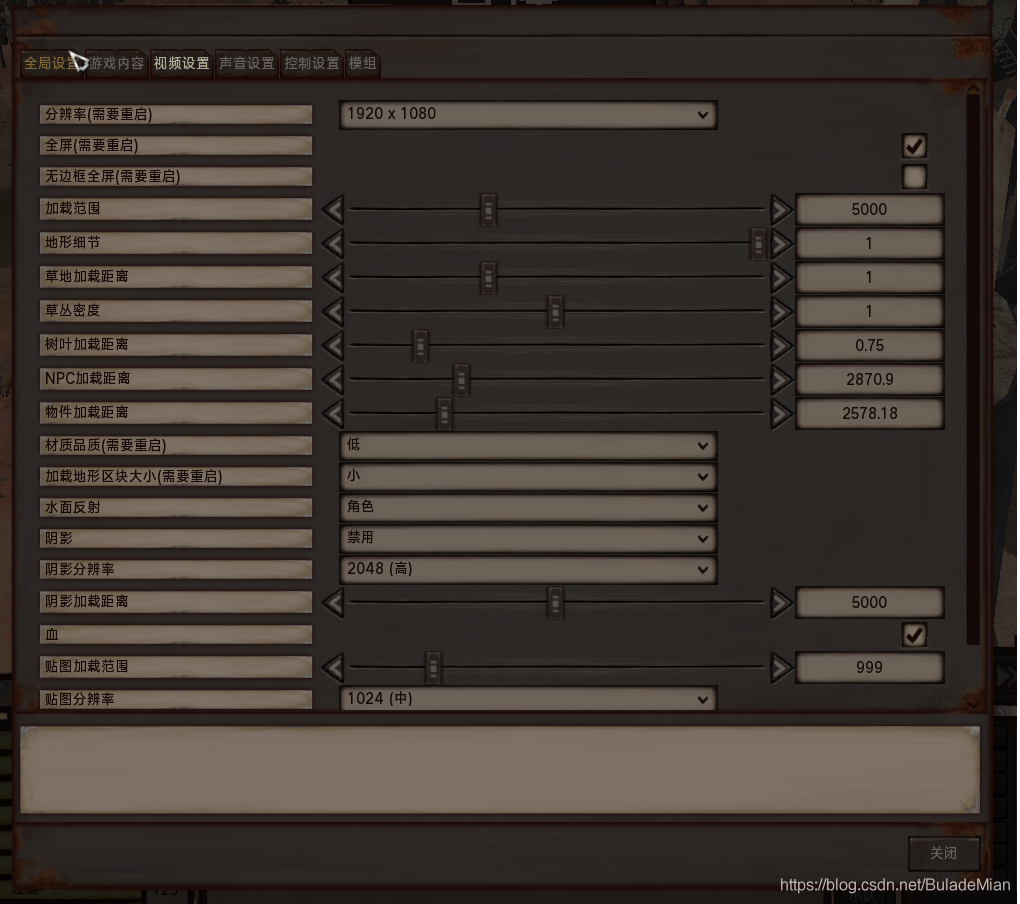
Open world, loaded NPCS, terrain, environment, objects, materials Settings, distance and range limits, does not mean that the entire game is directly loaded in memory, the current computer configuration is not supported for the time being.

NPC interaction
Not every NPC can interact and talk, guard, special dialogue to find fault with the NPC, robber, shop owner.
 
Role to develop
Almost every character can improve their abilities through training. Different RACES have different Settings, different experience for different skills, and different calculation values for different skills.
 
Characteristics of weapons
One-handed weapon, low damage, high speed
Long handled weapons. Indoor use is punishable
Giant weapon, high attack, can be broken armor, the level of the character’s skill requirements


Unable to find VBScript script engine or error 2738, could not access VBScript runtime

From: http://blog.sina.com.cn/s/blog_76af7f0f0101eoi2.html
The reason is to install some anti-virus software (such as Mcfee, Kaba, Rising, etc.), and change the DLL library of.vBS script opened by default in the registry. After uninstall anti-virus software, the registry that information has not been deleted, so lead to open. VBS script, DLL library, I’ll call the antivirus software program to appear this problem, the solution: manual methods, I integrated online methods to modify the following two registry keys (please backup before modification or setting up the system restore)

my system is Windows7 64 bit,

“start” -> “Run” – & gt; “Regedit”, find “HKEY_CLASSES_ROOT\CLSID\{b54F3741-5B07-11CF-a4B0-00AA004a55e8” \InprocServer32 “,

changes its “default” value to “C:\Windows\system32\vbscript.dll” (no quotes required, this DLL library is the program that opens. VBS scripts by default in Windows “).

before modifying, right click on the item “InprocServer32” and select “permission” to add “full control” permission to your current user, and then modify to solve this problem.  
The
value resolves the “VBScript script engine cannot be found” error on boot

when I found this method, I did not notice whether it was 64bit or 32bit, so I deleted the above values as follows.

then check HKEY_CLASSES_ROOT\CLSID\Wow6432Node\CLSID\{b54f3741-5b07-11cf-a4b0-00aa004a55e8}\InprocServer32 has the correct value C:\Windows\SysWOW64\vbscript.dll

, Error 2738, could not access vbscript runtime for custom action

needs to be resolved by modifying the following key value

HKEY_LOCAL_MACHINE\SOFTWARE\CLASSES\Wow6432Node\CLSID\{B54F3741-5B07-11cf-A4B0-00AA004A55E8}\InprocServer32.

change the value to “C:\Windows\SysWOW64\vbscript.dll” also need to set the permissions before modification

when you modify the above two items, you can see that the previous default DLL library is the residue of the McAfee that was uninstalled earlier.

there is also a method on the web that can be solved by deleting the following key values, but in my case, I did not find these two keys

Windows 64bit system delete

HKEY_Current_User\SOFTWARE\Classes\Wow6432Node\CLSID\{B54F3741-5B07-11CF-A4B0-00AA004A55E8

then enter cmd.exe enter CD %windir%\syswow64

and then enter regsvr32 vbscript.dll

Windows 32bit delete

HKEY_Current_User\SOFTWARE\Classes\CLSID\{B54F3741-5B07-11CF-A4B0-00AA004A55E8

then enter cmd.exe enter CD %windir%\system32

and then enter regsvr32 vbscript.dll

there is also an automatic fix if it is determined to be McAfee by downloading the fix:

1. Search for “McAffe Consumer Product Removal Tool” or “McPr.exe.”

2. Run MCPR. Exe.

3. Search MicrosoftFixit50842 or “MicrosoftFixit 50842.mSI “. Download the link http://go.microsoft.com/?linkid=9804433

4. Run MicrosoftFixit50842. Msi.

5. Restart and set.

above automatic method I did not use, for those who need to save the test.

reference links to http://answers.microsoft.com/en-us/windows/forum/windows_7-windows_programs/error-2738-could-not-access-vbscript-run-time-for/1a4499ae-8bc1-4534-9c6f-4d399ac70d9a

http://coldsummerwei.iteye.com/blog/940012

Pull is not possible because you have unmerged files. Please, fix them up in the work tree, and then

Note: The personal experience record of Git beginners is for reference only
 
1. Pull is not possible because you have unmerged files.
Symptoms: Pull
$ git pull
Pull is not possible because you have unmerged files.
Please, fix them up in the work tree, and then use ‘git add/rm < file> ‘
as appropriate to mark resolution, or use ‘git commit -a’
I think it’s because the local file is colliding
Solutions:
Reference –

1. Pull will use Git merge to cause conflicts. The conflicting files need to be resolved out of Git Add-u and git commit can only be pulled successfully.
2. If you want to abort local file changes, use Git reset –hard FETCH_HEAD. FETCH_HEAD represents the commit point formed after the last successful Git pull. Then git pull.
note:
Git merge forms a merge-head. Git push forms references like HEAD. A HEAD represents a local reference that has been formed after a recent successful push.

In my experience, sometimes this happens for no reason, and the Untracked files are quite many (actually I only changed one or two files), so I had to save the local changes I decided to make first, then use Git reset –hard FETCH_HEAD to go back to the point after the last successful pull, and then pull again without any problems
 
2.You are not currently on a branch.
Symptoms: During a pull, the “git reset –hard FETCH_HEAD” method fails.

$ git pull
You are not currently on a branch, so I cannot use any
'branch.<branchname>.merge' in your configuration file.
Please specify which remote branch you want to use on the command
line and try again (e.g. 'git pull <repository> <refspec>').
See git-pull(1) for details.

Solutions:
First git checkout-B temp
Second, Git Checkout Master
You can restore the master Repository state and then pull
Original: https://blog.51cto.com/halolk/1304701

How to Use Apt get Command Under Mac OSX

Since I have been in contact with the Ubuntu system before, I am quite familiar with the command sudo apt-get install XXX for a convenient installation software package. I have always felt that Mac is also a Linux system and there should be little difference between Ubuntu. However, today, when using the command sudo apt-get install libxml2, the Mac system reported -bash:apt-get:command not found. Later, I found out that the original apt-get is debian(Ubuntu) package manager, so I continued to query the solution.
Solution 1: Brew is used instead of Apt-GET
What is brew?
Homebrew is a software package management tool on Mac OSX that can be easily installed or uninstalled on the Mac.
How to install?
All you need to do to install is type the following command on the terminal (the Mac comes with Ruby and you don’t need to install it)

ruby -e "$(curl -fsSL https://raw.githubusercontent.com/Homebrew/install/master/install)"

After installation, use brew install libxml2. For more brew features, please use brew --help to view its help documentation.
Solution 2: Fink
What is Fink?
The Fink project hopes to bring a variety of open source software on Unix to the Darwin and Mac OS X platforms. We modified Unix software to compile and run (” port “) on Mac OS X, and provided a convenient distribution system so that everyone could download and use it. Fink USES tools in Debian such as DPKG and Apt-get to provide powerful binary package management. (The above content is from Fink’s official website)
How to install?
1. Open the following link to find the installation method of the corresponding version of OSX
http://www.finkproject.org/download/srcdist.php?PhpLang =zh
my system version is 10.10.3
can be in the upper left corner of the system apple -> About the local view system version
terminal input

More/System/Library/CoreServices/SystemVersion plist output

& lt; key> ProductVersion< /key>
< string> 10.10.3 & lt; /string>

2. Install
As mentioned in the link above, there are two ways to install version 10.10, one is to use a script provided by Fink for automatic installation, and the other is to download the zip for manual installation. I chose the first method, easy and quick 🙂

this address is a github address, I am not familiar with github, I have not found the way to download this file directly –So when I got to the link, I chose to copy the code and pasted it into a file called Install_Fink

chmod +x ./Install_Fink  // Modify the file as an executable
./Install_Fink  // Run the File

The script then checks to see if there are pre-installed xcode-select /Java/XQuartz programs in the system, without prompting for installation, and prompts you to continue by clicking any key or to exit by using Ctrl+ C and entering a password during the run. When the script downloads the Fink installation, it will be prompted with some configuration options. If it is not clear, Enter directly USES the default configuration or selects Y.
our prompt you to some basic installation is complete we lift upgrade has been completed, please run fink update – all take a look at what other have not upgraded, you may find this time after the input prompt can not find fink this command, if in the previous tip configuration Path when you don’t have refused to him, then only need to restart the terminal fink can use before ~ if you turned him down, and run which fink command what all can’t find the words, So you can run the Shell script /sw/bin/pathsetup.sh to configure the Path 🙂
(2) download the installed package
this method I don’t have a try, the installation process and order is the same as the script, specific please refer to the above gives a version of the installation address, probably look at the main steps include install xcode – select – & gt; Decompression package — & GT; Run./the bootstrap – & gt; Set the Path – & gt; Download the description file and the patch
After the installation is complete in terminal input sudo apt - get the install libxml2 </ code> surprise you will find that you can use ~ another Fink is not only a package manager, it also provides many other functions, so far I haven't to explore XD, another during installation to download command select features to install, I don't have to explore deeply ~ everything is waiting for you to read a text to dig too ~ if you have any questions about this article can give me a message, I will try my best to help solve ^. ^

How to Fix “Cannot open Eclipse Marketplace” Error

1、Open Eclipse->help->eclipse marketplace error
Cannot open Eclipse Marketplace
Cannot install remote marketplace locations: Connection failed
This is most often caused by a problem with your internet connection. Please check your internet connection and retry.
Unable to read repository athttp://marketplace.eclipse.org/catalogs/api/p.
Connection reset
Connection failed
This is most often caused by a problem with your internet connection. Please check your internet connection and retry.
Connection reset
How to Fix
(1) window->preferences->General->Network Connections,Active Provider Click Manual
(2)Add  -Djava.net.preferIPv4Stack=true in eclipse. ini

How to Fix Your Timestep

Hello, I’m Glenn Fiedler and welcome to the second article in my series on Game Physics.
In the previous article we discussed how to integrate the equations of motion using an RK4 integrator. Integration sounds complicated but really it’s just a way to advance the your physics simulation forward by some small amount of time called “delta time” (or dt for short).
But how to choose this delta time value? This may seem like a trivial subject but in fact, there are many different ways to do it, each with their own strengths and weaknesses – so read on!
Fixed delta time
The simplest way to step forward is with a fixed delta time, like 1/60th of a second:

    double t = 0.0;
    double dt = 1.0/60.0;

    while ( !quit )
    {
         integrate( state, t, dt );
         render( state );
         t += dt;
    }

In many ways this code is ideal. If you are lucky enough to have your physics delta time match the display rate and you can ensure that your update loop takes less than one frame then you have the perfect solution for updating your physics simulation.
But in the real world you may not know the display refresh rate ahead of time, VSYNC could be turned off, or perhaps you could be running on a slow computer which cannot update and render your frame fast enough to present it at 60fps.
In these cases your simulation will run faster or slower than you intended.
Variable delta time
Fixing this *seems* simple. Just measure how long the previous frame takes, then feed that value back in as the delta time for the next frame. This makes sense because of course, because if the computer is too slow to update at 60HZ and has to drop down to 30fps, you’ll automatically pass in 1/30 as delta time. Same thing for a display refresh rate of 75HZ instead of 60HZ or even the case where VSYNC is turned off on a fast computer:

    double t = 0.0;

    double currentTime = hires_time_in_seconds();

    while ( !quit )
    {
         double newTime = hires_time_in_seconds();
         double frameTime = newTime - currentTime;
         currentTime = newTime;

         integrate( state, t, frameTime );
         t += frameTime;

         render( state );
    }

But there is a huge problem with this approach which I will now explain. The problem is that the behavior of your physics simulation depends on the delta time you pass in. The effect could be subtle as your game having a slightly different “feel” depending on framerate or it could be as extreme as your spring simulation exploding to infinity, fast moving objects tunneling through walls and the player falling through the floor!
One thing is for certain though and that is that it’s utterly unrealistic to just expect your simulation to correctly handle *any* delta time passed into it. To understand why, consider what would happen if you passed in 1/10th of a second as delta time?How about one second?10 seconds?100?Eventually you’ll find a breaking point.
Semi-fixed timestep
It’s much more realistic to say that your simulation is well behaved only if delta time is less than or equal to some maximum value. You can use mathematics to find this exact delta time value given your simulation (there is a whole field on it called numerical analysis, try researching “interval arithmetic” as well if you are keen), or you can arrive at it using a process of experimentation, or by simply tuning your simulation at some ideal framerate that you determine ahead of time. This is usually significantly easier in practice than attempting to make your simulation bulletproof at a wide range of delta time values.
With this knowledge at hand, here is a simple trick to ensure that you never pass in a delta time greater than the maximum value, while still running at the correct speed on different machines:

    double t = 0.0;
    double dt = 1/60.0;

    double currentTime = hires_time_in_seconds();

    while ( !quit )
    {
         double newTime = hires_time_in_seconds();
         double frameTime = newTime - currentTime;
         currentTime = newTime;
          
         while ( frameTime > 0.0 )
         {
             const float deltaTime = min( frameTime, dt );
             integrate( state, t, deltaTime );
             frameTime -= deltaTime;
             t += deltaTime;
         }

         render( state );
    }

The benefit of this approach is of course that we now have an upper bound on delta time. It’s never larger than this value because if it is we subdivide the timestep. The disadvantage is that we’re now taking multiple steps per-display update including one additional step to consume any the remainder of frame time not divisible by dt. This is no problem if you are render bound, but if your simulation is the most expensive part of your frame you could run into problems including the so called “spiral of death”.
What exactly is this spiral of death?It’s what happens when your physics simulation cannot keep up with the steps it’s asked to take. For example, if your simulation is told: “OK, please simulate X seconds worth of physics” and if it takes Y seconds of real time to do so where Y > X, then it doesn’t take Einstein to realize that over time your simulation falls behind. It’s called the spiral of death because ironically being behind causes your update to simulate more steps, which causes you to fall further behind, which makes you simulate more steps…
So how do we avoid this?In order to ensure a stable update I recommend leaving some headroom. You really need to ensure that it takes *significantly less* than X seconds of real time to update X seconds worth of physics simulation. If you can do this then your physics engine can “catch up” from any temporary spike by simulating more frames. Alternatively you can clamp at a maximum # of steps per-frame and the simulation will appear to slow down under heavy load. Arguably this is better than spiraling to death, assuming of course that the heavy load is just a temporary spike.
Free the physics
Now lets take it one step further. What if you want exact reproducibility from one run to the next given the same inputs?This comes in handy when trying to network your physics simulation using deterministic lockstep, but it’s also generally a nice thing to know that your simulation behaves exactly the same from one run to the next without any potential for different behavior depending on the render framerate.
But you ask why is it necessary to have fully fixed delta time to do this?Surely the semi-fixed delta time with the small remainder step is “good enough”?And yes, you are right. It is good enough in most cases but it is not *exactly the same*. It takes only a basic understanding of floating point numbers to realize that (v*dt) + (v*dt) is not necessarily equal to v*2*dt due to to the limited precision of floating point arithmetic, so it follows that in order to get exactly the same result (and I mean exact down to the floating point bits) it is necessary to use a fixed delta time value.
So what we want is the best of both worlds: a fixed delta time value for the simulation plus the ability to render at different framerates. These two things seem completely at odds, and they are – unless we can find a way to decouple the simulation and rendering framerates.
Here’s how to do it. Advance the physics simulation ahead in fixed dt time steps while also making sure that it keeps up with the timer values coming from the renderer so that the simulation advances at the correct rate. For example, if the display framerate is 50fps and the simulation runs at 100fps then we need to take two physics steps every display update.
What if the display framerate is 200fps?Well in this case it would seem that we need to take half a physics step each display update, but we can’t do that, we must advance with constant dt; So instead we must take one physics step every two display updates. Even trickier, what if the display framerate is 60fps, but we want our simulation to run at 100fps?There is no easy multiple here. Finally, what if VSYNC is disabled and the display frame rate fluctuates from frame to frame?
If you head just exploded don’t worry, all that is needed to solve this is to change your point of view. Instead of thinking that you have a certain amount of frame time you must simulate before rendering, flip your viewpoint upside down and think of it like this: The renderer produces time and the simulation consumes it in discrete dt sized chunks.
Again:
The renderer produces time and the simulation consumes it in discrete dt sized chunks.

    double t = 0.0;
    const double dt = 0.01;

    double currentTime = hires_time_in_seconds();
    double accumulator = 0.0;

    while ( !quit )
    {
         double newTime = hires_time_in_seconds();
         double frameTime = newTime - currentTime;
         currentTime = newTime;

         accumulator += frameTime;

         while ( accumulator >= dt )
         {
              integrate( state, t, dt );
              accumulator -= dt;
              t += dt;
         }

         render(state);
    }

Notice that unlike the semi-fixed timestep we only ever integrate with steps sized dt so it follows that in the common case we have some unsimulated time left over at the end of each frame. This is important! This left over time is passed on to the next frame via the accumulator variable and is not thrown away.
The final touch
But what do to with this remaining time?It seems incorrect somehow doesn’t it?
To understand what is going on consider a situation where the display framerate is 60fps and the physics is running at 50fps. There is no nice multiple so the accumulator causes the simulation to alternate between mostly taking one and occasionally two physics steps per-frame when the remainders “accumulate” above dt.
Now consider that in general all render frames will have some small remainder of frame time left in the accumulator that cannot be simulated because it is less than dt. What this means is that we’re displaying the state of the physics simulation at a time value slightly different from the render time. This causes a subtle but visually unpleasant stuttering of the physics simulation on the screen known as temporal aliasing.
The solution is to interpolate between the previous and current physics state based on how much time is left in the accumulator:

    double t = 0.0;
    const double dt = 0.01;

    double currentTime = hires_time_in_seconds();
    double accumulator = 0.0;

    State previous;
    State current;

    while ( !quit )
    {
         double newTime = time();
         double frameTime = newTime - currentTime;
         if ( frameTime > 0.25 )
              frameTime = 0.25;	  // note: max frame time to avoid spiral of death
         currentTime = newTime;

         accumulator += frameTime;

         while ( accumulator >= dt )
         {
              previousState = currentState;
              integrate( currentState, t, dt );
              t += dt;
              accumulator -= dt;
         }

         const double alpha = accumulator/dt;

         State state = currentState*alpha + previousState * ( 1.0 - alpha );

         render( state );
    }

This looks pretty complicated but here is a simple way to think about it. Any remainder in the accumulator is effectively a measure of just how much more time is required before another whole physics step can be taken. For example, a remainder of dt/2 means that we are currently halfway between the current physics step and the next. A remainder of dt*0.1 means that the update is 1/10th of the way between the current and the next state.
We can use this remainder value to get a blending factor between the previous and current physics state simply by dividing by dt. This gives an alpha value in the range [0,1] which is used to perform a linear interpolation between the two physics states to get the current state to render. This interpolation is easy to do for single values and for vector state values. You can even use it with full 3D rigid body dynamics if you store your orientation as a quaternion and use a spherical linear interpolation (slerp) to blend between the previous and current orientations.
Click here to download the source code for this article.
Further reading
Integration Basics
Integration is used to determine the motion of an object over time. In this article I show how to correctly integrate the equations of motion using an RK4 integrator instead of starting off on the wrong foot with a stupid Euler integrator.
Physics in 3D
Leap ahead from integrating single values to integrating the entire physics state for a cube in three dimensions. Introduces rotational physics concepts including orientation in 3D, angular velocity and momentum, inertia and torque.
Spring Physics
Explains the physics of springs and how to apply them to control physics simulations. Learn how to implement joints, constraints, motors and basic collision response.
Networked Physics
How do network games synchronize physics over the network?This article explains the core techniques used in today’s first person shooters and shows how you can apply these techniques to network your own physics simulations.

Error:Execution failed for task ‘:app:processDebugGoogleServices’. > Please fix the version conflict

After integrating Google login and Google map, run the project, report

Error:Execution failed for task ':app:processDebugGoogleServices'.
> Please fix the version conflict either by updating the version of the google-services plugin (information about the latest version is available at https://bintray.com/android/android-tools/com.google.gms.google-services/) or updating the version of com.google.android.gms to 9.0.0.

Look at the project. The build

buildscript {
    repositories {
        jcenter()
    }
    dependencies {
        classpath 'com.android.tools.build:gradle:2.2.3'
        classpath 'com.novoda:bintray-release:0.3.4'
        classpath 'com.google.gms:google-services:3.0.0'
        // NOTE: Do not place your application dependencies here; they belong
        // in the individual module build.gradle files
    }
}

Moreover is app. The build

apply plugin: 'com.android.application'
apply plugin: 'com.google.gms.google-services'

dependencies {
    compile fileTree(include: ['*.jar'], dir: 'libs')
     //google map
    compile 'com.google.android.gms:play-services-maps:9.8.0'
    compile 'com.google.android.gms:play-services-location:9.8.0'
    //google login
    compile 'com.google.android.gms:play-services-auth:9.8.0'
    }

According to the latest version of the document, if 9.8.0 is changed to 9.0.0, then the map’s mmapView.onstop (), mmapView.onstart (); The method is not integrated, nor is it possible to change Google-Services :3.0.0 to document query 3.1.1.
The final solution will be

apply plugin: 'com.android.application'
apply plugin: 'com.google.gms.google-services'

Instead of

apply plugin: 'com.google.gms.google-services'
apply plugin: 'com.android.application'

Can be

JAVA 8: How to Convert List to Map

Several Java 8 examples show how to put a collection of objects (List) into a Map and how to handle multiple duplicate keys.Hosting.java

package com.mkyong.java8

public class Hosting {

    private int Id;
    private String name;
    private long websites;

    public Hosting(int id, String name, long websites) {
        Id = id;
        this.name = name;
        this.websites = websites;
    }

    //getters, setters and toString()
}

1. List toMap — Collectors. ToMap ()
Create a Hosting object collection, and use Collectors. ToMap to convert it to a Map.

TestListMap.java

package com.mkyong.java8

import java.util.ArrayList;
import java.util.List;
import java.util.Map;
import java.util.stream.Collectors;

public class TestListMap {

    public static void main(String[] args) {

        List<Hosting> list = new ArrayList<>();
        list.add(new Hosting(1, "liquidweb.com", 80000));
        list.add(new Hosting(2, "linode.com", 90000));
        list.add(new Hosting(3, "digitalocean.com", 120000));
        list.add(new Hosting(4, "aws.amazon.com", 200000));
        list.add(new Hosting(5, "mkyong.com", 1));

        // key = id, value - websites
        Map<Integer, String> result1 = list.stream().collect(
                Collectors.toMap(Hosting::getId, Hosting::getName));

        System.out.println("Result 1 : " + result1);

        // key = name, value - websites
        Map<String, Long> result2 = list.stream().collect(
                Collectors.toMap(Hosting::getName, Hosting::getWebsites));

        System.out.println("Result 2 : " + result2);

        // Same with result1, just different syntax
        // key = id, value = name
        Map<Integer, String> result3 = list.stream().collect(
                Collectors.toMap(x -> x.getId(), x -> x.getName()));

        System.out.println("Result 3 : " + result3);
    }
}

Output

Result 1 : {1=liquidweb.com, 2=linode.com, 3=digitalocean.com, 4=aws.amazon.com, 5=mkyong.com}
Result 2 : {liquidweb.com=80000, mkyong.com=1, digitalocean.com=120000, aws.amazon.com=200000, linode.com=90000}
Result 3 : {1=liquidweb.com, 2=linode.com, 3=digitalocean.com, 4=aws.amazon.com, 5=mkyong.com}


2. List to Map – Duplicated Key!
2.1 Run below code, and duplicated key errors will be thrown!

TestDuplicatedKey.java

package com.mkyong.java8;

import java.util.ArrayList;
import java.util.List;
import java.util.Map;
import java.util.stream.Collectors;

public class TestDuplicatedKey {

    public static void main(String[] args) {

        List<Hosting> list = new ArrayList<>();
        list.add(new Hosting(1, "liquidweb.com", 80000));
        list.add(new Hosting(2, "linode.com", 90000));
        list.add(new Hosting(3, "digitalocean.com", 120000));
        list.add(new Hosting(4, "aws.amazon.com", 200000));
        list.add(new Hosting(5, "mkyong.com", 1));

        list.add(new Hosting(6, "linode.com", 100000)); // new line

        // key = name, value - websites , but the key 'linode' is duplicated!?
        Map<String, Long> result1 = list.stream().collect(
                Collectors.toMap(Hosting::getName, Hosting::getWebsites));

        System.out.println("Result 1 : " + result1);

    }
}

Output: This error is somewhat misleading. It should show the value of “linode” instead of key.

Exception in thread "main" java.lang.IllegalStateException: Duplicate key 90000
	at java.util.stream.Collectors.lambda$throwingMerger$0(Collectors.java:133)
	at java.util.HashMap.merge(HashMap.java:1245)
	//...

2.2 In order to solve the problem of repeating key above, the third parameter is added to solve:

Map<String, Long> result1 = list.stream().collect(
                Collectors.toMap(Hosting::getName, Hosting::getWebsites,
                        (oldValue, newValue) -> oldValue
                )
        );

Output

Result 1 : {..., aws.amazon.com=200000, linode.com=90000}

Note

(oldValue, newValue) -> OldValue </ code> = = & gt; If the key is repeated, do you choose oldKey or newKey?

3.3 the Try newValue

Map<String, Long> result1 = list.stream().collect(
                Collectors.toMap(Hosting::getName, Hosting::getWebsites,
                        (oldValue, newValue) -> newvalue
                )
        );

Output

Result 1 : {..., aws.amazon.com=200000, linode.com=100000}


3. List to Map – Sort & Collect

TestSortCollect.java

package com.mkyong.java8;

import java.util.*;
import java.util.stream.Collectors;

public class TestSortCollect {

    public static void main(String[] args) {

        List<Hosting> list = new ArrayList<>();
        list.add(new Hosting(1, "liquidweb.com", 80000));
        list.add(new Hosting(2, "linode.com", 90000));
        list.add(new Hosting(3, "digitalocean.com", 120000));
        list.add(new Hosting(4, "aws.amazon.com", 200000));
        list.add(new Hosting(5, "mkyong.com", 1));
        list.add(new Hosting(6, "linode.com", 100000));

        //example 1
        Map result1 = list.stream()
                .sorted(Comparator.comparingLong(Hosting::getWebsites).reversed())
                .collect(
                        Collectors.toMap(
                                Hosting::getName, Hosting::getWebsites, // key = name, value = websites
                                (oldValue, newValue) -> oldValue,       // if same key, take the old key
                                LinkedHashMap::new                      // returns a LinkedHashMap, keep order
                        ));

        System.out.println("Result 1 : " + result1);

    }
}

Output

Result 1 : {aws.amazon.com=200000, digitalocean.com=120000, linode.com=100000, liquidweb.com=80000, mkyong.com=1}

In the above example, the stream has been sorted before collect so that “linode.com= 100,000” becomes “oldValue”.
References

    Java 8 Collectors JavaDocJava 8 — How to sort a MapJava 8 Lambda: Comparator example