Author Archives: Robins

How to Solve Error: “syntax error near unexpected token `newline'”

Here is a simple tutorial on how to solve error: “syntax error near unexpected token `newline'”

Symptom

The message syntax error near unexpected token `newline’ is displayed after the git add command is executed.

Analysis

The command contains a diamond operator (<>).

Solution

Delete the diamond operator (<>) in the command, for example, $ git add README.md.

WebView load webpage, HTTP call error

Project error:

 "Mixed Content: The page at 'https://wx.vzan.com/live/tvchat-427320897?v=637539910901869888#/' was loaded over HTTPS,
 but requested an insecure video 'http://i3.vzan.cc/m3u8/20200221/a487a8d9b2164043bb632165a0cc129c/v.f24306.m3u8'. 
 This request has been blocked; the content must be served over HTTPS.", 
 source: https://wx.vzan.com/live/tvchat-427320897?v=637539910901869888#/ (0)

Error analysis:

Starting from 9.0 (API level 28) on Android, plaintext communication support is disabled by default, which is officially said to be unsafe. Because the video source we play is HTTP protocol, we can’t play it.

Idea 1: add uses cleartext traffic

Indicates whether the application intends to use plaintext network traffic, such as plaintext http. The default value for applications with a target API level of 27 or lower is “true.”. For applications with API level 28 or higher, the default value is “false”.

 <!--Android 9.0 video playback function-->>
  <application
      android:usesCleartextTraffic="true" 
        >
   
  </application>

After modification, some models are still not feasible.

Idea 2: Android access to x5webview

Better article links: https://www.cnblogs.com/cuichen16/p/10785945.htm
After adding, Android 10.0 or above is not feasible for higher version mobile phones

Idea 3: setmixedcontentmode

//Allow cross-domain
webSetting.setAllowFileAccessFromFileURLs(true);
webSetting.setAllowUniversalAccessFromFileURLs(true);
webSetting.setSupportMultipleWindows(true);
if (Build.VERSION.SDK_INT >= 21) {
	webSetting.setMixedContentMode(android.webkit.WebSettings.MIXED_CONTENT_ALWAYS_ALLOW); // This sentence is crucial and can be added after
}

Finally, after adding the above three contents, the last step can be finished. If not, please continue to Baidu and keep looking for the key code.
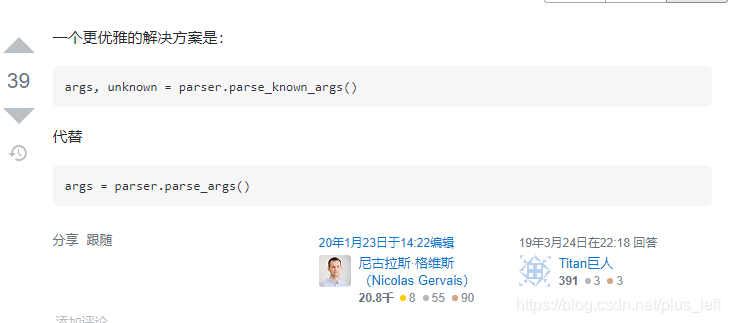
No repositories directory found inside registry_ DATA_ DIR

No repositories directory found inside registry_ DATA_ DIR

Registry uses delete_ docker_ registry_ Solution 1: modify the global configuration file solution 2: modify the third-party plug-in

Registry uses delete_ docker_ registry_ Image delete image

Delete the specified image:
/usr/local/bin/delete_ docker_ registry_ Image - I image name delete the specified image label:
/usr/local/bin/delete_ docker_ registry_ Image - I image name: label

Delete error

REGISTRY_ DATA_ Dir is the directory corresponding to the private library file mapped to the local volume

[root@bigdata ~]# delete_docker_registry_image --image ssh-web-console:latest
No repositories directory found inside REGISTRY_DATA_DIR /opt/registry_data/docker/registry/v2

Solution 1: modify the global configuration file

This method is suitable for using delete on the server_ docker_ registry_ Image three party plug-in for image deletion of docker private library

[root@bigdata ~]# vim /etc/profile
'''
export REGISTRY_DATA_DIR=/data/docker/registry/docker/registry/v2
"/etc/profile" 86L, 2182C 

Solution 2: modify the third-party plug-in

This method is applicable to the server, and it is also applicable to delete when calling shell command with background service_ docker_ registry_ Image three party plug-in for image deletion of docker private library

[root@bigdata ~]# vim /usr/local/bin/delete_docker_registry_image
'''
	if 'REGISTRY_DATA_DIR' in os.environ:
        registry_data_dir = os.environ['REGISTRY_DATA_DIR']
    else:
        registry_data_dir = "/root/data/registry/docker/registry/v2"//Here is the path to your own mirror repository
 
    try:
        cleaner = RegistryCleaner(registry_data_dir, dry_run=args.dry_run)
        if args.untagged:
            cleaner.delete_untagged(image)
        else:
            if tag:
                cleaner.delete_repository_tag(image, tag)
            else:
                cleaner.delete_entire_repository(image)
 
        if args.prune:
            cleaner.prune()
    except RegistryCleanerError as error:
        logger.fatal(error)
        sys.exit(1)
 
 
if __name__ == "__main__":
    main()

nginx: [error] open() “/usr/local/nginx/logs/nginx.pid“ failed (2: No such file or directory)

An error was reported when starting nginx: nginx: [error] open() “/ usr/local/nginx/logs/ nginx.pid ”Failed (2: no such file or directory)
solutions
are different every time I encounter them. I have encountered two solutions here, and I’d like to share them here

Situation 1: nginx.conf Of nginx.pid Annotated
Enter nginx.conf Catalog editor

sudo vi /usr/local/nginx/conf/nginx.conf

Just cancel the comments and restart nginx

sudo nginx -s reload 

Case 2: no configuration directory is specified

Enter to use the specified nginx.conf Restart nginx in the form of file (first, make sure that the PID in the first case is not commented, otherwise it may be opened for the first two times, but an error will still be reported later)

sudo /usr/local/nginx/sbin/nginx -c /usr/local/nginx/conf/nginx.conf


Libtorch Error: Expected object of type Variable but found type CUDALongType for argument #2 ‘index’

what(): Expected object of type Variable but found type CUDALongType for argument #2 ‘index’ (checked_ cast_ variable at … /… /torch/csrc/autograd/ VariableTypeManual.cpp:38 )

Problem Description: using the libtorch function torch:: index_ select(detections_ class_ Left, 0, index), the operation will report an error as above and enter the index_ The definition of select shows: static inline tensor index_ select(const Tensor & self, int64_ t dim, const Tensor & index)

Problem analysis:
through the error prompt, argument # 2 ‘index’ should be of variable type, and I use the tensor (data type is cudalongtype), so I always report an error.

Problem solving:
1. Make clear the difference between variable type and tensor, and quote another article’s interpretation: Zhihu’s article;

2. Turn the tensor into a variable and use the function: Torch:: autograd:: make_ variable(left_ index, false);// tensot—> Variable

Xgboost error solution

problem

Anaconda uses xgboost1.3.3 package to generate the following error message:

Starting in XGBoost 1.3.0, the default evaluation metric used with the
objective ‘ binary:logistic ’ was changed from ‘error’ to ‘logloss’.
Explicitly set eval_ metric if you’d like to restore the old behavior.

Solution

View the versions of packages that can be installed in the xgboost history.
Change xgboost package to historical version:

pip install xgboost==1.2.0

Making Python script into exe command under Windows

Making Python script into exe command under Windows

Method 1: use windows batch processing (Windows command script)

    create a new fanyi.bat file, which is as follows.

    @echo off
    python3 D:\test\fanyi.py %1
    
      add the current folder to the environment variable, re open a CMD window, and enter the command Fanyi Hello

      The second method uses pyintaller module to generate EXE file

        install pyinstaller module

        pip install pyinstaller
        
          enter the D: [test directory, and execute the generate command

          pyinstaller fanyi.py
          

          Generated fanyi.exe The file is in the D::

            add the folder to the environment variable and execute the command in CMD

“ValueError: check_hostname requires server_hostname“ when trying to update conda

After updating CONDA, an error is reported:
valueerror: check_ hostname requires server_ Hostname
this is the problem of scientific Internet port.
Solutions:
1. Check the port number of Science Internet.
2. Add the port number in the. Condarc file.
Check where. Condarc is under windows.
windows:C:\users\username\,linux:/home/username/
3、pip install urllib3==1.25.11。
The contents of condarc file are as follows:

ssl_verify: true
show_channel_urls: true
report_errors: false

Add a piece of code below and modify it as follows:

ssl_verify: true
show_channel_urls: true
report_errors: false
proxy_servers: {http: 127.0.0.1:8888, https: 127.0.0.1:8888}

note that if you change the following 8888 to your own port number, the estimation of each port is different.

Solution to the exception of PEM file logging in EC2

Logging in to EC2 will use

ssh -i <pem flie> ec2-user@<EC2 Public DNS>

To log in. Here are two possible problems and solutions

PEM file permission problem. After typing the SSH command, the following error will be displayed

@@@@@@@@@@@@@@@@@@@@@@@@@@@@@@@@@@@@@@@@@@@@@@@@@@@@@@@@@@@
@ WARNING: UNPROTECTED PRIVATE KEY FILE! @
@@@@@@@@@@@@@@@@@@@@@@@@@@@@@@@@@@@@@@@@@@@@@@@@@@@@@@@@@@@
Permissions 0644 for 'us.pem' are too open.

This can be solved by modifying the PEM file permissions.

chmod 600 us.pem

Request passphrase

After typing the SSH command, the system prompts as follows

Enter passphrase for key '/root/us.pem':

And no matter what text you enter, repeat the above prompt.

It was used in windows

Sublime text after opening the PEM file, copy the content to VI of Linux to generate the PEM file.

After that, we use Notepad of windows to open the PEM file, and then copy it to VI of Linux.