VTK installation
in this paper, under the win10 operating system, installed VTK8.1.2.
, Visual Studio2017 Community, this version can be used for free.
2, cmake-3.13.1-win64-x64.msi
2, cmake-3.13.1-win64-x64.msi
2, CMake
3, VTK8.1.2, download vtk-8.1.2.zip, binary file, free to use.
First of all, install VS2017 and CMAKE two software, because the installation of these two software is very simple, this article is skipped, if you have problems can be Baidu or Bing, pay attention to install VS2017 MFC also installed.
 :
:
 :
:
 :
:
 :
:
 :
:
 :
:
 :
:
 :
:
 :
:
 :
:
 :
:
 :
:
Configuration, compilation and installation of vtk8.1 in qt5.9
0 Compiling Environment
0.1 Package and version
|
Qt5.9.4 |
msvc2015_64 |
|
VS2015 | |
|
VTK 8.1.1 |
https://www.vtk.org/download/ |
|
cmake3.11.3 |
|
0.2 Local directory description
|
Qt5.9.4 msvc64 directory |
C: \ Qt \ Qt5.9.4\5.9.4 \ msvc2015_64 |
|
VTK decompression directory |
C: \ WS \ VTK \ VTK – 8.1.1 |
|
VTK Build directory |
C: \ WS, VTK, VTK – 8.1.1, build |
|
VTK installation directory (containing compiled inc,lib) |
C:\vtk |
1 the VTK download
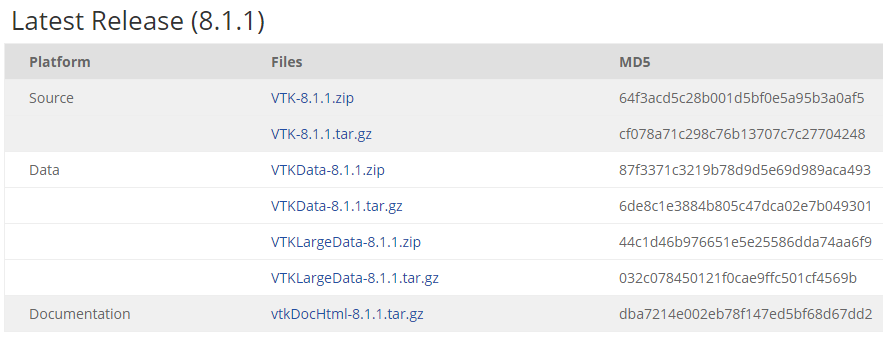
1.1 Download VTK-8.1.1.zip,VTKData-8.1.1.zip files
1.2 unzip
Select unzip to the current directory, the two files will be automatically assembled in the vtk-8.1.1 folder after unzip.

2. Configure VTK for Qt
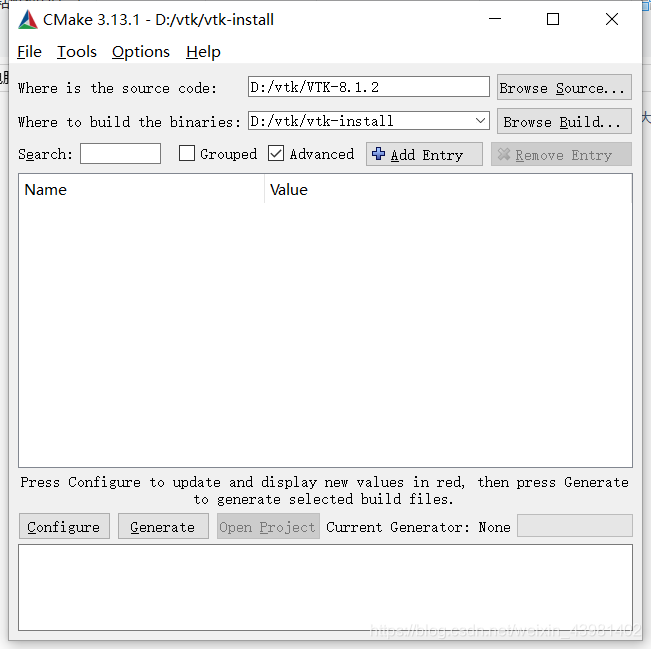
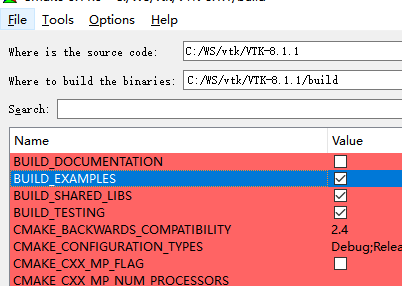
2.1 Start CMake, specify the source directory and compile directory, and click Configure.

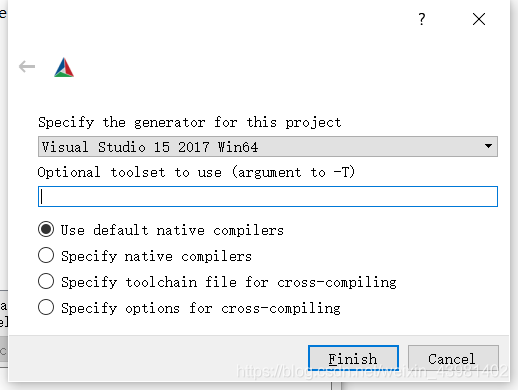
2.2 Specify the VS version
64-bit Visual Studio 14 2015 Win64, 32-bit Visual Studio 14 2015. Click Finish and wait for the configuration to complete.

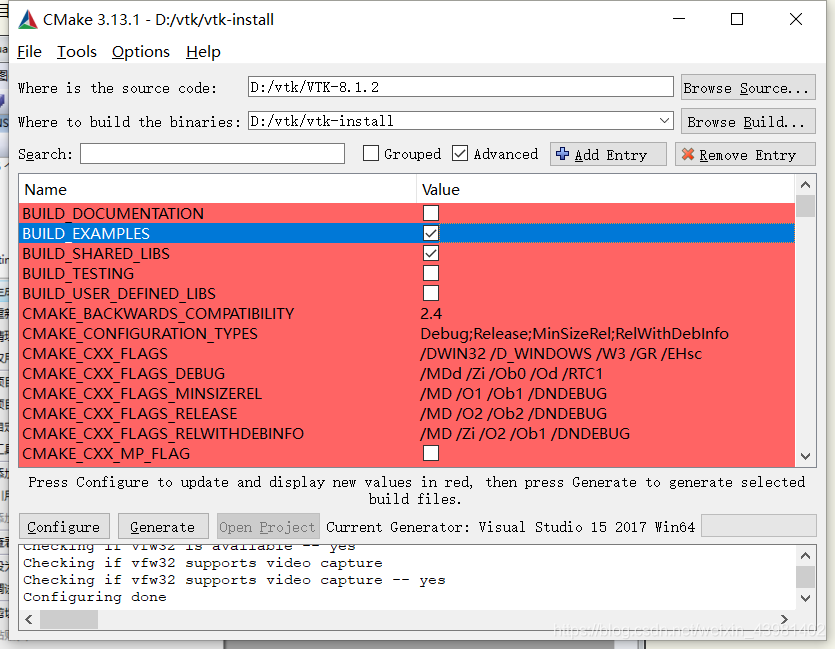
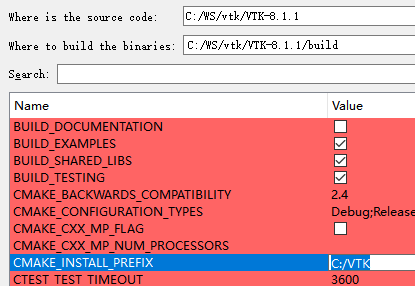
2.3 Configure compilation options (1)
BUILD options
Select Build_Examples, Build_Shared_Libs, and Build_Testing.
Note:
It is not recommended to select Documentation, which requires that Doxygen be installed first.
It is not recommended to remove TESTING as this will cause errors to be reported at the later VS compilation stage and header files to be modified.
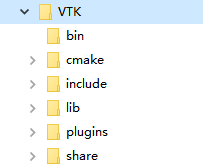
VTK installation directory
Include, lib, DLL (bin), and so on.
VTK_Group_Qt
Set the target environment for compilation to Qt.
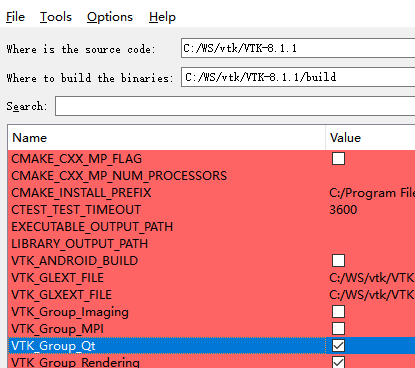
Once you have done all three Settings, click Configure.
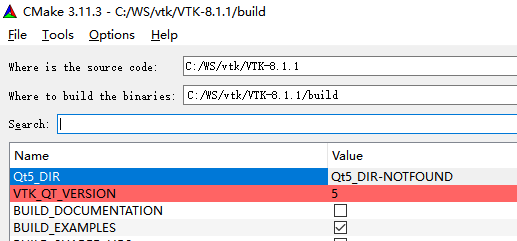
2.4 Configure compilation options (2)
After the first configuration is complete, the user is prompted for Qt5_DIR and VKT_QT_VERSION.
Amend the Qt5_DIR to C:/Qt/Qt5.9.4 5.9.4 msvc2015_64/lib/cmake/Qt5.
Set VKT_QT_VERSION to 5.
Click Configure again to continue.
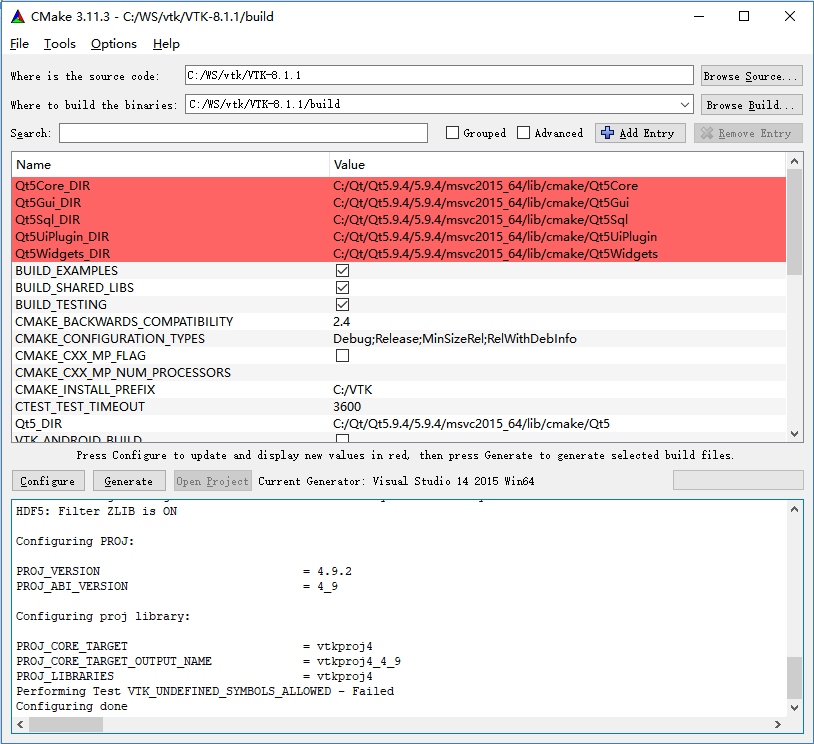
2.5 the Generate engineering
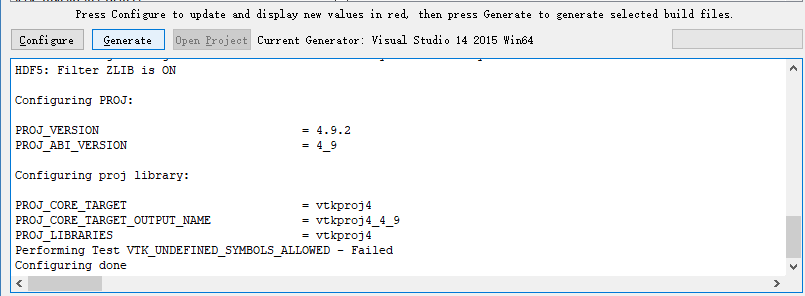
When the configuration is successful, a Configure Done prompt appears. Click Generate to build the project.
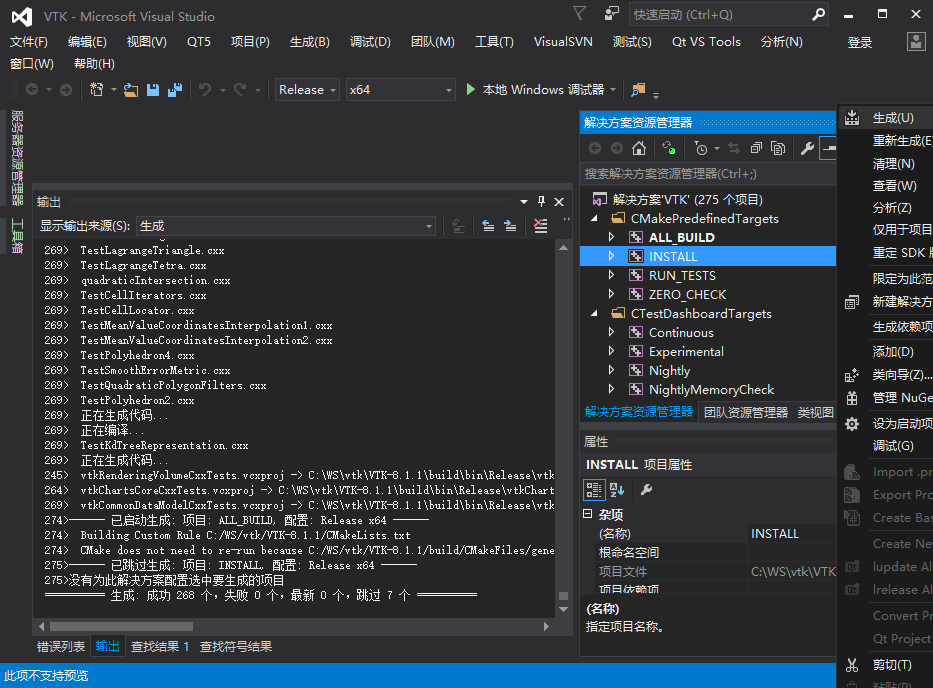
2.6 Start VS2015 and start compiling
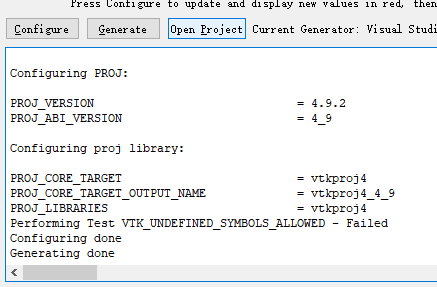
Generating done indicates that VS2015 project has been generated successfully. Click Open Project, VS2015 will start and Open the Project.
3 Compile VTK project in VS2015
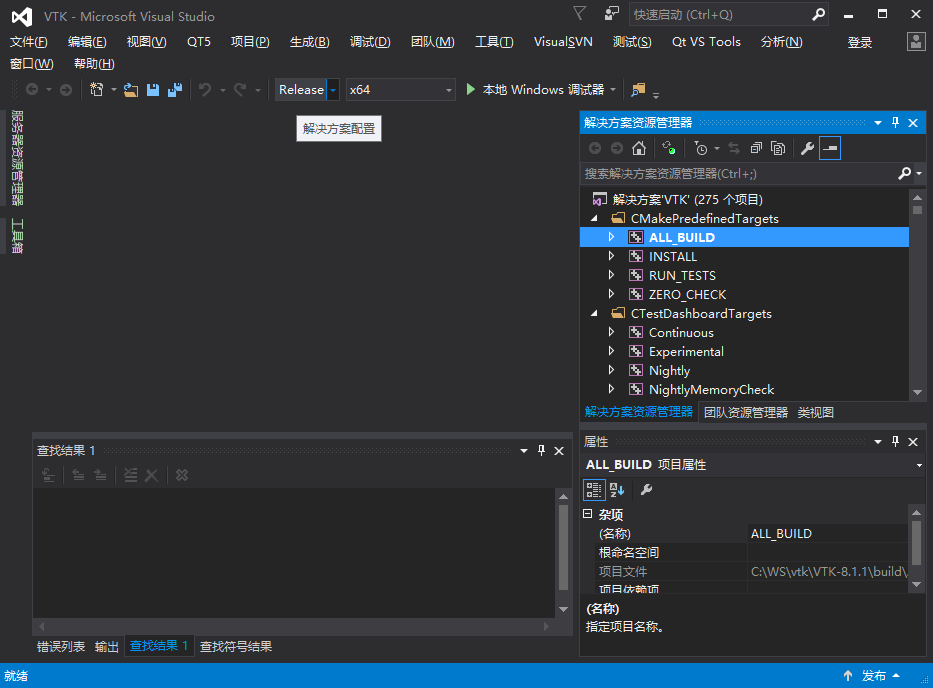
3.1 build
After opening the project, the default startup item is ALL_BUILD, and you can directly select Build. Both the Release and Debug versions need to be built, so two compilations are performed.
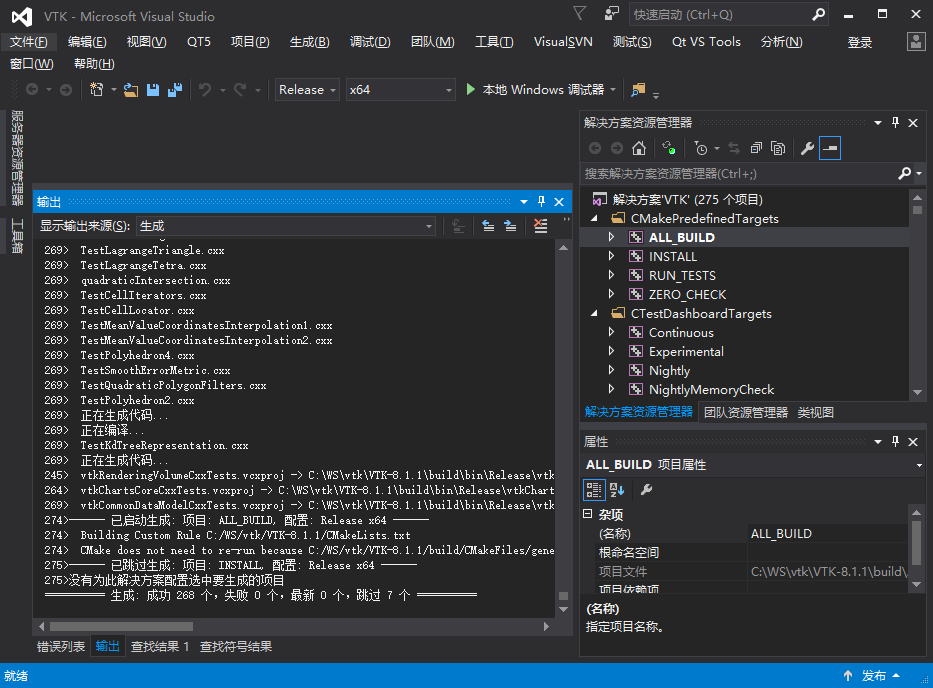
It’s been a long time, long time… . And it worked.

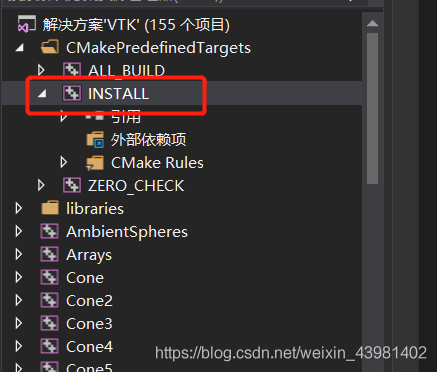
3.2 installation
Select Install, right-click Build.
Install OK.
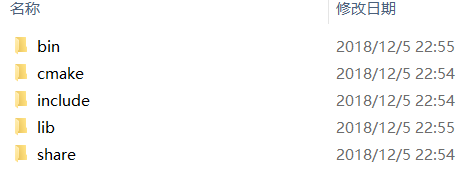
3.3 Compiling results
The results of VS2015 compilation include four parts.
1. Include does not distinguish between Release and Debug versions
2. Lib does not discriminate versions
3. The DLL selects debug and release versions according to the input configuration.
4. Plugin DLL is only available in Release versions.
The four compiled results are placed in two locations.
The.h and.lib files are stored in the C:\VTK directory (step 2.3 configuration). Please do not use DLL files under C:\VTK, because there is no distinction between release and debug.
The.dll file is placed in C:\WS\ VTK \ vtk-8.1.1 \build\bin (step 2.1 configuration).
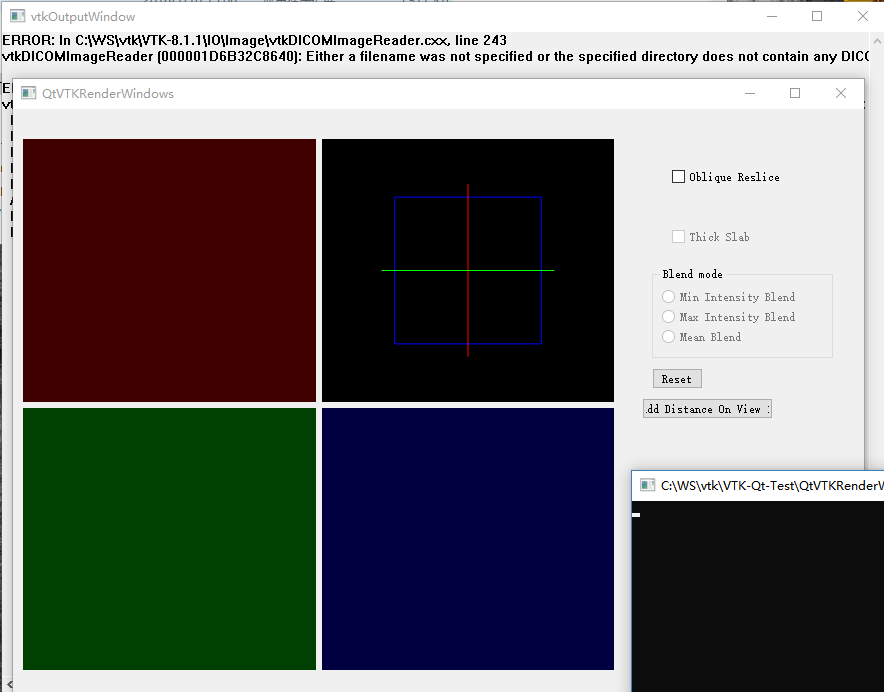
3.4 Compile test successfully (you can skip this step if you don’t want to test)
Compiled DLLs and EXEs in vtk-8.1.1\ build\bin\Release\
Copy qt5gui.dll, qt5core. DLL, qt5Widgets. DLL from the Qt directory to this directory or the debug directory. (Environment variables can also be configured)
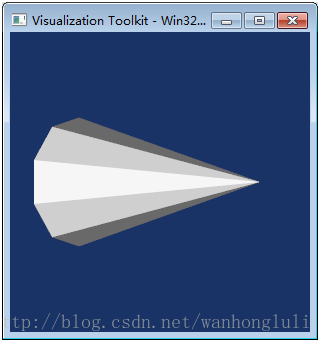
Run qtvtkrenderWindows.exe in this directory, and see as shown in the figure, the compilation of exe is successful after startup.
4. Install the QVTKWidget plug-in for Qt Designer
4.1 installation
Will be C: \ WS, VTK, VTK – 8.1.1, build \ bin \ Release \
Copy the QVTKWidgetPlugin.dll to the C:\Qt\Qt5.9.4\5.9.4\msvc2015_64\plugins\designer\ directory.
Note: Be sure to copy the Release version.
4.2 validation
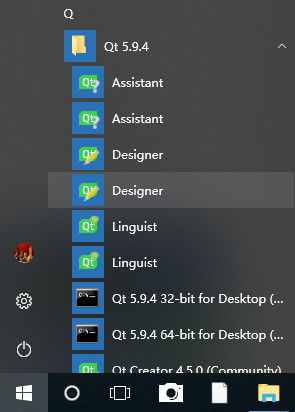
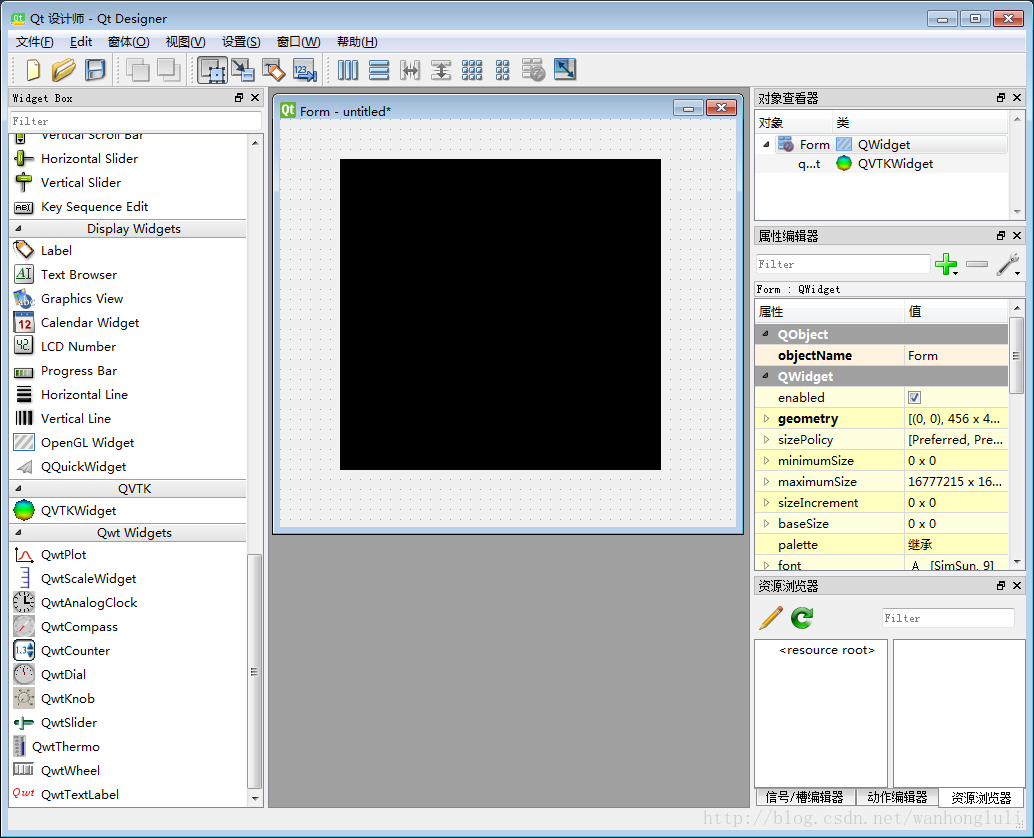
Start Qt Designer.
There are two versions, usually 32-bit at the top and 64-bit at the bottom. Select according to the compiled version.
At the bottom of the left-hand Widget Box you can see the QVTKWidget description installed successfully.

5 supplementary
5.1 Use VTK in VS2015 environment
You need to install the Qt Visual Studio Tools extension in the VS2015 extension and update. Note that QTPackage cannot use the QVTKWidget, do not install.
Installation steps
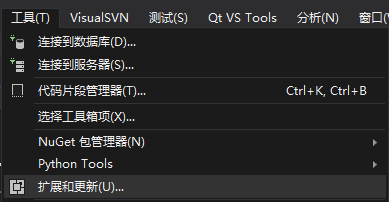
1. Select Extend and Update from the Tools menu
2. Select Qt Visual Studio Tools for installation online. There is also a QTPackage that cannot be used, do not install it.

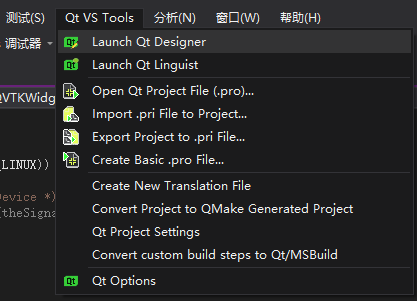
3. After successful installation, Qt VS Tools will appear on the menu. Click Launch Qt Designer to see it.
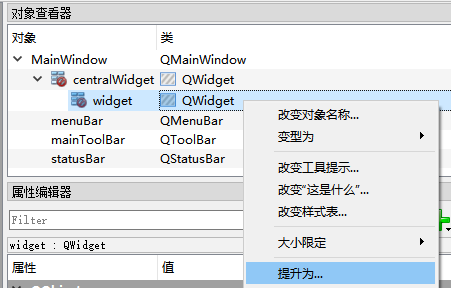
5.2 Use VTK in the Qt Creator environment
Designer in Qt Creator environment cannot see QVTKWidget, so it cannot be dragged and dropped directly. You need to drag and drop QWidget first, and then select QWidget to be promoted to QvtkWidget.
CMake_ Compiling VTK_ 9.0.0 running vtkcommoncolor DLL has access conflict
https://blog.csdn.net/weixin_42291376/article/details/105745115 in this place Here also thanks to the original blogger
0x00007FF8959AD270 (VTKCommonColour 9.0.dll) Exception: 0xC0000005: Access conflict occurs when reading position 0x0000009469200000.
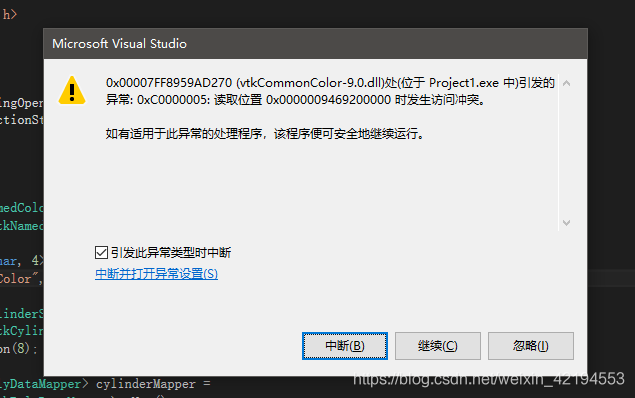
ah
 Then check to post an article
https://blog.csdn.net/qq_42641977/article/details/107687726.
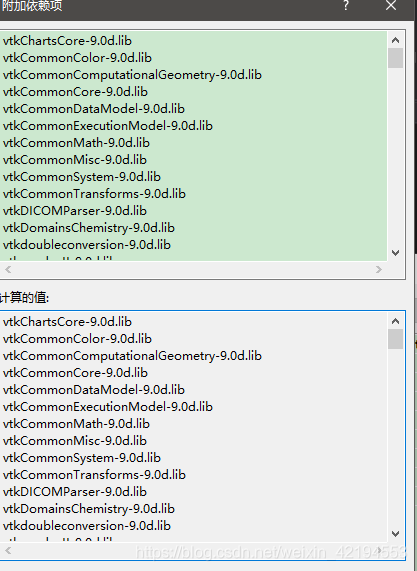
linker – input – attached dependency 9.0.lib suffix has been removed. 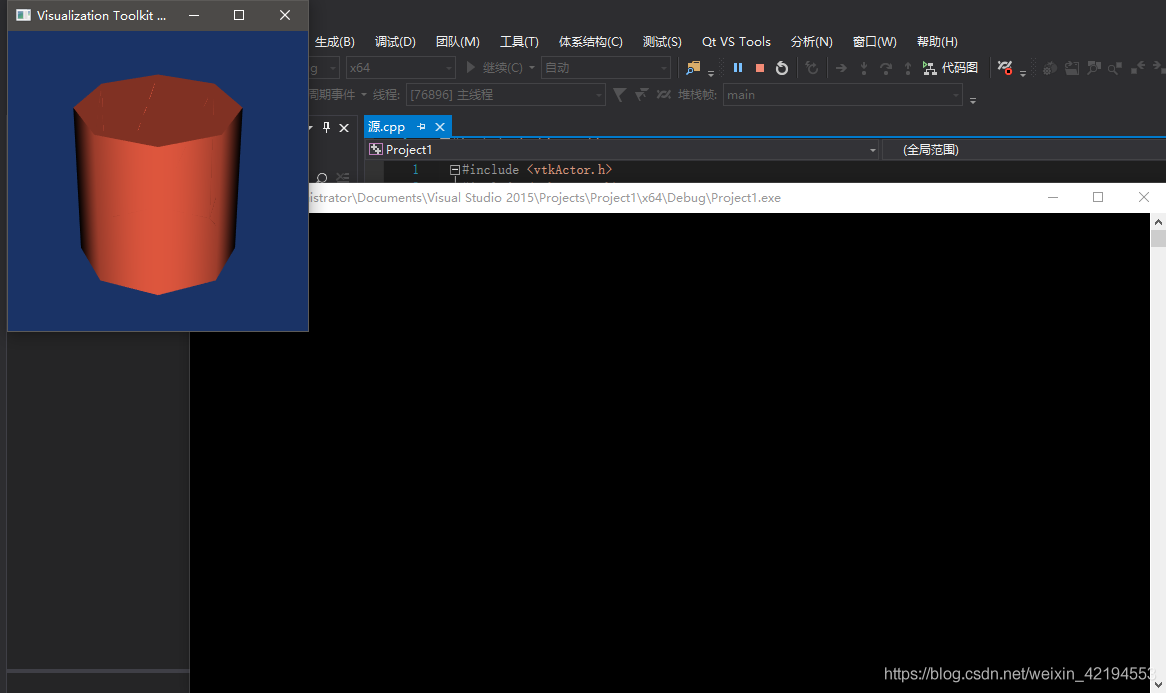
VTK + QT + vs compilation and installation configuration
The VTK, (Visualization Toolkit) is an open source, free software system for 3D computer graphics, image processing, and visualization. VTK is designed and implemented on the basis of object-oriented principles, its kernel is built in C++, contains about 250,000 lines of code, more than 2000 classes, but also contains several conversion interface, so you can also use VTK freely through Java, Tcl/Tk and Python various languages. VTK will be scientific experimental data such as architecture, meteorology, medicine, biology or aerospace, on the body, surface, light source and so on realistic rendering, so as to help people understand those who take the complex and often large scale digital presentation of scientific concepts or results.
purpose
The purpose of this article is to build an application development environment for VTK+ Qt +VS.
Qt version: 5.7.0
VTK version: 7.1.1
VS Version: 2013 (VC12)
Precondition: Cmake are installed in your environment, QT5.7.0 and VS2013 already configured installation, installation configuration is very simple, if there is something wrong with the configuration can refer to http://blog.csdn.net/goodtomsheng/article/details/45719205
VTK compilation and installation
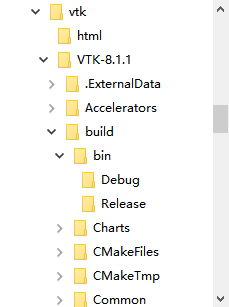
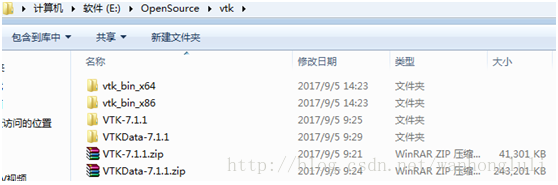
1. Download VTK7.1.1http://www.vtk.org/download/, at present the website is the latest version VTK8.0.1, conservative estimates I chose VTK7.1.1 version, the download file VTK – 7.1.1. Zip, VTKData – 7.1.1. Zip.
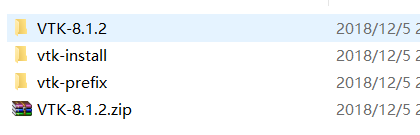
2. Create a directory named VTK (name whatever), unzip ctk-7.1.1.zip, vtkdata-7.1.1.zip into VTK directory, and create a vtk_bin_x64 directory to store the generated VTK project after CMake, the directory structure after unzip is shown in the figure.
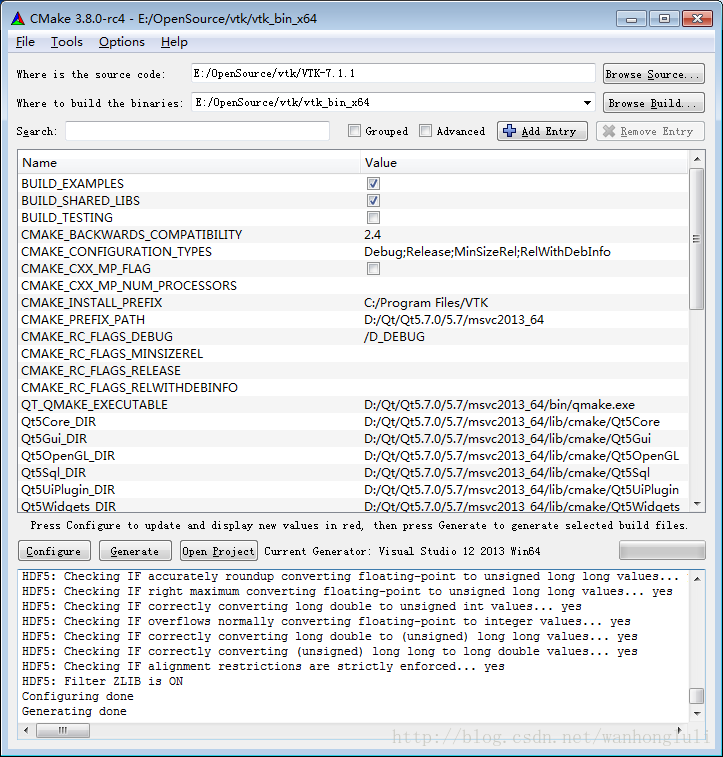
3. Open cmak-gui, select vtk-7.1.1 from Where is thesource code and vtk_bin_x64 from Where to build the binaries. Click Configure, select Visual Studio12 2013 in the pop-up dialog, and click Finish. After the Configue configuration is complete, there are several macros that need to be configured:
BUILD_SHARED_LIBS – Indicates whether to build a shared library or a static library. Default is the state selected for compilation. We want to build the shared library, so leave the default state.
BUILD_EXAMPLES – Indicates compilation of sample projects, selected here for easy learning.
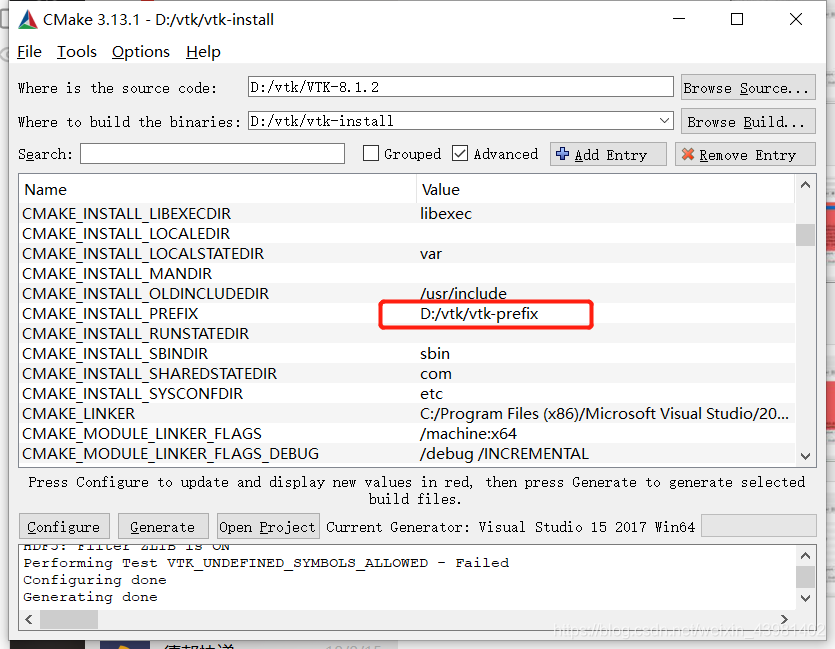
CMAKE_INSTALL_PREFIX — After the VTK compilation is complete, the installation directory, bin, lib, include, etc., will be copied to its specified directory. The default installation directory for x64 compilation is “C:/ProgramFiles /VTK”, but the real macro is set by VTK7.1.1. INSTALL_BIN_DIR, INSTALL_INC_DIR, INSTALL_LIB_DIR, INSTALL_MAN_DIR, INSTALL_PKGCONFIG_DIR. If you are not an administrator, it will fail to install in the default directory because of permissions issues.
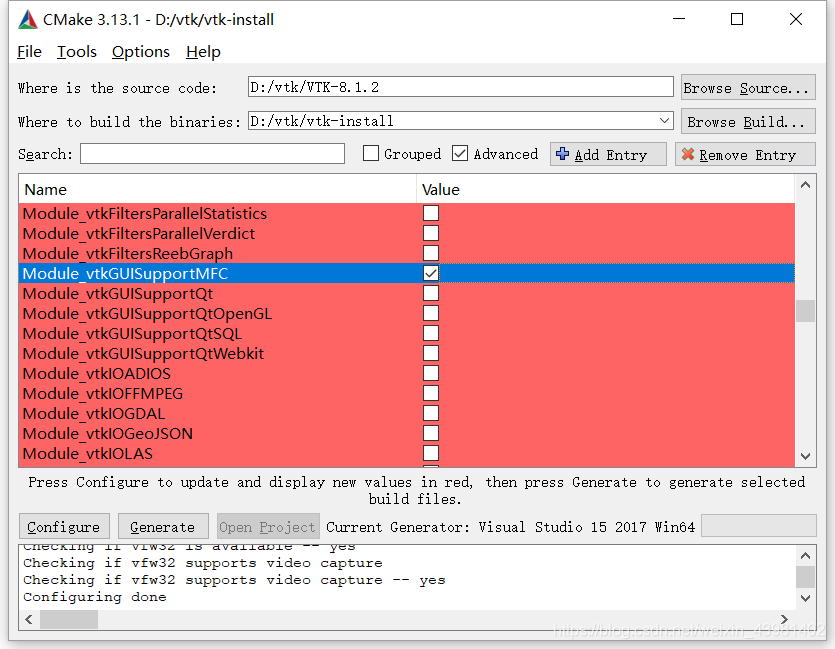
VTK_Group_Qt — Qt supported, not supported by default, we want to support Qt integrated development, so check this item. Also check the module_vtkguisupportQt and module_vtkguisupportQtopengl macros to support Qt.
VTK_QT_VERSION – QT version, I used to QT5 set to 5, so this option is not after the Configure, it doesn’t matter, such as the back after clicking the Generate reports QT version failed, after this time you can find this option and set to Generate was no problem.
VTK_DATA_STORE — VTK data storage location, is the previous from the VTK official website down the VTKData-7.1.1.zip, specified to decompress two layers under the directory, I here is “E:\OpenSource\ VTK \VTKData-7.1.1\VTK-7.1.1\.ExternalData”.
Module_vtkguisupportMFC – Specifies the library that will be generated to integrate with the MFC framework. I don’t need it here, so leave it unchecked.
Click Add Entry, Add CacheEntry, CMAKE_PREFIX_PATH, and set the Value to your Qt installation directory, “D:\Qt\Qt5.7.0\5.7\ MSVC2013_64”.
Click Generate when all of the above options are set. This will fail once due to the version of Qt, and it will be OK to regenerate after VTK_QT_VERSION is set correctly. After the CMAKE work is done, the interface is shown below, where the CMAKE work is finished.
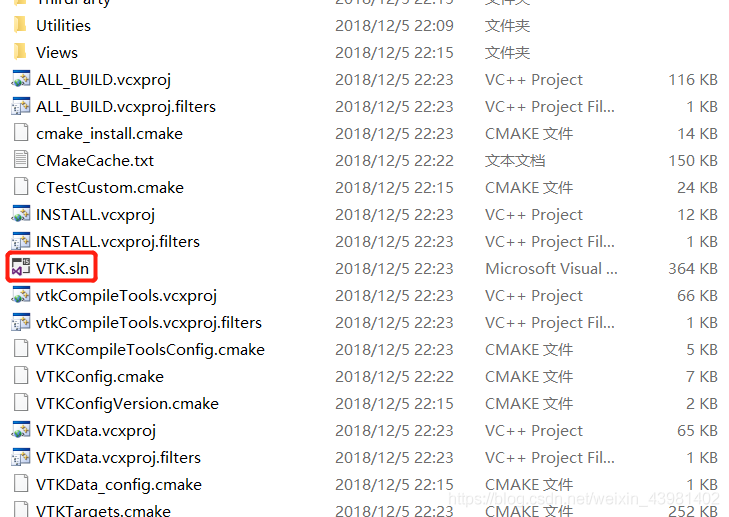
4. After Generate is completed, click OpenProject to open the configured VS2013 project. Click the menu to generate ->; Batch build, select ALL_BUILD to build Debug and Release versions. After the build is complete, click on the color when the build ->; Batch build, select Install to build Debug, this will Debug version lib, bin, inlcude and other copies to the “C:/Program Files /VTK” directory set above.
5. Combine with Qt Designer, Copy the qvtkwidgetPlugin.dll and the qvtkwidgetPlugin.lib and the qvtkwidgetPlugin.exp from the bin path generated by the Release to the plugins\designer (my path is D: QT \ qt\ Qt5.7.0\5.7\msvc2013_64\) Plugins \ Designer), do not use the Debug version to compile the generated file, Qt Designer will not read it. After setup, open QTDesigner and you will see QVTKWidget, as shown in the figure below.
6. VS project configuration (the official documentation of VTK recommends using CMAKE to manage the project, here will introduce some special attention to not using CMAKE to manage the project)
A) Create a new VS project (either a Qt project or a C++ project)
C:\Program Files\VTK\ Include \ VTK-7.1 \ C:\Program Files\VTK\lib \ C:\Program Files\VTK\lib \ A good way to do this is to open a project under “Examples” and copy it directly from the project configuration input library.
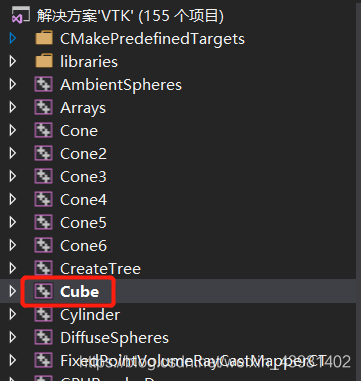
C) at that time if you send the sample program code copy of the Cone to the current engineering (Cone code given below), compiled by anything, while on a running program can not run normally or hang up directly after the operation, debugging to follow up after found vtkPolyDataMapper: : New () returns NULL, and the same code Examples of instances of engineering Cone can run normally and display effect. After analyzing the Cone project, we found that it had a number of preconditioning instructions, and one of the key preconditioning instructions was:
VtkRenderingCore_INCLUDE = “E:/OpenSource/VTK/vtk_bin_x64 CMakeFiles/vtkRenderingCore_AUTOINIT_vtkInteractionStyle_vtkRenderingOpenGL2. H”.
Vtkrenderingcore_autoinit_vtkinteractionstyle_vtkrenderingopengl2.h copy to vtkinteractionstyle_vtkrenderingopengl2.h indluce directory, and then add the preprocessor to your own VS project:
vtkRenderingCore_INCLUDE=”vtkRenderingCore_AUTOINIT_vtkInteractionStyle_vtkRenderingOpenGL2.h”
To see what the preprocessor does, open the.h file and see that it defines only one macro:
# define vtkRenderingCore_AUTOINIT2 (vtkInteractionStyle vtkRenderingOpenGL2), is actually the initialization VTK module, according to the official specification, can define this macro before all include files:
# define vtkRenderingCore_AUTOINIT2 (vtkInteractionStyle vtkRenderingOpenGL2), which can solve the problem. Or, as follows, at the very beginning of the code, before all the header files are included.
#include “vtkAutoInit.h”
VTK_MODULE_INIT(vtkRenderingOpenGL2); // VTK was built withvtkRenderingOpenGL2
VTK_MODULE_INIT(vtkInteractionStyle);
Either of the above methods can solve the problem. More detailed explanation can refer to http://www.vtk.org/Wiki/VTK/VTK_6_Migration/Factories_now_require_defines. The results of the Cone project are shown below. The window closes automatically after the Cone is rotated for a few seconds.
Compiled libraries address: https://pan.baidu.com/s/1pLMChzP wfd6
#include "vtkConeSource.h"
#include "vtkPolyDataMapper.h"
#include "vtkRenderWindow.h"
#include "vtkCamera.h"
#include "vtkActor.h"
#include "vtkRenderer.h"
int main()
{
  // Next we create an instance of vtkConeSource and set some of its
  // properties. The instance of vtkConeSource "cone" is part of a
  // visualization pipeline (it is a source process object); it produces data
  // (output type is vtkPolyData) which other filters may process.
  vtkConeSource *cone = vtkConeSource::New();
  cone->SetHeight( 3.0 );
  cone->SetRadius( 1.0 );
  cone->SetResolution( 10 );
  // In this example we terminate the pipeline with a mapper process object.
  // (Intermediate filters such as vtkShrinkPolyData could be inserted in
  // between the source and the mapper.)  We create an instance of
  // vtkPolyDataMapper to map the polygonal data into graphics primitives. We
  // connect the output of the cone souece to the input of this mapper.
  vtkPolyDataMapper *coneMapper = vtkPolyDataMapper::New();
  coneMapper->SetInputConnection( cone->GetOutputPort() );
  // Create an actor to represent the cone. The actor orchestrates rendering
  // of the mapper's graphics primitives. An actor also refers to properties
  // via a vtkProperty instance, and includes an internal transformation
  // matrix. We set this actor's mapper to be coneMapper which we created
  // above.
  vtkActor *coneActor = vtkActor::New();
  coneActor->SetMapper( coneMapper );
   // Create the Renderer and assign actors to it. A renderer is like a
  // viewport. It is part or all of a window on the screen and it is
  // responsible for drawing the actors it has.  We also set the background
  // color here.
  vtkRenderer *ren1= vtkRenderer::New();
  ren1->AddActor( coneActor );
  ren1->SetBackground( 0.1, 0.2, 0.4 );
  // Finally we create the render window which will show up on the screen.
  // We put our renderer into the render window using AddRenderer. We also
  // set the size to be 300 pixels by 300.
  vtkRenderWindow *renWin = vtkRenderWindow::New();
  renWin->AddRenderer( ren1 );
  renWin->SetSize( 300, 300 );
  // Now we loop over 360 degrees and render the cone each time.
  int i;
  for (i = 0; i < 360; ++i)
  {
    // render the image
    renWin->Render();
    // rotate the active camera by one degree
    ren1->GetActiveCamera()->Azimuth( 1 );
  }

  //
  // Free up any objects we created. All instances in VTK are deleted by
  // using the Delete() method.
  //
  cone->Delete();
  coneMapper->Delete();
  coneActor->Delete();
  ren1->Delete();
  renWin->Delete();

  return 0;
}
Recording some pits of VTK + QT
2. When cmake compiles VTK, select x64, enter the release mode that you want to select when you build VTK (otherwise there will be lib missing)
3. VS remember to start in administrator mode