Tag Archives: python

The problem of failed to create process occurs in pyinstaller package program of Python

method 1:

in the Python installation path to find Scripts file under the pyinstaller-script.py file and open, if the path does not have quotes then put quotes, this situation generally occurs in the pyinstaller version is low

method 2:

if the file cannot be packaged with quotation marks, then from the DOS command line into the Scripts folder of the Python installation path execute: Python pyinstaller-script.py G:\Python\Project\Pychar\Qt5\demo5.py (replace G:\Python\Project\Pychar\Qt5\demo5.py with the file you need to package yourself)

Worker failed to boot

the following error no detailed information, don’t know what went wrong code

Traceback (most recent call last):
  File "/home/charleswu/.virtualenvs/process/lib/python3.6/site-packages/gunicorn/arbiter.py", line 203, in run
    self.manage_workers()
  File "/home/charleswu/.virtualenvs/process/lib/python3.6/site-packages/gunicorn/arbiter.py", line 545, in manage_workers
    self.spawn_workers()
  File "/home/charleswu/.virtualenvs/process/lib/python3.6/site-packages/gunicorn/arbiter.py", line 617, in spawn_workers
    time.sleep(0.1 * random.random())
  File "/home/charleswu/.virtualenvs/process/lib/python3.6/site-packages/gunicorn/arbiter.py", line 245, in handle_chld
    self.reap_workers()
  File "/home/charleswu/.virtualenvs/process/lib/python3.6/site-packages/gunicorn/arbiter.py", line 525, in reap_workers
    raise HaltServer(reason, self.WORKER_BOOT_ERROR)
gunicorn.errors.HaltServer: <HaltServer 'Worker failed to boot.' 3>

Just add the parameter — preload to the gunicorn command to see the detailed error message
. Add the parameter and the error message is:

Traceback (most recent call last):
  File "/home/charleswu/.virtualenvs/process/bin/gunicorn", line 11, in <module>
    sys.exit(run())
  File "/home/charleswu/.virtualenvs/process/lib/python3.6/site-packages/gunicorn/app/wsgiapp.py", line 61, in run
    WSGIApplication("%(prog)s [OPTIONS] [APP_MODULE]").run()
  File "/home/charleswu/.virtualenvs/process/lib/python3.6/site-packages/gunicorn/app/base.py", line 223, in run
    super(Application, self).run()
  File "/home/charleswu/.virtualenvs/process/lib/python3.6/site-packages/gunicorn/app/base.py", line 72, in run
    Arbiter(self).run()
  File "/home/charleswu/.virtualenvs/process/lib/python3.6/site-packages/gunicorn/arbiter.py", line 60, in __init__
    self.setup(app)
  File "/home/charleswu/.virtualenvs/process/lib/python3.6/site-packages/gunicorn/arbiter.py", line 120, in setup
    self.app.wsgi()
  File "/home/charleswu/.virtualenvs/process/lib/python3.6/site-packages/gunicorn/app/base.py", line 67, in wsgi
    self.callable = self.load()
  File "/home/charleswu/.virtualenvs/process/lib/python3.6/site-packages/gunicorn/app/wsgiapp.py", line 52, in load
    return self.load_wsgiapp()
  File "/home/charleswu/.virtualenvs/process/lib/python3.6/site-packages/gunicorn/app/wsgiapp.py", line 41, in load_wsgiapp
    return util.import_app(self.app_uri)
  File "/home/charleswu/.virtualenvs/process/lib/python3.6/site-packages/gunicorn/util.py", line 350, in import_app
    __import__(module)
  File "/home/charleswu/AiDoctor/process_bchao/app.py", line 44, in <module>
    app = create_application()
  File "/home/charleswu/AiDoctor/process_bchao/app.py", line 31, in create_application
    from webapi import image_api
  File "/home/charleswu/AiDoctor/process_bchao/webapi/__init__.py", line 3, in <module>
    from .upload_image import image_api
  File "/home/charleswu/AiDoctor/process_bchao/webapi/upload_image.py", line 9, in <module>
    from interface import get_b_result
  File "/home/charleswu/AiDoctor/process_bchao/interface.py", line 6, in <module>
    from structuration import Struct
  File "/home/charleswu/AiDoctor/process_bchao/structuration.py", line 7, in <module>
    from split_word import desc_list, diag_list
ModuleNotFoundError: No module named 'split_word'

done!!!


use cv.imshow Error: (- 215: assertion failed) size.width >0 && size.height >0 in function ‘cv::imshow’

USES cv2 to display images:

import tensorflow as tf
import cv2 as cv
image = cv.imread('F:\CODES\n07740461_173.jpg')
cv.imshow("input", image)

error:


resolution 1: changes the “\” of the image path to “/” to display correctly.

image = cv.imread('F:/CODES/n07740461_173.jpg')

resolution 2: in the image path before the “r”, can be displayed correctly.

image = cv.imread(r'F:\CODES\n07740461_173.jpg')


django.db.utils .IntegrityError: NOT NULL constraint failed: blog_ blog.author_ ID error resolution

I am learning django these days, the project is to do my own blog, and then the shell command to create a new blog when the following error

django.db.utils.IntegrityError: NOT NULL constraint failed: blog_blog.author_id

is known from the error message that the non-null constraint of the database is the problem, and it is in blog.auther_id that the problem is

and then look at my creation process, first go back to my models model, the source code is as follows

from django.db import models
from django.contrib.auth.models import User

#  创建博客分类模型
class BlogType(models.Model):
    type_name = models.CharField(max_length=15)
    def __str__(self):
        return self.type_name

#  创建博客模型
class Blog(models.Model):
    title = models.CharField(max_length=50)
    blog_type = models.ForeignKey(BlogType, on_delete=models.DO_NOTHING)
    content = models.TextField()
    author = models.ForeignKey(User, on_delete=models.DO_NOTHING)
    created_time = models.DateTimeField(null=True, auto_now_add=True)
    last_updated_time = models.DateTimeField(null=True, auto_now=True)
    def __str__(self):
        return "<Blog: %s>" % self.title 

can tell me the foreign key I used in the author, and the author class I didn’t define in the model, so my shell code is as follows:

> > > from django.contrib.auth.models import User
> > > User.objects.all()
< QuerySet [<User: xxz>] >
> > > blog.auther = User.objects.all()[0]
> > > blog.save()

sqlite3.IntegrityError: NOT NULL constraint failed: blog_blog.author_id

and then there’s the problem, and the solution to that is very simple, is just to type

again

> > > blog.author_id = 1
> > > blog.save()

problem solved, so now let’s talk about how the problem came to be

https://docs.djangoproject.com/en/1.11/ref/models/instances/

here in the django document is the sentence

Model. pk

Regardless of whether you define a primary key field yourself, or let Django supply one for you, each model will have a property called pk. It behaves like a normal attribute on the model, but is actually an alias for whichever attribute is the primary key field for the model. You can read and set this value, just as you would for any other attribute, and it will update the correct field in the model.

translation is

whether you define your own primary key field or let Django provide one for you, each model has a property called pk. It behaves like a normal property on the model, but is actually an alias for an alias that belongs to the model's primary key field. You can read and set this value as you would any other property, and it updates the correct fields in the model.

general meaning is that you defined in the models of all the classes (as a table in the database), there will be a primary key id, every time you create an object, like write blog = blog () above, will automatically assign an id in the blog, and the increment, by the same token, the auther in the blog, to define a id, but not defined before, so this manual are defined.

Win10-64 installing pygraphviz

when you recently deployed a project, the PIP install requirements required a pygraphviz package. This package is for graphical data.
requirements
requirements
requirements
requirements
requirements
requirements
requirements
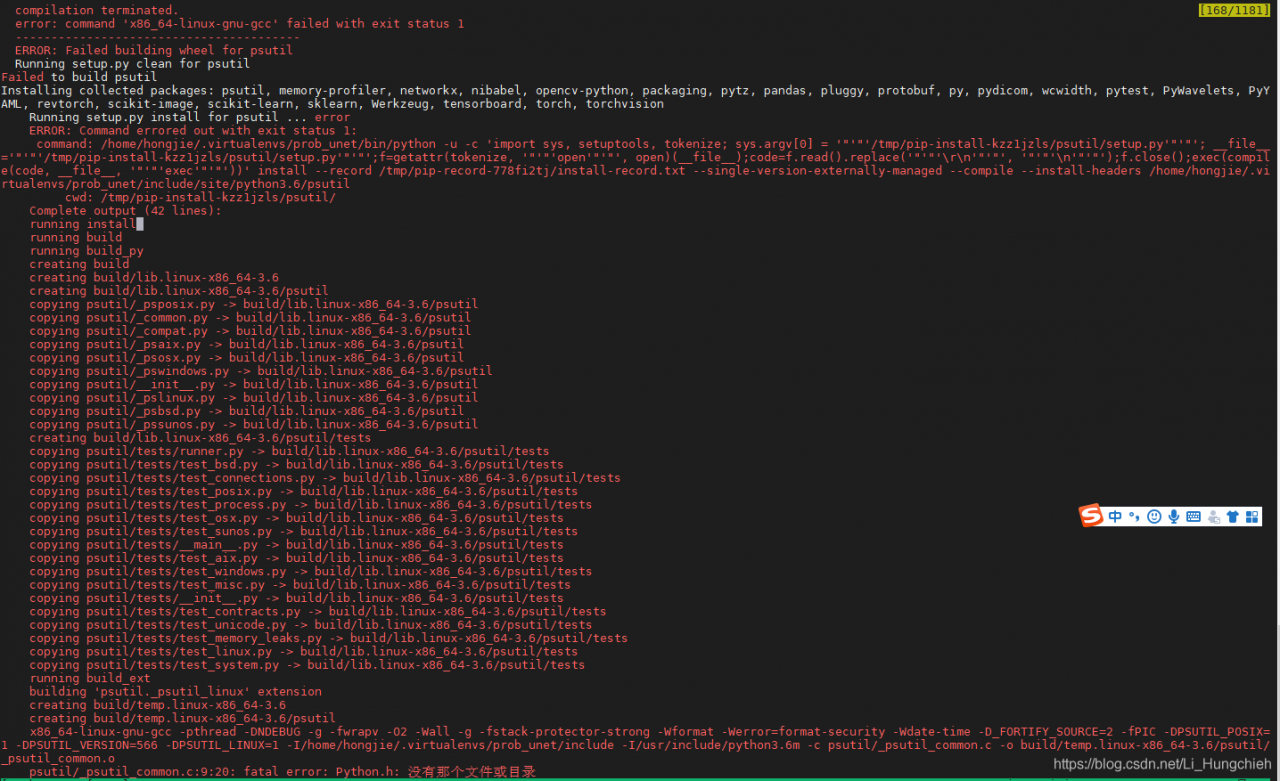
is the associated error message as shown below.

error: Microsoft Visual C++ 10.0 is required. Get it with "Microsoft Windows SDK 7.1": www.microsoft.com/download/details.aspx?id=8279

  ----------------------------------------
  Failed building wheel for pygraphviz
  Running setup.py clean for pygraphviz
Successfully built dominate Flask-Bootstrap flask-nav Flask-Uploads itsdangerous MarkupSafe visitor
Failed to build pygraphviz
Installing collected packages: appdirs, chardet, click, dominate, MarkupSafe, Jinja2, itsdangerous, Werkzeug, Flask, visitor, Flask-Bootstrap, Flask-Login, flask-nav, Flask-Uploads, WTForms, Flask-WTF, gunicorn, iso8601, numpy, pyparsing, six, packaging, pytz, requests, decorator, networkx, graphviz, pygraphviz
  Running setup.py install for pygraphviz ... error
    Complete output from command f:\fiat_dev\venv\scripts\python.exe -u -c "import setuptools, tokenize;__file__='C:\\Users\\JIANGM~1.FNS\\AppData\\Local\\Temp\\pip-install-b3cfvse8\\pygraphviz\\setup.py';f=getattr(tokenize, 'open', open)(__file__);code=f.read().replace('\r\n', '\n');f.close();exec(compile(code, __file__, 'exec'))" install --record C:\Users\JIANGM~1.FNS\AppData\Local\Temp\pip-record-h2160l90\install-record.txt --single-version-externally-managed --compile --install-headers f:\fiat_dev\venv\include\site\python3.4\pygraphviz:
	...
    running build_ext
    building 'pygraphviz._graphviz' extension
    error: Microsoft Visual C++ 10.0 is required. Get it with "Microsoft Windows SDK 7.1": www.microsoft.com/download/details.aspx?id=8279

    ----------------------------------------
Command "f:\fiat_dev\venv\scripts\python.exe -u -c "import setuptools, tokenize;__file__='C:\\Users\\JIANGM~1.FNS\\AppData\\Local\\Temp\\pip-install-b3cfvse8\\pygraphviz\\setup.py';f=getattr(tokenize, 'open', open)(__file__);code=f.read().replace('\r\n', '\n');f.close();exec(compile(code, __file__, 'exec'))" install --record C:\Users\JIANGM~1.FNS\AppData\Local\Temp\pip-record-h2160l90\install-record.txt --single-version-externally-managed --compile --install-headers f:\fiat_dev\venv\include\site\python3.4\pygraphviz" failed with error code 1 in C:\Users\JIANGM~1.FNS\AppData\Local\Temp\pip-install-b3cfvse8\pygraphviz\

in normal fashion, I started Posting this error message to Google. Found some so-called solutions, including pyGraphviz’s Github community, and other blog posts. The solution:
1. Let you install graphviz, then set the environment variable. Then specify at installation time a parameter such as Pip’s inlude path
2. Let you install a 32-bit python, then go to 1, recompile and install pygraphviz
3. Just get out of Windows Binaries for Python Extension Packages.
I’ve tried all of the above solutions. However, when I was compiling, there were a lot of c compilation errors. Format conversion errors and so on. doesn’t solve the real problem . I feel suspicious, these posts on the Net clearly say that doing so can solve ah!

when I received a useful message saying that pygraphviz does not support python3.4 or above . So I reinstalled Python 3.4 and changed the system’s Python environment variable. When I re-installed PIP Install Pygraphviz-xxx-.whl in the CMD, I was notified that the installation was successful.
but for this project I used vitrualenv to manage the packages it needed. I just wrapped this in the system Python library. So I activate the current venv,
and run PIP install pygraphviz-xxx-.whl again, a familiar error message appears:

(venv) F:\pygraphviz-1.3.1>pip install pygraphviz-1.3.1-cp34-none-win_amd64.whl
pygraphviz-1.3.1-cp34-none-win_amd64.whl is not a supported wheel on this platform.
You are using pip version 10.0.1, however version 18.0 is available.
You should consider upgrading via the 'python -m pip install --upgrade pip' command.

wait, didn’t you just install it?What’s the problem?
after some thinking, I found that the virtual python environment built in venv was set up a week ago. At that time, the python version of the system was 3.5.
, so the python version in this virtual environment was also 3.5. So the installation failed. To prove my point, I deleted Venv, re-opened a CMD, and reinstalled a virtual environment.
when I type PIP install pygraphviz-xxx-.whl again, the command line indicates that the installation was successful.

WHL is not a supported wheel on this platform.
is not supported on this platform. WHL is not a supported wheel on this platform. I always thought this meant that this version of the WHL file was not supported by my system version. Now, in retrospect, what it’s really saying is, the Python version doesn’t support, right?

and the last thing to notice is

pygraphviz package can be used on the premise that the software graphviz has been installed on the system, visit the official website to download the installation package, and install it. After installation, add the bin directory to the system path.


to summarize:

  • pygraphviz does not support python3.4 or above,
    when you install this package, try switching to a lower version of python
  • venv the python environment is based on the system python version,
    but after venv is installed, It is to some extent independent of the system python
  • is not a supported wheel on this platform
    platform is not only the operating system platform, but also the development environment, etc.

is also attached to install pygraphviz may useful connection :

  • installation steps in detail reference post: https://blog.csdn.net/churximi/article/details/51059285

  • Unofficial Windows Binaries for Python Extension Packages

    and finally, good luck ~

How to solve the import failure by prompting beautifulsoup under pychar

is usually channelled through IDEA tips, but this time I found that BeautifulSoup failed and suggested

SyntaxError: Missing parentheses in call to ‘print’. Did you mean print(int “Unit tests have failed! .

Internet search attempts, are not consistent, and finally found that the project package management interface import only effective, the following is the process:

File –> Settings (CTRL + Alt + s) – & gt; Project:(Project name) -> Project Interpreter. As shown below:

click “+” and enter Beautifulsoup to find the plugin you want to install.

note: Python2 was chosen to install BeautifulSoup and Python3 was chosen to install bs4.

Failed building wheel for psutil solution

PIP installation toroch failed to install psutil. The specific prompt is as follows:

problem:

as indicated in the error message, Python. H header file

is missing

solution:

install the corresponding version of the python-dev file, under ubuntu

sudo apt-get install python3.6-dev

reference

https://github.com/giampaolo/psutil/issues/1143

Failed building wheel for SCS appears in cvxpy

when installing the above convex optimization solver, failed building wheel for XXX appeared. In this case, the installation software could not install the corresponding wheel by itself, so the corresponding wheel needed to be added manually by yourself. The solution was divided into the following steps:

1. Go to https://www.lfd.uci.edu/~gohlke/pythonlibs/#lxml, find the WHL file for XXX, and download it.

2. Punch the command line in the local folder and run PIP install XXX -… .WHL, showing the next step after successful installation.

3. Re-perform the step that went wrong.

over.

cv2.error: OpenCV(3.4.2) error: (-215:Assertion failed) !empty() in function ‘detectMultiScale‘

cv2。错误:(-215:断言失败)!empty()函数’ detectMultiScale ‘

报错信息

cv2.error: OpenCV(3.4.2) /Users/travis/build/skvark/opencv-python/opencv/modules/objdetect/src/cascadedetect.cpp:1698: error: (-215:Assertion failed) !empty() in function 'detectMultiScale'

solution

cv2.CascadeClassifier('**/**/**.xml')

check the above path, in any case similar to check the path is correct

URLError: urlopen error [SSL: CERTIFICATE_VERIFY_FAILED] certificate verify failed (_ssl.c:833)

Python3 encountered this problem when downloading data, prompting urlError and SSL authentication failure. The accessed connection is HTTPS, so certificate validation is performed by default, and you can even cancel SSL validation

when HTTPS is loaded

 import ssl
  ssl._create_default_https_context = ssl._create_unverified_context

[Solved] Python Error: socket.gaierror : [errno 11004] getaddrinfo failed error

Because we are doing some web data set processing, we need to resolve the domain name and organize Ip, so we use
Socket.getaddrinfo.

First, read the domain name from the previously processed domain name dataset
Secondly, loop through them one by one
Do the exception handling

在这里插入图片描述

But the results are obviously not as good as they should be, but when you manually put a single domain name in and resolve it, there is no problem.

在这里插入图片描述

I think the problem is a newline at the end of server_name.

So I need to remove the ‘\n’
在这里插入图片描述

To explain, there are two ways to remove line breaks here.
Method 1: With .sprip(‘\n’)
Method 2: [:-1] (because the line break is always in the last character)
I hope this will help and solve the problem smoothly and instantly.

def get_dns():
    domains = DataDispose.get_domain_list()
    for domain in domains:
        try:
            myaddr = socket.getaddrinfo(domain[:-1], 'http')
            print(myaddr)
        except Exception as e:
            print(e)
            continue


[Python] failed building wheel for MySQL Python solution

Failed building wheel for mysql-python solution

The

error message is as follows:

Command "c:\users\june\envs\vueshop\scripts\python.exe -u -c "import setuptools, tokenize;__file__='C:\\Users\\June\\AppData\\Local\\Temp\\pip

-install-y_owp3eg\\mysqlclient\\setup.py';f=getattr(tokenize, 'open', open)(__file__);code=f.read().replace('\r\n', '\n');f.close();exec(compi
le(code, __file__, 'exec'))" install --record C:\Users\June\AppData\Local\Temp\pip-record-1j4yv2ch\install-record.txt --single-version-externa
lly-managed --compile --install-headers c:\users\june\envs\vueshop\include\site\python3.6\mysqlclient" failed with error code 1 in C:\Users\Ju
ne\AppData\Local\Temp\pip-install-y_owp3eg\mysqlclient\

in this website, you can download the corresponding package

open the terminal, install

is installed successfully.