Nmap lists open ports for remote machines
Nmap Scan Technology View Zenamp Scan Port NAMP Scan Port from the command line
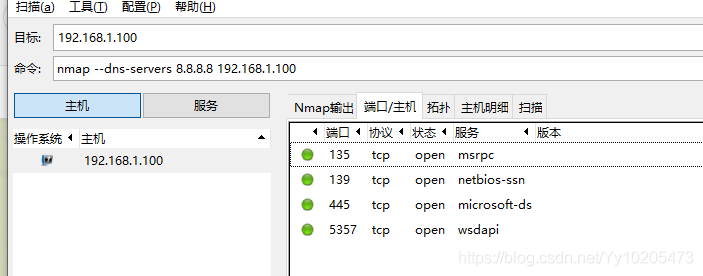
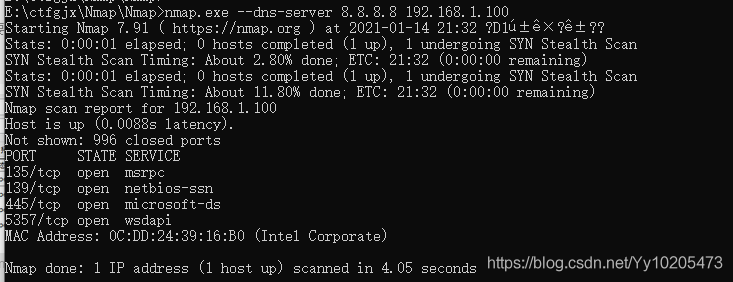
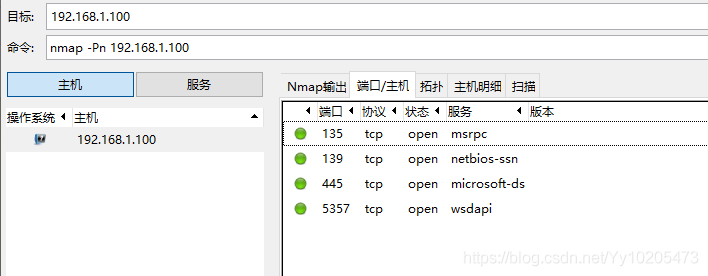
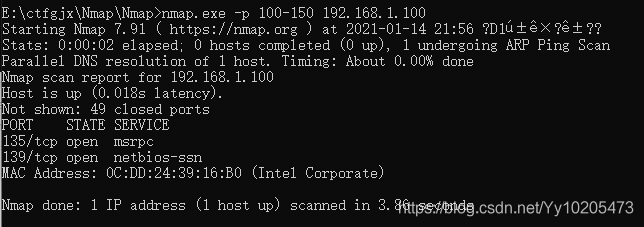
Domain name resolution using the specified DNS server Target host alive or firewall enabled (-pn parameter) Scan specific port range (-p)
Nmap profile
Nmap (Network Mapper) is used to discover hosts and services on a computer network to create a “map” of the network. To achieve its goal, Nmap sends a specific packet to the target host and then analyzes the response. We can use Nmap to detect the server’s live and developed services, as well as to perform security audits on targets.
zenamp: Graphical interface version of Namp.
The principle of
Determine whether the command line entered by Nmap contains the domain name. If it contains the domain name, it needs to use the DNS server for domain name resolution, and then send ICMP Echo Request to detect the host’s existence. Nmap will retrieve the machine information including the port information based on the packet returned.
Port state
| STATE (port) | explain |
|---|---|
| open | said port in the open STATE |
| closed | said port closed |
| filterd | said port in the filter can’t receive the returned the probe STATE |
| unfilterd | said port received back to the probe, but can’t confirm |
| opend/unfilterd | said port in the open or no filtering state |
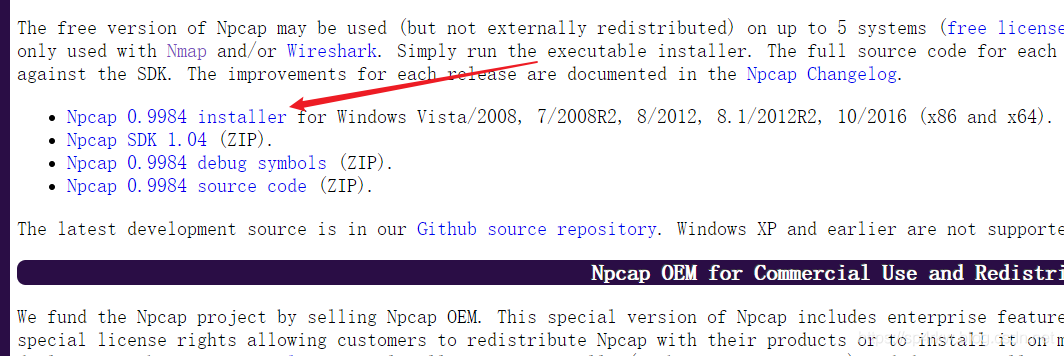
| closed/unfilterd | said port in the closed or filtering state NMAP scan technology to view nmap-h / mark> > SCAN TECHNIQUES are part of the SCAN TECHNIQUES. The following scanning techniques can be used to bypass certain filters in certain scenarios to achieve the purpose of detection. The parameters should be selected according to the actual situation. 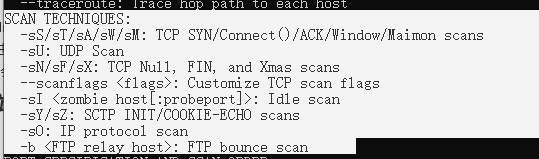 Zenamp scans ports Once Zenamp is open, enter the domain name or IP you want to probe into the target. 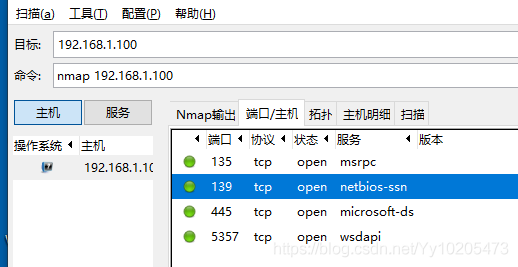 The namp scan port on the command line Kali bring namp, nmap to use under Windows, the installation is successful in his folder exists after zenamp namp command line version exists, in the folder of CMD into namp enter namp. Exe followed by the domain name or IP address can scan, need to know the process of scanning can use the enter key when can get the current scanning progress. 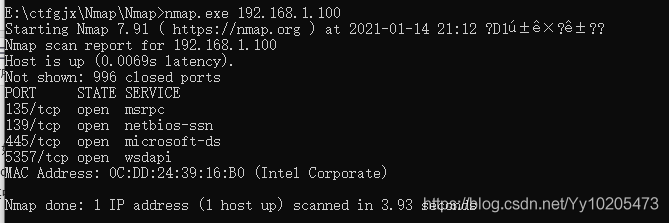 Use the specified DNS server to resolve the domain name The domain name is resolved to the IP address by the DNS server before the NMap probe. We can also use the specified DNS server for the resolution.
before the Windows of nmap were all good, today suddenly out of the problem, all kinds of reinstall can not be solved, do a night, finally solved, record the way 1, uninstall, reinstall the latest version of nmap, all default configuration go 3. Install the latest version of npcap check the first one (the one related to nmap) to install After , you can normally use nmap to learn the use of the system nmap, run a simple command : error: “dnet: Failed to open device eth1” and then downloaded is installing two winpcap incompatible?Uninstall the old version of winpcap, and then uninstall after what seems to remind, also did not pay attention to, it automatically ignored ~ find Packet. DLL changed to Packet. DLL. Bak… Nima, also do not know is the ghost that anti-virus software makes, after restoring original name, hint did not find again a check found that the name is also changed to wpcap.dll. Bak. After the recovery, the normal uninstall. After the installation, run the original command and find that the problem has been resolved. nmap – sT 192.168.0.184 must not ignore some important tips to solve the problem in the process of solving the problem because of haste. nmap IP address error: dnet: Failed to open device lo0 solution: Reinstall the latest version of Npcap Dnet: Failed to open device eth0-error with nmap 7.70 on Windows 10 |