main points:
By default, the scene comes with a camera to render all objects in the scene. The camera node can be regarded as an empty node, and a camera component is attached under it, so it is invisible. Each scene can have multiple cameras. The rendering levels of multiple cameras are grouped and rendered by associating group names. The rendering levels of multiple cameras comply with the node tree rules. First, the priority is divided according to the level of the camera node, and the lower camera, Its associated group is rendered later; For nodes under the same camera group, the lower the node, the later the rendering. The more you render, the closer the node looks to the top.
case
Camera practice: implementation of infinite parallax rolling map
1、 Camera group rendering
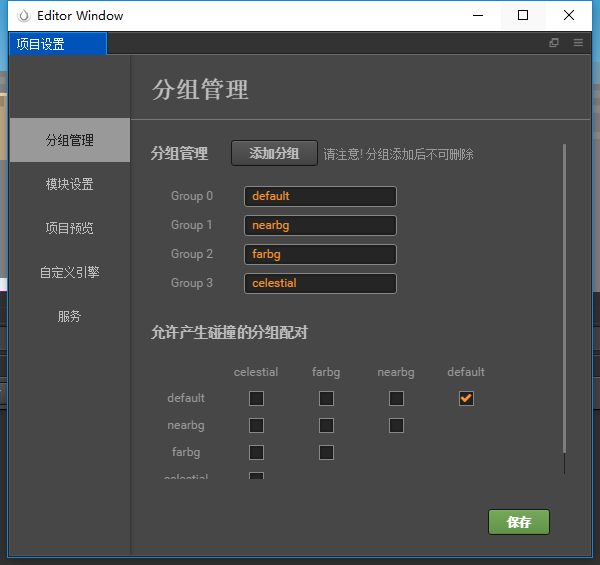
In the menu of Cocos creator, ` item ‘- & gt` Project settings ` – & gt` Changing or adding a group in group management is the same setting as the group management of physical collision.
Add multiple cameras in the scene, then add multiple groups in group management, and then set the settings of the camera cullingMask Attribute is the corresponding group. Each camera rendered object is filtered through this cullingmask.
The steps are as follows:
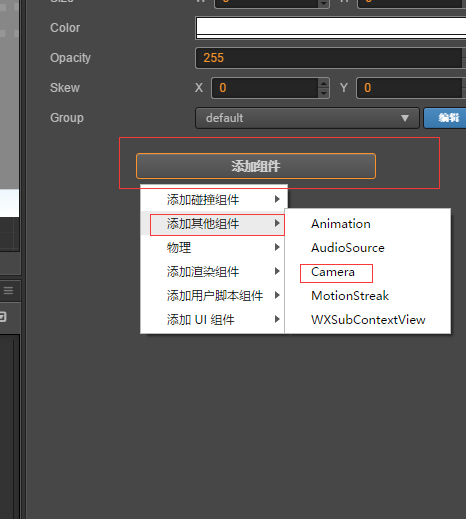
1. Create a camera node. Create an empty node in the hierarchy manager and add a camera component on this node, so that a camera node can be created. According to this method, two camera nodes, farcamera and nearcamera, are added to render the foreground and close-up respectively.
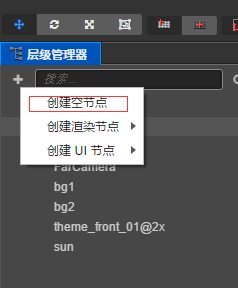
Empty node
Add camera
2. Group management. Add two groups in group management, nearbg and farbg.
Add group
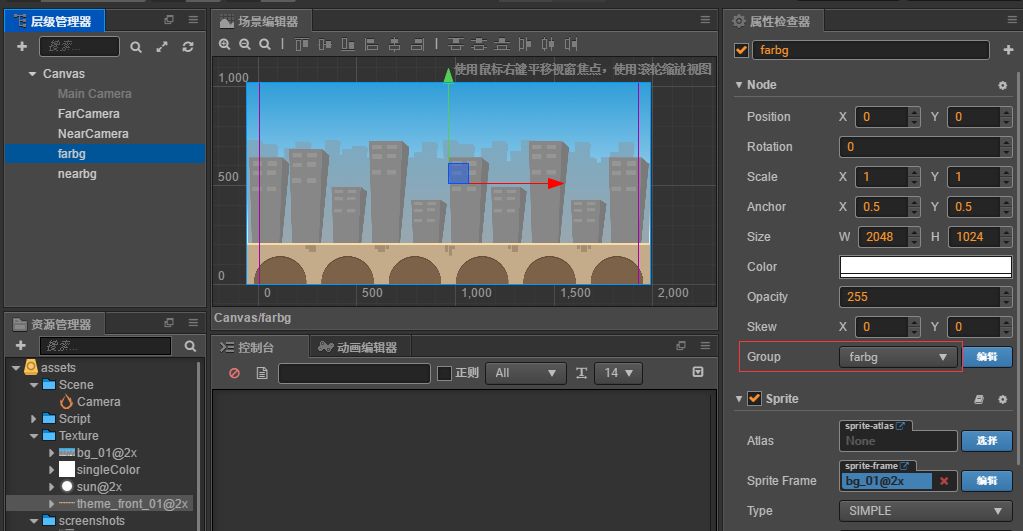
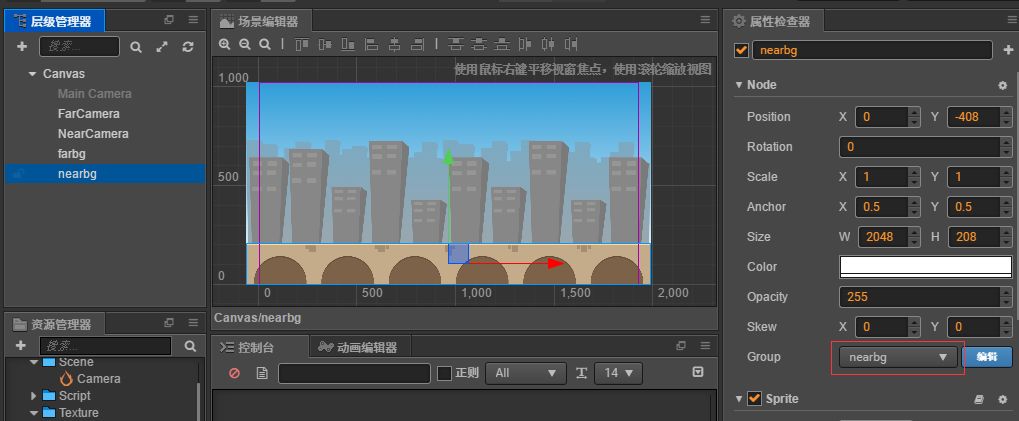
3. Add close view and long view nodes and set group names respectively
prospect
Close range
4. Set the cullmask property of camera, farcamera to farbg and nearcamera to nearbg.
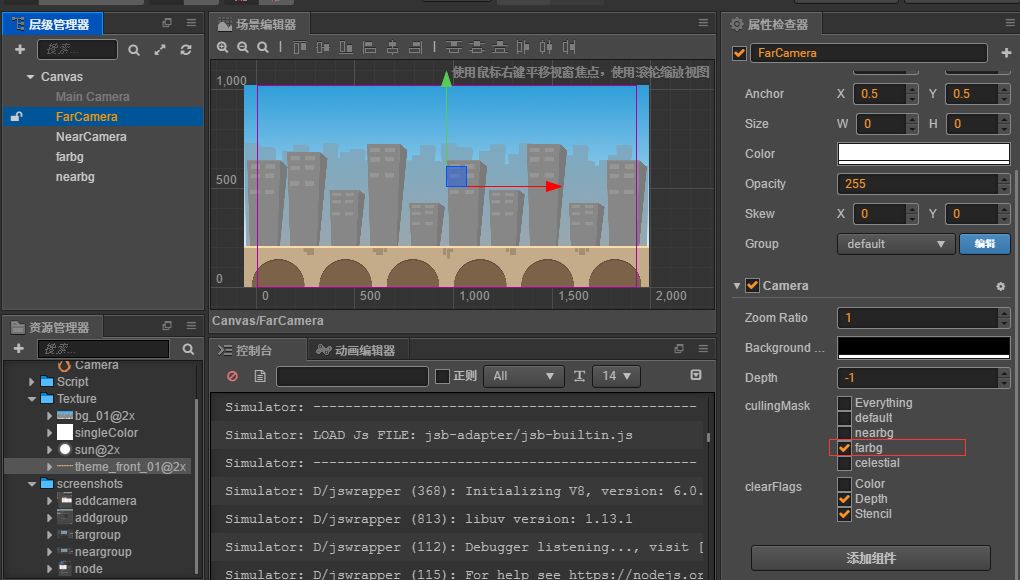
Perspective camera
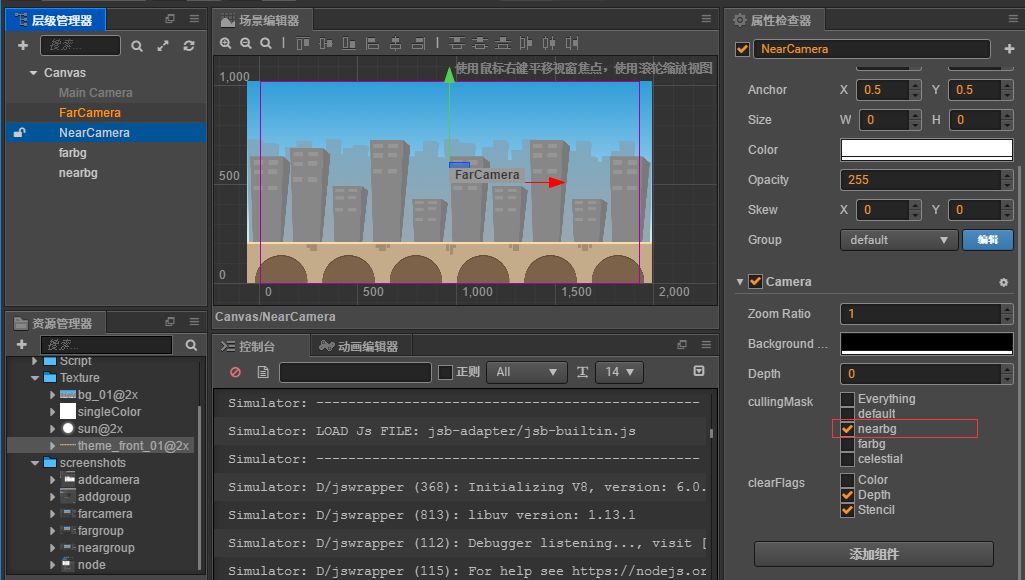
Close range camera
Here, the multi camera and group rendering settings are completed, and the interface can be seen by running the simulator.
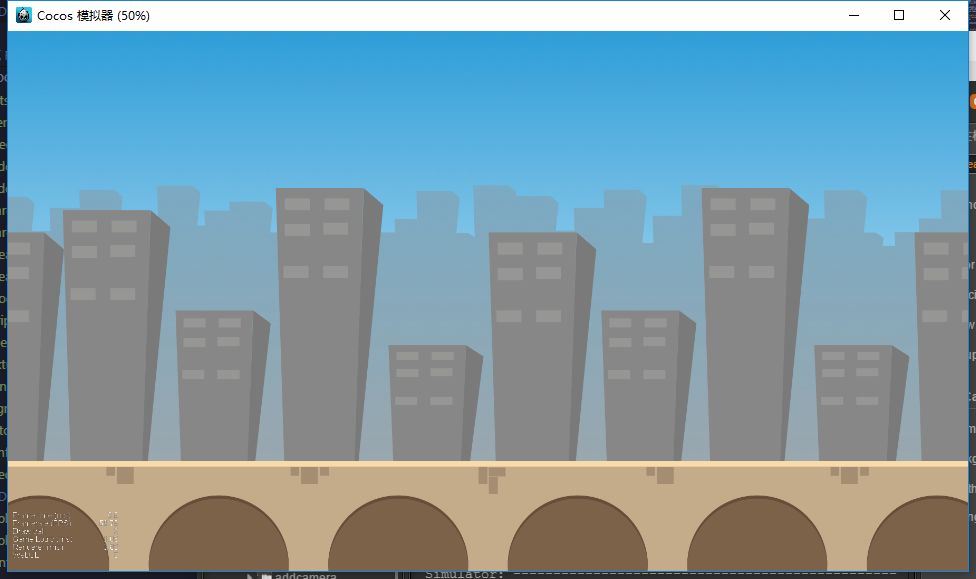
Operation results
2、 Parallax principle
There are two ways of parallax background. The traditional way is to keep the observation point unchanged, move the close view and long-range map, control the speed of close view and long-range map to produce parallax, and form an infinite rolling parallax background.
But what we are talking about here is the opposite process. The background picture is fixed and the observation point (camera) is moved. Due to the relativity of motion, the background picture moves in the opposite direction.
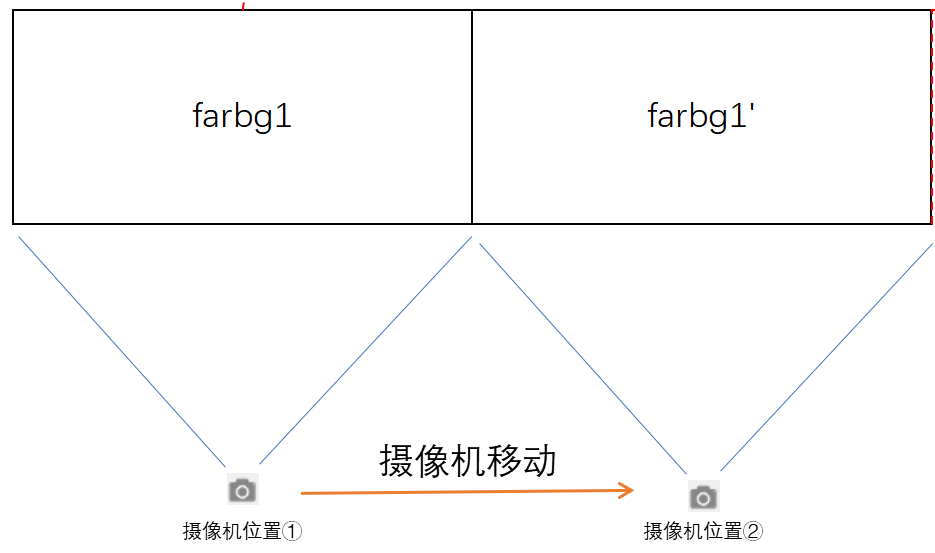
Principle I
As shown in the figure, if the camera keeps moving, it will soon exceed the visual boundary of farbg1. Therefore, two background images should be made. When moving to the boundary of farbg1, put another same background next to the boundary of farbg1. In this way, continuously set the position of farbg alternately, and you can scroll infinitely.
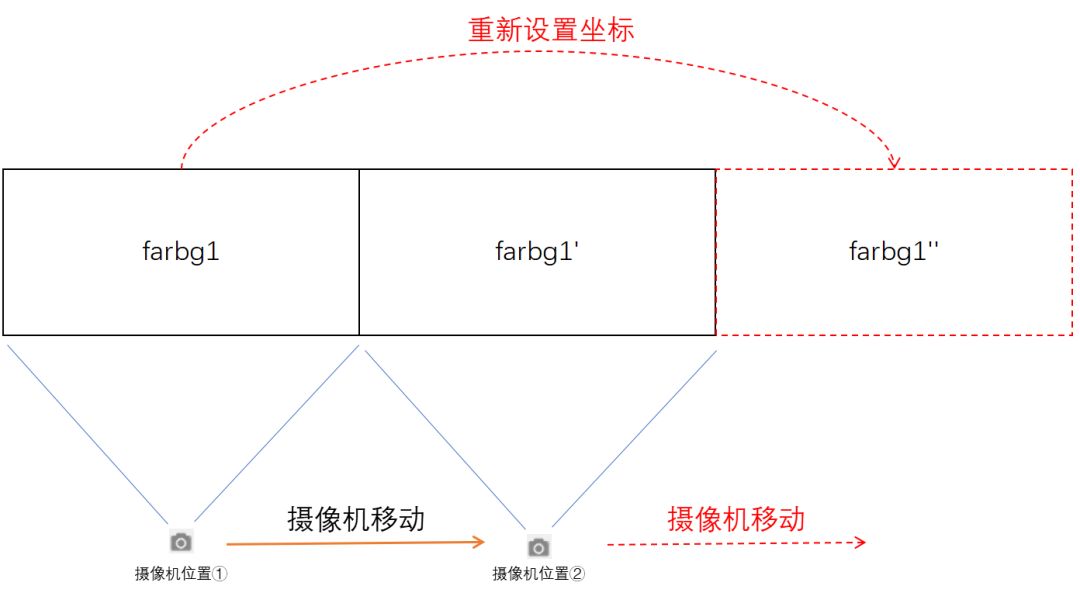
Principle I
The same principle sets the close range. The moving speed of the background is equal to the moving speed of the camera, and the direction is opposite. If the moving speed of the two cameras is different, an infinite rolling parallax background is formed.
3、 Jingjing
Some elements do not move. We call them static scenes, such as the sun and the moon. How to achieve them?
It’s actually very simple. Just use a camera to render them without moving the camera.
Implementation method: add a group celestial, turn on maincamera, set cullingmask to celestial, add a sun node, and set the group to celestial.
Also, when you play the characters, you need to set up a camera to render. This will make some special effects of lens, such as camera following, lens zoom, etc. This will be explained in detail in other articles. Please pay attention to the official account.
Implementation method: add a group player in the project settings, add a player node in the scene editor for character running, and set the group as player. A new node named playercamera is added to the scene editor. A camera component is added and cullingmast is set to player.
Playercamera only renders one player node, so you can see that the characters on the interface are running all the time. In fact, the characters are not moving at all, but the camera in the background is moving.
Final effect:
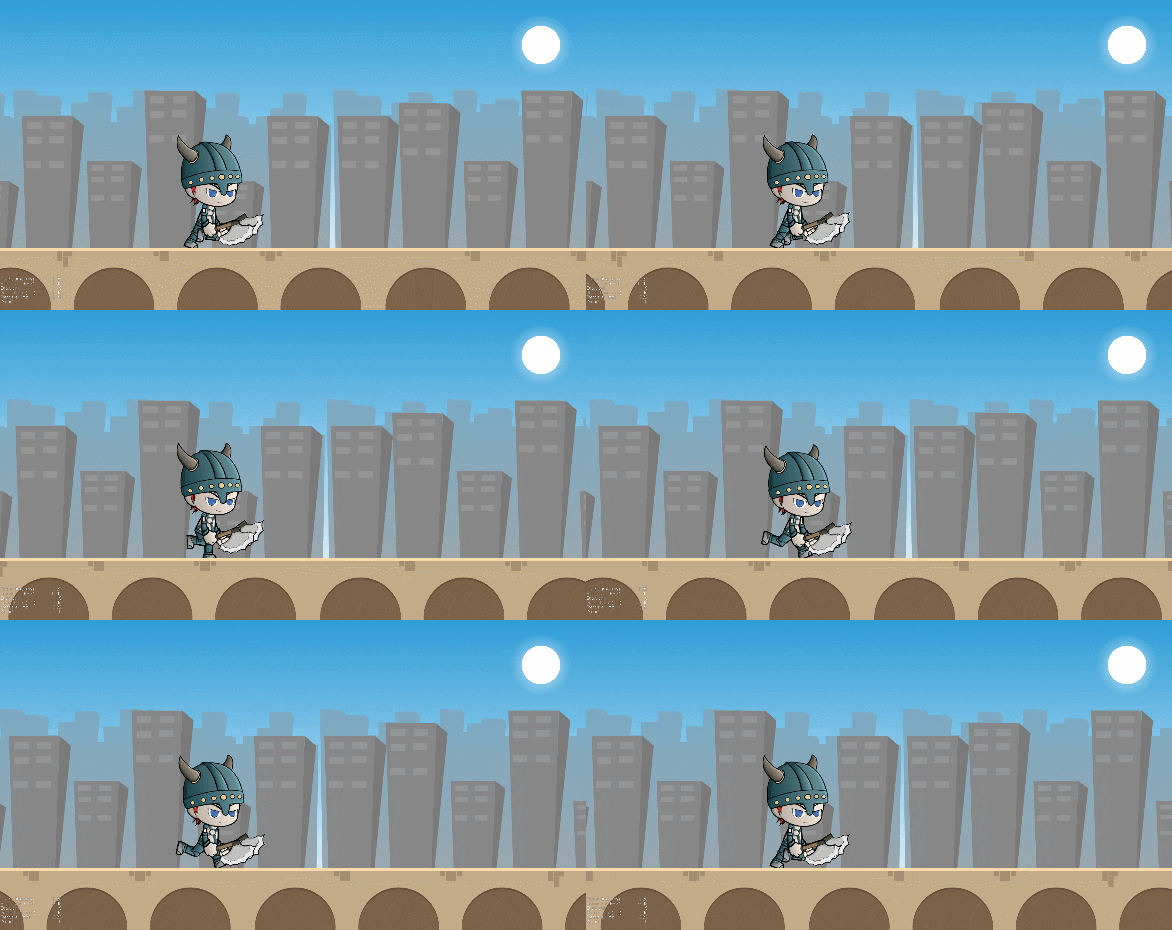
Effect preview

