Solution: convert the index strength of the array to int
Example:
# original
length = [id2tags[i.item()] for i in y[0].cpu() if i.item() > 0]
# Modify to:
length = [id2tags[int(i.item())] for i in y[0].cpu() if i.item() > 0]Solution: convert the index strength of the array to int
Example:
# original
length = [id2tags[i.item()] for i in y[0].cpu() if i.item() > 0]
# Modify to:
length = [id2tags[int(i.item())] for i in y[0].cpu() if i.item() > 0]The parameter may be missing or the property may be changed as follows:
parser.add_argument('--model', default='ResNet18',required=True)
args = parser.parse_args()
Replace with:
parser.add_argument('--model', default='ResNet18')
args = parser.parse_args()
Solution:
CUDA 11.5, using cudnn-11.3-windows-x64-v8 2.1. 32. Do not use cudnn-11.5-windows-x64-v8 3.0.98!
IT IS A BUG!!!
If an error is reported, it can be used
import tensorflow as tf
tf.compat.v1.disable_eager_execution()
To replace
import tensorflow as tfAnd the following placehoder function is replaced by the following TF
X = tf.compat.v1.placeholder(tf.float32)
Y = tf.compat.v1.placeholder(tf.float32)Question
Error installing Carla simulator installation failed 0x80070005 – access denied
error setup failed 0x80070005 – access is denied
One or more problems caused the setup to fail. Please fix the problem and try setting again. For more information, see the log file
installation failed
0x80070005 - Access is denied.
Solution:
Scenario option 1: run the installation file as an administrator
right click the installation file and select run as administrator. You need to work with your IT team to do this
option 2: temporarily disable anti-virus software
work with your IT team to temporarily disable any anti-virus software or malware running on your computer, and then try installing the software again.
reason
Antivirus or antimalware software prevents the installation of Carla simulator
additional information
e000: Error 0x80070005: Failed to write run key value.
e000: Error 0x80070005: Failed to update resume mode.
e000: Error 0x80070005: Failed to begin registration session.
e000: Error 0x80070005: Failed to begin registration session in per-machine process.
e000: Error 0x80070005: Failed to register bundle.
i399: Apply complete, result: 0x80070005, restart: None, ba requested restart: No
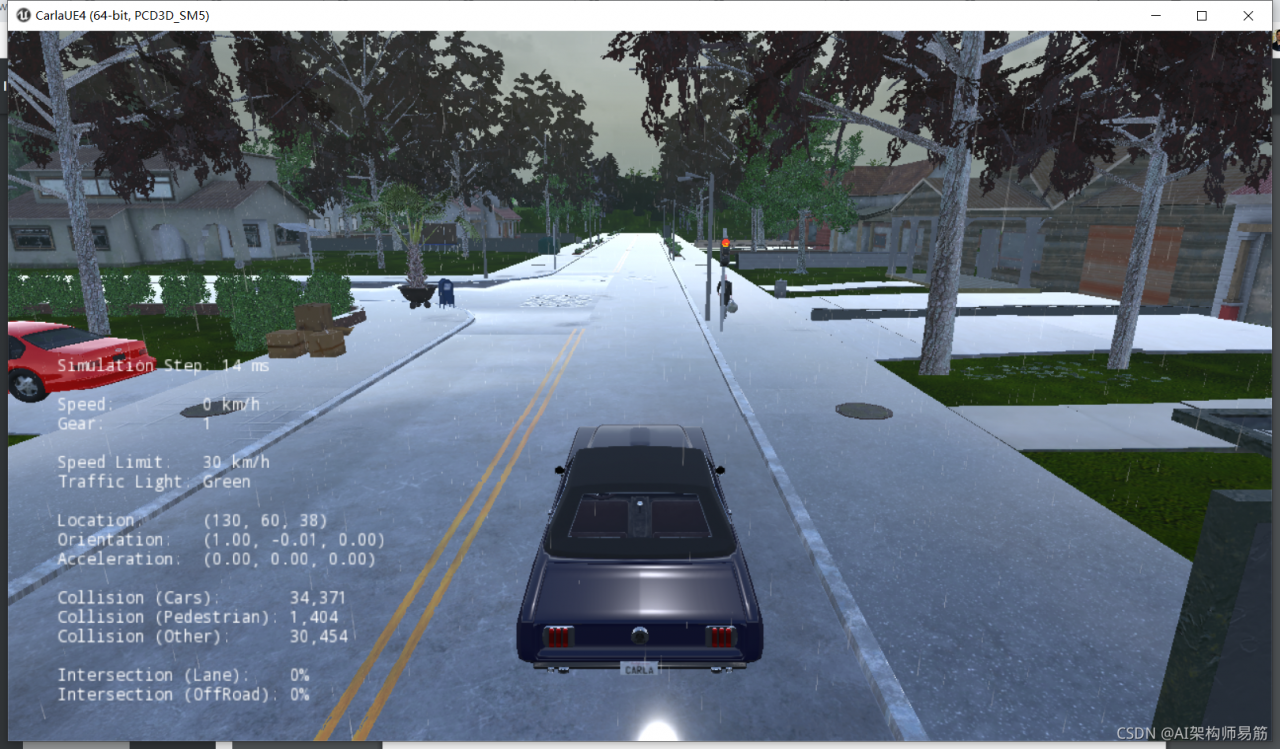
Carla emulator running interface

#Reference:
https://kb.tableau.com/articles/issue/error-setup-failed-0x80070005-access-is-denied-after-upgrading
Opencv error: attributeerror: module ‘CV2’ has no attribute ‘data’
the following error will appear when running the face detection code:
face_detector = cv.CascadeClassifier(cv.data.haarcascades + "haarcascade_frontalface_alt2.xml")
eye_detector = cv.CascadeClassifier(cv.data.haarcascades + "haarcascade_eye.xml")
smile_detector = cv.CascadeClassifier(cv.data.haarcascades + "haarcascade_smile.xml")


AttributeError: module 'cv2' has no attribute 'data'
Solution: uninstall your existing opencv Python and install my version of OpenCV
1. Open Anaconda prompt and enter
pip uninstall opencv-python2. Re input
pip install opencv-python -i http://mirrors.aliyun.com/pypi/simple --trusted-host mirrors.aliyun.comNote: when uninstalling opencv, select y, and don’t worry about red explosion
The problem indicates that the storage client cannot be connected.
Solution:
Execute on the nebula console
show hosts;Since the default is 127.0.0.1, the storage client gets the storage address through the metad service when connecting to the nebula storage, so the storage address obtained in the spark connector is 127.0.0.1:9779, which is wrong.
Therefore, you can change the default address to the real address.
Opencv Error:
ret2, th2 = cv.threshold(img, 0, 255, cv.THRESH_BINARY + cv.THRESH_OTSU)
cv2.error: OpenCV(4.5.3) C:\Users\runneradmin\AppData\Local\Temp\pip-req-build-c2l3r8zm\opencv\modules\imgproc\src\thresh.cpp:1557: error: (-2:Unspecified error) in function ‘double __cdecl cv::threshold(const class cv::_InputArray &,const class cv::_OutputArray &,double,double,int)’
THRESH_OTSU mode:
‘src_type == CV_8UC1 || src_type == CV_16UC1’
where
‘src_type’ is 16 (CV_8UC3)
Original Codes:
img = cv.imread('noisy.jpg')

# Fixed threshold method
ret1, th1 = cv.threshold(img, 105, 255, cv.THRESH_BINARY)
# Otsu threshold method
ret2, th2 = cv.threshold(img, 0, 255, cv.THRESH_BINARY + cv.THRESH_OTSU)
# Perform Gaussian filtering first, and then use Otsu threshold method
blur = cv.GaussianBlur(img, (5, 5), 0)
ret3, th3 = cv.threshold(blur, 105, 255, cv.THRESH_BINARY)
ret4, th4 = cv.threshold(blur, 0, 255, cv.THRESH_BINARY + cv.THRESH_OTSU)
Problem analysis
The CV2.Threshold() function inputs graphics in the form of single channel, while the image in the above code is input in the form of color three channels, resulting in an error.
Solution:
Convert the color image into a single channel gray image for input.
img = cv.imread('noisy.jpg',0)
Rerun the program
Run successfully

class ALSQPlus(Function):
    @staticmethod
    def forward(ctx, weight, alpha, g, Qn, Qp, per_channel, beta):
        # assert alpha > 0, "alpha={}".format(alpha)
        ctx.save_for_backward(weight, alpha, beta)
        ctx.other = g, Qn, Qp, per_channel
        if per_channel:
            sizes = weight.size()
            weight = weight.contiguous().view(weight.size()[0], -1)
            weight = torch.transpose(weight, 0, 1)
            alpha = torch.broadcast_to(alpha, weight.size())
            beta = torch.broadcast_to(beta, weight.size())
            w_q = Round.apply(torch.div((weight - beta), alpha)).clamp(Qn, Qp)
            w_q = w_q * alpha + beta
            w_q = torch.transpose(w_q, 0, 1)
            w_q = w_q.contiguous().view(sizes)
        else:
            w_q = Round.apply(torch.div((weight - beta), alpha)).clamp(Qn, Qp)
            w_q = w_q * alpha + beta
        return w_q

    @staticmethod
    def backward(ctx, grad_weight):
        weight, alpha, beta = ctx.saved_tensors
        g, Qn, Qp, per_channel = ctx.other
        if per_channel:
            sizes = weight.size()
            weight = weight.contiguous().view(weight.size()[0], -1)
            weight = torch.transpose(weight, 0, 1)
            alpha = torch.broadcast_to(alpha, weight.size())
            q_w = (weight - beta)/alpha
            q_w = torch.transpose(q_w, 0, 1)
            q_w = q_w.contiguous().view(sizes)
        else:
            q_w = (weight - beta)/alpha
        smaller = (q_w < Qn).float() #bool value to floating point value, 1.0 or 0.0
         bigger = (q_w > Qp).float() #bool value to floating point value, 1.0 or 0.0
         between = 1.0-smaller -bigger #Get the index in the quantization interval
        if per_channel:
            grad_alpha = ((smaller * Qn + bigger * Qp +
                between * Round.apply(q_w) - between * q_w)*grad_weight * g)
            grad_alpha = grad_alpha.contiguous().view(grad_alpha.size()[0], -1).sum(dim=1)
            grad_beta = ((smaller + bigger) * grad_weight * g).sum().unsqueeze(dim=0)
            grad_beta = grad_beta.contiguous().view(grad_beta.size()[0], -1).sum(dim=1)
        else:
            grad_alpha = ((smaller * Qn + bigger * Qp +
                between * Round.apply(q_w) - between * q_w)*grad_weight * g).sum().unsqueeze(dim=0)
            grad_beta = ((smaller + bigger) * grad_weight * g).sum().unsqueeze(dim=0)
        grad_weight = between * grad_weight
        #The returned gradient should correspond to the forward parameter
        return grad_weight, grad_alpha, grad_beta, None, None, None, None
RuntimeError: function ALSQPlusBackward returned a gradient different than None at position 3, but the corresponding forward input was not a Variable
The gradient return value of the backward function of Function should be consistent with the order of the parameters of forward
Modify the last line to return grad_weight, grad_alpha, None, None, None, None, grad_beta
Error: output with shape [1, 224, 224] don’t match the broadcast shape [3, 224, 224]
the image input by the original model is RGB three channel, and the input is single channel gray image.
# Error:output with shape [1, 224, 224] doesn't match the broadcast shape [3, 224, 224]
# The input image of the original model is RGB three-channel, and the one I input is a single-channel grayscale image.
# #------------------------------------------------ --------------------------------------
# from torch.utils.data import DataLoader
# dataloader = DataLoader(dataset, shuffle=True, batch_size=16)
# from torchvision.utils import make_grid, save_image
# dataiter = iter(dataloader)
# img = make_grid(next(dataiter)[0], 4) # Assemble a 4*4 grid image and convert it into 3 channels
# to_img(img)
# #-------------------------------------------------------------------------------------
# It seems that make_grid cannot be converted to 3 channels
The solution is as follows:
from torch import nn
from torchvision import datasets
from torchvision import transforms as T
from torch.utils.data import DataLoader
from torchvision.utils import make_grid, save_image
import numpy as np
import matplotlib.pyplot as plt

transform  = T.Compose([
         T.ToTensor(), #This will convert a numpy array between 0 and 255 into a floating point tensor between 0 and 1
          T.Normalize((0.5, ), (0.5, )), #In the normalize() method, we specify the mean of all channels of the normalized tensor image, and also specify the central deviation.
])
dataset = datasets.MNIST('data/', download=True, train=False, transform=transform)
dataloader = DataLoader(dataset, shuffle=True, batch_size=100)

print(type(dataset[0][0]),dataset[0][0].size())
# print(dataset[0][0])
# To draw a tensor image, we must change it back to a numpy array.
# We will do this in the function def im_convert(), which contains a parameter that will become a tensor image.
def im_convert(tensor):
    image=tensor.clone().detach().numpy()
    # The new tensor obtained using torch.clone() and the original data no longer share memory, but still remain in the calculation graph,
    # The clone operation supports gradient transfer and superposition without sharing data memory, so it is commonly used in scenarios where a unit in a neural network needs to be reused.
    # Usually if the requirements_grad of the original tensor=True, then:
    # tensor requires_grad=True after clone() operation
    # The tensor requires_grad=False after the detach() operation.
    image=image.transpose(1, 2, 0)
    # The tensor to be converted to a numpy array has the shape of the first, second and third dimensions. The first dimension represents the color channel, and the second and third dimensions represent the width and height of the image and pixels.
    # We know that each image in the MNIST dataset is a grayscale corresponding to a single color channel, and its width and height are 28 * 28 pixels. Therefore, the shape will be (1, 28, 28).
    # In order to draw an image, the shape of the image is required to be (28, 28, 1). Therefore, by swapping axis zero, one and two
    print(image.shape)
    image=image*(np.array((0.5, 0.5, 0.5))+np.array((0.5, 0.5, 0.5)))
    print(image.shape)
    # We normalize the image, and before we have to normalize it. Normalization is done by subtracting the average value and dividing by the standard deviation.
    # We will multiply by the standard deviation, and then add the average
    image=image.clip(0, 1)
    print(image.shape,type(image))
    return image
    # To ensure the range between 0 and 1, we use clip()
    # Function and passed zero and one as parameters. We apply the clip function to the minimum value 0 and maximum value 1 and return the image.

# It will create an object that allows us to pass through a variable training loader at a time.
# We access one element at a time by calling next on the dataiter.
# next() function will get our first batch of training data, and the training data will be divided into the following images and labels
dataiter=iter(dataloader)
images, labels=dataiter.next()

fig=plt.figure(figsize=(25, 6))
#fig=plt.figure(figsize=(25, 4)) #Picture output width is smaller than above
for idx in np.arange(20):
    ax=fig.add_subplot(2, 10, idx+1)
    plt.imshow(im_convert(images[idx]))
    ax.set_title([labels[idx].item()])
plt.show()
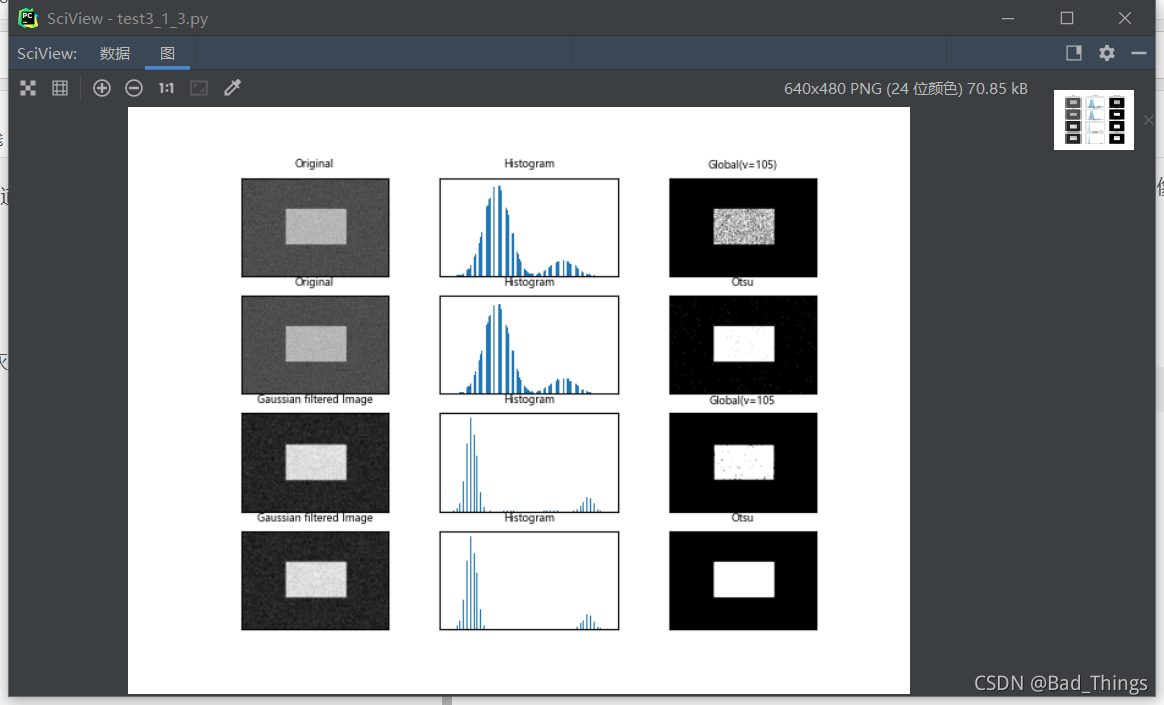
The final results are as follows:

Most of the errors reported in apex installation are mainly due to the unsuitable environment. For example, CUDA version is not suitable for torch. Please check the required CUDA version before installation:
# cuda version in pytorch
import torch
torch.version.cudaError Messages:
bert_as_service + tensorflow 2.1.0
Tensorflow 2.1.0 is not tested!
So reinstalled the virtual environment
I:?[35mVENTILATOR?[0m:freeze, optimize and export graph, could take a while…
d:\anaconda\envs\tensorflow\lib\site-packages\bert_serving\server\helper.py:176: UserWarning: Tensorflow 2.1.0 is not tested! It may or may not work. Feel free to submit an i
ssue at https://github.com/hanxiao/bert-as-service/issues/
‘Feel free to submit an issue at https://github.com/hanxiao/bert-as-service/issues/’ % tf.version)
E:?[36mGRAPHOPT?[0m:fail to optimize the graph!
Traceback (most recent call last):
File “d:\anaconda\envs\tensorflow\lib\runpy.py”, line 193, in run_module_as_main
“main”, mod_spec)
File “d:\anaconda\envs\tensorflow\lib\runpy.py”, line 85, in run_code
exec(code, run_globals)
File "D:\Anaconda\envs\tensorflow\Scripts\bert-serving-start.exe_main.py", line 9, in
File "d:\anaconda\envs\tensorflow\lib\site-packages\bert_serving\server\cli_init.py", line 4, in main
with BertServer(get_run_args()) as server:
File “d:\anaconda\envs\tensorflow\lib\site-packages\bert_serving\server_init_.py”, line 71, in init
self.graph_path, self.bert_config = pool.apply(optimize_graph, (self.args,))
TypeError: ‘NoneType’ object is not iterable
It can be used by installing tensorflow1.10+python3.6.10