Just remove the “usepackage {cite}”
[solved] genymotion, “unable to load VirtualBox engine”
System: win10 64bit
Genymotion version: 2.5.4
version
VirtualBox version: 5.0.4
Today, I plan to try the simulator of genymotion, and then download the latest version from the official website: https://www.genymotion.com/#!/download
However, the following error occurred after the installation:
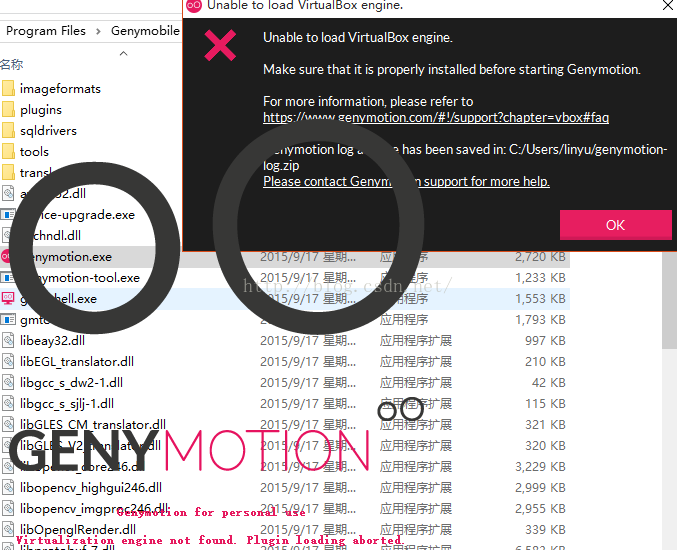
Virtualization engine not found. Plugin loading aborted.
Locate the log directory according to the prompt and open the log file: general- genymotion.log
As shown in the figure below:
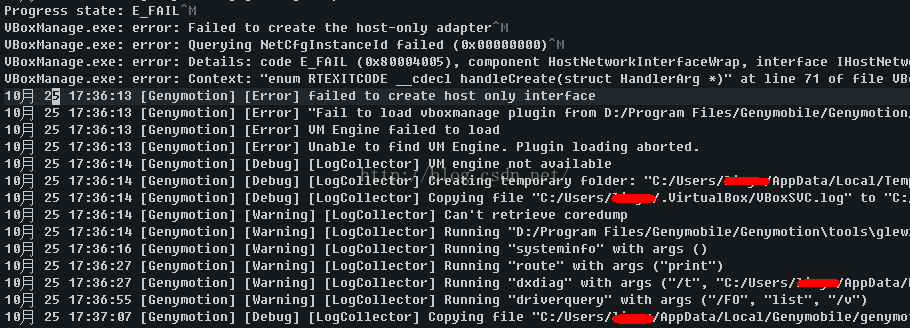
Progress state: E_ FAIL
VBoxManage.exe : error: Failed to create the host-only adapter
VBoxManage.exe : error: Querying NetCfgInstanceId failed (0x00000000)
VBoxManage.exe : error: Details: code E_ FAIL (0x80004005), component HostNetworkInterfaceWrap, interface IHostNetworkInterface
VBoxManage.exe : error: Context: “enum RTEXITCODE __ cdecl handleCreate(struct HandlerArg *)” at line 71 of file VBoxManageHostonly.cpp “
October 25 17:36:13 [genomic] [error] failed to create host only interface
October 25 17:36:13 [genomic] [error]” failed to load vboxmanage plugin from D / program files / genomicle / genomiction / plugins / “
October 25 17:36:13 [genomic] [error] VM Engine failed to load
October 25 17:36:13 [genomic] [error] unable to find VM engine. Plug loading above.
engine failed to load
October 25 17:36:13 [genomic] [error] unable to find VM engine
According to the prompt, there is an error in setting host network adapter in VBox. The possible reason is that VBox does not get administrator permission, so it installs genymotion-2.5.4- vbox.exe
This program must be run as an administrator, and then all the way to next…
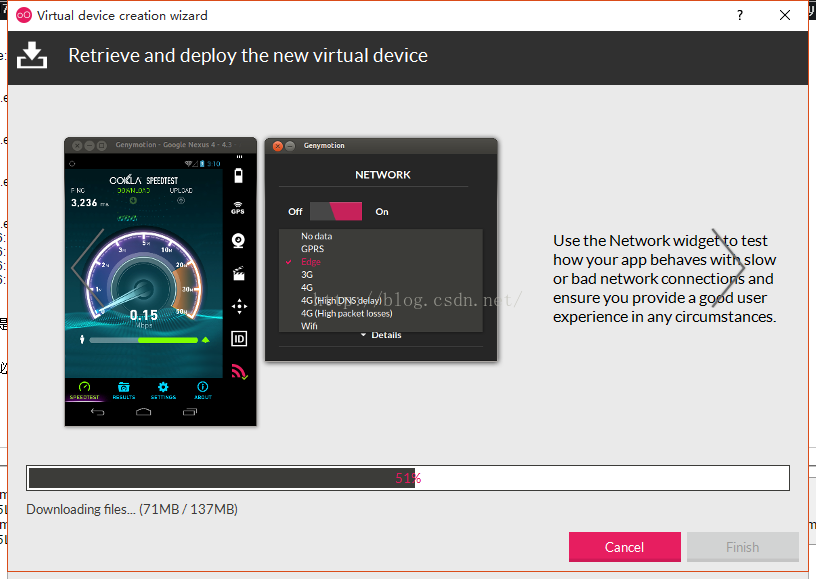
Currently downloading the virtual device, (‘◡’)
If not, please refer to the following steps. I’ve tried it again and it’s completely feasible.
- Run VirtualBox as administrator (By default is installed in C:\Program Files\Oracle\VirtualBox)Go to File -> Preferences -> Network (Left Navigation List) -> Host-only Networks (on the right tab)Select an adapter and click edit (the small screwdriver on the right)On “Adapter” tab set
IPv4 Address: 192.168.1.201IPv4 Network Mask: 255.255.255.0 On DHCP Server Tab set
Server Address: 192.168.1.100Server Mask: 255.255.255.0Lower Address Bound: 192.168.1.101Upper Address Bound: 192.168.1.199 Click Ok (Host-only Network details), click Ok (VM Settings)Open Genymotion (as Admin), install a new virtual device (you have deleted all past devices) and start it
The above steps are quoted from: http://stackoverflow.com/questions/31709084/genymotion-problems-in-windows-10
【JupyterLab】JavaScript output is disabled in JupyterLab
Error when using Matplotlib to display images in jupyterlab:
JavaScript output is disabled in JupyterLab
terms of settlement:
Just install the plot extension of jupyterlab.
Please refer to https://github.com/jupyterlab/jupyter-renderers/tree/master/packages/plotly-extension
The steps are as follows:
Use the CMD command line to execute the following command
jupyter labextension install @jupyterlab/plotly-extension
perhaps
…..\Anaconda3\Scripts\jupyter- labextension.exe install @jupyterlab/plotly-extension
result:
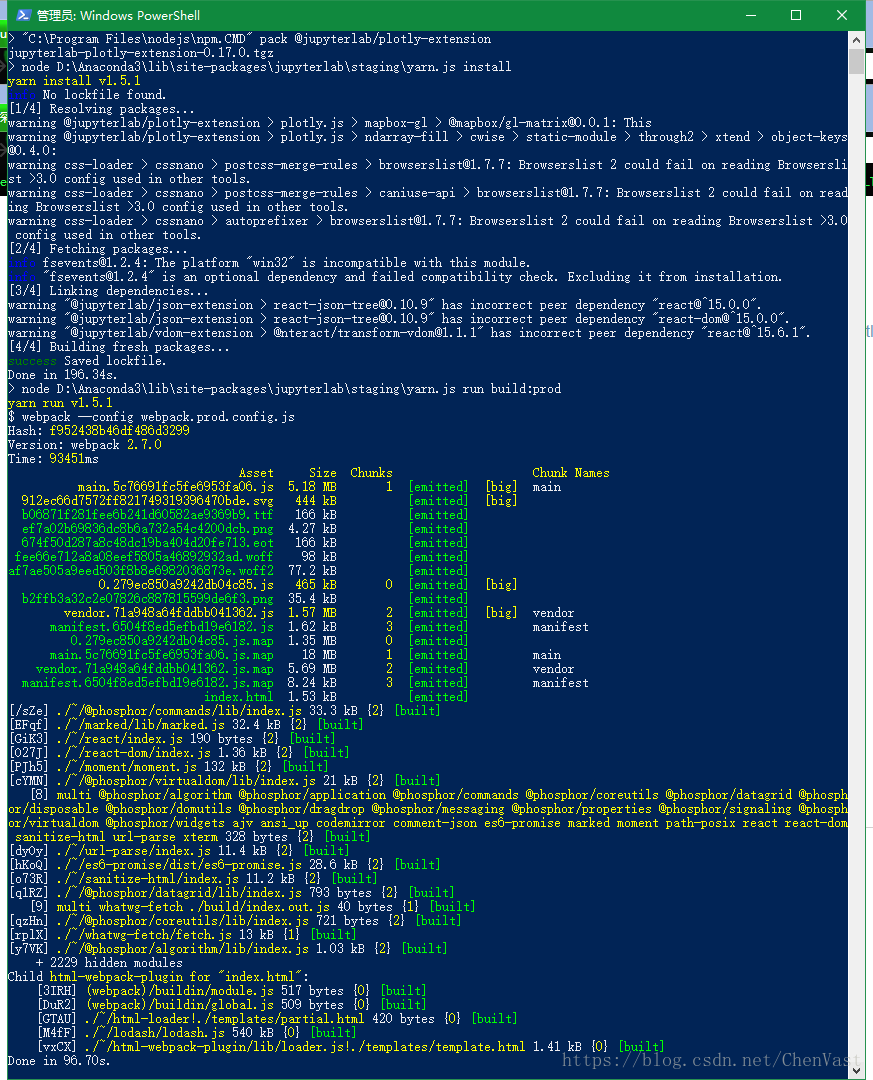
The installation is successful.
Then restart the following jupyterlab!
Solving Linux minute warning: no support for locale: en_ US.utf
$ sudo update-initramfs -u
[sudo] password for marty:
update-initramfs: Generating /boot/initrd.img-3.2.0-29-generic-pae
Warning: No support for locale: en_US.utf8
$ sudo locale-gen --purge --no-archive
Generating locales...
  en_AG.UTF-8... done
  en_AU.UTF-8... done
  en_BW.UTF-8... done
  en_CA.UTF-8... done
  en_DK.UTF-8... done
  en_GB.UTF-8... done
  en_HK.UTF-8... done
  en_IE.UTF-8... done
  en_IN.UTF-8... done
  en_NG.UTF-8... done
  en_NZ.UTF-8... done
  en_PH.UTF-8... done
  en_SG.UTF-8... done
  en_US.UTF-8... done
  en_ZA.UTF-8... done
  en_ZM.UTF-8... done
  en_ZW.UTF-8... done
Generation complete.
marty@xxxxxx:~
$ sudo update-initramfs -u
update-initramfs: Generating /boot/initrd.img-3.2.0-29-generic-pae
reference resources:
https://forums.linuxmint.com/viewtopic.php?f=42&t=111527 All kinds of answers from netizens
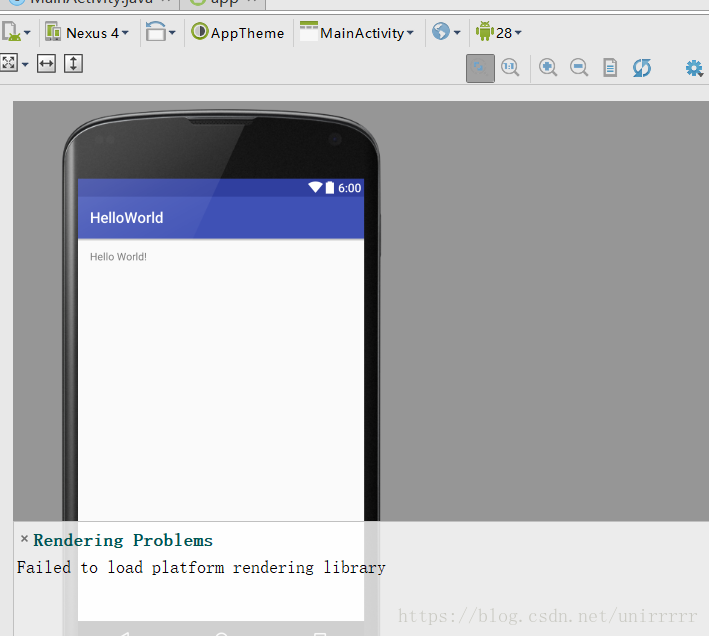
Rendering Problems :Failed to load platform rendering library
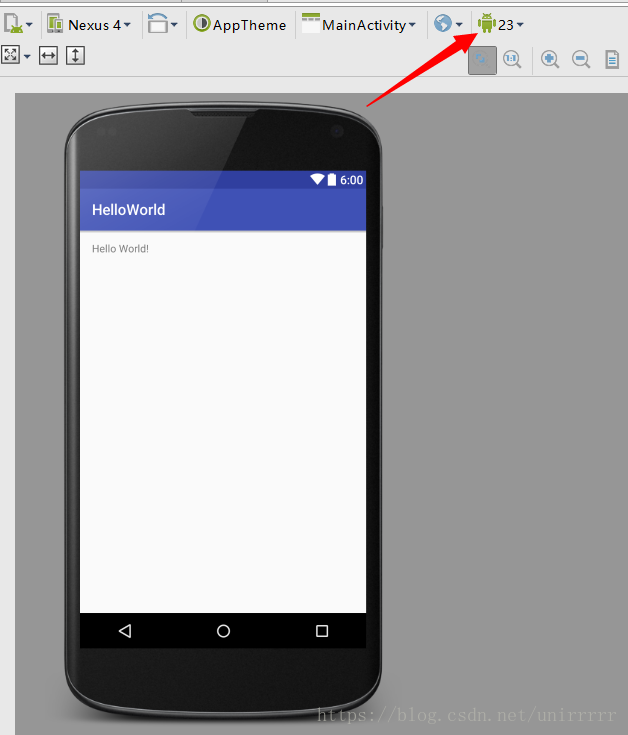
The Internet said that this problem occurred because the API version was too high, and it was OK to lower the version
the original setting was 28, but it couldn’t be adjusted to 27 or 26, so it was OK to adjust 23 24 25 to 23,
when it was adjusted to 24, it was wrong: the Internet said that because Android version 24 was null.
java.lang.NoClassDefFoundError: com/android/util/PropertiesMap
	at com.android.layoutlib.bridge.android.BridgeContext.createStyleBasedTypedArray(BridgeContext.java:940)
	at com.android.layoutlib.bridge.android.BridgeContext.obtainStyledAttributes(BridgeContext.java:638)
	at android.content.res.Resources_Theme_Delegate.obtainStyledAttributes(Resources_Theme_Delegate.java:71)
	at android.content.res.Resources$Theme.obtainStyledAttributes(Resources.java:1436)
	at android.widget.TextView.<init>(TextView.java:761)
	at android.widget.TextView.<init>(TextView.java:704)
	at android.widget.TextView.<init>(TextView.java:700)
	at com.android.layoutlib.bridge.MockView.<init>(MockView.java:50)
	at com.android.layoutlib.bridge.MockView.<init>(MockView.java:45)
	at com.android.layoutlib.bridge.MockView.<init>(MockView.java:41)
	at android.view.BridgeInflater.createViewFromTag(BridgeInflater.java:163)
	at android.view.LayoutInflater.createViewFromTag(LayoutInflater.java:727)
	at android.view.LayoutInflater.rInflate_Original(LayoutInflater.java:858)
	at android.view.LayoutInflater_Delegate.rInflate(LayoutInflater_Delegate.java:70)
	at android.view.LayoutInflater.rInflate(LayoutInflater.java:834)
	at android.view.LayoutInflater.inflate(LayoutInflater.java:492)
	at com.android.layoutlib.bridge.bars.CustomBar.<init>(CustomBar.java:95)
	at com.android.layoutlib.bridge.bars.StatusBar.<init>(StatusBar.java:67)
	at com.android.layoutlib.bridge.impl.Layout.createStatusBar(Layout.java:223)
	at com.android.layoutlib.bridge.impl.Layout.<init>(Layout.java:145)
	at com.android.layoutlib.bridge.impl.RenderSessionImpl.inflate(RenderSessionImpl.java:300)
	at com.android.layoutlib.bridge.Bridge.createSession(Bridge.java:429)
	at com.android.ide.common.rendering.LayoutLibrary.createSession(LayoutLibrary.java:350)
	at com.android.tools.idea.rendering.RenderTask$2.compute(RenderTask.java:510)
	at com.android.tools.idea.rendering.RenderTask$2.compute(RenderTask.java:498)
	at com.intellij.openapi.application.impl.ApplicationImpl.runReadAction(ApplicationImpl.java:967)
	at com.android.tools.idea.rendering.RenderTask.createRenderSession(RenderTask.java:498)
	at com.android.tools.idea.rendering.RenderTask.access$600(RenderTask.java:72)
	at com.android.tools.idea.rendering.RenderTask$3.call(RenderTask.java:610)
	at com.android.tools.idea.rendering.RenderTask$3.call(RenderTask.java:607)
	at com.android.tools.idea.rendering.RenderService.runRenderAction(RenderService.java:359)
	at com.android.tools.idea.rendering.RenderTask.render(RenderTask.java:607)
	at com.android.tools.idea.rendering.RenderTask.render(RenderTask.java:629)
	at com.intellij.android.designer.designSurface.AndroidDesignerEditorPanel$7.run(AndroidDesignerEditorPanel.java:519)
	at com.intellij.util.ui.update.MergingUpdateQueue.execute(MergingUpdateQueue.java:337)
	at com.intellij.util.ui.update.MergingUpdateQueue.execute(MergingUpdateQueue.java:327)
	at com.intellij.util.ui.update.MergingUpdateQueue$3.run(MergingUpdateQueue.java:271)
	at com.intellij.util.ui.update.MergingUpdateQueue.flush(MergingUpdateQueue.java:286)
	at com.intellij.util.ui.update.MergingUpdateQueue.flush(MergingUpdateQueue.java:244)
	at com.intellij.util.ui.update.MergingUpdateQueue.run(MergingUpdateQueue.java:234)
	at com.intellij.util.concurrency.QueueProcessor.runSafely(QueueProcessor.java:238)
	at com.intellij.util.Alarm$Request$1.run(Alarm.java:352)
	at java.util.concurrent.Executors$RunnableAdapter.call(Executors.java:511)
	at java.util.concurrent.FutureTask.run(FutureTask.java:266)
	at java.util.concurrent.ThreadPoolExecutor.runWorker(ThreadPoolExecutor.java:1142)
	at java.util.concurrent.ThreadPoolExecutor$Worker.run(ThreadPoolExecutor.java:617)
	at java.lang.Thread.run(Thread.java:748)
All the calls to 25, 26, 27 and 28 are errors of failed to load platform rendering library.
Insert keyframe giving keying set failed to insert any key frames (solved)
Blender 2.81 beta
problem description
After entering the posture mode , adjust the posture, and then press the I key to try to insert the key frame, but the error message is very difficult to understand
Frame position to insert key
So switch to the English version
“Insert keyframe giving keying set failed to insert any key frames”
On the Internet, it is said that the channels to be inserted are locked, but I did not lock them. At present, there is no good solution. You have to right-click to add frames in the N panel’s transform menu. I don’t know if this is a bug or not
solutions
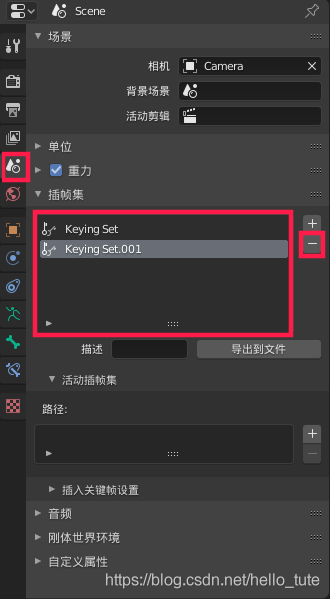
In the scene attributes tab, check the insert frame set list. If the data named keying set or keying set.001 is in the list, just delete them
Delete completed
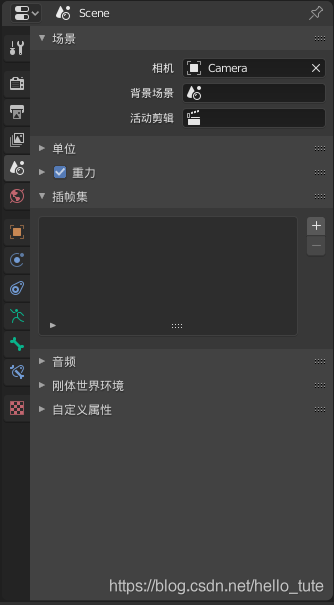
Then press the I key to insert the keyframe normally
Note: in fact, the so-called keying set is a very convenient mechanism. You need to select all the channels you need in advance and put them into a set. Then, when you press I key, blender will automatically insert frames for the channels in the set.
C + + error prototype for… Does not match any in class
Today, I encountered such a strange bug. After searching for a long time, I didn’t find it. When I finally reviewed the code, I found that the in the error reporting function called an undeclared function . But the compiler didn’t give me a hint and found that it took a certain amount of time. Finally, I declare and implement the function, and the bug is gone.
IOS warning – this block declaration is not a prototype
About warnings
We define a block without parameters, usually in the following way
|
one |
|
A warning is prompted in xcode9
|
one two |
|
The solutions can be as follows
|
one |
|
But in this way, many third parties need to change, the scope involved is too large, it may not be suitable at present, although this is the trend
Or, if it’s only a few places, it can be used
|
one two three four |
|
A complete temporary solution to all such warnings
In the setting of the project

Set to no, the warnings disappear
However, this is not a good habit. It’s just a temporary way not to prompt this type of warning
C# Member XXX cannot be accessed with an instance with an instance reference;qualify it with a type
C # error report:
Member XXX cannot be accessed with an instance with an instance reference;qualify it with a type name instead
Cannot access member XXX with an instance reference; qualify it with a type name instead
Solution: the method is static, so use the Class.Func Call instead of instantiation.
Attributeerror: ‘bytes’ object has no attribute’ encode ‘
When training the model, the following error is reported:
attributeerror: ‘bytes’ object has no attribute’ encode ‘
solution: click error report to enter the corresponding error report document, and change encode to decode.
This is because in python3, the encoding distinguishes between string and binary https://www.jianshu.com/p/a4cf632d97f1
Learning notes of Python 3: debugger speedups using Python not found
When you first run the PY module (eclipse), you usually encounter warning
warning: Debugger speedups using cython not found. Run '"C:\Python\Python36\python.exe" "C:\D\J2EESpace\eclipseNEON2\plugins\org.python.pydev.core_6.3.3.201805051638\pysrc\setup_cython.py" build_ext --inplace' to build.
pydev debugger: starting (pid: 10056)
The warning will not affect the running of the program. Indicates that cython was not found.
Python is an extension module tool of python, which is mixed with Python and C language to speed up the efficiency of Python.
According to the prompt, enter the “pysrc” directory and execute
python setup_cython.py build_ext --inplaceThat’s it.
Note that “Microsoft Visual C + + 14.0 is required” error sometimes occurs during execution.
error: Microsoft Visual C++ 14.0 is required. Get it with "Microsoft Visual C++Build Tools": http://landinghub.visualstudio.com/visual-cpp-build-toolsTherefore, it is necessary to ensure that Microsoft Visual C + + 14.0 (download address) is installed on the PC.
Attributeerror: the solution of module ‘urllib’ has no attribute ‘quote’
Record:
Today, I saw the interface document provided by others. When parsing the text, I used urllib.quote In the end, we found that it was a version problem. The way to write python2 is urllib.quote , python3 should be changed to urllib.parse.quote That’s it.