Error 1: When compiling the service written by Proc, the header file cannot be found
Solution:
- Execute the command first # find . -name “stddef.h” -print to find the storage path of stddef.h;
- Review the content of the pcscfg.cfg file under $oracle_home/precomp/admin, Modify the content marked in red below to the storage path of stddef.h actually queried by the above find statement.
sys_include=(/usr/include,/usr/lib/gcc-lib/i486-suse-linux/2.95.3/include,/usr/lib/gcc-lib/i386-redhat-linux/2.96 /include)
Error 2: prompt “ORA-01031: insufficient privileges” when compiling background source files
Solution:
- Log in with the oracle user,check the newsale user’s permission to use /home/oracle,execute the following command
$cd /home
$chmod –R 744 oracle
- Grant write permissions to files such as tnsnames.ora under $ORACLE_HOME/network/admin.
Error 3: When compiling background source files, prompt “ORA-01034”
Problem symptoms:
“ORA-01034: ORACLE not available
ORA-27121: unable to determine size of shared memory segment
SVR4 Error: 13: Permission denied”
Solution:
Log in as the oracle user, execute the following command
$cd $ORACLE_HOME/bin
$ls -altr oracle #Modify if it is not the following permissions after viewing
$ chmod 6751 oracle
Error 4: When compiling background source files, prompts “ORA-01034, ORA-27101 and Linux Error: 2: No Such file or dirctory”
Solution:
Start oracle service and monitor.
Error 5: When compiling background source files, prompt “ORA-12705”
Solution:
Check whether the language configurations such as nls under the .bash_profile file are the same as the oracle user’s .bash_profile.
Error 6: When compiling background source files, prompt buildserver related errors
Solution:
Check whether the configuration and order related to tuxedo under the .bash_profile file are correct (Compare with the actual path).
Error 7: Compile background source files, prompt “You do not have a valid SDK license”
Solution:
Maybe the license of tuxedo is incorrect. Check whether the lic.txt under /home/tuxedo/Tuxedo 8.1/bealic has been overwritten, or check whether the TYPE= SDK in lic is correct, and the value of type is SDK.
Error 8: When compiling the ubbwinnt file, prompts “CMDTUX_TAT:868:ERROR :tmloadcf can not run on a non-master node”
Solution:
View the machine name in the ubbwinnt file, modify and recompile.
Error 9: When compiling the ubbwinnt file, prompts “CMDTUX_TAT:868:ERROR tmloadcf cannot run on an active node”
Solution:
Tmshutdown -y stop all services, and recompile.
Error 10: When the application starts and closes tmshutdown -y, reports “CMDTUX_CAT:764: ERROR: can’t attach to BB”
Solution:
Ipcrm, ipcs or restart the computer.
Error 11: When the application starts, prompts “CMDTUX_CAT:1685:ERROR:Application initialization failure”
Solution:
- Check whether the server.ini file in the bin folder exists, whether its configuration is correct;
- Check the oracle’s Whether related services are started;
- Check if the ip address in ubbwinnt is correct;
- bdmconfig is missing Times the same error.
Error 12: prompts “CMDTUX_CAT:816:ERROR:Connot exec, executable file not found” when the application starts up
Solution:
Check whether the executable file generated when the source file is compiled is missing in the bin folder. Also if the tuxconfig file is missing, it will also prompt a “GMDTUX_CAT:1360” error.
Error 13: “Application Initialization Error” when starting center or counter
Solution:
- Check whether the BDE data source has settings, whether the settings are correct;
- Check whether the configuration in setreg.reg is correct ;
- Try another openfund.exe file.
Error 14: Client login failed, prompt “WTUXWS32.DLL not found, This application failed to start for this reason. Reinstalling the application may fix the problem”
Solution:
Check if the tuxedo patch has been installed, Check if the tuxedo runner path has been added to the path of the system environment variable. You can add the corresponding files that are prompted to be missing to “C:\WINDOWS\system32”.
Error 15: Use the new makefile file in 3.5, when compiling the background source file, an error is reported as shown below:
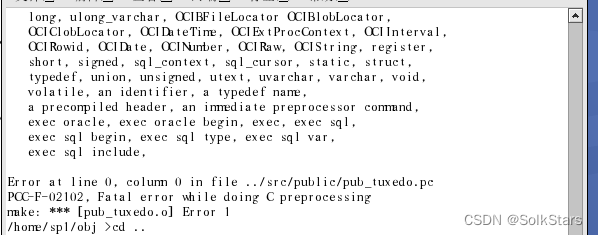
Solution:
Check if the path in the .bash_profile file is the configured fbase path. Whether the fbase installation package upload is useful requires binary upload.
Error 16: When using the asar middleware, to compile the background source file, an error is reported as shown below:

Solution:
Check if the fbase path is correctly configured in the .bash_profile file.
Error 17: When using the asar middleware, to compile the background source file, an error is reported as shown below:
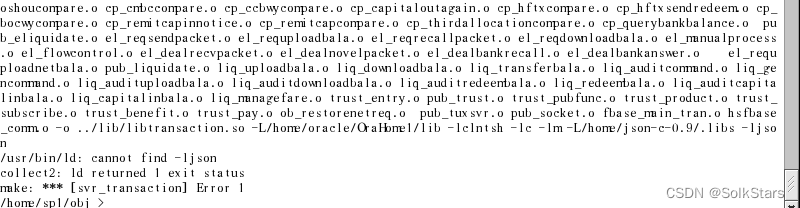
Solution:
json is not compiled successfully, Enter the json path to check whether the .lib folder is generated.
Error 18: The client login interface reports an error as shown below:
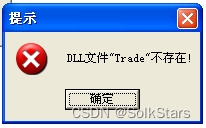
Solution:
Add F:\hs\fbase20\Fbase_win32\lib to the environment variable system variable path value; add F:\hs\fbase20\Fbase_win32\lib to the user variable lib value.
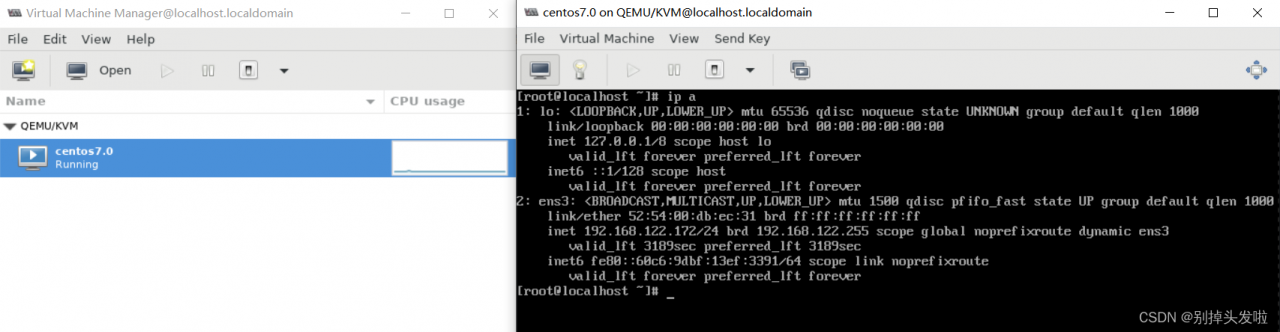
Error 19: Linux address settings
- View the network segment of this machine