We know that when you drag a figure in a window, it will flash as you draw it. In GDI, it is more complicated to solve this problem. By generating a memory DC in the memory and letting the brush draw in the memory DC when painting, the flashing problem can be solved by “pasting” the memory DC to the display with BitBLT once after painting. In OpenGL, we solve this problem by double caching. In general, dual caching is common in graphics working software. A double cache is two caches, a foreground cache and a background cache. The drawing is drawn in the background cache, and when it is done, it is swapped to the foreground cache so that there is no flicker.
A: the pixel format defined as support double buffered pixelDesc. DwFlags = PFD_DRAW_TO_WINDOW | PFD_SUPPORT_OPENGL | PFD_DOUBLEBUFFER | PFD_STEREO_DONTCARE;
B: Add such a line of code SwapBuffers(HDC) after the object is drawn. At this point, the OpenGL drawing has no flicker, but the MFC will repeatedly redraw the background to generate flicker
C: Process message loop ON
BOOL CoglView::On
{
// TODO: Add message handler code here and/or invoke default values
return TRUE;
//return CView::On
}
That solves the flicker problem once and for all!
Reprinted address:
http://blog.csdn.net/lsldd/article/details/7599225
MFC+OpenGL has many ways to remove flicker online. Such as:
http://hi.baidu.com/piaoshi111/blog/item/66dba5ff643caa275c60083b.html
The basic process of using OpenGL in MFC has been explained in considerable detail above. The steps to realize flicker-free are also given.
Now for the first problem: if you select “Split Windows” in the MFC Generation Wizard, you will find that even reloading OnEraseBkgnd will not solve the flicker problem!
The following code is generated by MFC for you:
(CPP)
view plain
The copy
- // In mainfrm. h: Virtual Bool PrecreateWindow (CreateStruct& Cs); // In mainfrm.cpp: BOOL CMainFrame: : OnCreateClient (LPCS LPCREATESTRUCT/* * /, CCreateContext * pContext) {return m_wndSplitter. Create (this, 2, 2,// TODO: adjust the rows and columns CSize (10, 10),// TODO: adjust the minimum size pContext pane); }
In other words, MFC overloads the onCreateClient function for you to implement split Windows. We know that MainFrm inherits from CFrameWnd. Let’s take a look at what Cframewnd’s OnCreateClient does:
(CPP)
view plain
The copy
- BOOL CFrameWnd: : OnCreateClient (LPCREATESTRUCT, CCreateContext * pContext) {//default create client will create a view if asked for it if (pContext! = NULL & amp; & PContext – & gt; M_pNewViewClass! = NULL) {if (CreateView (pContext AFX_IDW_PANE_FIRST) = = NULL) return FALSE. } return TRUE; }
This is where we create the view class CXXXView where we initialize OpenGL.
However, if splitting is used, MFC will automatically add an object m_WNDSplitter of type CSPLitterWnd, and your CXXXView class will simply be a view inside CSPLitterWnd.
When changing the window size, CSSPLITTERWND first responds to ON_WM_SIZE, and then lets CXXXView handle it further in its response function.
The window size of CSPLitterWnd is slightly larger than that of its internal CXXXView. Therefore, the refresh of CSPLitterWnd itself will affect the refresh of CXXXView and cause flicker.
The solution, then, is to either not use the split, which is absolutely fine.
If you have to split the window, you might need to derive your own CSSPLitterWnd class to modify its behavior.
Next problem, you might have a window that doesn’t refresh, but only resizes the window.
This is because your CXXXView only overloads OnDraw. How is OnDraw invoked?
See *\Microsoft Visual Studio 9.0\VC\atlmfc\ SRC \ MFC \viewcore.cpp
(CPP)
view plain
The copy
The
- ///the CView drawing support void the CView: : OnPaint () {//standard paint routine CPaintDC dc (this); OnPrepareDC (& amp; dc); Ontouch (& amp; dc); }
The response to the ON_WM_PAINT message is CView, which calls OnDraw, which you overloaded. Because of the paintdc, dc(this); This caused the window to not refresh continuously.
Want to know more detailed reasons, please see http://peipengshuai.blog.163.com/blog/static/1901226620123169431072/
All you need to know is that CPaintDC will remove ON_WM_PAINT from the refresh message queue. After removal, if the window has not changed, it will not refresh automatically.
So, what you need to do is very simple. Do not use CPaintDC dc(this) in the ON_WM_PAINT response to your CXXXView class; (comment out) can be.
The next problem: After maximizing the window, some areas of the window (such as the toolbar) will not refresh, leaving blank space.
The problem has not yet been perfectly solved. Refer to http://topic.csdn.net/t/20020220/16/534304.html, a driver problem. Unable to verify at this time.
If there is a solution, let us know in the comments.


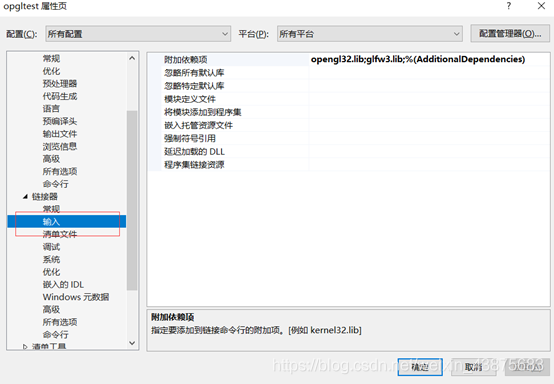
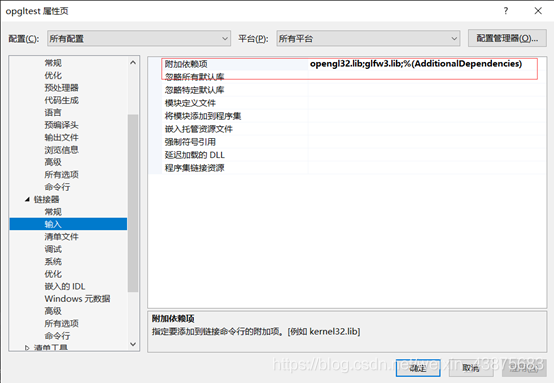
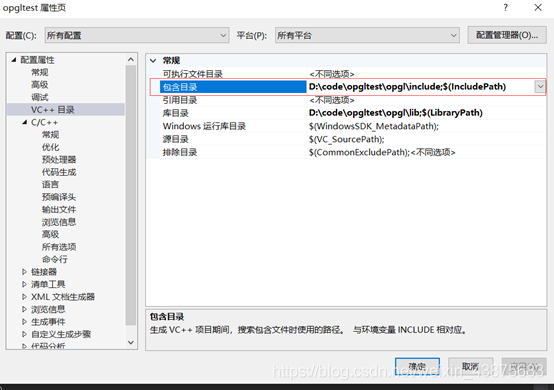 b5
b5 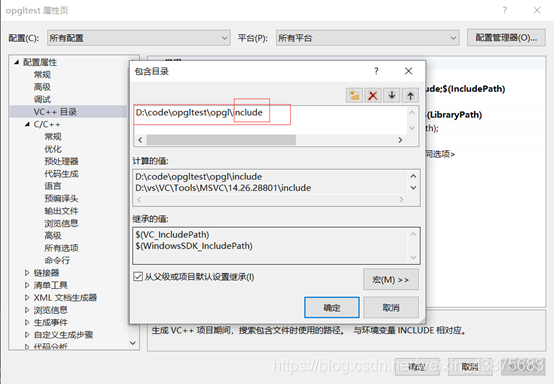
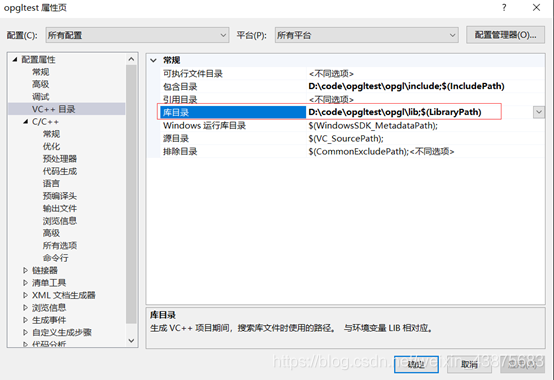
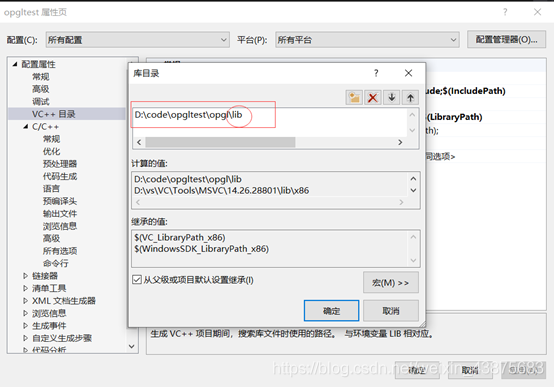
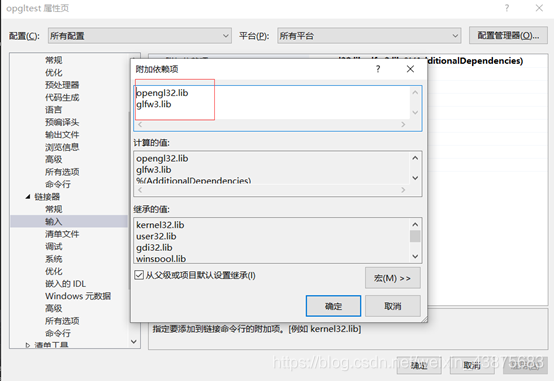
 <>bb4
<>bb4 
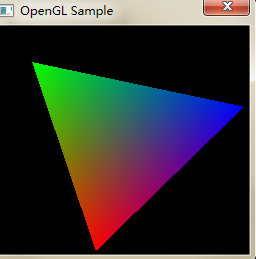
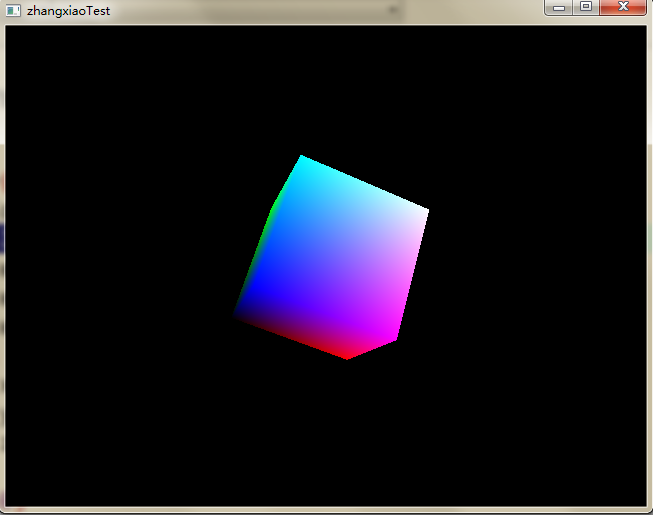

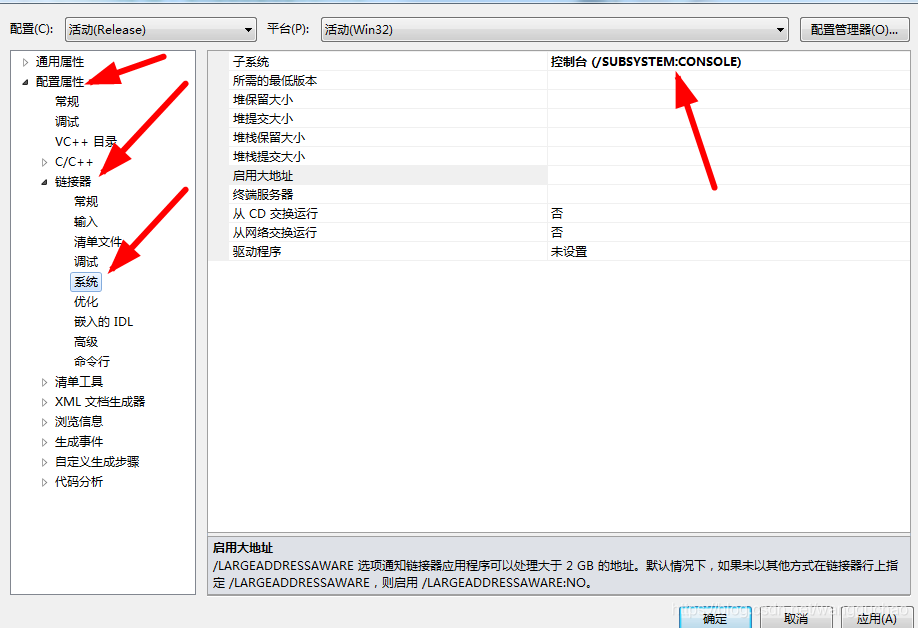
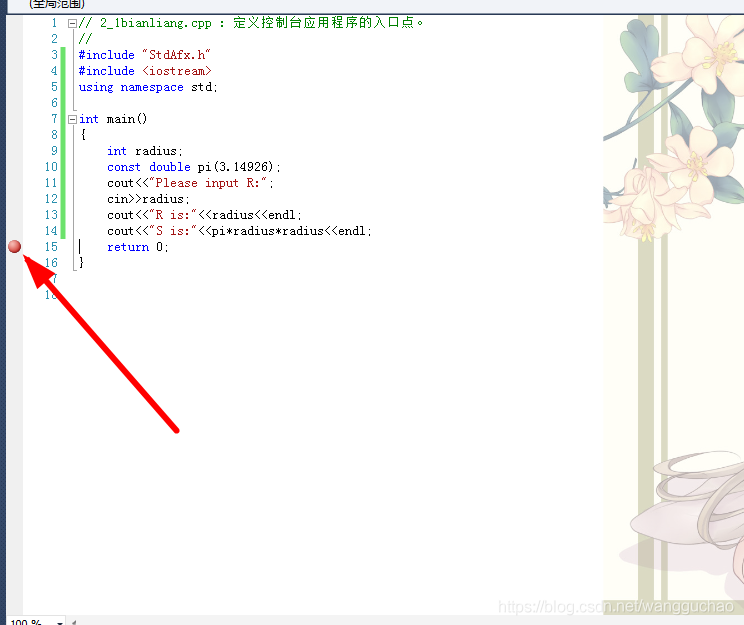
 directly Ctrl+F5 start. The effect is as follows: