Base64 coding is a kind of coding method of “guard against gentleman but not villain”. It is widely used in MIME Protocol. As the transmission code of e-mail, the generated code is reversible. The last two bits may have “=”, and the generated codes are all ASCII characters.
Advantages: fast speed, ASCII characters, incomprehensible to the naked eye
disadvantages: the encoding is relatively long, very easy to crack, only suitable for the occasion of encrypting non key information
Base64 encoding and decoding in Python
& gt; & gt; & gt; import Base64
& gt; & gt; s =’I am a string ‘
& gt; & gt; a = Base64. B64encode (s)
& gt; & gt; & gt; Print a
ztlkx9fwt / u0rg = =
& gt; & gt; & gt; print Base64. B64decode (a)
I am a string
Category Archives: How to Fix
In pandas, dataframe and np.array The mutual transformation between the two
I’ve been looking online for a long time. Either the data frame is transformed into array or the array is transformed into data frame. So here’s a summary. The python generation of mutual transformation is as follows:
Transform dataframe into array
and
df=df.valuesTransform array into dataframe
import pandas as pd

df = pd.DataFrame(df)
That’s OK!
Python Anaconda Spyder can’t display pictures by using Matplotlib. Error report solution: figures now render in the plots pane by default. To mak
This article starts with my Jekyll blog: zhang0peter’s personal blog
In the evening, when using Anaconda’s Spyder IDE and Matplotlib to draw pictures, the pictures will not be displayed. In the iPhone terminal, the error is reported as follows:
Figures now render in the Plots pane by default. To make them also appear inline in the Console, uncheck "Mute Inline Plotting" under the Plots pane options menu.
After searching for information on the Internet, we found the problem: Python – Spyder plot inline – stack overflow
The latest version of Spyder 4.0 shows the picture in the upper right corner by default, not in the terminal, as shown in the figure:
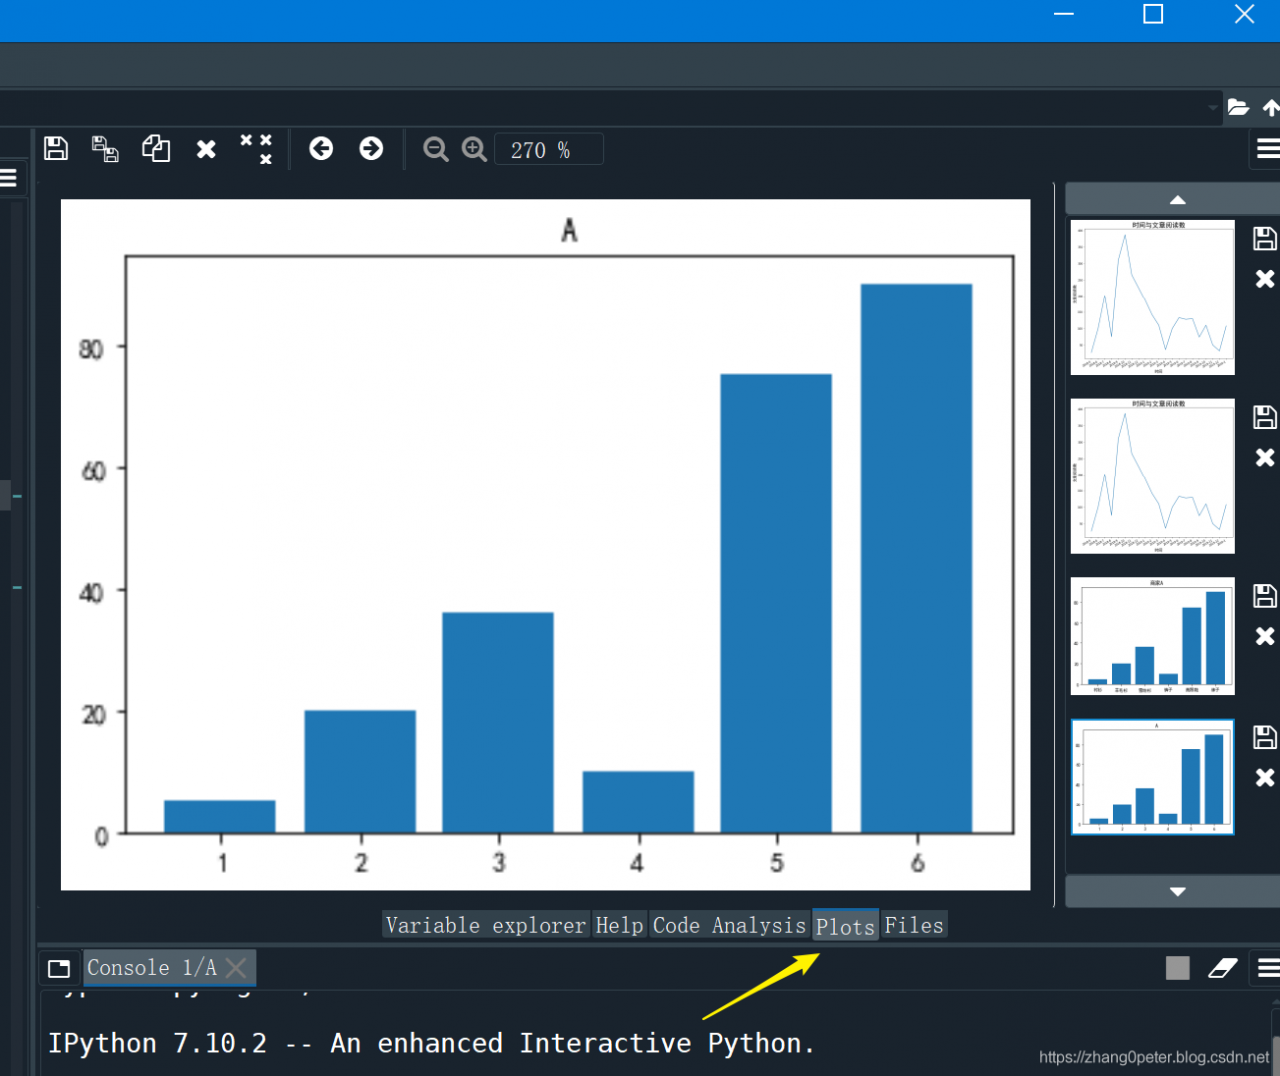
To display the pictures drawn by Matplotlib in the pop-up window, modify the settings:
Tools > Preferences > iPython console > Graphics > Graphics backend > Automatic
Restart the IDE, and now the drawing will pop up.
Springboot error, unable to read configuration file: could not resolve placeholder ‘xxx’ in value “${XXX}
Just configure the following code on the startup class
@Bean
    public static PropertySourcesPlaceholderConfigurer placeholderConfigurer() {

        PropertySourcesPlaceholderConfigurer placeholderConfigurer = new PropertySourcesPlaceholderConfigurer();

        placeholderConfigurer.setIgnoreUnresolvablePlaceholders(true);

        return placeholderConfigurer;
    }
should be OK
Spring boot prompt could not resolve placeholder in string value
1. Problem description
Spring boot refers to the configuration in YML in entity class
    @Value("${shiro.session.expireTime}")
    private final int expireTime = 30;
As soon as the project is started, an error is reported, indicating that could not resolve placeholder in string value. This error is basically caused by “configuration file not found”( application.yml )】
2. Solutions
Check whether the target / classes directory exists application.yml configuration file
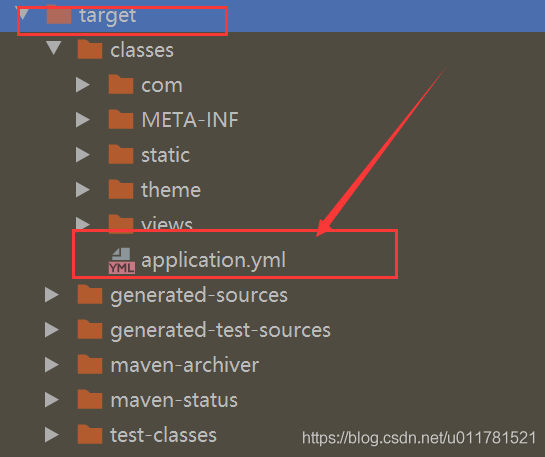
If it exists, add the primary key of propertysource to the configuration class, and judge whether it exists according to the error log application.yml Configuration file.
@Configuration
@PropertySource("classpath:application.yml")
public class ShiroConfig {
appear java.lang.NoClassDefFoundError A kind of reason and solution of the mistake
Today, when running a java program, I met java.lang.NoClassDefFoundError My mistake. At first glance, it’s the classpath setting. It turns out that the solution is also very simple. There are two ways:
When running, with the – CP parameter, the value is “‘”, which indicates the current directory. For example:
java -cp . VolcanoRobot
Write classpath =. \;% Java in the environment variable_ HOME%\lib\ tools.jar Again, pay attention to the one in front. You can:
java VolcanoRobot
In comparison, the latter method is more thorough.
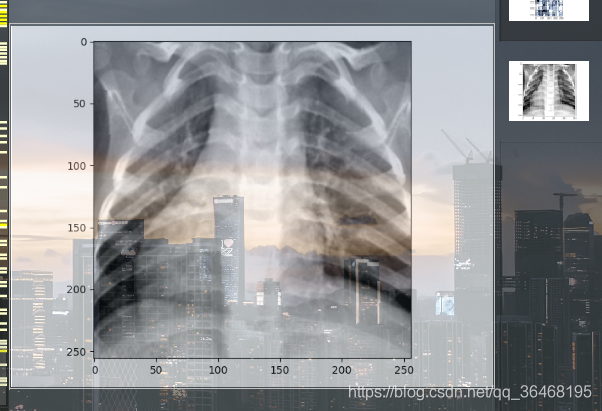
Resolve call‘ plt.show () ‘no image after
Call in code plt.show No img image is displayed after ()
import matplotlib.pyplot as plt
plt.imshow(img)
The solution is as follows:
First, add the following in the header file:
import pylabThen in the original code plt.show (IMG) add the following:
pylab.show()As shown in the figure, the picture can be displayed normally
In tensorflow tf.reduce_ Mean function
tf.reduce_ The mean function is used to calculate the mean value of tensor along a specified number axis (a dimension of tensor), mainly for dimension reduction or calculating the mean value of tensor (image).
reduce_mean(input_tensor,
                axis=None,
                keep_dims=False,
                name=None,
                reduction_indices=None)
The first parameter is input_ Tensor: the input tensor to be reduced; the second parameter axis: the specified axis; if not specified, the mean value of all elements will be calculated; the third parameter keep_ Dims: reduce dimension, set to true, the output result keeps the shape of input tensor, set to false, the output result will reduce dimension; the fourth parameter name: name of operation; the fifth parameter reduction_ Indicators: used to specify axes in previous versions, but has been discarded;
Take a tensor with dimension 2 and shape [2,3] as an example
import tensorflow as tf

x = [[1,2,3],
      [1,2,3]]

xx = tf.cast(x,tf.float32)

mean_all = tf.reduce_mean(xx, keep_dims=False)
mean_0 = tf.reduce_mean(xx, axis=0, keep_dims=False)
mean_1 = tf.reduce_mean(xx, axis=1, keep_dims=False)


with tf.Session() as sess:
    m_a,m_0,m_1 = sess.run([mean_all, mean_0, mean_1])

print m_a    # output: 2.0
print m_0    # output: [ 1.  2.  3.]
print m_1    #output:  [ 2.  2.]
If you set the dimension to keep the original tensor, keep_ Dims = true, results:
print m_a    # output: [[ 2.]]
print m_0    # output: [[ 1.  2.  3.]]
print m_1    #output:  [[ 2.], [ 2.]]
Similar functions include:
tf.reduce_ Sum: calculate the sum of all elements in the axis direction specified by the tensor; tf.reduce_ Max: calculate the maximum value of each element in the axis direction specified by the tensor; tf.reduce_ All: calculate the logical sum (and operation) of each element in the axis direction specified by the tensor; tf.reduce_ Any: calculates the logical or (or operation) of each element in the axis direction specified by the tensor;
IntelliJ idea / eclipse automatically generate author annotation signature
The signature of the author’s comments is as follows:
/**
* @ author E-mail:[email protected]
* @ version created on June 20, 2016 at 04:58:52 PM*/
Eclipse automatically generates the author annotation signature
file
Window – & gt; preference – & gt; Java – & gt; code style – & gt; code template when you select this movie, you will see a box on the right showing the option of code. You can click this option, click New java files under it, and then you can click Edit button to change its content to yours: (for example)
${filecomment}
${package_ Declaration}
/ *
* @ author E-mail:[email protected]
* @ version creation time: ${date} ${time}
* /
${aspect}
${type}_ declaration}
Finally, apply — & gt; OK..
In addition, I need to add that there is a “insert variable” button in the bottom left foot of the edit window that pops up after I click Edit. When I click it, it will display the variables that can be referenced in the current template, so I won’t look for the definition of variables everywhere like I do.
IntelliJ idea ﹣ automatically generates author annotation signature
1. Open file — & gt; setting
2. Find editor — & gt; file and code templates
3. Find includes
4. Change ${user} to a user-defined user name
/**
* created by name on ${date}.
*/
Error occurred when Python called cv2.findcontours: valueerror: not enough values to unpack (expected 3, got 2)
Opencv old version, return three parameters:
im2, contours, hierarchy = cv2.findContours(mask, cv2.RETR_TREE, cv2.CHAIN_APPROX_SIMPLE)
To return three parameters:
Just demote OpenCV to 3.4.3.18, and input PIP install opencv python = = 3.4.3.18 in the terminal
Opencv new version call, return two parameters:
contours, hierarchy = cv2.findContours(mask, cv2.RETR_ TREE, cv2.CHAIN_ APPROX_ SIMPLE)
tar.gz and tar.bz2 Unzip command
tar.gz and tar.bz2 Unzip command
Download to Linux source package on the network is mainly tar.gz and tar.bz2 Compressed format, part of it is zip
decompression tar.gz The order is
tar -zxvf xx.tar.gz
decompression tar.bz2 My orders are
tar -jxvf xx.tar.bz2
Unzip tool is used to unzip
JPA transaction problems executing an update / delete query
If JPA prompts executing an update / delete query, it must be because @ transactional and @ modifying are not added to the service layer.
Abnormal scene
When spring-boot2 + JPA performs add modify delete operation:
public interface UserRepository extends JpaRepository<User , Integer>{

    @Modifying
    @Query(value="update User c set c.state = ?1,c.lastupdatetime = ?2 where c.user_no= ?3")
    void updateUser(int state,Date nowDate,String user_no);

}
Exception: executing an update / delete query
Solution
Because JPA requires “no transaction support, update and delete operations cannot be performed”.
So on the other hand, @ transactional must be added to the service layer or repository layer to represent that this is a transaction level operation. Addition, deletion, modification and query are all transaction level except for query. It is OK to regard this as a specification.