Category Archives: Error

[Solved] Error running ‘LocalTest‘: Command line is too long. Shorten command line for LocalTest or also for…

Error running ‘Application’:
Command line is too long.Shorten command line for Application or also for Spring Boot default configuration.
IDEA reports the above error, add the following content to the project workspace.xml

  <component name="PropertiesComponent">
    //add
    <property name="dynamic.classpath" value="true" />
  </component>

Cuda Runtime error (38) : no CUDA-capable device is detected

When training the model in vscode, the following errors appear:
CUDA runtime error (38): no CUDA capable device is detected at/Torch/aten/SRC/THC/thcgeneral cpp:51

The reason is that CUDA is not selected correctly, so you need to check how many graphics cards you have first:
Enter Python in terminal; Enter the following code

import torch
print(torch.cuda.device_count()) #Number of available GPUs

View CUDA version

nvcc --version # Check your own CUDA version

I have two graphics cards in my library. Choose one from 0 or 1 and write it before
model = torch.nn.dataparallel (net). Cuda()

os.environ['CUDA_VISIBLE_DEVICES'] = '0'
model = torch.nn.DataParallel(net).cuda()

Problem solving.

OpenCV(-206:Bad flag (parameter or structure field)) Unrecognized or unsupported array type [How to Solve]

This problem occurred when I ran C + + opencv code. I realized that the mask format I entered was incorrect, not the. PNG or. JPG problem I wrote. The source of the problem may be that CV2. Imread() is loading an empty matrix. Instead of delving into this problem, I will check your input image and mask name and format again. I think this error is a sign that the image cannot be loaded correctly. You need to check your code imread read read problem, whether the file name is correct and whether there is a problem with the file input path. Finally, I changed the way the file path was read

My modification: change the input path in the program parameters to:

The above is my solution to this problem, the correct operation of the modified code.

[How to Solve] Content with element type ‘mapper’ must match

Today, in the mapper. XML file, I mistakenly annotated it with /* * code description */ and then reported this error
the specific exception is as follows

Caused by: org.xml.sax.SAXParseException; lineNumber: 134; columnNumber: 10, The element type "mapper" must match "(cache-ref|cache|resultMap*|parameterMap*|sql*|insert*|update*|delete*|select*)+"。

error code 

   /** Public conditions */
    <sql id="commonIfWhere">
        <if test='params.projectId != null and params.projectId != ""'>
            and project_id = #{params.projectId}
        </if>
        <if test='params.id!= null and params.id != ""'>
            and id = #{params.id}
        </if>
    </sql>

after correction

   <!-- Public conditions -->
    <sql id="commonIfWhere">
        <if test='params.projectId != null and params.projectId != ""'>
            and project_id = #{params.projectId}
        </if>
        <if test='params.id!= null and params.id != ""'>
            and id = #{params.id}
        </if>
    </sql>

The problem was solved smoothly

How to Solve error: command ‘C:\Program Files\NVIDIA GPU Computing Toolkit\CUDA\v11.0\bin\nvcc.exe‘ failed

Perfect solution error: Command ‘C’: program files, NVIDIA GPU computing toolkit, CUDA, v11.0, bin, nvcc.exe ‘failed with exit status 1

[win10 install detectron2]

My compiling environment:

pytorhc:1.8.1+cu111

cuda11.0

Download first https://github.com/facebookresearch/detectron2, then go to the file directory, then go to the command line, and then run

python setup.py build --force develop

Then came the problem:

E:/。。。/detectron2-master (3)/detectron2/detectron2/layers/csrc/nms_rotated/nms_rotated_cuda.cu(68): error: identifier "single_box_iou_rotated" is undefined
          detected during instantiation of "void nms_rotated_cuda_kernel(int, double, const T *, unsigned long long *) [with T=float]"
(105): here

E:/。。。/detectron2-master (3)/detectron2/detectron2/layers/csrc/nms_rotated/nms_rotated_cuda.cu(68): error: type name is not allowed
          detected during instantiation of "void nms_rotated_cuda_kernel(int, double, const T *, unsigned long long *) [with T=float]"
(105): here

E:/。。。/detectron2-master (3)/detectron2/detectron2/layers/csrc/nms_rotated/nms_rotated_cuda.cu(68): warning: expression has no effect
          detected during instantiation of "void nms_rotated_cuda_kernel(int, double, const T *, unsigned long long *) [with T=float]"
(105): here

E:/。。。/detectron2-master (3)/detectron2/detectron2/layers/csrc/nms_rotated/nms_rotated_cuda.cu(58): warning: variable "cur_box" was set but never used
          detected during instantiation of "void nms_rotated_cuda_kernel(int, double, const T *, unsigned long long *) [with T=float]"
(105): here

5 errors detected in the compilation of "E:/。。。/detectron2-master (3)/detectron2/detectron2/layers/csrc/nms_rotated/nms_rotated_cuda.cu".
nms_rotated_cuda.cu
C:\Users\。。。\anaconda3\lib\site-packages\torch\utils\cpp_extension.py:369: UserWarning: Attempted to use ninja as the BuildExtension backend but we could not find ninja.. Falling back to using the slow distutils backend.
  warnings.warn(msg.format('we could not find ninja.'))
C:\Users\。。。\anaconda3\lib\site-packages\torch\utils\cpp_extension.py:311: UserWarning:

                               !! WARNING !!

!!!!!!!!!!!!!!!!!!!!!!!!!!!!!!!!!!!!!!!!!!!!!!!!!!!!!!!!!!!!!!!!!!!!!!!!!!!!!!!
Your compiler (cl 19.00.24210) may be ABI-incompatible with PyTorch!
Please use a compiler that is ABI-compatible with GCC 5.0 and above.
See https://gcc.gnu.org/onlinedocs/libstdc++/manual/abi.html.

See https://gist.github.com/goldsborough/d466f43e8ffc948ff92de7486c5216d6
for instructions on how to install GCC 5 or higher.
!!!!!!!!!!!!!!!!!!!!!!!!!!!!!!!!!!!!!!!!!!!!!!!!!!!!!!!!!!!!!!!!!!!!!!!!!!!!!!!

                              !! WARNING !!

  warnings.warn(ABI_INCOMPATIBILITY_WARNING.format(compiler))
error: command 'C:\\Program Files\\NVIDIA GPU Computing Toolkit\\CUDA\\v11.0\\bin\\nvcc.exe' failed with exit status 1

After solving the problem, run the command again and install it successfully,

Flutter Package error: keyboard_visibility:verifyReleaseResources

··· shell
FAILURE: Build failed with an exception.
What went wrong:
Execution failed for task ‘:keyboard_visibility:verifyReleaseResources’.

A failure occurred while executing com.android.build.gradle.internal.tasks.Workers$ActionFacade
Android resource linking failed
C:\Users\user.gradle\caches\transforms-2\files-2.1\039e4be8150fd2be72df998bdce8645b\core-1.1.0\res\values\values.xml:142:5-173:25: AAPT: error: resource android:attr/fontVariationSettings not found.

 C:\Users\user\.gradle\caches\transforms-2\files-2.1\039e4be8150fd2be72df998bdce8645b\core-1.1.0\res\values\values.xml:142:5-173:25: AAPT: error: resource android:attr/ttcIndex not found.

Try:
Run with –stacktrace option to get the stack trace. Run with –info or –debug option to get more log output. Run with –scan to get full insights. Get more help at https://help.gradle.org
BUILD FAILED in 10m 52s
···

Open your project with android studio and change the compileSdkVersion to the same version as yours.

SAP MM41 error: Retail materials cannot be maintained.

SAP MM41 error: Retail materials cannot be maintained in the industry system

Trying to execute transaction code MM41/MM43, I received the following error.

Retail materials cannot be maintained in the industry system
Message no. MH194
Diagnosis
Your system is not defined as an SAP Retail System. For this reason, you can use only industry functions for maintaining material master records, and not retail-specific maintenance functions.
Procedure
Contact your system administrator.

The analysis of the reported error is as follows.

To use the Retail-transactions you need to have your system set to Retail – with all the advantages and restrictions of Retail. And: there’s no turning back to a normal system unless you reinstall it.
So, to set up Retail, go to SPRO -> Activate SAP ECC Extensions -> Choose Industry Business Function Set ISR_RETAILSYSTEM. Again: once you activate the Business Function, you CAN’T go back – unless you wipe the whole system.
Please also read the SAP Help on SAP Retail to get familiar with the solution BEFORE you activate it. I think it’s lot less trouble than reinstalling the system.

The showdialog() method in thread/threading. Timer/task reported an error: “before ole can be called, the current thread must be set to single thread unit (STA) mode.”

Before ole can be called, the current thread must be set to single threaded unit (STA) mode. Make sure that your main function is marked with stathreadattribute.

Error environment:

1. In the thread thread, call the showdialog() method

2. In the thread timer, call the showdialog() method

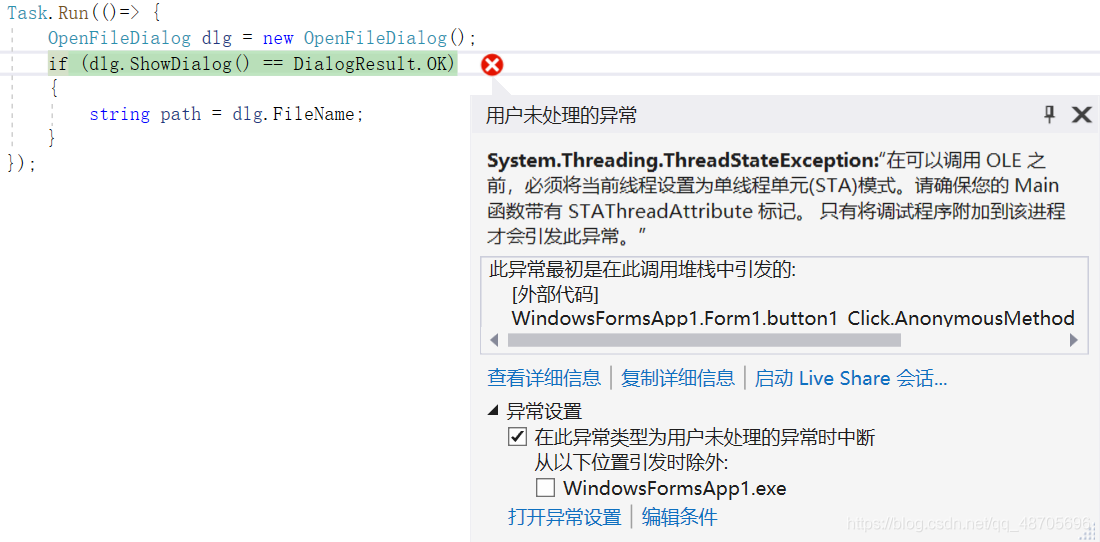
3, calling the ShowDialog() method in the Task task.

Error exception:

When the. Showdialog() method is executed, the following error will appear: “before ole can be called, the current thread must be set to single threaded unit (STA) mode. Please make sure that your main function is marked with stathreadattribute.”

Error reason:

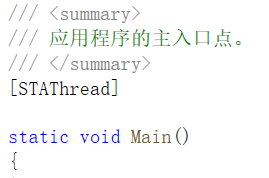
1. First of all, make sure that the main entry of the program is marked with stathreadattribute. If not, please add [stathread] to see if the problem is solved

2. Because this operation is executed in the newly created thread, the UI cannot be accessed, that is, calling ShowDialog () directly is indeed problematic. Non UI thread cannot open window

Solution:

1. Thread

By setting the apartmentstate property of the thread to apartmentstate   Enumeration value that controls the type of cell created.

Among them:

Sta: thread will create and enter a single thread unit;

MTA: thread will create and enter a multi thread unit;

Unknown: the apartmentstate property has not been set.

The code is as follows:

Thread th = new Thread(()=> new Form1().ShowDialog());
th.SetApartmentState(ApartmentState.STA);
th.Start();

This is a common practice on the Internet

2. System.threading.timer

See below!!

3. Task

Task encapsulates task, work content, not thread. A task may be executed on any thread, so the task does not provide thread properties, and the thread class should not be used in asynchronous methods. Moreover, the apartmentstate property of the thread should not be modified in the task, because the thread may execute other tasks. In other words, sta thread cannot be thread pool thread!!   See below!!


So!! Big move here!!!

👉 Multithreading interface should use control. Invoke delegate to let UI thread do it by itself 👈

this.Invoke(some   delegate);// Synchronization
or
this.begininvoke (some)   delegate);// Asynchronous

The code is as follows:

private void button1_Click(object sender, EventArgs e)
{
    Func<string> func = OFD;
    Task task = new Task(() =>
    {
        string res = (string)this.Invoke(func);//Synchronize! Let the UI threads do it themselves
    });
    task.Start();

}
private string OFD()
{
    OpenFileDialog dlg = new OpenFileDialog();
    if (dlg.ShowDialog() == DialogResult.OK)
    {
        string path = dlg.FileName;
        return path;
    }
    return null;
}

Celery Error: Did you remember to import the module containing this task?

report errors:

Did you remember to import the module containing this task?
Or maybe you're using relative imports?

Please see
http://docs.celeryq.org/en/latest/internals/protocol.html
for more information.

The full contents of the message body was:
b'[[], {}, {"callbacks": null, "errbacks": null, "chain": null, "chord": null}]' (77b)
Traceback (most recent call last):
  File "d:\venv\lib\site-packages\celery\worker\consumer\consumer.py", line 555, in on_task_received
    strategy = strategies[type_]
KeyError: 'terminal.tasks.add_order_and_other'

The reason for this error is that the task has not been found. There are two ways for celery to find the task
1. First of all, Django + celery is used here, not djcelery. Import all tasks in tasks.py in the view view function under settings
from. Task import add_ data, add_ course, add_ order_ and_ Other
(only import is OK) (this method is not recommended, because it’s a bit of heresy, hahaha)
2. Add app.autodiscover in cell.py_ Tasks ([‘terminal. Tasks’]), terminal. Tasks is the location of the task file.

Tips: if you close the corresponding window after starting the cell, the cell timer task will stop
when you start the cell by using the cell multi start W1 – a project name – B, the window timer task will not stop either. At the same time, you do not need to start the beat by using this command.