System environment: centos7

Oracle environment: 11g
Fault description: the server directly restarts after running data crash, and various errors are reported after restart,
Tns-03505: failed to resolve name,
The external PLSQL connection prompts ora-12170: TNS: connection timeout.
The specific solutions are as follows:
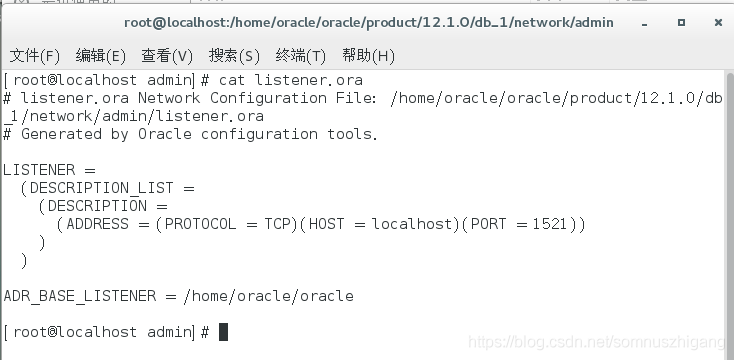
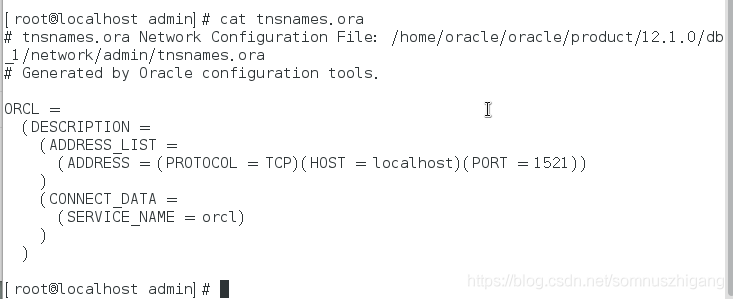
1. Check the file configuration information listener and tnsnames, and confirm that the following is correct. If the configuration of this file is wrong, the listening service will not be started normally.
2. Start the monitoring service lsnrctl start and update the registration
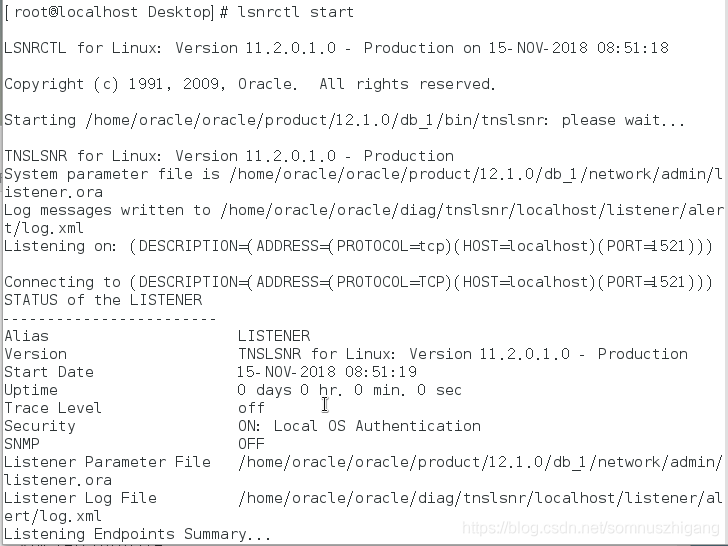
Services Summary…
Service “orcl” has 1 instance(s).
Instance “orcl”, status UNKNOWN, has 1 handler(s) for this service…
The command completed successfully
“Unknown” is prompted here. Registration update is required,
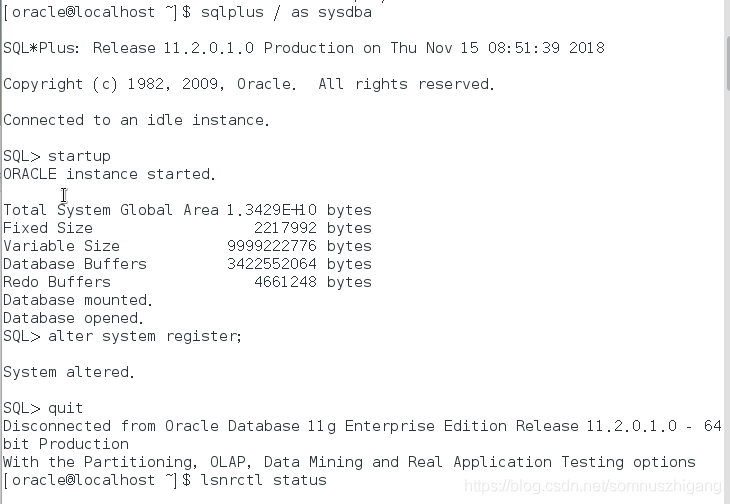
3. Open orcl service and update the registration
sqlplus/as sysdba
startup
alter system register;
quit
lsnrctl status
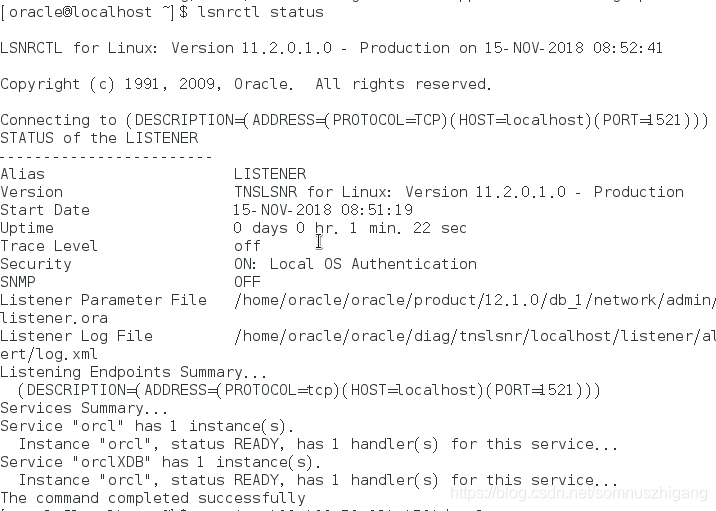
Service “orcl” has 1 instance(s).
Instance “orcl”, status READY, has 1 handler(s) for this service…
Service “orclXDB” has 1 instance(s).
Instance “orcl”, status READY, has 1 handler(s) for this service…
The command completed successfully
Confirm that the monitoring status is ready
then
4. Test results
Tns-03505 failed to resolve name is displayed. After confirming that there is no problem in the previous steps, proceed to the last step to view the firewall and port information
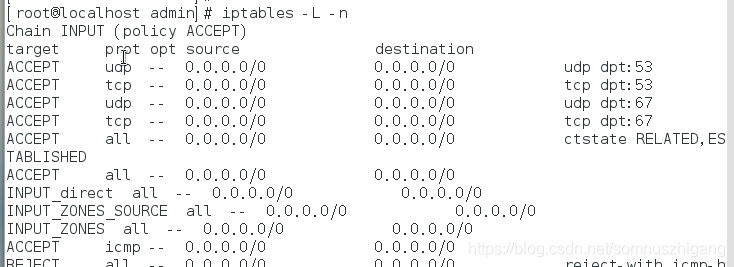
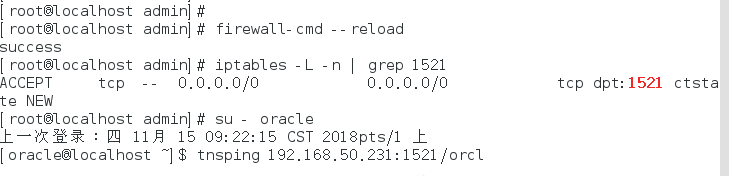
5. Check the firewall information, view the specific port information, and add the corresponding port. After confirming that the port is added, test again, and you can access it normally