Today, let’s talk about how to use set gravity() in Android LinearLayout.
Previously, when doing a function, you need to set the gravity of LinearLayout according to the change of data. Before, I wrote the code directly in the XML file roid: gravity I don’t know how to set the properties when I need to set them dynamically in Java code this time. Later, after searching the information on the Internet, I found that set gravity () can be set. Here is a record.
It is often used in UI layout android: gravity And android: layout_ Gravity.
LinearLayout has two very similar properties:
android: gravity And android: layout_ gravity。
The differences between them are as follows:
android: gravity Attributes are the restrictions on the content of the view. For example, text on a button. You can set the position of the text relative to the view, such as left, right, etc.
in the view android: layout_ Gravity is used to set the position of the view relative to the parent view. For example, if a button is in the LinearLayout, you want to place the button in the left or right position of the LinearLayout, you can set it through this property
Namely android: gravity It is used to set the alignment of the content in the view relative to the view component android: layout_ Gravity is used to set the alignment of the view component relative to the container.
The principle follows android:padding-left, android: layout_ Marginleft is a bit similar. If both properties are set on the button.
android:paddingLeft= The content set on the “30px” button is 30 pixels away from the left boundary of the button
and android: layout_ Marginleft = “30px” the whole button is 30 pixels away from the content set on the left
Let’s get back to the point. We can set the android:gravity= “Center” to make the text in EditText display in the center of the EditText component; at the same time, we set the android: layout_ Gravity = “right” to make the EditText component appear on the right in LinearLayout. Look at the effect:
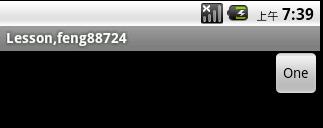
As we can see, in EditText, the text is centered, and the EditText component itself is aligned to the right of LinearLayout.
Attach layout file:
<LinearLayout
   xmlns:android="http://schemas.android.com/apk/res/android"
    android:orientation="vertical"
    android:layout_width="fill_parent"
    android:layout_height="fill_parent">
    <EditText
        android:layout_width="wrap_content"
        android:gravity="center"
        android:layout_height="wrap_content"
        android:text="one"
        android:layout_gravity="right"/>
</LinearLayout>
Then the above is set through the layout file. , I believe everyone has written, so how to set the location of components through Java code?
The above effects are still considered.
By looking at the SDK, we find that there is a set gravity method. As the name suggests, this method should be used to set the text alignment in the button component.
After a careful search, I didn’t find the setlayoutgravity method. I’m a little disappointed. But it’s right to think about it. If you have this method, you can put the button in the position where the layout is not supported_ What to do in a container of gravity property!
So I thought that this attribute might be in the layout. So I took a closer look at the “layout params” of LinearLayout and found that there is a “gravity” attribute in it. I believe this is used to set the position of components relative to the container itself. Yes, it should be him.
The practice found that, if so, attached code, you see.
The code is relatively simple, but it took me a little time to find them.
		Button button  = new Button(this);
		button.setText("One");
		LinearLayout.LayoutParams lp = new LinearLayout.LayoutParams(LayoutParams.WRAP_CONTENT,LayoutParams.WRAP_CONTENT);
		//This is equivalent to the Android:layout_gravity property in the layout file
		lp.gravity = Gravity.RIGHT;
		button.setLayoutParams(lp);
		// this is equivalent to the Android:layout_gravity property in the layout file
		button.setGravity(Gravity.CENTER);

		LinearLayout linear = new LinearLayout(this);
		// Note that for LinearLayout layout, setting horizontal or vertical is a must! Otherwise, the effect will not be visible.
		linear.setOrientation(LinearLayout.VERTICAL);
		linear.addView(button);
		setContentView(linear);
Or you can:
		Button button  = new Button(this);
		button.setText("One");
		//This is equivalent to the Android:gravity property in the layout file
		button.setGravity(Gravity.CENTER);

		LinearLayout linear = new LinearLayout(this);
		// Note that for LinearLayout layout, setting horizontal or vertical is a must! Otherwise, you won't see the effect.
		linear.setOrientation(LinearLayout.VERTICAL);

		LinearLayout.LayoutParams lp = new LinearLayout.LayoutParams(LayoutParams.WRAP_CONTENT,LayoutParams;)
		// This is equivalent to the Android:layout_gravity property in the layout file
		lp.gravity = Gravity.RIGHT;

		linear.addView(button, lp);
		setContentView(linear);
In addition, to set the position in relative layout, use the add rule method, as follows:
params = new RelativeLayout.LayoutParams(LayoutParams.WRAP_CONTENT, LayoutParams.WRAP_CONTENT);
        params.addRule(RelativeLayout.CENTER_IN_PARENT);
        mContainer.addView(progress,params);
One more thing to note here:
android: layout_ Gravity is only valid in LinearLayout and FrameLayout:
1. For LinearLayout:
When android:orientation=vertical (vertical), only the setting in the horizontal direction works, but the setting in the vertical direction does not work. That is: left, right, center_ Horizontal is in effect.
When android:orientation=horizontal (horizontal), only the setting in the vertical direction works, but the setting in the horizontal direction does not. Namely: top, bottom, center_ Vertical is in effect.
2. For FrameLayout: arbitrary android: layout_ The gravity attribute is effective, which makes it very convenient to layout components.
Here is a brief introduction. Android’s setgravity() actually corresponds to LinearLayout or FrameLayout android: gravity Attribute, because relative layout does not have this attribute, the code setting in relative layout does not work. Because the Internet is full of android:gravity And android: layout_ The gravity attribute are talked about together, so I’ll talk about it together. Dynamic settings android: layout_ Gravity is actually through LinearLayout.LayoutParams Of lp. gravity It’s also very simple.
That’s all for Android setgravity().
It’s that simple.
Read More:
- How to Use Annotations in Flutter & Dart
- Android: How to Start App Automatically
- Installation, Configuration and Simple Use of Rancher
- Docker -v Directory Mount (How to Use)
- How to Use Apt get Command Under Mac OSX
- linux use sh execute source error [How to Solve]
- [Solved] Error: listen EADDRINUSE: address already in use :::5000
- How to Solve Error: Address already in use
- Error in compiling Android AOSP by Ubantu [How to Solve]
- Ubuntu18.04 Compile Error: android 7 FAILED [How to Solve]
- Nginx Error: [emerg] bind() to [::]:80 failed (98: Address already in use)
- [Solved] Web server failed to start. Port 8080 was already in use.
- How to Solve Android Linux5.10 Kernel do_gettimeofday Function Error
- [Solved] Nvml compilation official use case error: collect2: error: ld returned 1 exit status
- C#: How to Use Itextsharp to Manipulate PDF Files
- [Solved] CentOS Use Yum to install dependency: error: rpmdb open failed
- [Solved] Go use zoom to connect DM database and start reporting error in Linux
- Android converts a view to bitmap + to handle the black edge of the view with rounded corners
- The upgrade of Ubuntu results in an error in the compilation of Android Jack [Two Method to Solve]
- [Solved] Ubuntu20.04 Error: “Failed to install the following Android SDK packages as some licences have not..“error