Ordinary cluster:
The queue Queue we created at this time, its metadata (mainly some configuration information of Queue) will be synchronized in all RabbitMQ instances, but the messages in the queue will only exist on one RabbitMQ instance, not will be synchronized to other queues.
When we consume a message, if it is connected to another instance, then that instance will locate the location of the Queue through metadata, then access the instance where the Queue is located, and pull the data and send it to the consumer.
This kind of cluster can improve the message throughput of RabbitMQ, but it cannot guarantee high availability, because once a RabbitMQ instance hangs, the message cannot be accessed. If the message queue is persistent, it can continue after the RabbitMQ instance is restored. Accessed; if the message queue is not persisted, the message is lost.
Mirrored cluster : It is based on the normal mode, and the required queue is made into a mirrored queue, which exists in multiple nodes to achieve high availability (HA). This mode solves the above problems. Broker will actively synchronize message entities between mirror nodes, and there is no need to temporarily pull data when the consumer fetches data. The side effects of this mode are also obvious. In addition to reducing system performance, if there are too many mirrored queues and a large number of messages entering, the network bandwidth inside the cluster will be greatly consumed. Generally, mirror mode is recommended for scenarios with high reliability requirements.
Node type :
- RAM node: The memory node stores all the metadata definitions of queues, switches, bindings, users, permissions and vhosts in memory. The benefit is that operations such as switch and queue declarations can be made faster.
- Disk node: Store metadata on disk. A single-node system only allows disk-type nodes to prevent system configuration information from being lost when RabbitMQ is restarted.
RabbitMQ requires at least one disk node in the cluster, all other nodes can be memory nodes, and when a node joins or leaves the cluster, it must notify at least one disk node of the change. If the only disk node in the cluster crashes, the cluster can still keep running, but no other operations (add, delete, modify, check) can be performed until the node recovers. To ensure the reliability of cluster information, or when you are not sure whether to use disk nodes or memory nodes, it is recommended to use disk nodes directly.
1. Build the RabbitMq operating environment
Operating environment: centos7, build two rabbitmq nodes through docker.
1. Query the rabbitmq image through search
docker search rabbitmq
2. Pull the latest official image of rabbitmq through pull.
It is better to bring the version with the tag of management. Otherwise, the latest latest is pulled, and the web management page cannot be displayed in full, and an overview: management only mode will be prompted.
docker pull rabbitmq:3.8.25-management
3. Create the container
docker run -d --name rabbitmq1 -p 5672:5672 -p 15672:15672 --hostname myRabbit1
-e RABBITMQ_DEFAULT_VHOST=my_vhost1  -e RABBITMQ_DEFAULT_USER=admin
-e RABBITMQ_DEFAULT_PASS=admin a4eb038c2ecb
–name: container name
-p: endpoint mapping
–hostname: node name of rabbitmq
-e RABBITMQ_DEFAULT_VHOST: virtual host name
-e RABBITMQ_DEFAULT_USER: login account
-e RABBITMQ_DEFAULT_PASS: Login password
a4eb038c2ecb is the mirror id, replace it according to your own situation.
4. Start the management page
Our image does not open the web management page by default, so we enter the container startup through the exec command. The environment of this image is centos
[root@moyu ~]# docker exec -it 639a151c5440 /bin/bash
root@myRabbit:/# rabbitmq-plugins enable rabbitmq_management
Access http://localhost:15672/ in the browser to open it, and another rabbitmq does the same, the difference is that the ports are changed to 5673 and 15673, etc., and when creating a container, use –link to connect to the first rabbitmq node (or Create a bridged network connection), as follows
docker run -d --name rabbitmq2 -p 5673:5672 -p 15673:15672 --hostname myRabbit2
-e RABBITMQ_DEFAULT_VHOST=my_vhost2  -e RABBITMQ_DEFAULT_USER=admin
-e RABBITMQ_DEFAULT_PASS=admin --link rabbitmq1:myRabbit1 a4eb038c2ecb
5. Set erlang cookie
The erlang cookie can be set by the parameter -e RABBITMQ_ERLANG_COOKIE when running the container, but it is now expired and deprecated.
We first check the running log of the container through the docker logs command, and look for the home dir parameter as follows
[root@moyu ~]# docker logs rabbitmq1
//.....
  Starting broker...2021-11-17 02:19:55.859245+00:00 [info] <0.222.0>
2021-11-17 02:19:55.859245+00:00 [info] <0.222.0>  node           : rabbit@myRabbit1
2021-11-17 02:19:55.859245+00:00 [info] <0.222.0>  home dir       : /var/lib/rabbitmq
2021-11-17 02:19:55.859245+00:00 [info] <0.222.0>  config file(s) : /etc/rabbitmq/conf.d/10-default-guest-user.conf
2021-11-17 02:19:55.859245+00:00 [info] <0.222.0>                 : /etc/rabbitmq/conf.d/management_agent.disable_metrics_collector.conf
2021-11-17 02:19:55.859245+00:00 [info] <0.222.0>  cookie hash    : Aed9pjd9vYWw3hng7Gjmkg==
2021-11-17 02:19:55.859245+00:00 [info] <0.222.0>  log(s)         : /var/log/rabbitmq/rabbit@myRabbit1_upgrade.log
2021-11-17 02:19:55.859245+00:00 [info] <0.222.0>                 : <stdout>
2021-11-17 02:19:55.859245+00:00 [info] <0.222.0>  database dir   : /var/lib/rabbitmq/mnesia/rabbit@myRabbit1
So the .erlang.cookie file is under this path, we can see this file when we enter the container
root@myRabbit1:~# ls -a /var/lib/rabbitmq
.  ..  .bash_history  .erlang.cookie  mnesia
Let’s set the permissions of the erlang cookie and run the following code in the container. If the permissions are not enough, the subsequent operations will report an error
chmod 600 /var/lib/rabbitmq/.erlang.cookie
After that, we copy the .erlang.cookie file in rabbitmq1 to the physical machine through the docker cp command and then copy it to the container of rabbitmq2. The copy command between the physical machine and the container is as follows:
The container copies files to the physical machine: docker cp Container name: Container directory
Physical machine directory Physical machine copies files to the container: docker cp Physical machine directory Container name: Container directory
The specific code is as follows:
docker cp rabbitmq1:/var/lib/rabbitmq/  d:\workspace\
docker cp d:\workspace\rabbitmq\.erlang.cookie rabbitmq2:/var/lib/rabbitmq/
After copying, the rabbitmq2 container needs to be restarted, otherwise the following error will be reported when the rabbitmqctl command is executed:
[error] Cookie file /var/lib/rabbitmq/.erlang.cookie must be accessible by owner only
Normal cluster mode
After restarting, enter the container and add the node of rabbitmq2 to rabbitmq1 to create a common cluster, and execute the following codes respectively:
rabbitmqctl stop_app
rabbitmqctl reset
rabbitmqctl join_cluster --ram rabbit@myRabbit1    //myRabbitmq1 is the hostname of rabbitmq in rabbitmq1 container
rabbitmqctl start_app
After that, we can see two nodes on the web management page.
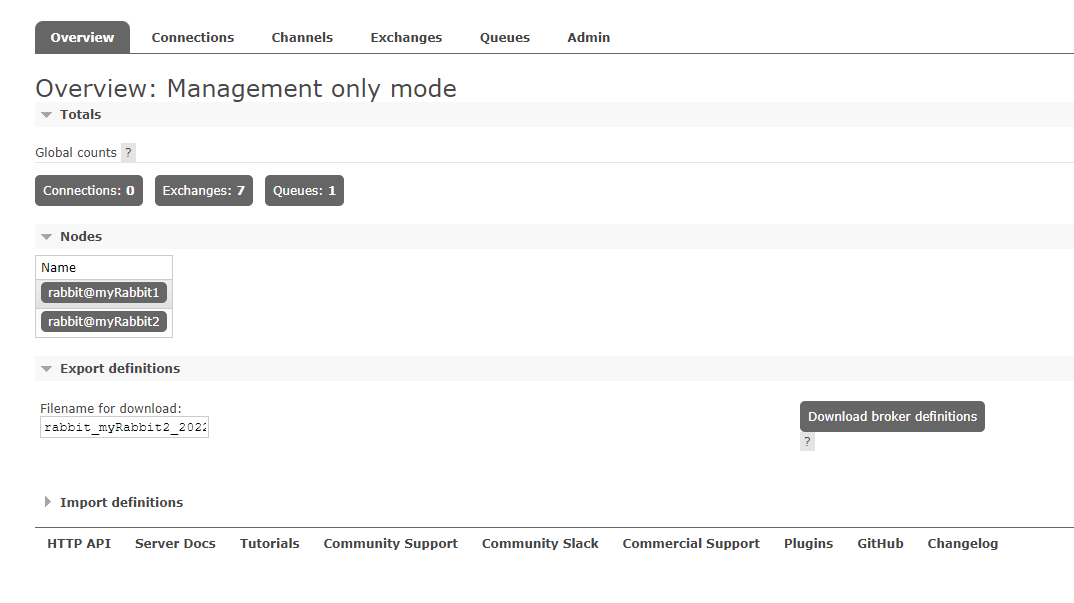
Create a queue at any node, and another node will also generate the same queue. And it can be found that the vhost of rabbitmq2 has changed from my_vhost2 to my_vhost1, which is the same as rabbitmq.
3. Mirror Mode
The mirror mode is to enter the rabbitmq1 container on the basis of the normal mode and enter the following command:
rabbitmqctl set_policy -p my_vhost1 ha-all "^" '{"ha-mode":"all"}' --apply-to all
The specific format is
rabbitmqctl set_policy [-p Vhost] Name Pattern Definition [Priority]
-p Vhost: Optional parameter, set for the queue under the specified vhost
Name: the name of the policy
Pattern: Matching pattern of the queue (regular expression)
Definition: definition of the mirror, including three parts ha-mode, ha-params, ha-sync-mode
        ha-mode: specifies the pattern of the mirror queue, valid values are all/exactly/nodes
            all: means mirroring on all nodes in the cluster
            exactly: means mirroring on a specified number of nodes, the number of nodes is specified by ha-params
            nodes: means mirroring on the specified nodes, the node names are specified by ha-params
        ha-params: as a parameter, as a supplement to ha-mode
        ha-sync-mode: the way to synchronize messages in the queue, valid values are automatic and manual
priority: optional parameter, the priority of the policy

rabbitmqctl set_policy ha-all "^" '{"ha-mode":"all"}' --apply-to all
Or log in to the rabbitmq management page –> Admin –> Policies –> Add / update a policy
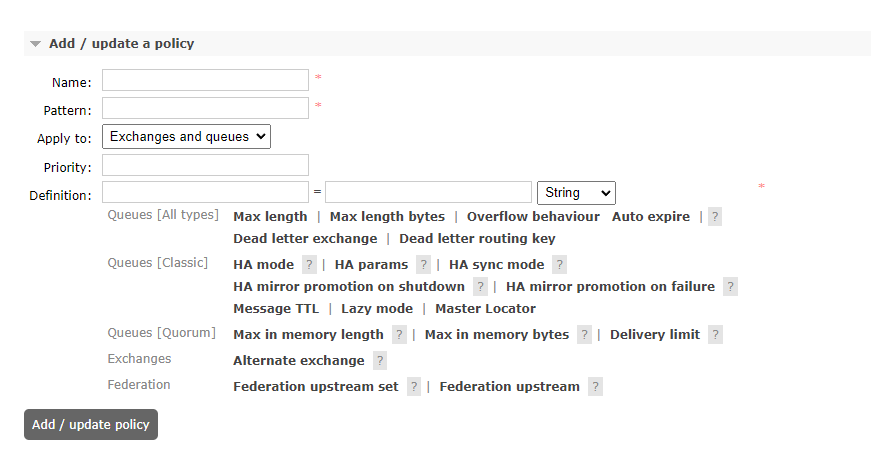
name: policy name
Pattern: ^ matcher, only one means match all. message refers to the name of the queue starting with the synchronization “message”
Definition: ha-mode=all is a matching type, which is divided into 3 modes: all (representing all queues)
Priority: Priority, first sorted according to priority, the higher the value, the higher the priority; the same priority is sorted according to the creation time , the later it is created, the higher the priority.
Briefly explain the difference between Operator Policy and User Policy:
- Operator Policy is for service providers or corporate infrastructure departments to set certain general rules that need to be enforced
- User Policy is a set of rules for business applications
Operator Policy and User Policy will be combined and applied to the queue. In order to prevent the coverage of some key attributes of the queue by the Operator Policy, such as the Dead Letter Exchange of the dead letter queue exchange, resulting in unexpected results of business applications, the Operator Policy only supports expire, message -ttl, max-length, max-length-bytes4 parameters.