Tag Archives: glew

Vs2013 + glfw + glew configure OpenGL development environment

Transfer: http://blog.csdn.net/u011926277/article/details/50912638

Recently found a very good learning OpenGL basics website, click open the link. Since the configuration environment section is not very detailed, after many days of struggle, the development environment was successfully configured, for the record.
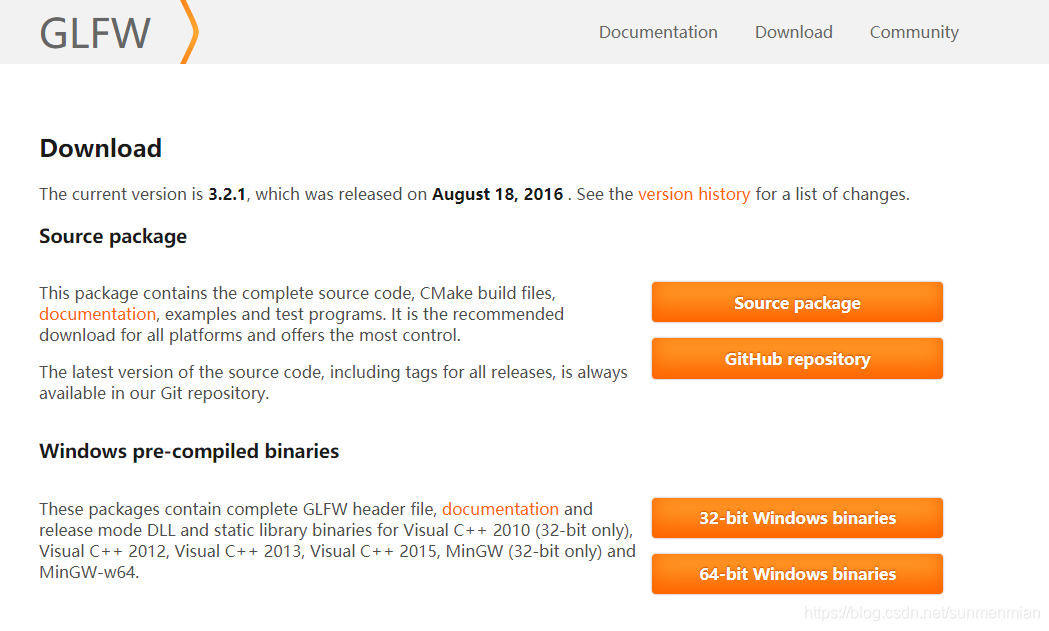
1. Download GLFW. The URL is: Click the open link. Because still have over the wall, so use the github download.
2. Download cMake. The URL is: Click the open link. The download is the version used by the author of this site, the Win32 Installer.
3. Download Glew. The URL is: Click the open link. Download the zip package, because the method used here is native compilation.

1> After the tool is prepared, a folder is set up in a directory to place the source code and library. OpenGL folder is set up on the machine, and include and libs folders are set up under it to place the source code and library respectively. The screenshot is shown below.

2> Since glew does not use cMake, glew is compiled first to get the required libraries.
A. Unpack Glew’s zip package, enter the build directory, and open the corresponding project with the corresponding version of VS (select the project under VS12 directory). VS2013 is used for this machine.
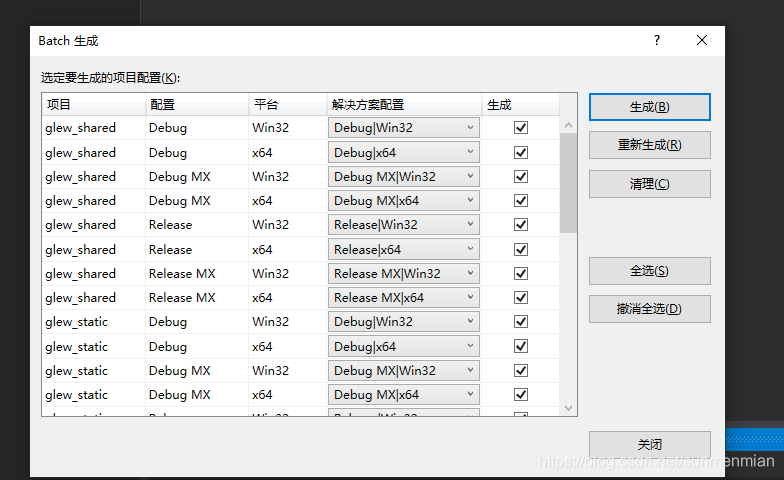
B. Open glew.sln with VS2013 or later and compile the project (right-click ->; Generate the solution).
C. Open glew-2.0.0\lib\Debug\Win32 and copy glew32sd.lib to OpenGL/libs.
D. Copy the GL folder from glew-2.0.0\include folder to the OpenGL/include folder.

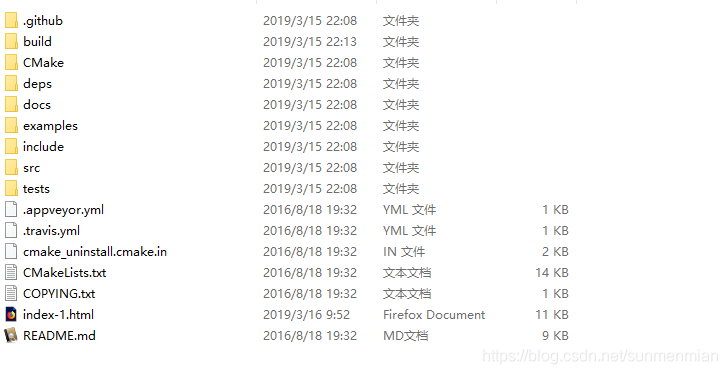
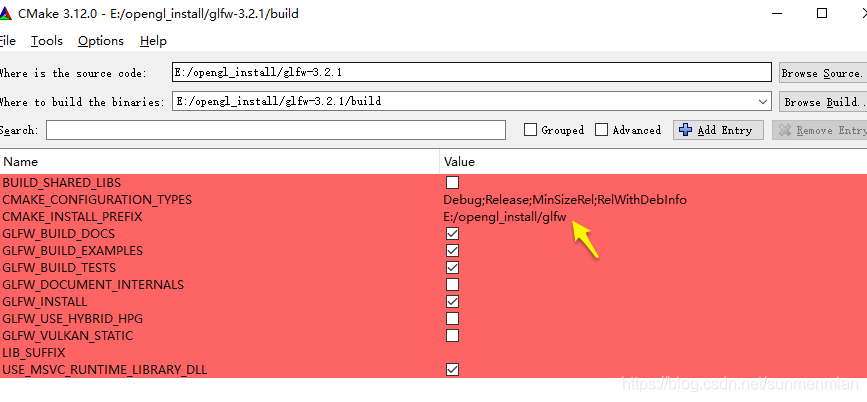
3> To prepare the GLFW library, use the CMake tool to first generate the project and then compile it. The process is as follows.
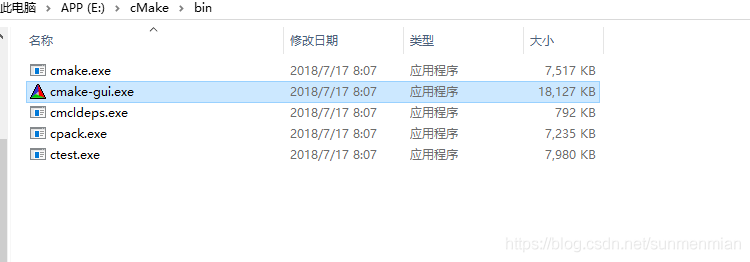
A. After installing cMake, open cMake (cmake-gui) and click Browse Source to set the directory to the GLFW directory.
B. Click Browse Build and set the directory to the GLFW/Build folder. (The Build folder here needs to be created by yourself) as follows.
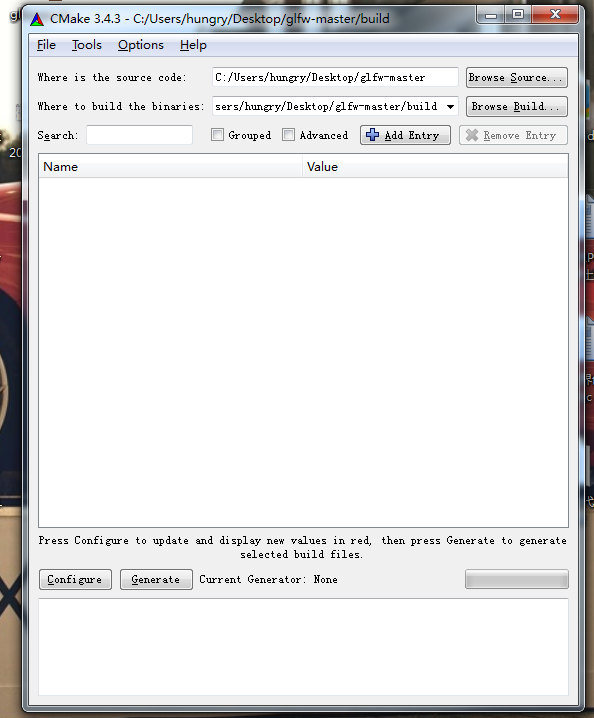
C. Click Configure in the lower left corner and select the target platform. Since this is VS2013, select Visio Studio 12 2013 and click OK.
D. Then click Configure again, and click Generate to build the project. The selection status is as follows.
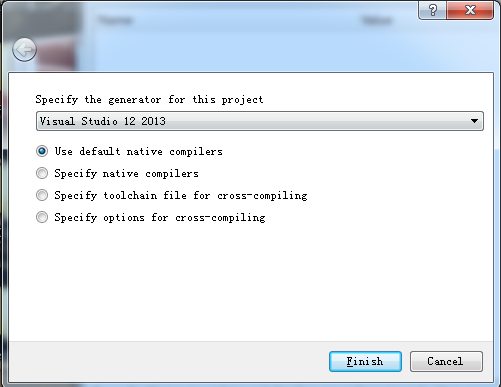
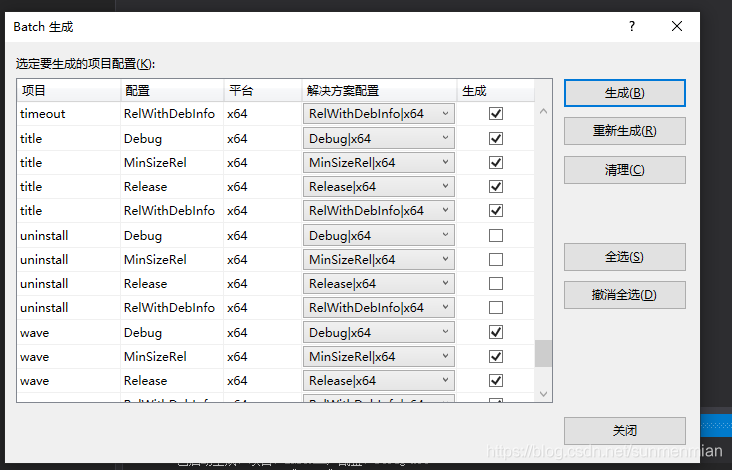
E. Close cMake. Open the project in vs2013, compile it, and generate glfw3.lib after success.
F. Build \ SRC \Debug directory has just compiled the project generated glfw3.lib library, copy this library to the OpenGL/libs directory.
G. Copy the GLFW folder under GLFW-master /include to the OpenGL/include folder.
H. The files in the finally generated OpenGL folder are as follows:


4> At this point the basic environment is configured, and the next step is to link the libraries to the source code in a newly created, empty project, and import some libraries manually. The specific process is as follows.
A. Create an empty project. (C ++ project)
B. Right-click item ->; Property – & gt; Configure properties ->; Vc + + directories – & gt; Include the directory, add the path to OpenGL/include.
C. Right-click item ->; Property – & gt; Configure properties ->; Vc + + directories – & gt; Add the path to OpenGL/libs. The screenshot is shown below.
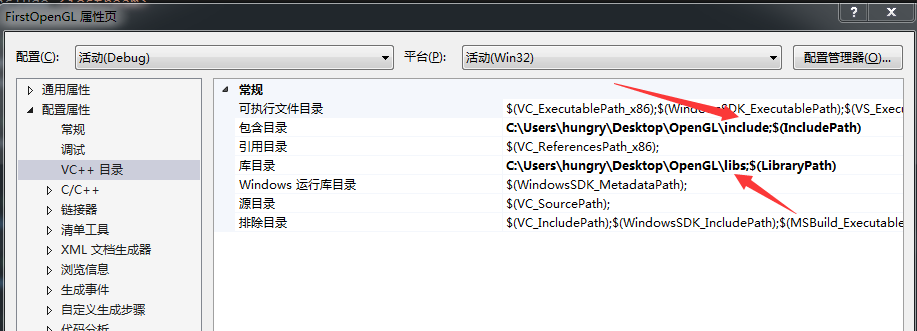
D. Right-click item ->; Property – & gt; Configure properties ->; The linker – & gt; Input – & gt; Attach dependencies to which to add
opengl32.Lib
glfw3.lib
glew32sd.lib
, the screenshot is as follows.
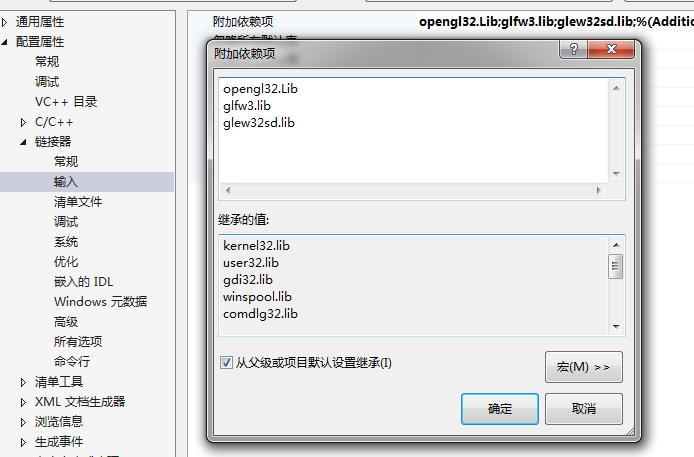
E. After saving the configuration in turn, you can enter the code in the Main class and test it. If no error is reported, that is, the environment is configured successfully, the test code can be tested from the beginning of the website or, or copy the code below.

#include <iostream>  

// GLEW  
#define GLEW_STATIC  
#include <GL/glew.h>  

// GLFW  
#include <GLFW/glfw3.h>  


// Function prototypes  
void key_callback(GLFWwindow* window, int key, int scancode, int action, int mode);

// Window dimensions  
const GLuint WIDTH = 800, HEIGHT = 600;

// The MAIN function, from here we start the application and run the game loop  
int main()
{
	std::cout << "Starting GLFW context, OpenGL 3.3" << std::endl;
	// Init GLFW  
	glfwInit();
	// Set all the required options for GLFW  
	glfwWindowHint(GLFW_CONTEXT_VERSION_MAJOR, 3);
	glfwWindowHint(GLFW_CONTEXT_VERSION_MINOR, 3);
	glfwWindowHint(GLFW_OPENGL_PROFILE, GLFW_OPENGL_CORE_PROFILE);
	glfwWindowHint(GLFW_RESIZABLE, GL_FALSE);

	// Create a GLFWwindow object that we can use for GLFW's functions  
	GLFWwindow* window = glfwCreateWindow(WIDTH, HEIGHT, "LearnOpenGL", nullptr, nullptr);
	if (window == nullptr)
	{
		std::cout << "Failed to create GLFW window" << std::endl;
		glfwTerminate();
		return -1;
	}
	glfwMakeContextCurrent(window);
	// Set the required callback functions  
	glfwSetKeyCallback(window, key_callback);

	// Set this to true so GLEW knows to use a modern approach to retrieving function pointers and extensions  
	glewExperimental = GL_TRUE;
	// Initialize GLEW to setup the OpenGL Function pointers  
	if (glewInit() != GLEW_OK)
	{
		std::cout << "Failed to initialize GLEW" << std::endl;
		return -1;
	}

	// Define the viewport dimensions  
	glViewport(0, 0, WIDTH, HEIGHT);

	// Game loop  
	while (!glfwWindowShouldClose(window))
	{
		// Check if any events have been activiated (key pressed, mouse moved etc.) and call corresponding response functions  
		glfwPollEvents();

		// Render  
		// Clear the colorbuffer  
		glClearColor(0.2f, 0.3f, 0.3f, 1.0f);
		glClear(GL_COLOR_BUFFER_BIT);

		// Swap the screen buffers  
		glfwSwapBuffers(window);
	}

	// Terminate GLFW, clearing any resources allocated by GLFW.  
	glfwTerminate();
	return 0;
}

// Is called whenever a key is pressed/released via GLFW  
void key_callback(GLFWwindow* window, int key, int scancode, int action, int mode)
{
	std::cout << key << std::endl;
	if (key == GLFW_KEY_ESCAPE && action == GLFW_PRESS)
		glfwSetWindowShouldClose(window, GL_TRUE);
}

cop

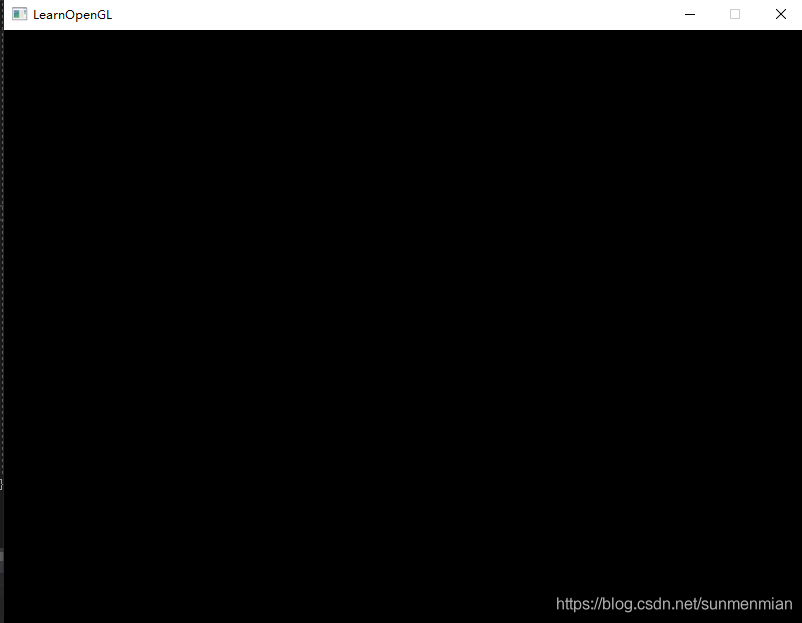
F. After compilation and running, the following window appears on behalf of successful environment configuration.

At this point, the environment configuration is complete.

Thanks again for sharing, the environment is finally matched!!

Configuring OpenGL development environment in win10 + vs2015 (including the method of installing 32-bit and 64 bit libraries)

In order to learn OpenGL, I wanted to configure both 32-bit and 64-bit development environments in VS, but I didn’t find a solution to this problem on the web. Maybe everyone knows that, so I don’t think it’s a problem… I was suffering from one night and one morning, make a headache, asked the teacher, the method does not work, finally is their own try out, remember this, for other small white point of reference, the following began to systematically introduce the configuration process)
Here’s the file I packed. The Glew library (which has been compiled) can also be downloaded from the official website. I have also given the download address of the official website in the following content.
A, OpenGL library
1. The GLUT libraries

GLUT (OpenGL Utility Toolkit) is a cross-platform tool library that can only be used under Win32, does not provide a 64-bit development environment, and has not been updated since 1998
2. Freeglut library
This library, a modification of the original GLUT library, provides both 32-bit and 64-bit build environments, and is better maintained.
3. The GLEW libraries
Glew (OpenGL Extension Wrangler) is another helper library.
II. Configuration process
1. Configuration of the FreeGLUT library

Download link

Freeglut freeglut 3.0.0 (download you need to download other versions into freeglut version)

OpenGL + VS2015 + Win10 64-bit development environment configuration. OpenGL + VS2015 + Win10 64-bit development environment configuration. OpenGL + VS2015 + Win10

I just want to add two caveats

When using CMAKE to extract a FreeGlut, Configure

32-bit pick 64 choose

store 32-bit generated file folder named freeglut – x86 (can be any name, here only to illustrate behind)
store 32-bit generated file folder named freeglut – x64

SLN generates the solution in the x64 environment in debug mode and release mode respectively.

SLN generates the solution in the x86 environment in debug mode and release mode, respectively
2, 32-bit and 64-bit environment configuration focus!!

32 –

    under the installation path of VS2015 the include file to create a new GL folder will download freeglut – 3.0.0 freeglut 3.0.0 \ freeglut – 3.0.0/include/GL. H header file
    in the C: \ Program Files \ Microsoft Visual Studio (x86) 14.0\VC\ Include \GL (that is, the GL folder created in step 1)
    Put the FreeGlutd. DLL in FreeGlut-x86 \bin\Debug and the FreeGlut-x86 \bin\Release FreeGlut. DLL
    C:\Program Files (x86)\Microsoft Visual Studio
    in 14.0\VC\bin (you may find that the names of the two DLLs are different) Put the.lib file
    FreeGlut-x86\ lib and in RealEase

i>: \Program Files (x86)\Microsoft Visual Studio 14.0\VC\lib

64

    Put the FreeGlutd. DLL from FreeGlut-x64 \bin\Debug and the FreeGlut-x64 \bin\Release FreeGlut. DLL
    C: Program Files (x86)\Microsoft Visual Studio VC 14.0 \ \ bin \ amd64
    will freeglut – x64 \ lib in the Debug and Realease..lib file
    in the C: \ Program Files \ Microsoft Visual Studio (x86) in VC 14.0 \ \ lib \ amd64 note: 32-bit and 64 – bit libraries. H header file is the same as

So now the FreeGLUT library is configured

2. Configuration of GLEW library

2.1 Download and compile source code

Download link

GLEW GLEW – 2.1.0. Zip

Unzip and open glew.sln in glew-2.1.0\glew-2.1.0\build\vc12

The solution is generated in Debug mode in x86 environment, and the 32-bit Debug library is obtained. Generate the solution in Release mode in x86 environment, and get the 32-bit Release library; Build the solution under Debug mode in x64 environment, and get 64-bit Debug library; Generate the solution in Release mode in the x64 environment, resulting in a 64-bit Release library.

2.2 configuration GLEW32 a

    will glew – 2.1.0 \ glew – 2.1.0 \ include \ GL. H header file
    in the C: \ Program Files \ Microsoft Visual Studio (x86) in VC 14.0 \ \ include \ GL

    will
    Glew 2.1.0 \ glew – 2.1.0 \ bin \ Debug \ Win32
    Glew32d. DLL and

    Glew 2.1.0 \ glew – 2.1.0 \ bin \ Release \ Win32
    glew32.dll
    In C: \ Program Files \ Microsoft Visual Studio (x86)
    in the VC 14.0 \ \ bin to glew 2.1.0 \ glew – 2.1.0 \ lib \ Debug \ Win32 2. Under the lib Files and
    glew 2.1.0 \ glew – 2.1.0 \ lib \ Release 2 \ Win32..lib file
    in the C: \ Program Files (x86)\Microsoft Visual Studio 14.0\VC\lib

    64-bit

      will
      Glew 2.1.0 \ glew – 2.1.0 \ bin \ Debug \ x64
      Glew32d. DLL and

      Glew 2.1.0 \ glew – 2.1.0 \ bin \ Release \ x64
      glew32.dll
      In C: \ Program Files \ Microsoft Visual Studio (x86) VC 14.0 \ \ bin \ amd64
      will glew 2.1.0 \ glew – 2.1.0 \ lib \ Debug \ x64 2. Under the lib Files and
      glew 2.1.0 \ glew – 2.1.0 \ lib \ Release \ x64 under 2..lib file
      in the C: \ Program Files (x86)\Microsoft Visual Studio 14.0\VC\ Lib \ AMD64

So far, it is done ~

Put 32-bit DLLs and lib files in the corresponding VS folder, and 64-bit DLLs and lib files in the corresponding VS folder \amd64
if you think these compilation or configuration steps special trouble, you can see my another article, one minute can be configured to start OpenGL programming. (I’ll write another day.)

(64 bit) OpenGL configuration + vs2017 + glew + glfw

Note: **** native OpenGL version must be higher than Glew library version
native OpenGL version

enGL version string: 4.5.0 – Build 25.20.100.6323
<>>

OpenGL version string: 4.5.0 – Build 25.20.100.6323

OpenGL version string: 4.5.0 – Build 25.20.100.6323
Download:
1. glew:http://glew.sourceforge.net/ find corresponding native OpenGL version of glew
2. GLFW: glfw.org click on the top right corner of the download
3. VS2017:https://visualstudio.microsoft.com/zh-hans/vs/
Glew:
: glew
: glew
: glew
: glew
: glew
: glew
: glew
: glew
: glew
: glew
: glew
: glew
: glew
Select VC10 (or V12 or later) in the Build folder to open the glew.sln solution.
2. You will be prompted to upgrade Glew projects created by a lower version of VS. Click “OK” to upgrade the VC++ compiler and libraries to support compilation of VS 2017.


br>

include\GL

5, Return to glew-1.10.0 root and copy glew32.lib from “lib\Release\Win32” to “lib\x86”, such as E:\vs2017\VC\Tools\MSVC\14.16.27023\lib\x86
6, Return to glew-1.10.0 root directory, copy glew32.lib from lib\Release\x64 to lib\x64 of VS installation directory, such as E:\vs2017\VC\Tools\MSVC\14.16.27023\lib\x64
(This is not very safe, because it is difficult to manage and easy to lose, the preferred way is to create a new directory containing all the third party libraries and header files. And specify these folders in your IDE or compiler.
7, Copy glew32.dll from bin\Release\Win32 to C:\Windows\System32, then return to glew-1.10.0 root
8, Go back to glew-1.10.0 root and copy glew32.dll from bin\Release\x64 to C:\ WindowsSYSWOW64
At this point, the configuration of the Glew library is complete!


mpile Source code
<>>

Compile Source code


Compile Source code


Compile Source code