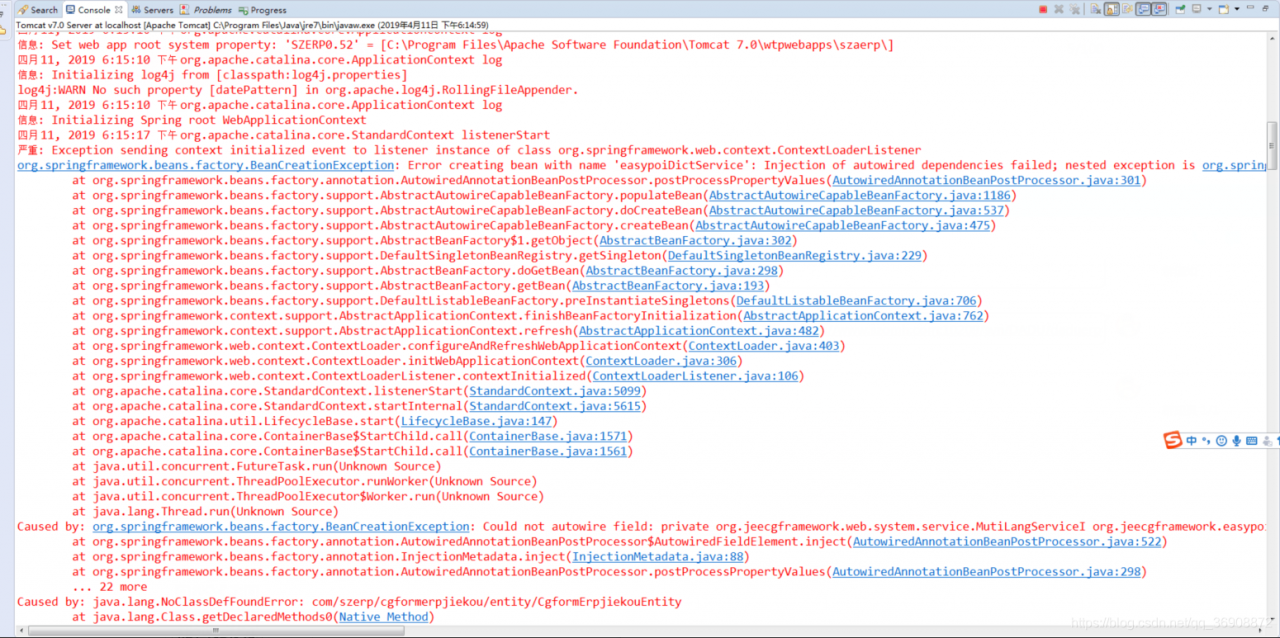
I ran into a bug today
org.springframework.beans.factory.UnsatisfiedDependencyException: Error creating bean with name 'skuController'


The solution:
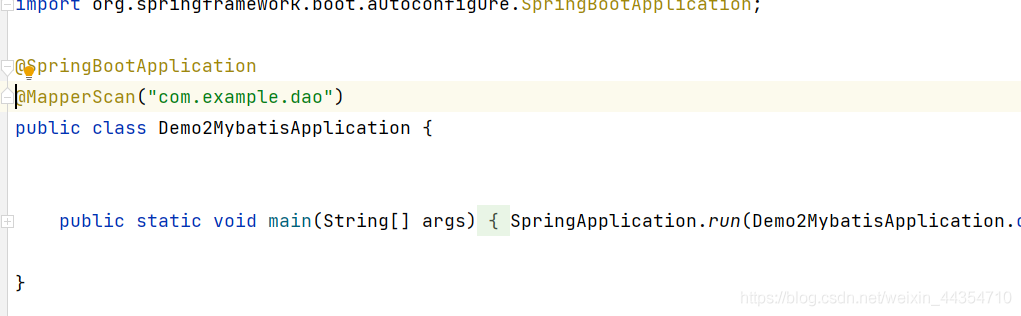
1. Maybe the implementation class didn’t add @servcie annotation. After you add it, click start, and the error still exists. Heartbreak X1 2. It may be that @mapperscan (“com. XXX. Mapper”) is not added to the startup class. After you add it, click start, and the error still exists. Heartbreak x2 3. Maybe the Dao package in serviceimpl is not imported into @ Autowired. After you add it, click start, and the error still exists. How about heartbreak X3
is it endless fun to be immortal and die? In the end, you have listed three possibilities, but you still need a note:
@ enable autoconfiguration
@The main functions of enable autoconfiguration are as follows:
Enable automatic configuration of the spring application context and try to guess and configure the beans you may need. Automatic configuration classes are usually based on class paths and defined bean applications. For example, if you have
tomcat-embedded.jar in your classpath, you may want a Tomcat embedded servletcontainerfactory (unless you define your own embedded servletcontainerfactory
bean). When using springbootapplication, automatic configuration of the context is automatically enabled and this annotation is added, so there is no extra effect
autoconfiguration tries to be as intelligent as possible and will be backed up when you define more of your own configurations. You can always manually exclude () any configuration you don’t want to apply (if you can’t access them). You can also exclude them through spring.
autoconfigure. Exclude attributes. After the user-defined bean is registered, auto configuration is always applied. Packages of classes annotated with @
enable autoconfiguration, usually through @
spring boot application, have special significance and are often used as “default”. For example, it will be used to scan the @ entity class. It is generally recommended to place @
enable autoconfiguration in the root package (if you do not use @ springbootapplication) so that you can search all subpackages and classes conditionalonclass and @ conditionalonsingbean).
The above explanations about @ enableautoconfiguration are copied from other places by bloggers. If it’s a bit difficult to understand, you just need to know that it’s Bean’s automatic assembly tool. Maybe you will ask, why do I do this?Can’t I use @ import directly in my project?Of course, since it is automatic configuration, of course, you want the project to start and load.