Category Archives: How to Install

Ubuntu14.04 installation error: no such partition

Reference:
Ubuntu boot up with GRUB Rescue> Terminal mode repair methods: http://www.linuxidc.com/Linux/2012-07/65249.htm
Windows& Ubuntu double system a key Ghost, prompt grub rescue solution: http://www.linuxidc.com/Linux/2015-01/111189.htm

# # # # # # # # # # # # # # # # # # # # # # # # # # # # # # # # # # # # # # # # # # #

Windows 7+Ubuntu14.04 dual system has been installed, a Ubuntu14.04 has been installed, the following error occurs after boot:

error:no such partition
Entering rescue mode...
grub rescue>

has been reinstalled in the system before, so this problem has been encountered several times. Record it today

There are not many commands available in this case, ls, set, insmod

Enter LS and the following information appears:

(hd0) (hd0,msdos7) (hd0,msdos6) (hd0,msdos5)

this information should be the disk partition information, the mode is approximately (hd0,msdosX), X represents the number

Enter SET and the following information appears:

cmdpath=(hd0)
prefix=(hd0,msdos8)/boot/grub
root=hd0,msdox8


To find out which partition Ubuntu is installed on, here’s how:

ls (hd0,msdosX)/grub  OR  ls (hd0,msdosX)/boot/grub

enter the above command in turn, X is the number, is the ls command appears in the number, if there is a lot of file information, is the partition

Assume that the input LS (HD0, MSDOS4) is a lot of information. Next, set:

set root=(hd0,msdos4)
set prefix=(hd0,msdos4)/grub

Note: If /boot/ GRUB is above, change the following command accordingly

After setting, you can input set command to view, and the output information will change to:

cmdpath=(hd0)
prefix=(hd0,msdos4)/grub
root=hd0,msdos4


Continue typing the command:

insmod normal

This works for me or

insmod /grub/normal.mod

Or change to the corresponding /boot/grub/…

Finally, enter:

normal

Grub’s boot menu is restored

After entering Ubuntu, enter the following command:

sudo apt-get install grub2
sudo update-grub
sudo update-install /dev/sda

restart, return to normal


Bid for Kirin (Linux kernel) 7.0 compiler and installation sdl2.0 and QT using sdl2

Chinese standard kirin (Linux kernel)7.0 compiler installation SDL2.0
Compile environment and preparation
Kylin desktop operating system software V7.0SDL2 source code download address
compile
1. Unpack

tar xvf  SDL2-2.0.12.tar.gz

2. Enter the folder SDL2-2.0.12

cd SDL2-2.0.12

3. Configure Confiure

./configure --prefix=$PWD/build

4. Compile and install

make && make install

5, complete
Configuring environment variables (same as window principle)
You can also directly copy the dynamic link library to /user/lib (similar to Win7: C:\ Windows \Sytstem32)export LD_LIBRARY_PATH=$LD_LIBRARY_PATH:[absolute path of source code]/ sdl2-2.0.12 /build/lib
Qt call SDL2
Add SDL2 library in. Pro

INCLUDEPATH += $$PWD/SDL2/include/
DEPENDPATH += $$PWD/SDL2/include/
LIBS += -L$$PWD/SDL2/lib/ -lSDL2 


How to Install PSSH in Centos7

The article directories
Check the installation environment Install PSSHPSSH command package command using PSSH remote batch execute command PSCP parallel transfer file to remote Prsync parallel transfer file to remote Pslurp pull remotely to local Pnuke remote batch Killall

Check the installation environment
PSSH requires Python 2.4 or above, first query your own Python version in CentOS, the query command is as follows:

[root@hadoop-master ~]# python --version
Python 2.7.5

If you haven’t already installed Python, you can install Basic Installation of Python for Beginners under Linux.
Install the PSSH

wget https://pypi.python.org/packages/60/9a/8035af3a7d3d1617ae2c7c174efa4f154e5bf9c24b36b623413b38be8e4a/pssh-2.3.1.tar.gz
tar xf pssh-2.3.1.tar.gz -C /usr/local/pssh/
cd /usr/local/pssh/pssh-2.3.1/
python setup.py install

Check the installation

[root@hadoop-master pssh-2.3.1]# pssh --help
Usage: pssh [OPTIONS] command [...]

Options:
  --version             show program's version number and exit
  --help                show this help message and exit
  -h HOST_FILE, --hosts=HOST_FILE
                        hosts file (each line "[user@]host[:port]")
  -H HOST_STRING, --host=HOST_STRING
                        additional host entries ("[user@]host[:port]")
  -l USER, --user=USER  username (OPTIONAL)
  -p PAR, --par=PAR     max number of parallel threads (OPTIONAL)
  -o OUTDIR, --outdir=OUTDIR
                        output directory for stdout files (OPTIONAL)
  -e ERRDIR, --errdir=ERRDIR
                        output directory for stderr files (OPTIONAL)
  -t TIMEOUT, --timeout=TIMEOUT
                        timeout (secs) (0 = no timeout) per host (OPTIONAL)
  -O OPTION, --option=OPTION
                        SSH option (OPTIONAL)
  -v, --verbose         turn on warning and diagnostic messages (OPTIONAL)
  -A, --askpass         Ask for a password (OPTIONAL)
  -x ARGS, --extra-args=ARGS
                        Extra command-line arguments, with processing for
                        spaces, quotes, and backslashes
  -X ARG, --extra-arg=ARG
                        Extra command-line argument
  -i, --inline          inline aggregated output and error for each server
  --inline-stdout       inline standard output for each server
  -I, --send-input      read from standard input and send as input to ssh
  -P, --print           print output as we get it

Example: pssh -h hosts.txt -l irb2 -o /tmp/foo uptime

PSSH package command

Command specific use
First, edit a hosts. TXT file to record the host address to be operated. The following is the one configured by my host, in which hadoopy-slave2 and
hadoopy-slave3 are in shutdown state

[root@hadoop-master pssh]# cat hosts.text 
hadoop-slave1
hadoop-slave2
hadoop-slave3

PSSH remote batch execution command

#-h followed by the host ip file, file data format [user@]host[:port]
#-P Displaying output contents

The specific use

[root@hadoop-master pssh]# pssh -P -h hosts.text uptime
hadoop-slave1:  13:55:14 up 1 day,  4:03,  0 users,  load average: 0.00, 0.01, 0.05
[1] 13:55:31 [SUCCESS] hadoop-slave1
[2] 13:55:33 [FAILURE] hadoop-slave2 Exited with error code 255
[3] 13:55:33 [FAILURE] hadoop-slave3 Exited with error code 255

To enter a password, use the following command:

[root@hadoop-master pssh]# pssh -A -h hosts.text uptime

If it’s a executive shell command , you can do something like this

[root@hadoop-master pssh]# pssh -h hosts.text "source /etc/profile"
[1] 21:01:46 [SUCCESS] hadoop-slave3
[2] 21:01:46 [SUCCESS] hadoop-slave2
[3] 21:01:46 [SUCCESS] hadoop-slave1

PSCP transfers files to remote in parallel
File transfer, but remote directory creation is not supported

[root@hadoop-master pssh]# pscp -r -h hosts.text ./* /usr/local
[1] 14:10:31 [SUCCESS] hadoop-slave1
[2] 14:10:34 [FAILURE] hadoop-slave2 Exited with error code 1
[3] 14:10:34 [FAILURE] hadoop-slave3 Exited with error code 1

Prsync transfers files to remote locations in parallel
File transfer, and support remote new directory

[root@hadoop-master pssh]# pscp -r -h hosts.text hosts.text  /usr/local/pssh/
[1] 14:17:18 [FAILURE] hadoop-slave1 Exited with error code 1
[2] 14:17:21 [FAILURE] hadoop-slave2 Exited with error code 1
[3] 14:17:21 [FAILURE] hadoop-slave3 Exited with error code 1

contrast

[root@hadoop-master pssh]# prsync -r -h hosts.text hosts.text  /usr/local/pssh/
[1] 14:18:08 [SUCCESS] hadoop-slave1
[2] 14:18:11 [FAILURE] hadoop-slave2 Exited with error code 255
[3] 14:18:11 [FAILURE] hadoop-slave3 Exited with error code 255

Pslurp pulls from remote to local
Pslurp will pull the file from the remote to the local, automatically create the directory named remote host IP in the local, and put the pulled file in the corresponding host IP directory
format: pslurp-h ip.txt-l < Local directory & GT; < Remote directory/file & GT; < Local renaming & GT;

[root@hadoop-master pssh]# pslurp -h hosts.text -L /usr/local/test /usr/local/pssh/hosts.text psshtest
[1] 14:26:49 [SUCCESS] hadoop-slave1
[2] 14:26:52 [FAILURE] hadoop-slave2 Exited with error code 1
[3] 14:26:52 [FAILURE] hadoop-slave3 Exited with error code 1

This will create the folder directory based on the configured IP or host

drwxr-xr-x. 2 root root        22 Agu  11 14:26 hadoop-slave1
drwxr-xr-x. 2 root root         6 Agu  11 14:24 hadoop-slave2
drwxr-xr-x. 2 root root         6 Agu  11 14:24 hadoop-slave3

Pnuke remote mass killall

[root@hadoop-master pssh]# pnuke -h hosts.text java
[1] 14:32:04 [SUCCESS] hadoop-slave1
[2] 14:32:06 [FAILURE] hadoop-slave2 Exited with error code 255
[3] 14:32:06 [FAILURE] hadoop-slave3 Exited with error code 255
How to solve the error of “failed to create the Java virtual machine” in installing eclipse 2020-03 in MAC environment

MAC environment installation Eclipse 2020-03 report “failed to create the Java virtual machine” error resolution

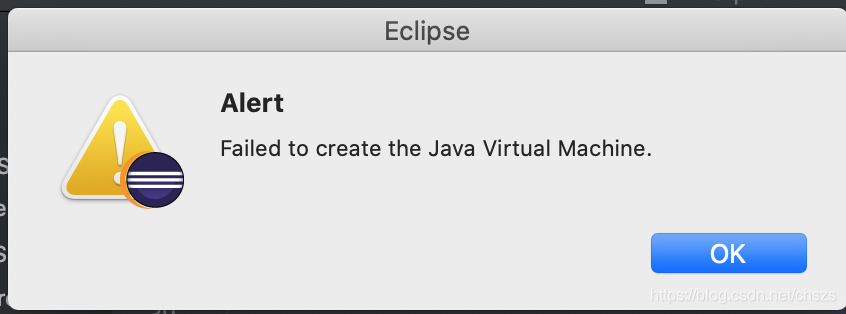
in macOS Catalina 10.15.2 environment, install the latest version of Eclipse: eclipse-je-2020-03-r-gesty-macosx-cocoa-x86_64. DMG, and run Eclipse report “failed to create the Java virtual machine” after installation.

as shown in figure 1:

the problem is due to JDK 14 being installed in the macOS environment. Even with the latest version of Eclipse, JDK 14 is still not supported, up to JDK 13, so the solution is to uninstall JDK 14. If you want to keep JDK 14 and Eclipse 2020-03 coexisting, you can solve this:

step 1: execute the command under the Shell terminal:

$ /usr/libexec/java_home -V
Matching Java Virtual Machines (3):
    14, x86_64:	"Java SE 14"	/Library/Java/JavaVirtualMachines/jdk-14.jdk/Contents/Home
    11.0.3, x86_64:	"AdoptOpenJDK 11"	/Library/Java/JavaVirtualMachines/adoptopenjdk-11.jdk/Contents/Home
    1.8.0_232, x86_64:	"AdoptOpenJDK 8"	/Library/Java/JavaVirtualMachines/adoptopenjdk-8.jdk/Contents/Home

as you can see, I have JDK 8, 11, and 14 on my host.

note , executing “/usr/libexec/ java_home-v 11” is invalid, it will not resolve the error of Eclipse.

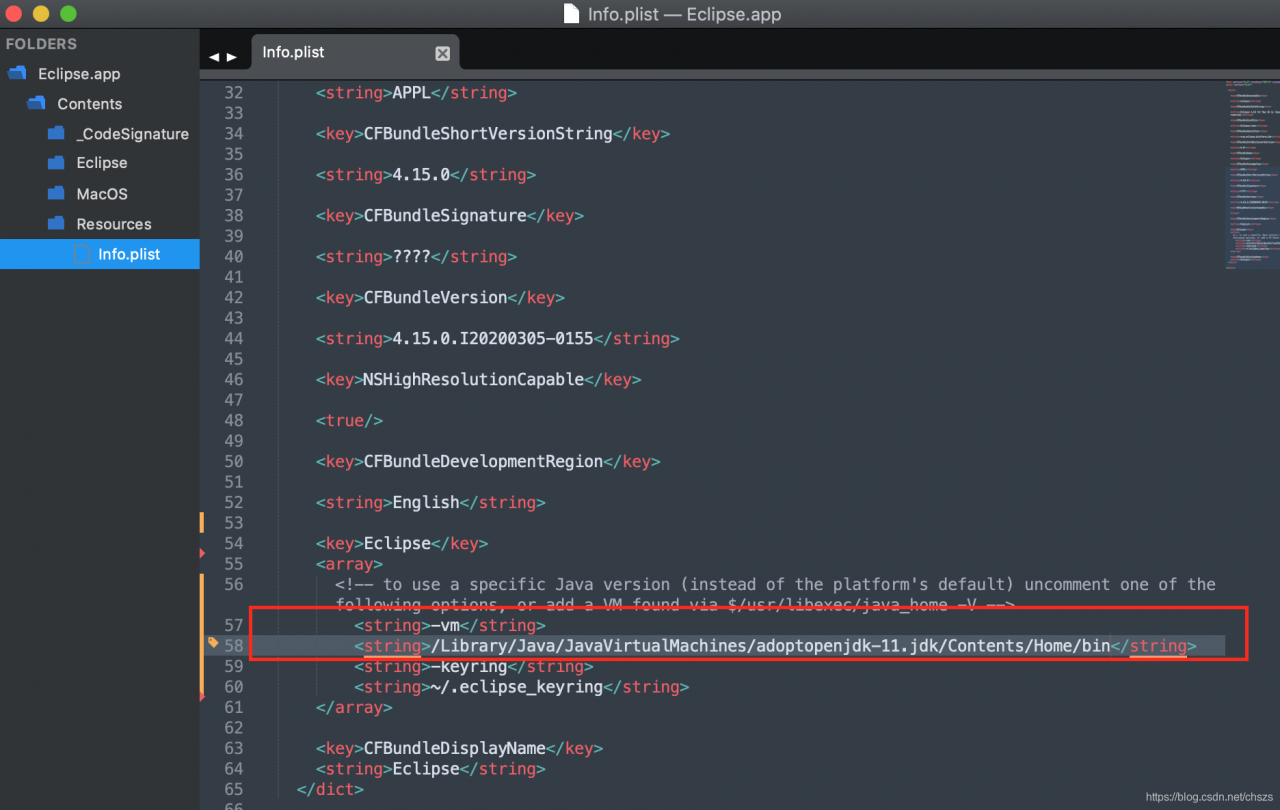
step 2: use the editor open Eclipse app/Contents/Resources/Info. The file, found at the back of the label, and modify the content is as follows: </ p>

    <array>
		<string>-vm</string>
        <string>/Library/Java/JavaVirtualMachines/adoptopenjdk-11.jdk/Contents/Home/bin</string>
        <string>-keyring</string>
        <string>~/.eclipse_keyring</string>
    </array>

as shown in figure 2:

save and exit.
note that you add the -vm option and point the vm option to JDK 11 (you can also point to JDK 8 or any version that is not native to JDK14, depending on your needs).

restart Eclipse and the familiar interface returns. Figure 3: