Windows connects to the Linux remote desktop with Xmanager4.0’s Xstart
The installation package:
xorg-x11-xauth
xterm.x86_64 0:253-1.el6
Execute the command path:/usr/bin/xterm
The benefit of Xstart connecting to the Linux remote desktop is that you don’t need to do anything on the server side, just turn on SSH.
The server has to have a desktop environment, and X Window
XDMCP connection, the server side to do some configuration, trouble.
The menu
Xmanager Enterprise 4 — Xbrowser
Create a new Xstart session
The protocol is SSH,
Click the following button to select GNOME
Open the session and you can connect to the remote desktop. It’s easy.
There are three menus in the taskbar,
One is to display the Linux header menu
One is the taskbar that displays Linux
One is the desktop that displays Linux
How to quit
Right-click in the taskbar (right) and close XManager
You can also set up an Xstart session in the following way
The menu
Xmanager Enterprise 4 — Xstart
If an error is reported: the X11 transfer application has been rejected,
(check first that X11Forwarding yes
is set in etc/ssh/sshd_config, but on some hosts, no matter how you set it up in the client side, there’s no way you can forwarding the X11 forwarding feature correctly; after logging in, DISPLAY will always be empty. The sshd_config file also doesn’t disable The X11 Forwarding feature.
solution:
originally X11 forwarding relies on the “xorg-x11-xauth” package, so you must first install the “xorg-x11-xauth” package.
yum install xorg-x11-xauth)
X Window should be installed on the server. See the link below.
If the server does not have a desktop environment, the following error is reported
[17:18:41] Start timer (TIMER_SHUTDOWN, 180).
bash: /usr/bin/gnome-session: No such file or directory
———————————————————————————————————————————————-
Start the specific Settings for the GNOME desktop with XStart
start xstart, name a session, enter host name, hang SSH, enter user name and password, and Execution Command box: if GNOME is started, fill in DISPLAY=$DISPLAY /usr/bin/gnome-session; if KDE is started, fill in DISPLAY=$DISPLAY /usr/bin/startkde to modify configuration
1) Click start – All programs – XManager 3 – Xconfig, and then double-click the configuration you are currently using (there is a small checkmark, usually Default Profile).
2) Window Mode select Multiple Windows Mode, then click Settings, select Multiple Windows Mode TAB, Window corresponding to the drop-down box select Remote Only or Automatic Switch, and click OK
Select Terminate at Reset
4) Click OK.
Failure to start XStart several errors and resolution
Error 1: Can’t open display: localhost:10.0 when connecting
_X11TransSocketINETConnect () can ‘t get the address for localhost: 6010: Name or service not known
/usr/bin/xterm Xt error: Can’t open display: localhost:10.0
Solutions:
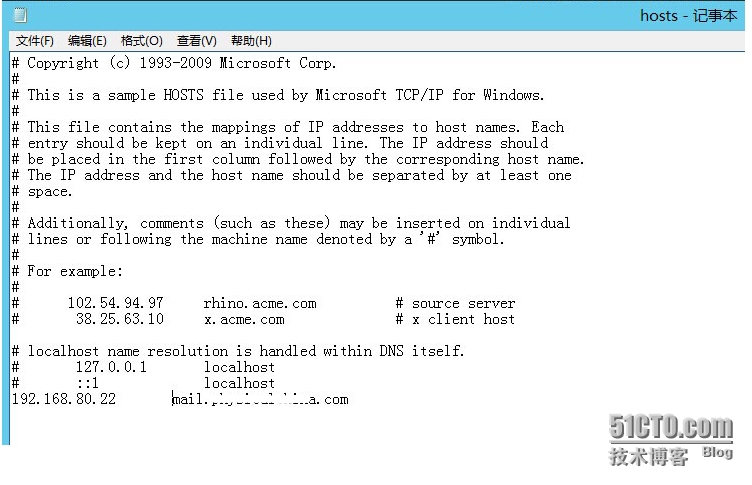
Add in /etc/hosts
127.0.0.1 localhost
Ipaddress hostname
Then you can go to the graphical interface, and notice the actual IP and machine name
Error 2: The Xterm directory for SLC5 and SLC4 is not the same and should be noted.
/usr/X11/bin/xterm: Command not found.
Change Excution Command to
The/usr/bin/xterm – ls – $display display
Can be
————————————————————————————————————————
[16:21:58] Host authentication initiated…
[16:21:58] Hostkey fingerprint:
[16:21:58] SSH – dsa 1024 o c: c3: f8:71:0 f: d2: b2: e1:4 c: 21: f8: abarim: 9 a: 9 a
[16:22:00] Accepted. Verifying the host key…
[16:22:00] Verified.
[16:22:00] User authentication initiated…
[16:22:00] Sent user name ‘oracle’.
[16:22:00] Sent password.
[16:22:00] follow the command line.
[16:22:00] /usr/X11R6/bin/ xterm-ls-display $display
[16:22:00] Start timer (TIMER_SHUTDOWN, Xauthority
/usr/X11R6/bin/xauth: creating new authority file /home/oracle/.Xauthority
bash: /usr/X11R6/bin/xterm: No such file or directory
[16:22:01] Connection closed
Solution:
[root@localhost ~]# rpm-qf /usr/bin/xterm
xterm-215-4.el5
The RPM package was found missing and installed
Mount the cd-rom
[root@localhost ~]# mount -t iso9660 /dev/cdrom /mnt/cdrom
[root@localhost ~]#cd /mnt/cdrom
[root@localhost cdrom]# cd Server
[root@localhost Server]# ls xterm*
xterm-215-5.el5.i386.rpm
[root@localhost Server]# rpm -ivh xterm-215-5.el5.i386.rpm
warning: xterm-215-5.el5.i386.rpm: Header V3 DSA signature: NOKEY, key ID 37017186
Preparing… # # # # # # # # # # # # # # # # # # # # # # # # # # # # # # # # # # # # # # # # # # # [100%]
the file/usr/bin/resize the from the install of xterm – 215-5. El5 conflicts with the file from package xterm – 215-4. El5
the file /usr/bin/xterm from install of xterm-215-5.el5 conflicts with file from package xterm-215-4.el5
An error occurred installing the xter-215-5.el5.i386.rpm package, meaning that the Xterm package named Xter-215-4.el5 has been installed under /usr/bin/xterm
Determine what to do now that the package already exists…
modify the configuration of Xstart and click the arrow to add it in the Execution Command: as shown in the figure below:
After clicking the arrow, click Add/Remove… Add the execution command line. The following figure
After adding, in the XStart window, re-specify, as shown in the figure below
That’s it