Error setting the certificate verification location
check the file location, including cacert.pem
Author Archives: Robins
Postgis Install Error: could not load library “C:\……“:The specified module could not be found.
Windows10 x64/PostgreSQL 9.6 /Postgis 2.3
Solution: just copy two. DLLs (libeay32. DLL and ssleay32. DLL) from the “… PostgreSQL/9.6/bin/postgisgui” folder and paste them into the bin folder.
Python RuntimeError: Expected 4-dimensional input for 4-dimensional weight [32, 1, 5, 5]
1. Problem introduction
Today, when using Python to train a model, the data set is read and preprocessed by using the functions provided by python. The network uses the custom CNN, and then there is such a small error as shown in the title when running.
2. Operation error
As follows:
RuntimeError: Expected 4-dimensional input for 4-dimensional weight [32, 1, 5, 5], but got 2-dimensional input of size [32, 784] instead
3. Code
First of all, my own customized CNN network is as follows:
class MNIST_Model(nn.Module):
    def __init__(self, n_in):
        super(MNIST_Model, self).__init__()

        self.conv1 = nn.Sequential(
            nn.Conv2d(in_channels=n_in,
                      out_channels=32,
                      kernel_size=(5, 5),
                      padding=2,
                      stride=1),
        )

        self.maxp1 = nn.MaxPool2d(
                       kernel_size=(2, 2))

        self.conv2 = nn.Sequential(
            nn.Conv2d(in_channels=32,
                      out_channels=64,
                      kernel_size=(5, 5),
                      padding=0,
                      stride=1),
        )

        self.maxp2 = nn.MaxPool2d(kernel_size=(2, 2))

        self.fc1 = nn.Sequential(
            nn.Linear(in_features=64 * 5 * 5, out_features=200)  # Mnist
        )

        self.fc2 = nn.Sequential(
            nn.Linear(in_features=200, out_features=10),
            nn.ReLU()
        )


    def forward(self, x):
        x = self.conv1(x)
        x = self.maxp1(x)
        x = self.conv2(x)
        x = self.maxp2(x)
        x = x.contiguous().view(x.size(0), -1)
        x = self.fc1(x)
        x = self.fc2(x)
        return x
Then there is the code in the training model
#Instantiate the network, considering only the use of the CPU
model = model.MNIST_Model(1)
net = model.to(device)
# Define loss function and optimizer
criterion = nn.CrossEntropyLoss()
What is the use of #momentum:momentum factor?
optimizer = optim.SGD(model.parameters(),lr=lr,momentum=momentum)


#Start training First define the array that stores the loss function and accuracy
losses = []
acces = []
#For testing
eval_losses = []
eval_acces = []

for epoch in range(nums_epoches):
    #Clear each training first
    train_loss = 0
    train_acc = 0
    # Set the model to training mode
    model.train()
    #Dynamic learning rate
    if epoch%5 == 0:
        optimizer.param_groups[0]['lr'] *= 0.1
    for img,label in train_loader:
        #Forward propagation, passing the image data into the model
        # out outputs 10 dimensions, respectively the probability of each number, i.e. the score for each category
        out = model(img)
        # Note here that the parameter out is 64*10 and label is a one-dimensional 64
        loss = criterion(out,label)
        #backpropagation
        #optimizer.zero_grad() means to set the gradient to zero, that is, the derivative of loss with respect to weight becomes zero
        optimizer.zero_grad()
        loss.backward()
        #This method updates all the parameters, and once the gradient has been calculated by a function such as backward(), we can call this function
        optimizer.step()

        # Record the error
        train_loss += loss.item()

        #Calculate the accuracy of the classification, find the subscript with the highest probability
        _,pred = out.max(1)
        num_correct = (pred == label).sum().item()#record the number of correct labels
        acc = num_correct/img.shape[0]
        train_acc += acc
    losses.append(train_loss/len(train_loader))
    acces.append(train_acc/len(train_loader))

    eval_loss = 0
    eval_acc = 0
    model.eval()
    for img,label in test_loader:
        img = img.view(img.size(0),-1)

        out = model(img)
        loss = criterion(out,label)

        optimizer.zero_grad()
        loss.backward()
        optimizer.step()

        eval_loss += loss.item()

        _,pred = out.max(1)
        num_correct = (pred == label).sum().item()
        acc = num_correct/img.shape[0]
        eval_acc += acc
    eval_losses.append(eval_loss/len(test_loader))
    eval_acces.append(eval_acc/len(test_loader))


    print('epoch:{},Train Loss:{:.4f},Train Acc:{:.4f},Test Loss:{:.4f},Test Acc:{:.4f}'
             .format(epoch,train_loss/len(train_loader),train_acc/len(train_loader),
                    eval_loss/len(test_loader),eval_acc/len(test_loader)))
4. Analyze the reasons
Locate error location
Traceback (most recent call last):
  File "train.py", line 73, in <module>
    out = model(img)
  File "/home/gzdx/anaconda3/envs/Torch/lib/python3.7/site-packages/torch/nn/modules/module.py", line 889, in _call_impl
    result = self.forward(*input, **kwargs)
  File "/home/gzdx/wyf/PARAD/model.py", line 48, in forward
    x = self.conv1(x)
  File "/home/gzdx/anaconda3/envs/Torch/lib/python3.7/site-packages/torch/nn/modules/module.py", line 889, in _call_impl
    result = self.forward(*input, **kwargs)
  File "/home/gzdx/anaconda3/envs/Torch/lib/python3.7/site-packages/torch/nn/modules/container.py", line 119, in forward
    input = module(input)
  File "/home/gzdx/anaconda3/envs/Torch/lib/python3.7/site-packages/torch/nn/modules/module.py", line 889, in _call_impl
    result = self.forward(*input, **kwargs)
  File "/home/gzdx/anaconda3/envs/Torch/lib/python3.7/site-packages/torch/nn/modules/conv.py", line 399, in forward
    return self._conv_forward(input, self.weight, self.bias)
  File "/home/gzdx/anaconda3/envs/Torch/lib/python3.7/site-packages/torch/nn/modules/conv.py", line 396, in _conv_forward
    self.padding, self.dilation, self.groups)
RuntimeError: Expected 4-dimensional input for 4-dimensional weight [32, 1, 5, 5], but got 2-dimensional input of size [32, 784] instead
As you can see, this is roughly the result of our incoming data input into CNN network, and then due to different dimensions. Because we input four dimensions, but we get two dimensions.
  File "train.py", line 73, in <module>
    out = model(img)
5. Solutions
For this kind of problem, there are many different solutions on the Internet. This person also refers to some ideas given by others on the Internet, and then modifies them by himself, and the error is solved, as shown below:
for i,data in enumerate(train_loader):
        #Forward propagation, passing the image data into the model
        # out output 10 dimensions, respectively the probability of each number, i.e. the score of each category
        inputs, labels = data
        inputs,labels = data[0].to(device), data[1].to(device)
        # inputs torch.Size([32, 1, 28, 28])
        out = model(inputs)
The solution is also very simple. At the beginning of the training, the data will be assigned according to this reading method, and then it will be passed into the model without the above error.
6. Complete code
import numpy as np
import model
import torch

#Importing PyTorch's built-in mnist data
from torchvision.datasets import mnist

#Import pre-processing module
from torchvision import transforms
from torch.utils.data import DataLoader

#Importing neural network tools
import torch.nn as nn
import torch.nn.functional as F
import torch.optim as optim

#Define the hyperparameters to be used later
train_batch_size = 32
test_batch_size = 32

#Learning rate and number of training sessions
learning_rate = 0.01
nums_epoches = 50

#Parameters used when optimizer
lr = 0.1
momentum = 0.5

#Use compose to specify the preprocessor
transform = transforms.Compose([transforms.ToTensor(),transforms.Normalize([0.5],[0.5])])

#Download the data, create a new data folder in the project folder to store the downloaded data
train_dataset = mnist.MNIST('./data', train=True, transform=transform, target_transform=None, download=False)
test_dataset = mnist.MNIST('./data', train=False, transform=transform, target_transform=None, download=False)

#Data loaders, combined datasets and samplers, and single or multi-process iterators on datasets
train_loader = DataLoader(train_dataset, batch_size=train_batch_size, shuffle=True, num_workers=0)
test_loader = DataLoader(test_dataset, batch_size=test_batch_size, shuffle=False)

device = torch.device("cuda:0" if torch.cuda.is_available() else "cpu")

#Instantiate the network, considering only the use of the CPU
model = model.MNIST_Model(1)
net = model.to(device)
# Define loss function and optimizer
criterion = nn.CrossEntropyLoss()
What is the use of #momentum:momentum factor?
optimizer = optim.SGD(model.parameters(),lr=lr,momentum=momentum)


#Start the training by defining an array that stores the loss function and the accuracy
losses = []
acces = []
# test with
eval_losses = []
eval_acces = []

for epoch in range(nums_epoches):
    #Clear each training first
    train_loss = 0
    train_acc = 0
    # Set the model to training mode
    model.train()

    #动态学习率
    if epoch%5 == 0:
        optimizer.param_groups[0]['lr'] *= 0.1
    for i,data in enumerate(train_loader):
        #Forward propagation, passing the image data into the model
        # out output 10 dimensions, respectively the probability of each number, i.e. the score of each category
        inputs, labels = data
        inputs,labels = data[0].to(device), data[1].to(device)
        out = model(inputs)
        #Note here that the parameter out is 64*10 and label is 64 in one dimension
        loss = criterion(out,labels)
        #backpropagation
        #optimizer.zero_grad() means to set the gradient to zero, that is, to make the derivative of loss with respect to weight zero
        optimizer.zero_grad()
        loss.backward()
        # This method updates all the parameters, and once the gradient has been calculated by a function like backward(), we can call this function
        optimizer.step()

        #Record the error
        train_loss += loss.item()

        # Calculate the accuracy of the classification, find the subscript with the highest probability
        _,pred = out.max(1)
        num_correct = (pred == labels).sum().item() # Record the number of correct labels
        acc = num_correct/inputs.shape[0]
        train_acc += acc
    losses.append(train_loss/len(train_loader))
    acces.append(train_acc/len(train_loader))
    print('Finished Training')

    # save
    PATH = './model/mnist_net.pth'
    torch.save(net.state_dict(), PATH)

    eval_loss = 0
    eval_acc = 0
    model.eval()
    for i,data in enumerate(test_loader):
        inputs, labels = data
        inputs,labels = data[0].to(device), data[1].to(device)
        out = model(inputs)
        loss = criterion(out,labels)

        optimizer.zero_grad()
        loss.backward()
        optimizer.step()

        eval_loss += loss.item()

        _,pred = out.max(1)
        num_correct = (pred == labels).sum().item()
        acc = num_correct/inputs.shape[0]
        eval_acc += acc
    eval_losses.append(eval_loss/len(test_loader))
    eval_acces.append(eval_acc/len(test_loader))


    print('epoch:{},Train Loss:{:.4f},Train Acc:{:.4f},Test Loss:{:.4f},Test Acc:{:.4f}'
             .format(epoch,train_loss/len(train_loader),train_acc/len(train_loader),
eval_loss/len(test_loader),eval_acc/len(test_loader)))urllib3.exceptions.MaxRetryError: HTTPConnectionPool(host=‘localhost‘, port=8097): Max retries excee
After using visdom, the following problem occurs.
requests.exceptions.ConnectionError: HTTPConnectionPool(host=’localhost’, port=8097): Max retries exceeded with url: /env/main (Caused by NewConnectionError(‘<urllib3.connection.HTTPConnection object at 0x0000027F8769B7F0>: Failed to establish a new connection: [WinError 10061] Unable to connect due to aggressive rejection by the target computer.’))
[WinError 10061] Unable to connect because the target computer is actively rejecting.
Visdom python client failed to establish socket to get messages from the server. This feature is optional and can be disabled by initializing Visdom with `use_incoming_socket=False`, which will prevent waiting for this request to timeout.
Setting up a new session…
visdom The above problem will also occur if it is not started.
Solution.
python -m visdom.server
Python ImportError: numpy.core.multiarray failed to import
1. Scenario: install the lower version of pytorch1.2, and prompt this error after installation
2. The reason is that Python is not up-to-date, but numpy is up-to-date, so reduce the version of numpy
3. Execute CONDA install – C CONDA forge numpy = 1.16
4. Problem solving.
Module not found error: no module named ‘filefolder’ appears when learning engineering knowledge
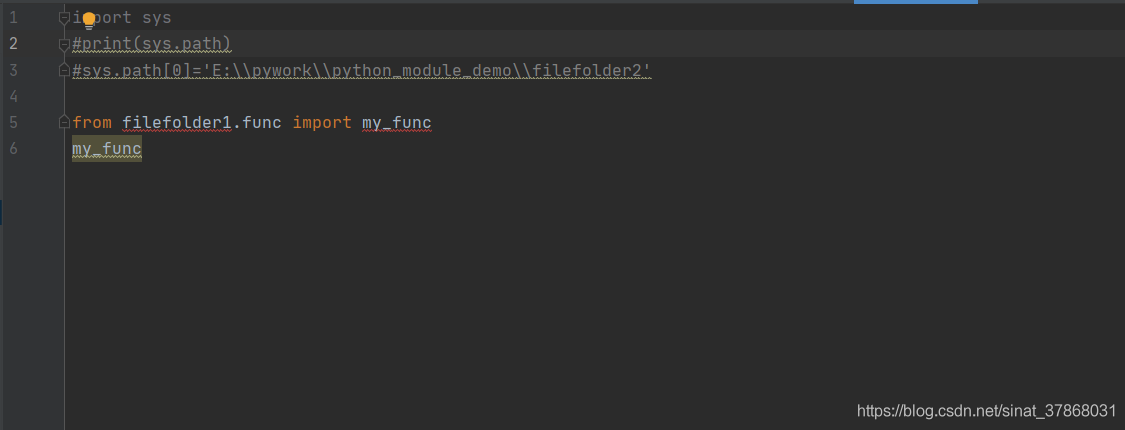
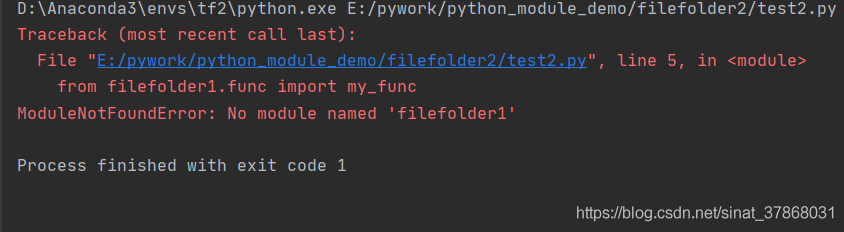
Solution: Add path to solve successfully
import sys
#print(sys.path)
#sys.path[0]=‘E:\pywork\python_module_demo\filefolder2’
sys.path.insert(0,‘E:\pywork\python_module_demo’)
Containerd Error: btrfs/ioctl.h: No such file or directory
An error was reported when compiling containerd on Debian system:
error: Btrfs/IOCTL. H: no such file or directory
The reason for this error is that Btrfs is not installed, just install one:
sudo apt get install Btrfs tools
How to Solve Error “ImportError: cannot import name imsave“
Problem description
Today, when running a GitHub code two years ago, an error was reported:
from scipy.misc import imsave

ImportError: cannot import name 'imsave'
But after checking, I found that I have installed the SciPy module. When checking the internal function module of SciPy, I found that there are no functions such as imsave
import scipy.misc

print(dir(scipy.misc))
After searching, it is found that the reason is the SciPy version: after SciPy 1.3, functions such as SciPy. Misc. Imread/imsave will be discarded.
resolvent
To re install the previous version of SciPy, first log in to the official website of SciPy and find the corresponding WHL file. As the python environment of this machine is Ubuntu + python = 3.6.9, download the third corresponding file:
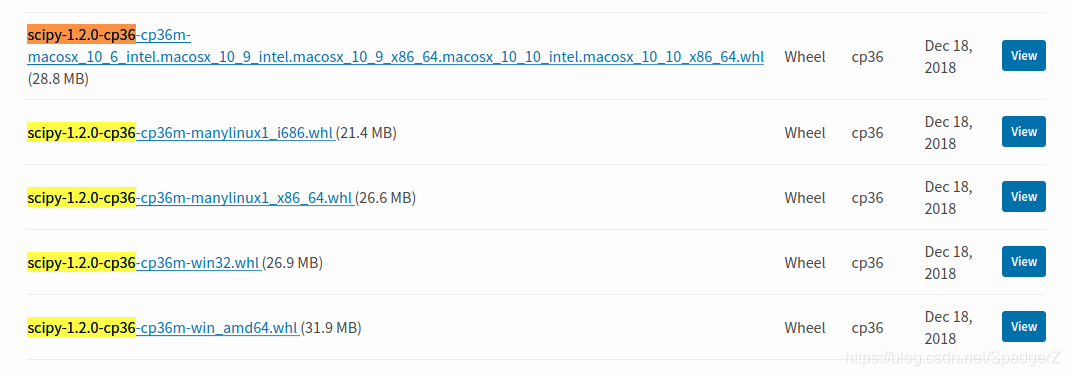
Then uninstall the previous SciPy and install the file
# uninstal scipy
pip uninstall scipy


# install
pip install scipy-1.2.0-cp36-cp36m-manylinux1_x86_64.whl
Check the SciPy internal function again
You can see that there are functions like imread, imsave, imshow, etc
Github Clone Failed SSL_ERROR_SYSCALL in connection to github.com:443
Problem description
When using git to pull GitHub code, clone failed with the following error
fatal: unable to access 'https://github.com/xxx/xxx.git/': LibreSSL SSL_connect: SSL_ERROR_SYSCALL in connection to github.com:443
Causes
The proxy of HTTPS was set before
resolvent
Cancel the proxy for HTTPS and http
git config --global --unset http.proxy
git config --global --unset https.proxy
Finally, take a look at the global configuration of GIT
git config --global --list
Finally, try git clone . If it fails at the first time, you can re open a terminal for execution
Supplement
Git clone failed fatal: early EOF
This is because git does not have enough cache space. You can try to increase http. Postbuffer (by 500MB)
git config --global http.postBuffer 524288000
MySQL Error: Error writing file ‘/tmp/MY4WYVlC‘ (Errcode: 28 – No space left on device)
MySQL Error: Error writing file ‘/tmp/MY4WYVlC’ (Errcode: 28 – No space left on device)
I. Problem Description
1、MySQL is fine, but suddenly it doesn’t work, with the following information.
System internal error.
Error message.
org.springframework.jdbc.UncategorizedSQLException:
Error querying database. Cause: java.sql.SQLException: Error writing file ‘/tmp/MY4WYVlC’ (Errcode: 28 – No space left on device)
The error may exist in file [/home/webapps/xxxxl/XXXDao.xml]
The error may involve com.thxxx.getListArea-Inline
The error occurred while setting parameters
SQL: SELECT a.id, ROUND(a.wt* 99/(SELECT max(wt) from xxxx ),2) AS wt, ROUND(a.qt, 2) AS qt, DESC LIMIT ? …
Cause: java.sql.SQLException: Error writing file ‘/tmp/MY4WYVlC’ (Errcode: 28 – No space left on device)
; uncategorized SQLException for SQL []; SQL state [HY000]; error code [3]; Error writing file ‘/tmp/MY4WYVlC’ (Errcode: 28 – No space left on device); nested exception is java.sql.SQLException: Error writing file ‘/tmp/MY4WYVlC’ (Errcode: 28 – No space left on device)
at org.springframework.jdbc.support.AbstractFallbackSQLExceptionTranslator.translate(AbstractFallbackSQLExceptionTranslator.java:84)
at org.springframework.jdbc.support.AbstractFallbackSQLExceptionTranslator.translate(AbstractFallbackSQLExceptionTranslator.java:81)
at org.springframework.jdbc.support.AbstractFallbackSQLExceptionTranslator.translate(AbstractFallbackSQLExcepti
…
Caused by: java.sql.SQLException: Error writing file ‘/tmp/MY4WYVlC’ (Errcode: 28 – No space left on device)
…
Second, the problem is solved
1、Cause: Errcode: 28 – No space left on device : Insufficient disk space. There is not enough disk space on the server where MySQL is installed.
2、Solution: Expand disk space; delete junk files, etc.
3、Linux steps for reference.
df -lh : Check the disk space distribution
cd xx : Enter the directory that takes up all the space
du -sh * : check the size of each directory file
Find the junk files that take up space
rm xx : Delete the junk files.
Solution of socket write error caused by pressing F5 to refresh page by ehcache user
Method 1
When using ehcache as the page cache of a website, you may encounter a problem: when the user presses F5 to refresh the page continuously, the following error will be generated in the output log of Tomcat:
ClientAbortException:  java.net.SocketException: Software caused connection abort: socket write error
......
Caused by: java.net.SocketException: Software caused connection abort: socket write error
In a word, socket write error error
In fact, this is because the user keeps making requests when pressing F5, but each request is not complete. The user makes a request and immediately interrupts it. On the server side, because ehcache caches the page, ehcache is responsible for outputting the cached content to the user. Let’s look at the source code of cachingfilter of ehcache, in which the writecontent method is responsible for outputting content to users (of course, generally we choose to configure net.sf.ehcache.structures.web.filter.simplepagecachingfilter , simplepagecachingfilter inherits the cachingfilter class)
protected void writeContent(final HttpServletRequest request,  final HttpServletResponse response, final PageInfo pageInfo)
    throws IOException, ResponseHeadersNotModifiableException {
    byte[] body;
    boolean shouldBodyBeZero = ResponseUtil.shouldBodyBeZero(request, pageInfo.getStatusCode());
    if (shouldBodyBeZero) {
        body = new byte[0];
    } else if (acceptsGzipEncoding(request)) {
        body = pageInfo.getGzippedBody();
        if (ResponseUtil.shouldGzippedBodyBeZero(body, request)) {
            body = new byte[0];
        } else {
            ResponseUtil.addGzipHeader(response);
        }
    } else {
        body = pageInfo.getUngzippedBody();
    }
    response.setContentLength(body.length);
    OutputStream out = new BufferedOutputStream(response.getOutputStream());
    out.write(body);
    out.flush();
}
Here, the out. Flush () method is responsible for the final refresh of the output content. Obviously, if the user interrupts the request when the server sends data to the user, the server will generate an error of clientabortexception: java.net.socketexception: software caused connection above: socket write error .
Of course, this is a reasonable mechanism. However, if the background has been outputting a lot of error log information, it is not what we want. So, how to solve this problem?
Here, we can implement our own filter class by inheriting net.sf.ehcache.structures.web.filter.simplepagecacheingfilter :
import java.io.IOException;

import javax.servlet.http.HttpServletRequest;
import javax.servlet.http.HttpServletResponse;

import net.sf.ehcache.constructs.web.PageInfo;
import net.sf.ehcache.constructs.web.ResponseHeadersNotModifiableException;
import net.sf.ehcache.constructs.web.filter.SimplePageCachingFilter;

public class MySimplePageCachingFilter extends SimplePageCachingFilter {
	protected void writeContent(final HttpServletRequest request, final HttpServletResponse response, final PageInfo pageInfo) throws IOException, ResponseHeadersNotModifiableException {
		try {
			super.writeContent(request, response, pageInfo);
		} catch (IOException e) {
			System.out.println("Visits are too frequent!");
		}
	}
}
Here, we rewrite the writecontent method and use try catch to process this method. At this time, we can ensure that a large amount of socket write error log information does not appear in Tomcat log records.
Method 2
httpServletResponse.setHeader("Content-Type","text/html;charset=UTF-8");
GCC error: unrecognized command line option ‘-no-pie’
Input the command GCC - M32 - no-pie - O linkbox main. O Phase1. O to connect the two relocatable nodes. An error is reported: GCC: error: unrecognized command line option '- no-pie'
Reason: CentOS’s default compiled version of GCC is 4:00, so you need to upgrade GCC. Here you use Yum install to install. Enter the following command in turn
sudo Yum install CentOS release SCL RH
sudo Yum install devtoolset-8-build
sudo Yum install devtoolset-8-gdb
source/opt/Rh/devtoolset-8/enable , set the boot to use GCC – V to view the version, and upgrade to version 8.3.1