Tag Archives: python

[Solved] error: OpenCV(4.5.2) :-1: error: (-5:Bad argument) in function ‘copyMakeBorder‘

Question:

##Boundary fill
import cv2
top_size,bottom_size,left_size,right_size=(50,50,50,50)
replicate=cv2.copyMakeBorder(img,top_size,bottom_size,left_size,right_size,boderType=cv2.BORDER_REPLICATE)
reflect=cv2.copyMakeBorder(img,top_size,bottom_size,left_size,right_size,boderType=cv2.BORDER_REFLECT)
reflect101=cv2.copyMakeBorder(img,top_size,bottom_size,left_size,right_size,boderType=cv2.BORDER_REFLECT101)
wrap=cv2.copyMakeBorder(img,top_size,bottom_size,left_size,right_size,boderType=cv2.BORDER_WRAP)
constant=cv2.copyMakeBorder(img,top_size,bottom_size,left_size,right_size,boderType=cv2.BORDER_CONSTANT,value=0) 
Outcome:
error Traceback (most recent call last)
<ipython-input-39-820a457b4770> in <module>
      2 import cv2
      3 top_size,bottom_size,left_size,right_size=(50,50,50,50)
----> 4 replicate=cv2.copyMakeBorder(img,top_size,bottom_size,left_size,right_size,boderType=cv2.BORDER_REPLICATE)
      5 reflect=cv2.copyMakeBorder(img,top_size,bottom_size,left_size,right_size,boderType=cv2.BORDER_REFLECT)
      6 reflect101=cv2.copyMakeBorder(img,top_size,bottom_size,left_size,right_size,boderType=cv2.BORDER_REFLECT101)

error: OpenCV(4.5.2) :-1: error: (-5:Bad argument) in function 'copyMakeBorder'
> Overload resolution failed:
>  - copyMakeBorder() missing required argument 'borderType' (pos 6)

analysis:

error: OpenCV(4.5.2) :-1: error: (-5:Bad argument) in function 'copyMakeBorder'
> Overload resolution failed:
>  - copyMakeBorder() missing required argument 'borderType' (pos 6)

“Bordertype” spelling error!!!!

Correct code:

##Boundary fill
import cv2
top_size,bottom_size,left_size,right_size=(50,50,50,50)
replicate=cv2.copyMakeBorder(img,top_size,bottom_size,left_size,right_size,borderType=cv2.BORDER_REPLICATE)
reflect=cv2.copyMakeBorder(img,top_size,bottom_size,left_size,right_size,borderType=cv2.BORDER_REFLECT)
reflect101=cv2.copyMakeBorder(img,top_size,bottom_size,left_size,right_size,borderType=cv2.BORDER_REFLECT101)
wrap=cv2.copyMakeBorder(img,top_size,bottom_size,left_size,right_size,borderType=cv2.BORDER_WRAP)
constant=cv2.copyMakeBorder(img,top_size,bottom_size,left_size,right_size,borderType=cv2.BORDER_CONSTANT,value=0) 


import matplotlib.pyplot as plt
plt.subplot(231),plt.imshow(img,'gray'),plt.title('ORIGINAL')
plt.subplot(232),plt.imshow(replicate,'gray'),plt.title('REPLICATE')
plt.subplot(233),plt.imshow(reflect,'gray'),plt.title('REFLECT')
plt.subplot(234),plt.imshow(reflect101,'gray'),plt.title('REFLECT101')
plt.subplot(235),plt.imshow(wrap,'gray'),plt.title('WRAP')
plt.subplot(236),plt.imshow(constant,'gray'),plt.title('CONSTANTL')

plt.show()

Output results:

    cv2.BORDER_ Replicate copy method, copy the edge pixel CV2. Border_ Reflect reflection method, the interested image pixels on both sides of the entry CV2. Border_ Reflect101 reflection method, with the most edge pixel as the axis, symmetrical CV2. Border_Wrap method cv2.border_Constant good method
[Solved] Anaconda Error: pyqt can’t use QSqlDatabase to connect to MySQL

1. Problem description

Generally speaking, pyqt can connect to MySQL database in the following format:

self.DB = QSqlDatabase.addDatabase('QMYSQL')
self.DB.setDatabaseName("school_club") # Enter the data table you want to access
self.DB.setHostName('localhost')
self.DB.setPort(3306)
self.DB.setUserName('root')
self.DB.setPassword('') # Enter the password for your own database

However, sometimes the connection fails, and debug can’t point out the error clearly. Errors can be found in the following ways.

Method 1: check the driver attached to pyqt

print(QSqlDatabase.drivers())

If ‘qmmysql’ and ‘qmysql3’ are found missing in the driver, it indicates that the error is driver missing. You can use this method to solve the problem. Because under normal conditions, the output should be as follows:

['QSQLITE', 'QMYSQL', 'QMYSQL3', 'QODBC', 'QODBC3', 'QPSQL', 'QPSQL7']

Method 2: print error information

print(self.DB.lastError().text())

This method can also get the specific part of the connection error.

2. How to solve the lack of qmmysql driver?

The author’s pyqt is installed in Anaconda environment, so the folder path to be found by the driver is special.

The general idea is to add two DLL files: qsqlmysql.dll and libmysql.dll in pyqt related folder. At the same time, these two files must be fully matched with the relevant pyqt version.

Step 1: load qsqlmysql.dll

First, open Anaconda prompt, enter the following command line, and adjust the python version to 5.12.1 (only this version comes with qsqlmysql.dll, other versions of this DLL are too difficult to find a matching one)

pip install PyQt5==5.12.1

After this step, qsqlmysql.dll has been successfully installed in the relevant folder.

Step 2: load libmysql.dll

This is relatively easy. First, find the libmysql.dll (this is the default path for MySQL installation, and the user-defined path will be found separately) in the path of C:// program files/MySQL/MySQL server 8.0/bin, and copy it.

Take my computer as an example, paste the file to the following path:

D:\Anaconda\Anaconda\Lib\site-packages\PyQt5\Qt\bin

You can choose the appropriate path according to the relative path of the above path according to the installation location of anaconda.

Restart the programming tool and print again (QSqlDatabase. Drivers()). It is found that ‘qmmysql’ and ‘qmysql3’ have successfully appeared.

[Solved] Python Import mmcv Warning: ImportError: libGL.so.1: cannot open shared object file: No such file or directory

ImportError: libGL.so.1: cannot open shared object file: No such file or directory
centos 7.5 Simply install the relevant dependencies.

 yum install mesa-libGL.x86_64
 
 Installed
  mesa-libGL.x86_64 0:18.3.4-12.el7_9

Installed as a dependency:
  libX11.x86_64 0:1.6.7-3.el7_9       libX11-common.noarch 0:1.6.7-3.el7_9         libXau.x86_64 0:1.0.8-2.1.el7
  libXdamage.x86_64 0:1.1.4-4.1.el7   libXext.x86_64 0:1.3.3-3.el7                 libXfixes.x86_64 0:5.0.3-1.el7
  libXxf86vm.x86_64 0:1.1.4-1.el7     libglvnd.x86_64 1:1.0.1-0.8.git5baa1e5.el7   libglvnd-glx.x86_64 1:1.0.1-0.8.git5baa1e5.el7
  libxcb.x86_64 0:1.13-1.el7          libxshmfence.x86_64 0:1.2-1.el7              mesa-libglapi.x86_64 0:18.3.4-12.el7_9

Done!

Ubuntu 20.04 installation:

(mmdet2) root@ubuntuserver:~# apt install libgl1-mesa-glx
Reading package lists... Done
Building dependency tree
Reading state information... Done
The following additional packages will be installed:
  libdrm-amdgpu1 libdrm-intel1 libdrm-nouveau2 libdrm-radeon1 libgl1 libgl1-mesa-dri libglapi-mesa libglvnd0 libglx-mesa0 libglx0
  libllvm12 libpciaccess0 libsensors-config libsensors5 libvulkan1 libwayland-client0 libx11-xcb1 libxcb-dri2-0 libxcb-dri3-0
  libxcb-glx0 libxcb-present0 libxcb-randr0 libxcb-shm0 libxcb-sync1 libxcb-xfixes0 libxfixes3 libxshmfence1 libxxf86vm1
  mesa-vulkan-drivers
Suggested packages:
  lm-sensors
The following NEW packages will be installed:
  libdrm-amdgpu1 libdrm-intel1 libdrm-nouveau2 libdrm-radeon1 libgl1 libgl1-mesa-dri libgl1-mesa-glx libglapi-mesa libglvnd0
  libglx-mesa0 libglx0 libllvm12 libpciaccess0 libsensors-config libsensors5 libvulkan1 libwayland-client0 libx11-xcb1
  libxcb-dri2-0 libxcb-dri3-0 libxcb-glx0 libxcb-present0 libxcb-randr0 libxcb-shm0 libxcb-sync1 libxcb-xfixes0 libxfixes3
  libxshmfence1 libxxf86vm1 mesa-vulkan-drivers
0 upgraded, 30 newly installed, 0 to remove and 127 not upgraded.
Need to get 34.3 MB/34.8 MB of archives.
After this operation, 458 MB of additional disk space will be used.
Do you want to continue?[Y/n] y
...
Setting up libgl1-mesa-glx:amd64 (21.0.3-0ubuntu0.1~20.04.1) ...
Processing triggers for libc-bin (2.31-0ubuntu9.2) ...

Try importing again:

(mmdet) [root@node1 ~]# python
Python 3.8.10 (default, Jun  4 2021, 15:09:15)
[GCC 7.5.0] :: Anaconda, Inc. on linux
Type "help", "copyright", "credits" or "license" for more information.
>>> import mmcv
>>> exit

[Solved] Error starting proxy server: oserror (10013), “an attempt was made to access the socket in a way that the access permission is not allowed.”, None, 10013, None)

1. Problem description

Error in starting mitmproxy script

PS D:\D1\code\AutoTest\python_interface_autotest\PythonInterfaceAutoTest> cd .\chapter7\mitmproxy\
PS D:\D1\code\AutoTest\python_interface_autotest\PythonInterfaceAutoTest\chapter7\mitmproxy> mitmweb -s .\get_data.py
Error starting proxy server: OSError(10013, 'Made an attempt to access the socket in a way that access rights are not allowed.', None, 10013, None)
PS D:\D1\code\AutoTest\python_interface_autotest\PythonInterfaceAutoTest\chapter7\mitmproxy> mitmweb -s .\get_data.py
Error starting proxy server: OSError(10013, 'Made an attempt to access the socket in a way that access rights are not allowed.', None, 10013, None)

2. Problem solving

1. Specify the port number to resolve the port conflict

PS D:\D1\code\AutoTest\python_interface_autotest\PythonInterfaceAutoTest\chapter7\mitmproxy> mitmweb -s .\get_data.py -p 8083
Web server listening at http://127.0.0.1:8081/
Loading script .\get_data.py
Proxy server listening at http://*:8083

2. Query the process corresponding to the default startup port number 8080 and close it

Iterator calling next method: Stopiteration [How to Solve]

Solution:

When using next() to access an iterator that has been iterated, there will be such an error: stopiteration
the solution is to give a default value: next (ITER, default) , which will be output after the iteration is completed
suppose that the original writing method of the loop is:

a = next(iter_test) # Iteration completion will report an error StopIteration
print(a)

Change to:

a = next(iter_test,None)
if a is not None:
	print(a)

Problem analysis

The following code will report an error:

iter_list = iter([1, 2, 3, 4])

for i in range(10):
    print(next(iter_list))

Error will be reported after outputting 1234, which can be changed to:

iter_list = iter([1, 2, 3, 4])

for i in range(10):
    a = next(iter_list, None)
    if a is not None:
        print(a)

This will output: 1 2 3 4

To silence this warning, use `float` by itself. Doing this will not modify any behavior and is safe.

import numpy as np 
e = np.ones((3,3),np.float)# 3x3 floating-point 2-dimensional array, and initialize all elements to value 1

D:\projects\Numpy\array.py:25: DeprecationWarning:
np.float is a deprecated alias for the builtin float.
To silence this warning, use float by itself. Doing this will not modify any behavior and is safe. If you specifically wanted the numpy scalar type, use np.float64 here.
Deprecated in NumPy 1.20;
for more details and guidance:
https://numpy.org/devdocs/release/1.20.0-notes.html#deprecations

Change to:

import numpy as np 
e = np.ones((3,3),np.float64)# 3x3 floating-point 2-dimensional array, and initialize all elements to value 1

All right, we’re in the trough

The usage of typing.union in Python

1. Python can pass two kinds of parameters and return multiple values

Usually, a parameter and return value can only be of one type. In C/C + +, Java and golang, it is impossible to return two types, or pass parameters to use two types, but it is possible in Python.

def mytest(a:str or int)->str or int:
  return a*2

2. Using Uinon in Python

from typing import Union
def mytest(a:Union[str,int])->Union[str,int]:
  return a*2

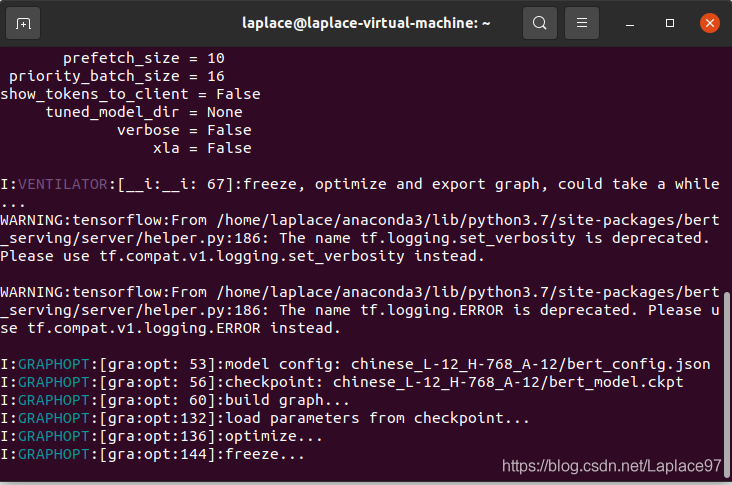
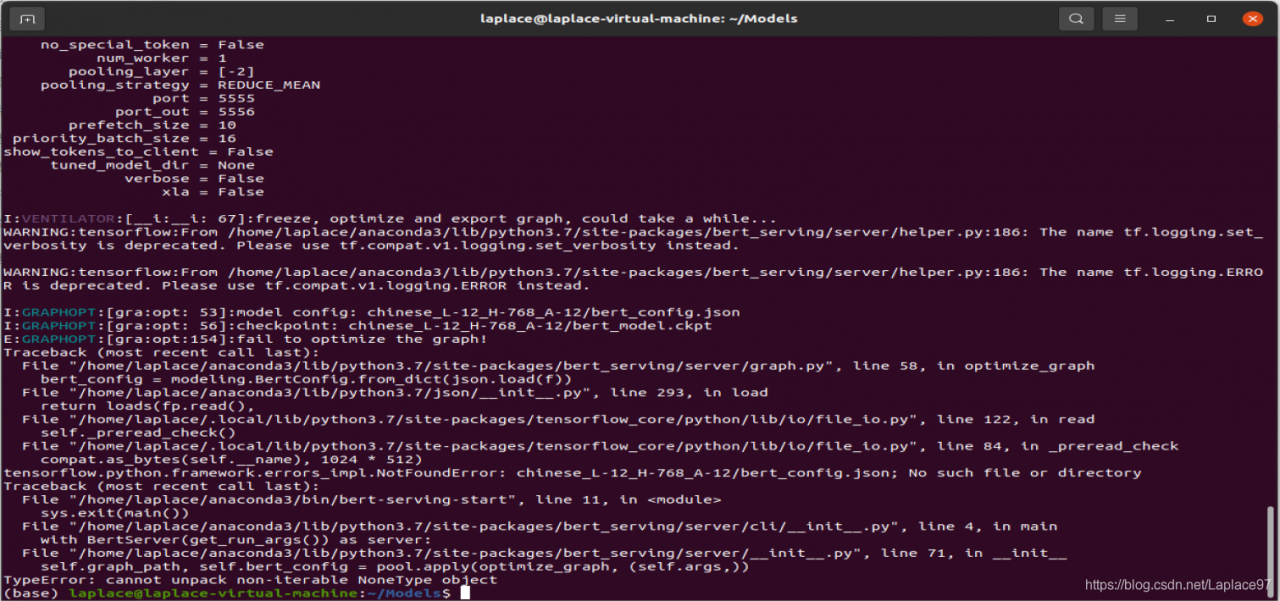
Type error: cannot unpack non Iterable non type object appears when starting Bert server in Ubuntu system

Type error: cannot unpack non Iterable non type object appears when starting Bert server in Ubuntu system

Questions

Enter Bert serving start – model_ dir chinese_ L-12_ H-768_ A-12 -num_ worker 1 -max_ seq_ In the case of len 64, type error: cannot unpack non Iterable non type object is reported

resolvent

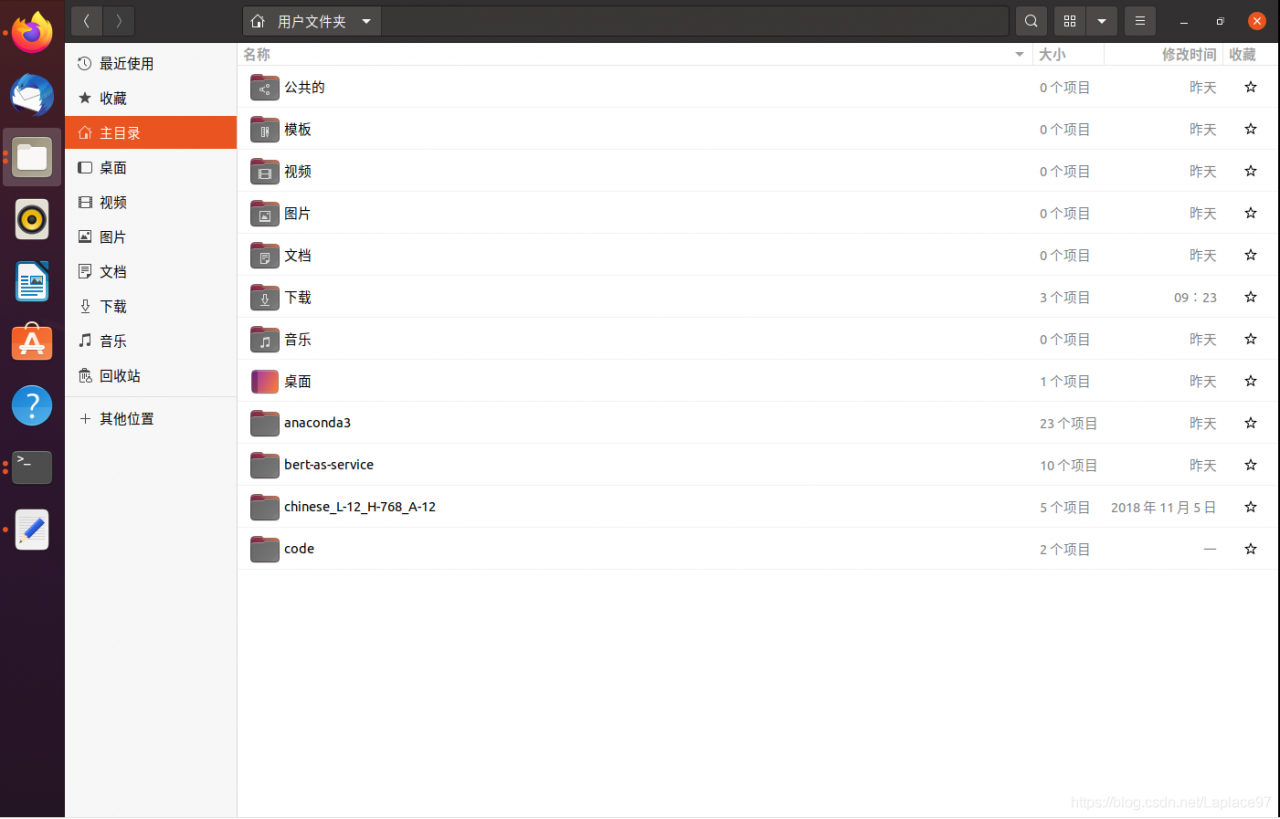
    check whether the startup path is correct, – model_ Dir is followed by the downloaded and unzipped corpus model address. The figure below is my path after decompression. You can right-click on the interface and select “open on terminal”

    just re-enter the command. This is the reason for my problem. After re entering the command, no error will be reported
    2. Check your tensorflow version, which is not supported at present. My tensorflow version is 1.15.0. 0

    Finally, it can run without any error

Error in tensorflow loading model valueerror: unknown layer: functional

Contents of articles

Problem description solution references

Problem description

When you pull the model trained by the server to your own computer, tensorflow loads the model and reports an error valueerror: unknown layer: functional error

import tensorflow as tf

model = tf.keras.models.load_model('test.h5')

The server

python 3.6.13
tensorflow-gpu==2.3.0

Own computer

python 3.6.5
tensorflow-gpu==2.1.0

Solution

pip install tensorflow-gpu==2.3.0

References

    Value

“class“ object is not subscriptable

When writing python3 code, when running,
an error is reported. This class object is not subscriptible
reports that it has no subscript, but when the subscript is used, check the code carefully. Sure enough,
there is a place where I want to use the attribute under the class. I am not “dot”, but []
which causes this error. I must check patiently where this class attribute is used

if job.mode == value or job['mode'] == value:

go through

if job.mode == value or job.mode == value