Connect ZK
public static void main(String[] args) {
        CuratorFramework curator = CuratorFrameworkFactory.builder().connectString("127.0.0.1")
                .retryPolicy(new RetryOneTime( 4))
                .connectionTimeoutMs(10000)
                .sessionTimeoutMs(6000)
                .build();
        curator.start();
    }
Error Messages:
Error: A JNI error has occurred, please check your installation and try again
Exception in thread “main” java.lang.NoClassDefFoundError: org/apache/curator/RetryPolicy
at java.lang.Class.getDeclaredMethods0(Native Method)
at java.lang.Class.privateGetDeclaredMethods(Class.java:2701)
at java.lang.Class.privateGetMethodRecursive(Class.java:3048)
at java.lang.Class.getMethod0(Class.java:3018)
at java.lang.Class.getMethod(Class.java:1784)
at sun.launcher.LauncherHelper.validateMainClass(LauncherHelper.java:544)
at sun.launcher.LauncherHelper.checkAndLoadMain(LauncherHelper.java:526)
Caused by: java.lang.ClassNotFoundException: org.apache.curator.RetryPolicy
at java.net.URLClassLoader.findClass(URLClassLoader.java:382)
at java.lang.ClassLoader.loadClass(ClassLoader.java:424)
at sun.misc.Launcher$AppClassLoader.loadClass(Launcher.java:349)
at java.lang.ClassLoader.loadClass(ClassLoader.java:357)
… 7 more
To solve it, it is not suitable for the execution of the main method, just use the following method
@Test
    public void testzk() {
        CuratorFramework curatorFramework = Demo.getCuratorFramework();
        System.out.println(curatorFramework);

    }


public static CuratorFramework getCuratorFramework() {

        CuratorFramework client = CuratorFrameworkFactory.builder().connectString("127.0.0.1:2181")
                .connectionTimeoutMs(60 * 1000)
                .sessionTimeoutMs(60 * 1000).retryPolicy(new RetryUntilElapsed(1000, 4)).build();

        client.start();

        return client;
    }
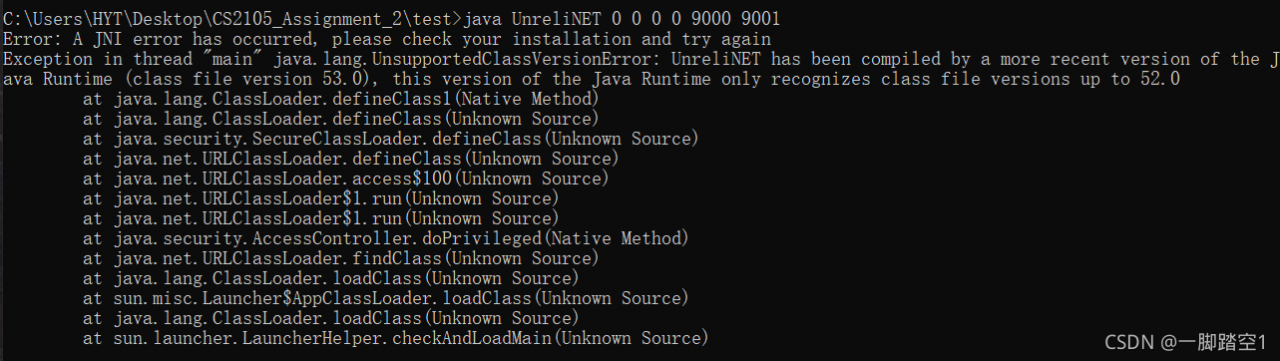
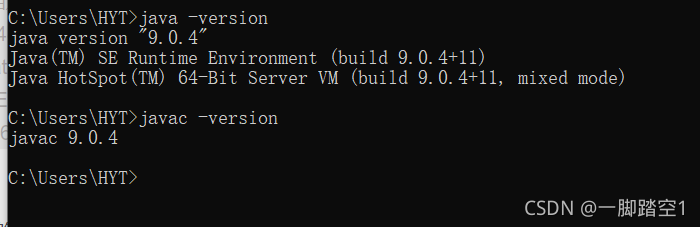
 java – version views the version of JRE (running environment). Javac – version looks at the version of JDK (compilation environment). Note: if you cannot successfully view the version by entering the above command, it indicates that there is a problem with the environment configuration. Please refer to here. Back to the point, if you find inconsistencies after checking the version, reconfigure the environment to ensure that the version is consistent and then recompile and run. It should be noted that I didn’t write the code here, and only got the compiled class file, so I can only solve this problem by changing the running java version. From the error message, we can know that after compilation, this code only supports the JRE environment of java version 52.0 or above. Even if we don’t know which java version 52.0 corresponds to, it must be higher than 1.8.0. In order to avoid problems in the future, I plan to directly update the entire java version, that is, replace JDK and JRE with a new version. Also, considering that 1.8.0 may be needed in the future, I will not delete the 1.8.0 version.
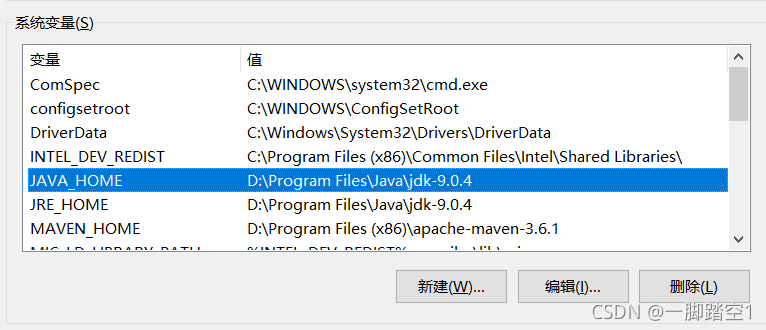
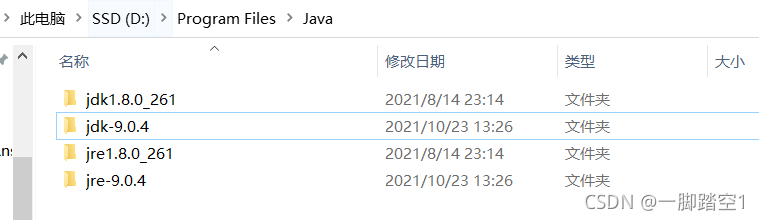 modify the original Java in the system variable_ Home and JRE_ Home path to point to the newly installed java version of 1.9 (if the way to configure the environment is different from mine, it doesn’t matter. In essence, it’s just that the path to point has changed. I suggest this way to configure it for management convenience. Please refer to the configuration link provided above). As shown below
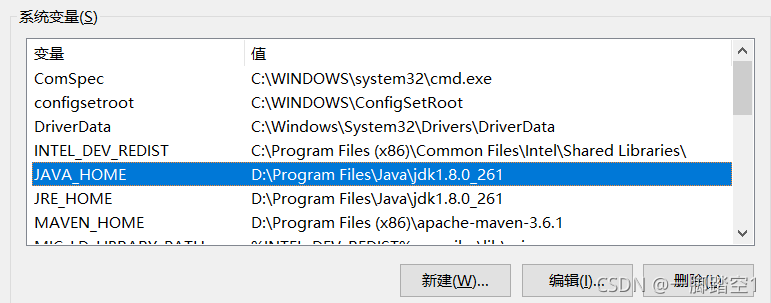
 run the code again and run successfully