
Because

Statement, the number of columns inserted is more or less than the number of columns in the table
Change the number of front and back columns to be equal
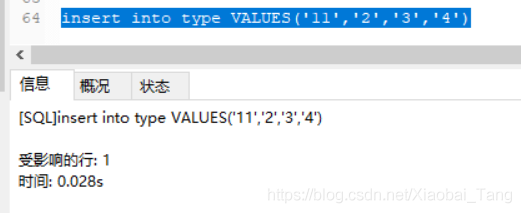

Because

Statement, the number of columns inserted is more or less than the number of columns in the table
Change the number of front and back columns to be equal

There has been this bug in the past two days. Record the solution and summary.
Solution:
1. Driver configuration error (my bug)
2. Database connection address error
3. Account password error
4. The database is not started or has no right to access, such as without networking
5. The version does not correspond to (my bug)
6. Driver jar package is not introduced into the project
My MySQL jar package is 5.0.8, but my MySQL server is 8.0, so I can change it to 5.1.46!
Mysql-connector-java-5.1.46-bin.jar download address:
Download address
We can find out the reason according to the actual situation.
I believe many students encounter the problem of invalid prompt identifier when using group by. Don’t worry, let’s summarize the common solutions to this problem:
Example: take the information of the youngest employee in each department
my SQL statement is as follows:
select name,min(age),(select deptname from dept d where d.deptid=uif.deptid)deptname from userinfo uif group by name,deptname
When you click execute, the system prompts:
ORA-00904:"deptname":Identifier is invalid
Error reason: the field after group by cannot be an alias (if you want to use an alias, you need to nest it at one level)
Solution 1:
--goup by The department name (alias: deptname ) is directly used in the deptid field of the employee information table
select name,min(age),(select deptname from dept d where d.deptid=uif.deptid)deptname from userinfo uif group by uif.name,uif.deptid
Solution 2:
--Grouping after one level of nesting
select us.name,min(us.age),us.deptname from (select name,age,(select deptname from dept d where d.deptid=uif.deptid)deptname from userinfo uif)us
group by us.name,us.deptname
How about this time?If you have any questions, please leave a message to study together~
I want to customize the function today, but the mysql console reports an error
This function has none of DETERMINISTIC, NO SQL, or READS SQL DATA in its declaration and binary logging is enabled (you might want to use the less safe log_bin_trust_function_creators variable)
It means I don’t have the function function enabled
show variables like '%func%';
Here I have turned on the function function as on

setting parameters to turn on the function function
set global log_bin_trust_function_creators=1;
# vim /etc/odbc.ini
[freeswitch]
Driver = MySQL
SERVER = localhost
PORT = 3306
DATABASE = myDatabase
OPTION = 67108864
Note: option = 67108864 Start SQL batch, freeswitch ODBC mode must be on
ODBC does not configure SQL preprocessing, resulting in an error when executing multiple SQL statements at the same time
ubuntu20.04
Download and install ODBC driver from MySQL website
Note that the version option of 8x is invalid after setting,
Solution demotion
mysql-connector-odbc-5.3.14-linux-ubuntu19.10-x86-64bit.tar.gz
Verification supports preprocessing methods, which are not described here for ODBC configuration
isql -v freeswitch
delete from sip_ registrations where sub_ host is null and hostname=’VM-0-13-ubuntu’ and network_ ip like ‘%’ and network_ port like ‘%’ and sip_ u
mysql: [ Warning] C:\Program Files\MySQL\MySQL Server 8.0\bin\mysql.exe: ignoring option ‘–
Before opening MySQL, it was normal. After entering the password today, it has been flashing back. The warning is as follows:
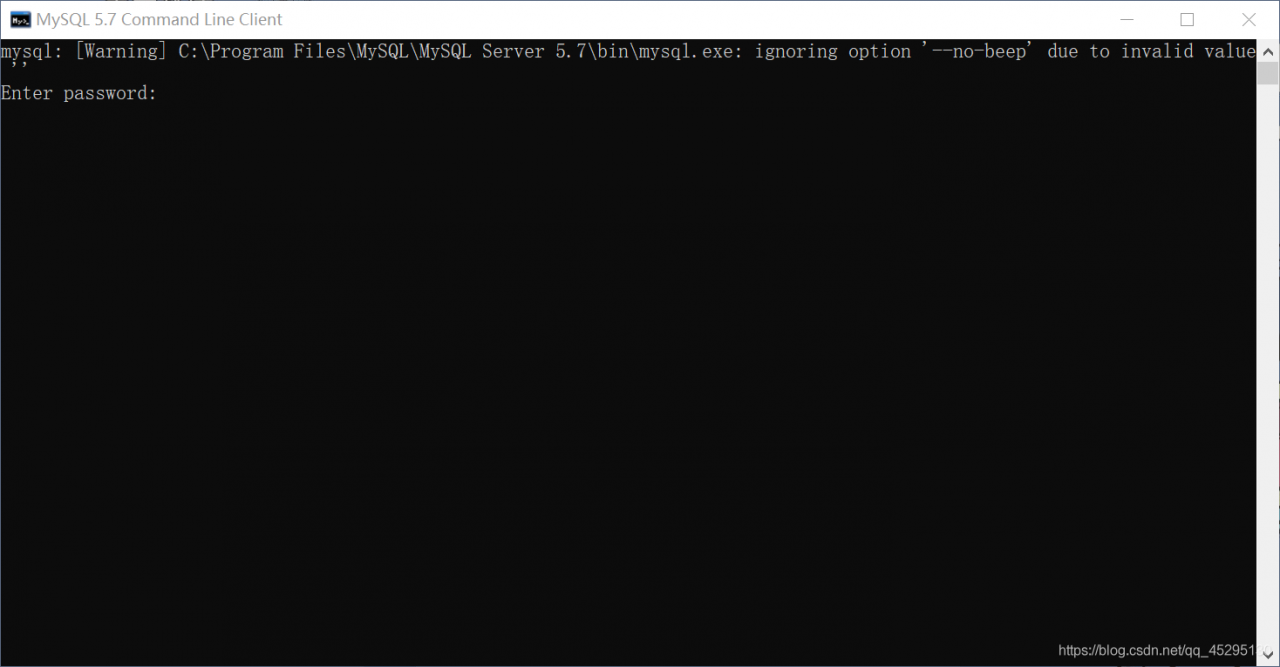
mysql: [ Warning] C:\Program Files\MySQL\MySQL Server 8.0\bin\mysql.exe: ignoring option ‘– no-beep’ due to invalid value ‘’.**
terms of settlement:
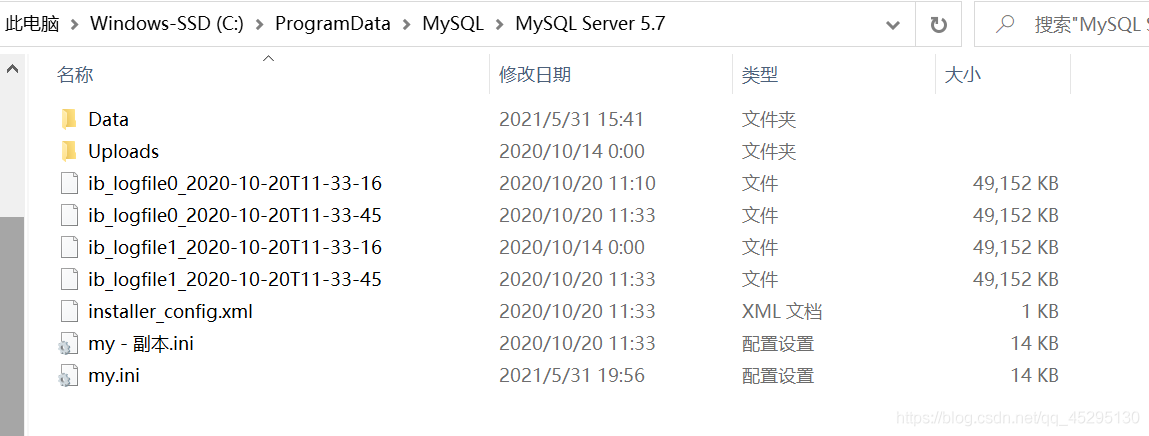
Open the above path (my computer is like this, the default path, if your path is not the same, it is recommended to find the installation path), find my.ini file, it is recommended to save a copy before changing to prevent modification errors. Open it in Notepad and find the following statement:
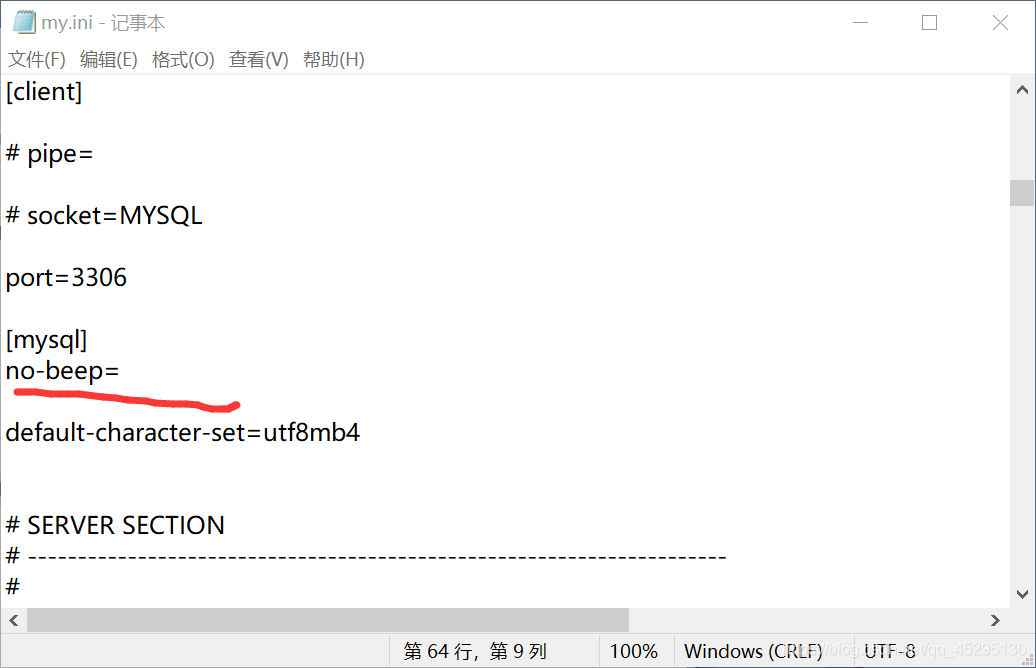
Delete the “=” in the red underlined statement and click save.
Reopen the MySQL execution box. Generally speaking, 80% of the problem is solved successfully. However, if you still flash back, right-click to find the folder where MySQL is located and enter the. EXE file from the folder chart. I hope these will help you.
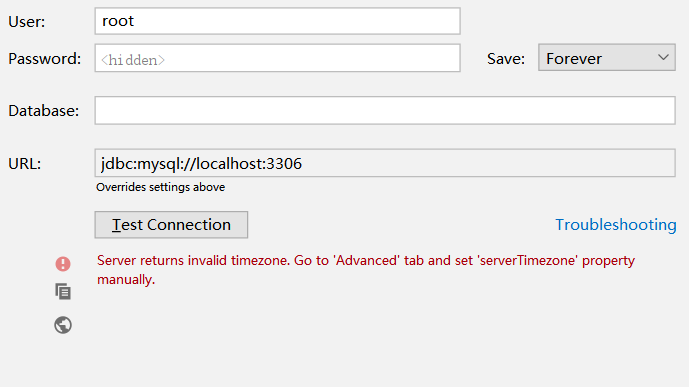
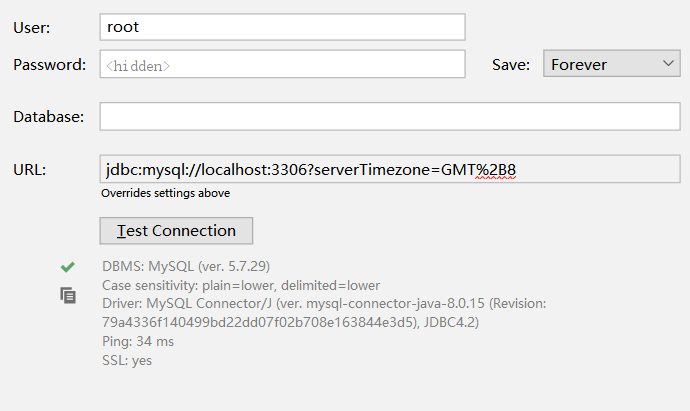
For time zone issues, the MySQL driver defaults to UTC time zone.
# set time zone mysql> set global time_zone = '+8:00';
Query OK, 0 rows affected (0.00 sec)
# Set the time zone to East 8 mysql> set time_zone = '+8:00';
Query OK, 0 rows affected (0.00 sec)
# Refresh permissions to make the settings take effect immediately mysql> flush privileges;
Query OK, 0 rows affected (0.00 sec)
mysql> show variables like '%time_zone%';
 +------------------+--------+
 | Variable_name | Value |
 +------------------+--------+
 | system_time_zone | EST |
 | time_zone | +08:00 |
 +------------------+--------+
 2 rows in set (0.00 sec)
In the last article, I just wrote about installing Mysql, I want to use Navicat to connect, and then I get an error. Record the error here and solve it.
When Navicat connects to MySQL Server8.0 version, Client does not support authentication protocol requested by server appears; the solution is as follows:
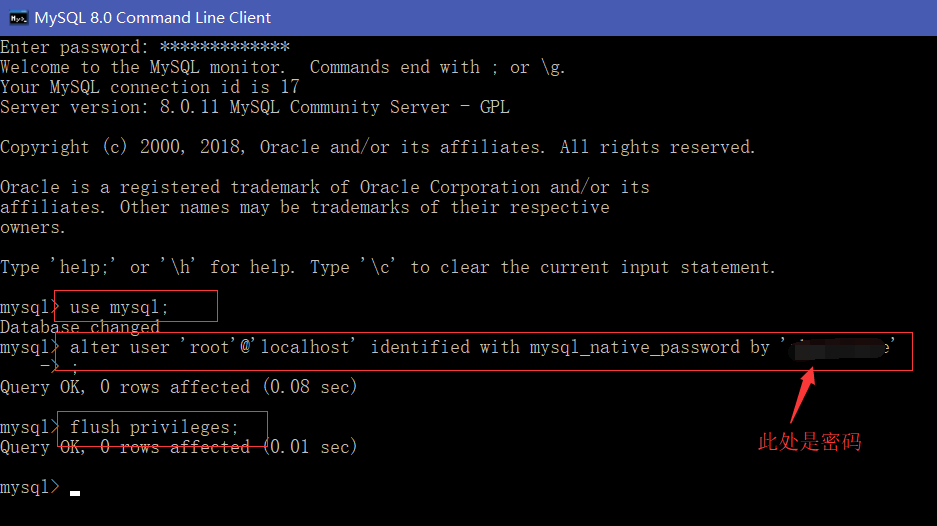
The command is as follows:
1.use mysql;
2. alter user’root’@’localhost’ identified with mysql_native_password by’********’;
3. flush privileges;
I just started to check on the Internet how to use momgoose to delete all documents in the collection. But I didn’t find it. I just blogged it down. It’s convenient for myself and others.
It is also possible to use the native statements in mongoDB. But in line with the requirements of the code to be written, it is really unwilling to write this way.
How to use the methods provided by mongoose to delete all documents in the collection in mongoose is listed below.
Code:
They are: Model.remove(Delete document condition, callback function).
Example:
    // delete all documents

    // Student is a Model.
    Student.remove((), function ( err ) { // If the filter condition is empty, it means all
        console .log( "success" );
    });
It can also be like this:
    // delete all documents
    // Student is a Model.
    Student.remove( function ( err ) {
        console .log( "success" );
    });
The above two methods are related use cases can be found in the official documentation and StackOverFlow.
But my Mongoose version is 5.9.Officially, the above method is a deprecated method. Do not use it anymore. We recommend using another method instead.
Method after 5.9: Model.deleteMany()
    // Student is a Model.
    Student.deleteMany({}, function ( err ) {
        console .log( "success" );
    });
This intention is to modify a user’s password, the command found on the Internet is as follows
mysql> update user set password=password(“new password”) where user=”username”;
ERROR 1054(42S22) Unknown column’password’ in’field list’ is reported after execution
The reason for the error is that there is no password field in the mysql database under version 5.7, and the password field is changed to authentication_string
So please use the following command:
>mysql -u root -p
Enter password: ********
Welcome to the MySQL monitor.  Commands end with ; or \g.
Your MySQL connection id is 12
Server version: 5.7.18-log MySQL Community Server (GPL)

Copyright (c) 2000, 2017, Oracle and/or its affiliates. All rights reserved.

Oracle is a registered trademark of Oracle Corporation and/or its
affiliates. Other names may be trademarks of their respective
owners.

Type 'help;' or '\h' for help. Type '\c' to clear the current input statement.

mysql> use mysql;
Database changed
mysql > select User from user; #here is the query user command
 +-----------+
| User      |
+-----------+
| ******* |
| mysql.sys |
| root      |
+-----------+
3 rows in set (0.00 sec)

mysql > update user set password=password( " ******* " ) where user = " ******* " ; #Modify password error
ERROR 1054 (42S22): Unknown column 'password' in 'field list'
mysql> update mysql.user set authentication_string=password('*******') where user='*******';  #修改密码成功
Query OK, 1 row affected, 1 warning (0.00 sec)
Rows matched: 1  Changed: 1  Warnings: 1

mysql > flush privileges; #effective immediately
Query OK, 0 rows affected (0.00 sec)

mysql> quit
Bye

n >mysql -u *******- p #Log in as this user successfully.
Enter password: ********
…………………………
mysql>
I installed a 64-bit Oracle database and a 32-bit Oracle client. When I opened the client’s SQL Developer in the start menu for the first time, I was prompted to enter the path of java.exe. I chose the jdk path that comes with the Oracle database. After confirming, an error was reported. :
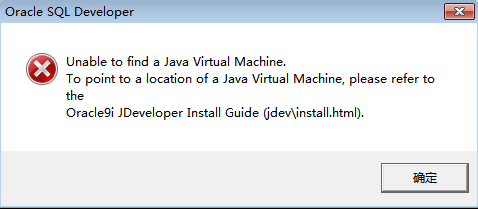
Baidu looked for a solution. The reason is that the built-in jdk in the 64-bit Oracle database is also 64-bit, but the installed Oracle client is 32-bit, so it is not compatible.
There are two general solutions:
1) Download Oracle SQL Developer x64 from the Internet ( http://www.oracle.com/technetwork/developer-tools/sql-developer/downloads/index.html ), and then replace the original directory: D:\app\oracle\product 32-bit Oracle SQL Developer under \11.1.0\db_1\sqldeveloper. Restart Oracle SQL Developer and specify the path of java.exe.
2) Install JDK6 x86, which is 32-bit JDK. Although our system is 64-bit, it is also compatible with 32-bit JDK.
Due to other needs, I must use a 32-bit client, so I chose the second method. I downloaded the 32-bit jdk from the Oracle official website and installed it. After that, modify the java.exe startup path of SQL Developer. At this time, you cannot click SQL Developer in the start menu to define the java.exe path, because the path has already been initialized, and the above error will be reported when you click SQL Developer. At this time, if you want to modify the java.exe path, you need to modify the configuration file.
1. Find the sqldeveloper.conf file in the following path
D:\app\mattran\product\11.2.0\client_1\sqldeveloper\sqldeveloper\bin
2. Open the file

3. Change the path at the red line to the path of the 32-bit jdk just installed as follows:

4. Save and exit.
Then click SQL Developer under Oracle-OraClient11g_home1 in the start menu to start successfully.