Tag Archives: windows

Error: failed to format “E:”; Diskpart errorlevel – 2147212243

In the afternoon, I made the following mistake when installing Windows PE to usb flash disk:

D:\Windows Kits\10\Assessment and Deployment Kit\Deployment Tools>MakeWinPEMedia /UFD C:\WinPE_amd64 E:
WARNING, ALL DATA ON DISK DRIVE E: WILL BE LOST!
Proceed with Format [Y,N]?Y
Formatting E:...

ERROR: Failed to format "E:"; DiskPart errorlevel -2147212243.

This error is because the size of the USB drive exceeds the maximum size of FAT32 by 32G.
solution is to format the usb disk into FAT32 format.

windows update error 0x8024401c

Error 0x8024401c
Execute the command prompt as a system administrator and then execute the following three lines of instructions:
net stop wuauserv
reg delete HKEY_LOCAL_MACHINE\SOFTWARE\Policies\Microsoft\Windows\WindowsUpdate
net start wuauserv
Operation is as follows:
C:\Windows\system32> Net stop wuauserv
Windows Update service is being stopped.
Windows Update service was successfully stopped.
C:\Windows\system32> Reg delete HKEY_LOCAL_MACHINE\SOFTWARE\Policies\Microsoft\Windows supdate
do you want to permanently delete the login machine code HKEY_LOCAL_MACHINE\SOFTWARE\Policies\Microsoft\Windows\WindowsUpdate (yes/no)?Y
operation completed successfully.
C:\Windows\system32>
C:\Windows\system32> Net start wuauserv
Windows Update service is starting.
Windows Update service has started successfully.

Visual Studio 2005 — Error code 1603 for this component means “Fatal error during installation.


Visual Studio 2005 — Error code 1603 for this component means “Fatal error during installation.
 
These days, because a project needs and want to install VS2005, Do not know how to return a responsibility, install to Microsoft Document Explorer 2005 prompt installation failure, how also continue not to go down, looked up a lot of data on the Internet, tried a lot of methods did not solve, on the difference reinstall the system, ha ha. In the last ready to give up suddenly because of a Qihoo 360 accidental system vulnerability repair installation failed to think of the reason, and then try, always successfully installed!
Now on the Internet on the installation of VS2005 Microsoft Document Explorer 2005 installation failure reasons and their own experience experience summary, previous lessons, hope to help others:
Before you start, please make sure that you have carefully reviewed the installation instructions of MS and tried the method. The official documentation is still very important.
 
The first recruit:
1. Empty all previous installations (including components from all previous versions), including the contents of the Windows /temp folder. 2. Open a vs cd-rom, have a file of Windows granted entry into the vs/wcu/msi31 folder, and install it. 3. Restart the computer and close the anti-virus software and firewall. 4. Modify the programe file and temp folders so that the programe program has sufficient permissions — in fact, you can login in and install 2005 with administrator.

5, now you can directly install.
(If this doesn’t work, see below)
 
The second recruit:
1. Open the VS2005 installation disk and enter the directory VS/WCU /DExplore
 
2. Manually run DExplorer. Exe
 
3. Run the VS2005 installation program again.
 
Three recruit:
1. Fix the.NET Framework 2.0
 
2. Remove a file named rgstrtn. LCK, which may be in
“%APPDATA%/Microsoft Help” or %temp% or directory under %temp% or
“/Documents and Settings/All Users{.windows}/Application Data/Microsoft Help”.
 
3, Then, see if ANY directories exist under “APPDATA%/Microsoft Help” or
“/Documents and Settings/All Users{Windows}/Application Data/Microsoft Help”, they need to be moved to another directory for this error to go away, a rename to another name will not work, The code is checking the Existance of ANY Directory of Name and the directories “APPDATA%/Microsoft Help” or “/Documents and Settings/All Users/Application Data/Microsoft Help” having ANY directory under it will not resolve this error.
All folders under Microsoft Help will be removed or renamed, pay attention to the path is good.
 
4. Ensure that you log in as Administrator and have sufficient permissions to operate the installation.
 
5. Install VS2005 again
(The above three tips are basically enough to solve most of these problems, if you are not good, you may be in the same situation as me, then try the following tips, hehe)
 
The fourth recruit:
1. Open your installer’s temp directory. Mine is /Documents and Settings/ Luocl (the username you logged in to) /Local Settings/ temp.
 
2. Remove the Temp folder’s encryption attribute: Click the Temp file’s attribute — & GT; Conventional – & gt; Advanced, uncheck the “encrypt Content to Protect Data” TAB, and click OK.
 
3. Reinstall VS2005.
 

Windows Visual C + + 2005 redistributable error 1935 solution

The reason: in the control panel, the wrong operation has deleted the vcredist_x86 2005
phenomenon: QQ2010 cannot be used, Nero 10 cannot be used, installation Arcgis10 failed!
solution, downloaded the vcredist_x86 sp1 installation on the Internet, the problem then appeared, the installation process is also very slow ~~~ finally appeared “Error 1935. PublicKeytoken =”1fc8b3b9a1e18e3b”,processirArchitecture=”x86″

, it turned out that the Windows service “Windows Installer service” did not start properly.
solve “Windows Installer service” launch exception, “error 1450: system resources insufficient, unable to complete the requested service”,
After analysis and search, it was found that it was caused by the residual installation of Arcgis9.3. The main reason was that the registration space was limited
error modification method after installation of Arcgis9.3:
1, in the run enter regedit to open registry editor
2, find HKEY_LOCAL_MACHINE\System\CurrentControlSet\Control
3, change the RegistrySizeLimit (REG_DWORD type) value to FFFFFFFF (base 10 is 4294967295)
4, restart the computer
Start the “Windows Installer Service” again, OK
Run vcredist_x86 2005 SP1 as administrator again (be careful not to put it in the Chinese directory and clear the contents of the TEMP folder), OK
QQ, Nero, Arcgis and other software, due to the VCR caused by abnormal start, need to delete clean (use makeup removal software to clear the cache), and then install it is OK

Solve the problem that Windows 7 cannot be updated automatically_ Prompt error code 80246008

Windows 7 cannot automatically update the error code 80246008
Since yesterday, Windows Update Update encountered an error, unable to download and install the Update patch, error code 80246008.
As shown in figure

= = = = = = = = = = = = = = = = = = = = = = = = = = = = = = = = = = = = = = = = = = = =
Click “Get Help information about the error” in the figure to get the following:
You must log in as an administrator to perform these steps.
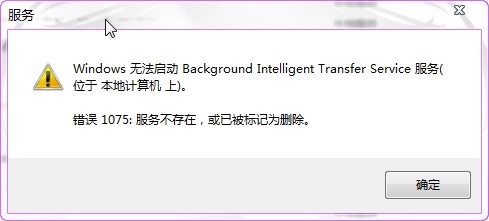
If you receive a Windows Update error 80246008 while downloading the Update, you may need to change the backend Smart Transfer Service (BITS) or Windows Event log service Settings, and then restart each service.
The steps to change or restart the backend intelligent Transport Service (BITS)

1.
By clicking the Start button


, then click Control Panel to open Administration Tools. In the search box, type Administrative Tools, and then click Administrative Tools.

2.
Double-click Services.

[windows] U disk installed system, unable to format the selected partition [error: 0x8004242d]

 
directory
Problem a.
Ii. U disk installation system steps
3. Solve
4. Reference


Problem a.
 
Recently in the antique level computer reinstall the system, considering the introduction of domestic memory, good cheap oh, old computer thrown away, unfortunately, do not throw away the place, fortunately, upgraded once;
 
Since the old computer is the BIOS MBR boot partition, the default installation of Windows 10 is UEFI, so when I use the USB drive to install, I will go to where do you want to install Windows?This step, format the C disk partition, pop-up can not format, [error: 0x8004242D];
 
Ii. U disk installation system steps
 
Briefly record the process:
1. Download address: https://www.microsoft.com/zh-cn/software-download/windows10;
2. Download MediaCreationToolXXX. Exe.
3. Use mediacreationToolxxX. exe to install on usb storage;
4. Modify the BIOS boot item to boot on the U disk;
5. Change the Boot Mode, modify the SATA Mode (old computers, AHCI), explain and illustrate the reference address: https://www.zhihu.com/question/26048255;
6. Save THE BIOS Settings, then plug in the U disk, restart the computer, and follow the steps to install;
 
Normally according to the above operation steps, high probability is no problem; But still can’t for some machines for problems, such as I have met with the latest version of the Win 10 ISO is the default mode of EFI boot (but most old computer’s hard drive seems to be in the form of MBR boot partition, otherwise don’t call the old computers), go to format the partition that step, the next step walk not bottom go to, format the hard disk, is not willing to give up, instead of MBR and GPT will lose data, throw a partition also calculate, the key is to format the hard disk data;
 
I don’t want to format the entire hard disk or lose data, but I still want to boot the partition hard disk in MBR format and then install the Win 10 system. What should I do?
 
3. Solve
 
Delete the EFI directory and xxx. EFI file in the usb boot, restart the computer, and then switch to MBR to install and boot.
 
4. Reference

    http://rufus.ie/; https://baike.baidu.com/item/EFI/2025809?fr=aladdin;


(after)


“Error: a JNI error has occurred” and “error of” jvm.cfg To solve the problem

Today in the CMD environment

java Helloworld.java
javac Helloworld

If it doesn’t work, it shows up

Exception in thread "main" java.lang.UnsupportedClassVersionError: helloworld has been compiled by a more recent version of the Java Runtime (class file version 57.0), this version of the Java Runtime only recognizes class file versions up to 52.0

Error message.
after thinking about it, I probably made a java8 environment by playing mine craft before. Later, I downloaded and installed jdk13 for development, which caused the problems caused by the difference between javac and Java version.
then reset JAVA_HOME to C:\Program Files\Java\jdk-13 should be solved.
when something weird happens, still report this error. In a rage, I deleted
and reported an error after I deleted
directory which caused the conflict

Error: could not open `C:\Program Files\Java\jre1.8.0_201\lib\amd64\jvm.cfg

The problem should be clear, because I don’t know which environment variable is still pointing to this folder, I find the same problem in stackoverflow, where Jason Hughes mentioned that this guideline exists in C:\Program Files\Common Files\oracle\ folder, (my word is C:\Program Files(x86)\Common Files\oracle\), delete the directory directly and restart once it comes.
problem solved.

Recovery your PC / device needs to be repaired, boot

Windows failed to start, Recovery Your PC/Device needs to be repaired
Reconvery
Your PC/Device needs to be repaired
File: Boot\BCD
Error Code: 0Xc000000d

use the start U disk, enter the command prompt, respectively type:
BOOTREC /SCANOS
BOOTREC /FIXMBR
BOOTREC /FIXBOOT
BOOTREC /REBUILDBCD
Note:
BOOTREC /SCANOS scan hard disk has several startup
BOOTREC /REBUILDBCD rebuild startup, according to the prompt input can be.

If you open the store in iTunes, you will be prompted to solve the 310 error

When iTunes opens the Store, it prompts 310 for error resolution
Have seen this kind of circumstance on oneself computer before, this computer is so again today, check up just know, it is the problem that IE agent sets originally.
Because I sometimes use IP proxies and things like that.
See the Internet is IE agent set things, go to IE in a look, it is really. Speechless.

Solve boot prompt“ error:unknown filesystem Grub rescue “problem

Life, toss and turn! Windows XP, Vista, 7, 8, 8.1, 10, Black Apple, Ubuntu, Ubuntu Kylin, Deepin, Phoenix OS, Peer OS, Elementary OS, centOS, I finally messed up my new computer and had the biggest problem ever. I could not enter the system directly through the boot interface, and the black screen showed “Error: Unknown filesystem grub rescue “, in line with fine asked baidu, on the Internet a lot of, the mainstream approach very much the same but more or less problems, where some of the replacement is not clear, in a move not bottom go to, the combination of routine summed up the solution is as follows: a method, a

baidu experience on this post can basically solve the problem of less serious:
http://jingyan.baidu.com/article/c85b7a640cd7d6003bac95f8.html,
with step 3 should pay attention to the “ls (hd0, msdos1)/boot/grub” should be add a space after the ls,
the “ls (hd0, msdos1)/boot/grub, if each tried, but it is always display the error: The unknown Filesystem, or filesystem, is the only option;
2, method 2
operation on WinPE, first make usb boot disk, choose the most simple fool operation, on the baidu search U disk boot disk, conveniently take the first http://www.kuaiqidong.com/ search results, in fact, the startup disk production tools are the same, download and install, fool operation, if not true, there will be tutorials on download site, made after startup disk into the computer, in holding down the F10 boot directly into the boot option (some computer will be different, Here don’t enter BOIS modify priority startup), choose your usb flash drive, and then select the third item on the interface, enter the PE system, on the surface of the table there is a practical tool folder, choose “partition tool DiskGenius”, the top row labels “hard drive”, select “rebuilding the master boot record (MBR)”, then click “yes”, then pull the usb flash drive to restart to go, but sometimes will appear below this kind of situation, such as my computer is SSD + mechanical hard disk this model, I carry the Windows on the SSD and my second system in mechanical hard disk, After entering the “Partition tool DiskGenius”, select the disk with the second system in the left bar, and then click “hard Drive”… According to the above steps, restart will let you choose which launched a system, but there is a problem is to let you choose the first option is winpe what of, the name is too ugly, you can refer to this item according to be fond of change the boot name:
http://jingyan.baidu.com/article/22a299b5223ecc9e19376a11.html.
So far the problem has been solved perfectly! As to how to delete the double system under Windows system in another system may follow:
http://jingyan.baidu.com/article/642c9d34e371c3644b46f768.html.
In the end, I would like to advise you that it is enough to install a Windows system for work, study and entertainment.

AE ram preview requires 2 or more frameworks to solve playback

After Effects error:RAM preview needs 2 or more frames to playback
 
“RAM preview requires 2 or more frames for playback “or” explained that memory capacity is too small”
 
 
Another small finding was that WHEN AE rendered by pressing the “0” button, if it said “After Effects Error :RAM Preview needs 2 or more frames to Playback “, the popular online message was that it was running out of memory, so just release it. In fact, there is a small side door, which is to check the From Current Time check box on the right. Accidentally discovered..

 
I used the English version and noticed that the RAM preview changed when I adjusted to different Settings.

in the AE menu, you can follow the following steps to find out the RAM preview memory configuration options:

so if you set the adjustment bar to the far right for the fastest preview speed, press 0 again, the following prompt may appear:

“After Effects Error :RAM Preview needs 2 or more Frames to Playback”, so this graphical option should be adjusted to avoid this error.

the other RAM preview also have different options:

I am will adjust the tie rod moved to the far left, anyway, large memory capacity (64 – bit Windows 7 of 8 gb of memory), then I am chose “From the current frame” this option, the English meaning is From now this frame (start preview), activate this option has the advantage of, avoid to start From scratch every time.

then I first move the pointer of the timeline to the place I want to review, and then press the 0 key of the keypad to start the rendering, I found that the RAM render preview can be accumulated.
although rendered will likely stop somewhere, if you press the keypad 0, can timely preview with audio clips, and then if you press the keypad 0, if memory allocation is reasonable, can also continue to accumulate, every rendering is tight as the last rendering the end point, this section after accumulation, the green line of time online will have different rendering process with time, gradually accumulate, until will run out the allocation of memory. This allows you to view long rendered content.

also:

render after press 0 can only play the part of the green line, if it is a green line between the blue line or blank, then press 0 when the preview will be stopped on the blue line starting point (or starting point of the blank, the end of the green), if you would turn it into green and sustainable, in former time pointer positioned in the green line, and choose “” From the current frame”, continue to press the keypad 0, and the green line in the middle of the blue lines or fill blank section was JiCheng green. It is recommended that you always use the 0 key of the keypad, so that you can watch long segments of accumulated content with sound. When viewing the RAM preview, if you reach the key point, press the * key on the keypad to mark, which is useful for audio editing in the future.

preview window has the “SHIFT+RAM” option, which can be rendered every other frame preview, generally defined in the project default resolution about half of the definition, and for the frame-by-frame jump preview. Also associated with this is the option “SKIP”, which allows you to choose how many frames you want to render in to save time. Above SHIFT + RAM is to skip a frame.
, of course, selects 0 to render everything (no omitted interval frames). The above two items should be noted: because some people may like to keep RAM rendering content, but you should pay attention to the interval frame parameters (1 and 2 or 0?). And possible audio spacing issues. Note that select 0: is all the spaceless render!

(CTRL+ keyboard 0 can save RAM preview content)

with audio preview, might as well CTRL+4 to activate the audio level indicator to see if the audio is overloaded…

preview has a lot to play with… As long as you stick to the zero key on your keypad, you’ll iterate over the steps, render, play, accumulate render…
green line is part of the timeline can be spliced together, mainly is the stitching together of the persistent green line, can real-time with audio playback preview, if you insist on cumulative preview render, allocated memory segment will make the corresponding adjustment, is likely to be behind the rendering gradually turn green, and in front of the green line is gradually becoming blue…

Git did not exit cleanly (exit code 128)

Problem description:

After creating an empty local Git repository, it is intended to Pull the code in the remote repository to the local exception. The specific exception contents are as follows:
git.exe pull –progress -v –no-rebase “origin” master

POST git-upload-pack (275 bytes)
remote: Counting objects: 7, done.
remote: Compressing objects: 100% (6/6), done.
warning: No common commits
remote: Total 7 (0) delta, reused 3 (delta 0), pack – reused 0

* From https://github.com/Jackson-AndyLau/CMSManager branch master – & gt; FETCH_HEAD
* [new branch] master -> origin/master
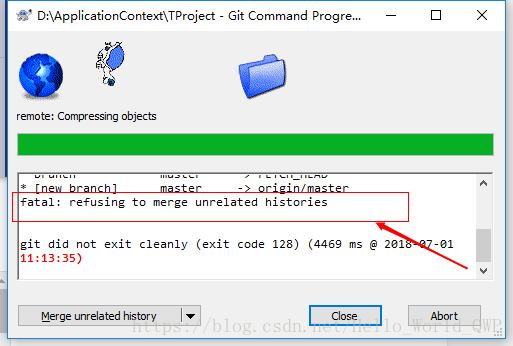
fatal: refusing to merge unrelated histories

git did not exit cleanly (exit code 128) (4469 ms @ 2018-07-01 11:13:35)

As shown in the figure below:

Solutions:

About this problem, the general solution and the core solution of the content encountered in the previous problem are the consistent “Git did not exit Cleanly (Exit Code 1) solution”.

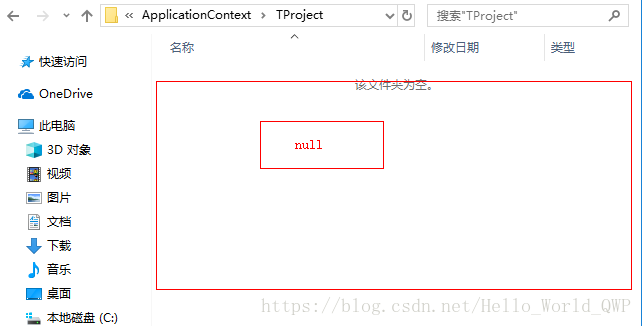
1. According to the error prompt, we need to delete the git configuration file of the local repository to form an empty folder. Nothing in git folder should appear, and then “Git Clone” project from the remote repository directly, as shown in the figure below:
Empty folder:

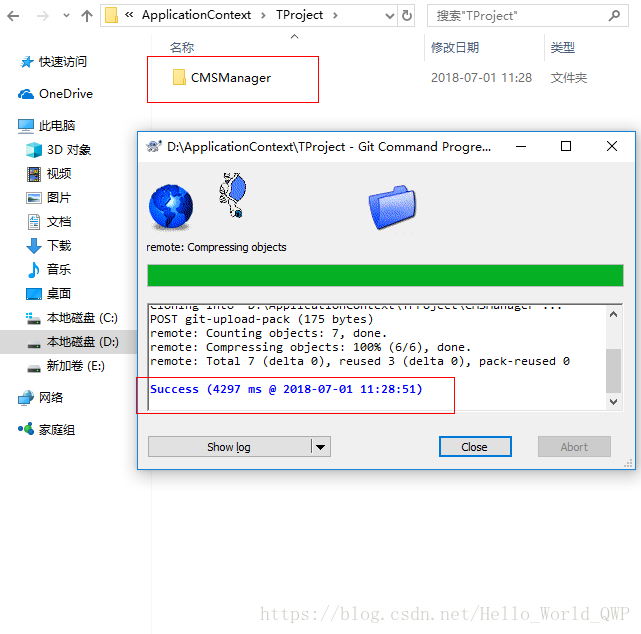
2. Directly from the remote GitHub Clone project, it was found that the Clone succeeded, as shown in the figure below:

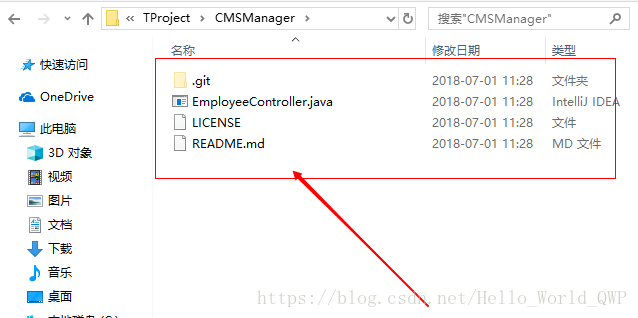
3. After remote Clone, the following figure appears:

Ok, this is the solution for Git did not exit Cleanly (Exit Code 1). If you have any questions or encounter any questions, please feel free to leave a message to me. I will answer them in detail.
xiehouyu: “learn together, progress together”, also hope that we pay more attention to the CSND IT community.