Category Archives: Linux

Couldn‘t create temporary archive name. [How to Solve]

[root@HRBB03-PUB-UNDEFINED-26-ITC51 cmadmin]#
[root@HRBB03-PUB-UNDEFINED-26-ITC51 cmadmin]# vgcreate vg_data /dev/sdb
Couldn’t create temporary archive name.
[root@HRBB03-PUB-UNDEFINED-26-ITC51 cmadmin]#
[root@HRBB03-PUB-UNDEFINED-26-ITC51 cmadmin]#
[root@HRBB03-PUB-UNDEFINED-26-ITC51 cmadmin]# vgcreate vg_data /dev/sdb
Volume group “vg_data” successfully created
[root@HRBB03-PUB-UNDEFINED-26-ITC51 cmadmin]#

It could be that the , / root directory is running out of space and needs to be deleted.

[Solved] CUDA driver version is insufficient for CUDA runtime version

CUDA driver version is insufficient for CUDA runtime version

Question:

An error is reported when docker runs ONEFLOW code of insightface

 Failed to get cuda runtime version: CUDA driver version is insufficient for CUDA runtime version

reason:

1. View CUDA runtime version

cat /usr/local/cuda/version.txt

The CUDA version in my docker is 10.0.130

CUDA Version 10.0.130

2. The CUDA version has requirements for the graphics card driver version, see the following link.
https://docs.nvidia.com/cuda/cuda-toolkit-release-notes/index.html

CUDA Toolkit Linux x86 64 Driver Version Windows x86 and 64 Driver Version
CUDA 11.0.3 Update 1
CUDA 11.0.2 GA >= 450.51.05 >= 451.48
CUDA 11.0.1 RC >= 450.36.06 >= 451.22
CUDA 10.2.89 >= 440.33 >= 441.22
CUDA 10.1 (10.1.105 general release, and updates) >= 418.39 >= 418.96
CUDA 10.0.130 >= 410.48 >= 411.31
CUDA 9.2 (9.2.148 Update 1) >= 396.37 >= 398.26
CUDA 9.2 (9.2.88) >= 396.26 >= 397.44

cat /proc/driver/nvidia/version took a look at the server’s graphics card driver is 418.67, CUDA 10.1 should be installed, and I installed 10.0.130 cuda.

NVRM version: NVIDIA UNIX x86_64 Kernel Module  418.67  Sat Apr  6 03:07:24 CDT 2019
GCC version:  gcc version 7.3.0 (Ubuntu 7.3.0-27ubuntu1~18.04)

solve:

Installing CUDA 10.1

(1) First in https://developer.nvidia.com/cuda-toolkit-archive According to the machine environment, download the corresponding cuda10.1 installation file. For the installer type, I choose runfile (local). The installation steps will be simpler.

wget https://developer.download.nvidia.com/compute/cuda/10.1/Prod/local_installers/cuda_10.1.243_418.87.00_linux.runsudo sh 

(2) Installation

sh cuda_10.1.243_418.87.00_linux.run

The same error occurred, unresolved
it will be updated when a solution is found later.

The request was rejected because the URL contained a potentially malicious String “//“

Problem description

After the introduction of spring security, there is no problem using Vue proxy locally. There is a problem using nginx. The problem is located in the nginx configuration

Solution:

# rewrite ^(/api/?.*)$ /$1 break;  // old
 rewrite ^/api/(.*)$ /$1 break;    // modified

Explanation
take blog.lhuakai.top/api/getxxx as an example

nginx found /API , replaced the match to /api.getxxx/ with $1 (the content in the first group) getxxx and finally became blog.lhuakai.top/getxxx

How to Fix No default.conf file in conf.d after Installing Nginx

In the process of learning nginx, the default.conf file in the conf.d directory cannot be found after installing nginx. The reason is that the EPEL source under the operating system is downloaded by default, which is the Fedora operating system

Scheme I

resolvent

Reinstall nginx and modify the EPEL image source address of nginx

Reinstall

sudo yum install yum-utils

Create a new nginx.repo file

sudo vim /etc/yum.repos.d/nginx.repo

add to

[nginx-stable]
name=nginx stable repo
baseurl=http://nginx.org/packages/centos/$releasever/$basearch/
gpgcheck=1
enabled=1
gpgkey=https://nginx.org/keys/nginx_signing.key
module_hotfixes=true

[nginx-mainline]
name=nginx mainline repo
baseurl=http://nginx.org/packages/mainline/centos/$releasever/$basearch/
gpgcheck=1
enabled=0
gpgkey=https://nginx.org/keys/nginx_signing.key
module_hotfixes=true

By default, a stable repository of nginx packages is used. If you want to use the mainline nginx package, run the following command:

sudo yum-config-manager --enable nginx-mainline

Installing nginx

sudo yum install nginx

This is the information I found on the Internet. I see that many people have handled this problem according to this scheme, but like me, there is still no default.conf file under scheme 1 conf.d, so you can try the second method.

Scheme II

Because the default.conf itself is a configuration file, my idea is to directly create one since there is no one, and see if it works. So I created an empty file with VI default.conf, and then found the contents of the default.conf file on the Internet and put it in.

server {
    listen       80;
    server_name  localhost;


    #charset koi8-r;
    #access_log  /var/log/nginx/host.access.log  main;

    location /mystatus {
        stub_status;
    }

    location/{
        root   /usr/share/nginx/html;
        index  index.html index.htm;
    }


    #error_page  404              /404.html;


    # redirect server error pages to the static page /50x.html
    #
    error_page   500 502 503 504  404 /50x.html;//Modify the 404 status code of the corresponding pointed to the access directory, and restart the server after modification.
    location = /50x.html {
        root   /usr/share/nginx/html;
    }


    # proxy the PHP scripts to Apache listening on 127.0.0.1:80
    #
    #location ~ \.php$ {
    #    proxy_pass   http://127.0.0.1;
    #}


    # pass the PHP scripts to FastCGI server listening on 127.0.0.1:9000
    #
    #location ~ \.php$ {
    #    root           html;
    #    fastcgi_pass   127.0.0.1:9000;
    #    fastcgi_index  index.php;
    #    fastcgi_param  SCRIPT_FILENAME  /scripts$fastcgi_script_name;
    #    include        fastcgi_params;
    #}


    # deny access to .htaccess files, if Apache's document root
    # concurs with nginx's one
    #
    #location ~ /\.ht {
    #    deny  all;
    #}
}

Finally, we changed the configuration according to the project requirements we deployed. Let’s also start nginx to have a look. We can see that there is no error after starting nginx, and we can also see the process of nginx, which shows that this method is feasible and simpler than scheme 1.

[Solved] websocket error in Linux service: / lib64 / libc. So. 6: version ` glibc_2.17‘ not found

1.Error reporting
after the websocket service is installed on the server,
when viewing the log, the following error messages are found:
/lib64/libc. So. 6: version ` glibc_ 2.17’ not found (required by ./node)

It shows that the version of a plug-in in the Lib library does not exist

2.Solution
1. View the glibc version available in the system

// Use the strings command to view
strings /lib64/libc.so.6 |grep GLIBC_
// View the results as follows.
GLIBC_2.2.5
GLIBC_2.2.6
GLIBC_2.3
GLIBC_2.3.2
GLIBC_2.3.3
GLIBC_2.3.4
GLIBC_2.4
GLIBC_2.5
GLIBC_2.6
GLIBC_2.7
GLIBC_2.8
GLIBC_2.9
GLIBC_2.10
GLIBC_2.11
GLIBC_2.12
GLIBC_2.13
GLIBC_2.14
GLIBC_2.15
GLIBC_2.16
GLIBC_PRIVATE

As can be seen from the figure, there is no glibc_ Version 2.17 of glibc library, so you need to download a newer version of glibc library.

2. Download a new version of glibc library
https://ftp.gnu.org/gnu/glibc/glibc-2.17.tar.gz
Or through

wget https://ftp.gnu.org/gnu/glibc/glibc-2.17.tar.gz
# Unpack the tarball
tar -xvf glibc-2.17.tar.gz

3. Compile and install

# 1. Go to the glibc-2.17 directory
cd glibc-2.17
# 2. Create the build directory
mkdir build
# 3. Go into the build directory
cd build
# 4, execute . /configure
... /configure --prefix=/usr --disable-profile --enable-add-ons --with-headers=/usr/include --with-binutils=/usr/bin
# 5. Install
make && make install

4. View shared libraries

ls -l /lib64/libc.so.6
=====================
// You can see that the soft link has been created
lrwxrwxrwx. 1 root root 12 Jan 13 01:49 /lib64/libc.so.6 -> libc-2.17.so

5. Review the glibc version in the system again

[root@localhost ~]# strings /lib64/libc.so.6 |grep GLIBC_
GLIBC_2.2.5
GLIBC_2.2.6
GLIBC_2.3
GLIBC_2.3.2
GLIBC_2.3.3
GLIBC_2.3.4
GLIBC_2.4
GLIBC_2.5
GLIBC_2.6
GLIBC_2.7
GLIBC_2.8
GLIBC_2.9
GLIBC_2.10
GLIBC_2.11
GLIBC_2.12
GLIBC_2.13
GLIBC_2.14
GLIBC_2.15
GLIBC_2.16
GLIBC_2.17
GLIBC_PRIVATE

It can be found that it is the latest version

6. Check the log again and find that the original error has been solved ~

[Solved] error while loading shared libraries: libmpc.so.3: cannot open shared object file

1. You can try to install this dependency first, and then try to compile whether it can be compiled normally

apt-get --reinstall install libmpc3

2. If it still doesn’t work, you can check whether there is this file in your compilation package path, or whether there is this file in other paths. If so, open the file with VI and insert a line below your path

sudo vi /etc/ld.so.conf

For example, mine is/opt/usr/lib

and then refresh

sudo ldconfig

Initializing the Kubernetes master node ERROR: failed to pull image registry.aliyuncs.com/google_containers/coredns:v1.8.0

run kubeadm init –config=kubeadm.yml –upload-certs | tee kubeadm-init.log command error: failed to pull image registry.aliyuncs.com/google_containers/coredns:v1.8.0
full error message as below:

kubeadm init --config=kubeadm.yml --upload-certs | tee kubeadm-init.log

[init] Using Kubernetes version: v1.21.2
[preflight] Running pre-flight checks
        [WARNING IsDockerSystemdCheck]: detected "cgroupfs" as the Docker cgroup driver. The recommended driver is "systemd". Please follow the guide at https://kubernetes.io/docs/setup/cri/
        [WARNING Hostname]: hostname "node" could not be reached
        [WARNING Hostname]: hostname "node": lookup node on 127.0.0.53:53: server misbehaving
[preflight] Pulling images required for setting up a Kubernetes cluster
[preflight] This might take a minute or two, depending on the speed of your internet connection
[preflight] You can also perform this action in beforehand using 'kubeadm config images pull'
error execution phase preflight: [preflight] Some fatal errors occurred:
        [ERROR ImagePull]: failed to pull image registry.aliyuncs.com/google_containers/coredns:v1.8.0: output: Error response from daemon: manifest for registry.aliyuncs.com/google_containers/coredns:v1.8.0 not found: manifest unknown: manifest unknown
, error: exit status 1
[preflight] If you know what you are doing, you can make a check non-fatal with `--ignore-preflight-errors=...`
To see the stack trace of this error execute with --v=5 or higher

Prompt to pull registry.aliyuncs.com/google_ Containers/coredns: v1.8.0 this image failed
use kubedm config images list — config kubedm.yml to query the image to be downloaded

kubeadm config images list --config kubeadm.yml

registry.aliyuncs.com/google_containers/kube-apiserver:v1.21.2
registry.aliyuncs.com/google_containers/kube-controller-manager:v1.21.2
registry.aliyuncs.com/google_containers/kube-scheduler:v1.21.2
registry.aliyuncs.com/google_containers/kube-proxy:v1.21.2
registry.aliyuncs.com/google_containers/pause:3.4.1
registry.aliyuncs.com/google_containers/etcd:3.4.13-0
registry.aliyuncs.com/google_containers/coredns:v1.8.0

Use the docker images command to query images

docker images

registry.aliyuncs.com/google_containers/kube-apiserver            v1.21.2    106ff58d4308   3 weeks ago     126MB
registry.aliyuncs.com/google_containers/kube-controller-manager   v1.21.2    ae24db9aa2cc   3 weeks ago     120MB
registry.aliyuncs.com/google_containers/kube-scheduler            v1.21.2    f917b8c8f55b   3 weeks ago     50.6MB
registry.aliyuncs.com/google_containers/kube-proxy                v1.21.2    a6ebd1c1ad98   3 weeks ago     131MB
registry.aliyuncs.com/google_containers/pause                     3.4.1      0f8457a4c2ec   6 months ago    683kB
registry.aliyuncs.com/google_containers/etcd                      3.4.13-0   0369cf4303ff   10 months ago   253MB

It is found that there is no registry.aliyuncs.com/google in the downloaded image_ Containers/coredns: v1.8.0
use the docker command to pull the image

docker pull registry.aliyuncs.com/google_containers/coredns:1.8.0

Kubernetes needs registry.aliyuncs.com/google_ Containers/coredns: v1.8.0, rename the image with the docker tag command

# rename
docker tag registry.aliyuncs.com/google_containers/coredns:1.8.0 registry.aliyuncs.com/google_containers/coredns:v1.8.0
# detele all mirror
docker rmi registry.aliyuncs.com/google_containers/coredns:1.8.0

Run the initialization command again

kubeadm init --config=kubeadm.yml --upload-certs | tee kubeadm-init.log

Prompt success

Your Kubernetes control-plane has initialized successfully!

To start using your cluster, you need to run the following as a regular user:

  mkdir -p $HOME/.kube
  sudo cp -i /etc/kubernetes/admin.conf $HOME/.kube/config
  sudo chown $(id -u):$(id -g) $HOME/.kube/config

Follow the above prompts to configure kubectl

mkdir -p $HOME/.kube
cp -i /etc/kubernetes/admin.conf $HOME/.kube/config

# NOT ROOT 
chown $(id -u):$(id -g) $HOME/.kube/config

Verify success

kubectl get node

# The ability to print out node information indicates success
NAME   STATUS     ROLES                  AGE   VERSION
node   NotReady   control-plane,master   31m   v1.21.2

Linux solves nohup: ignoring input and appending output to “nohup. Out” and nohup: ignoring input redirection error to standard output

1. Direct execution document

nohup ./test.sh

Prompt appears:

 Ignore the input and append the output to the "nohup.out"

And input the output result into the default file nohup. Out

2. Redirecting standard output to a file

nohup ./test.sh > a.txt

Prompt appears:

 nohup: Ignore input redirection errors to the standard output

Output the result to the specified file a.txt

3. Redirecting standard error output to a file

nohup ./test.sh > a.txt 2>&1 &

No hint

-bash: sqlplus: command not found [How to Solve]

Error description

$ sqlplus/as sysdba
-bash: sqlplus: command not found

Treatment method

View environment.bash_ Profile configuration

$ find -name .bash_profile
./.bash_profile
$ pwd
/home/oracle
$ vi .bash_profile
# .bash_profile

# Get the aliases and functions
if [ -f ~/.bashrc ]; then
        . ~/.bashrc
fi

# User specific environment and startup programs

PATH=$PATH:$HOME/.local/bin:$HOME/bin

export PATH

#add by rui on 20210715
export ORACLE_BASE=/oracle/app
export ORACLE_HOME=$ORACLE_BASE/oracle/product/12.1.0/dbhome_1 --Configuration error, change to [1]
export ORACLE_SID=rui1
export PATH=$HOME/bin:$ORACLE_HOME/bin:$PATH
export LD_LIBRARY_PATH=$ORACLE_HOME/lib:/usr/lib

[1] export ORACLE_ HOME=$ORACLE_ BASE/product/12.1.0/dbhome_ one

Open a new window and enter the command again

$ sqlplus/as sysdba

SQL*Plus: Release 12.1.0.2.0 Production on Thu Jul 15 04:42:11 2021

Copyright (c) 1982, 2014, Oracle.  All rights reserved.


Connected to:
Oracle Database 12c Enterprise Edition Release 12.1.0.2.0 - 64bit Production
With the Partitioning, OLAP, Advanced Analytics and Real Application Testing options

SQL>

It can be seen that the problem has been successfully solved
the reason for this error is $oracle_ Home configuration error.

Prompt “entering emergency mode. Exit the shell to continue” if the Linux operating system does not start normally

It is an Aliyun ecs server, and the following information is seen through vnc login, entering rescue mode.
Generating “/run/initramfs/rdsosreport.txt”
“Entering emergency mode. Exit the shell to continue”
“Type ‘journalctl’ to view system log.”
You might want to save “/run/initramfs/rdsosreport.txt” to a USB stick or /boot after mounting them and attach it to a bug report.

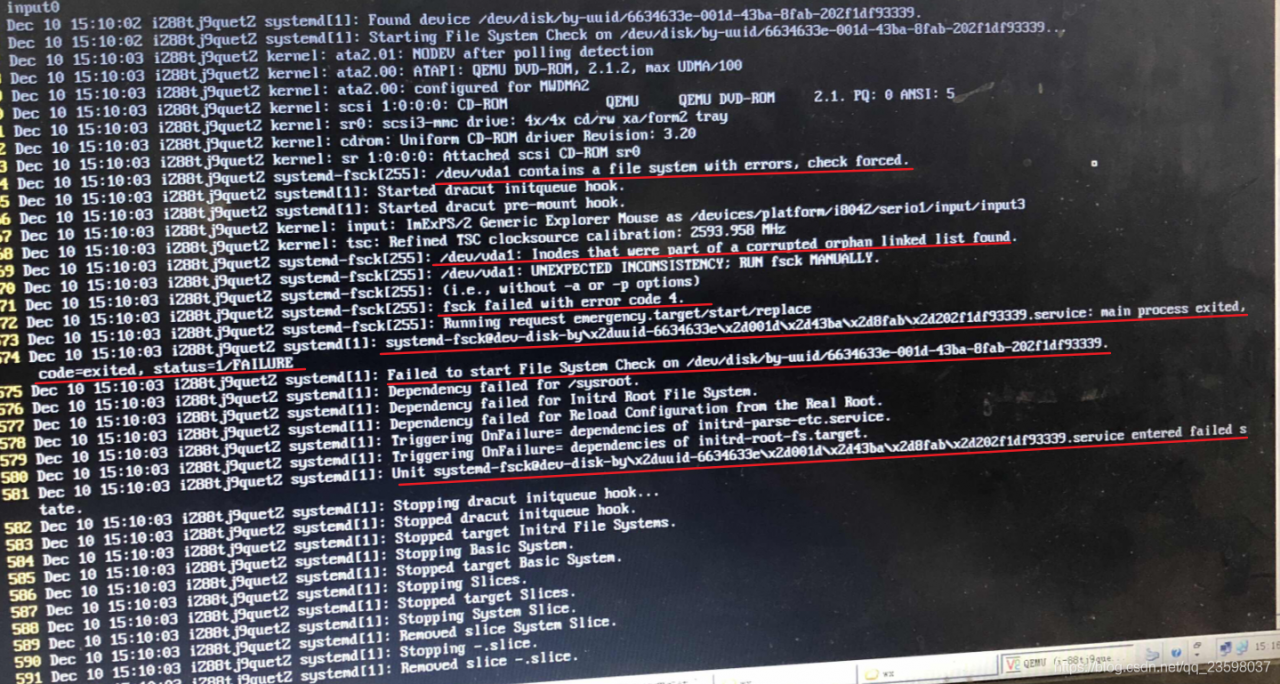
journalctl warning: /dev/vda1 contains a file system with errors,check forced
fsck failed with error code 4.
Failed to start FIle System Check on /dev/disk/by-uuid/xxx
Dependency failed for /sysroot.
And many other errors, it is impossible to see to which part of the operating system boots into the rescue mode!

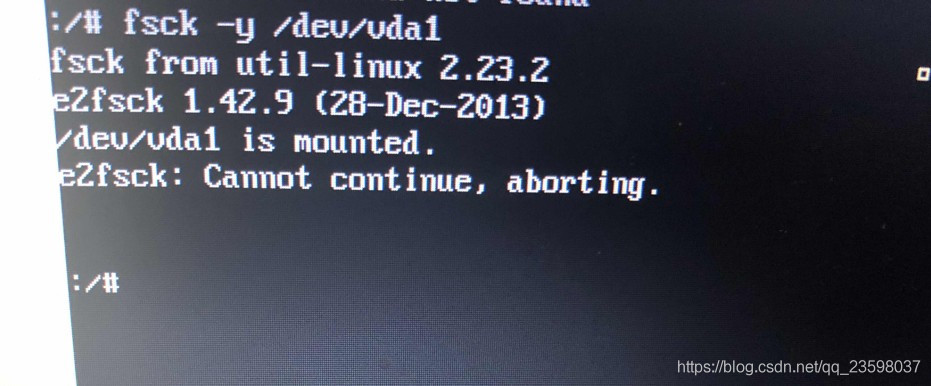
1. execute fsck -y /dev/vda1 under :/#, there is fsck command, prompt /dev/vda1 is mounted

2, the directory umount off, reboot again can enter the system normally

Centos7 Start Error: Entering emergency mode.Exit the shell to continue

Centos7 start error: Entering emergency mode.Exit the shell to continue

input journalctl

journalctl

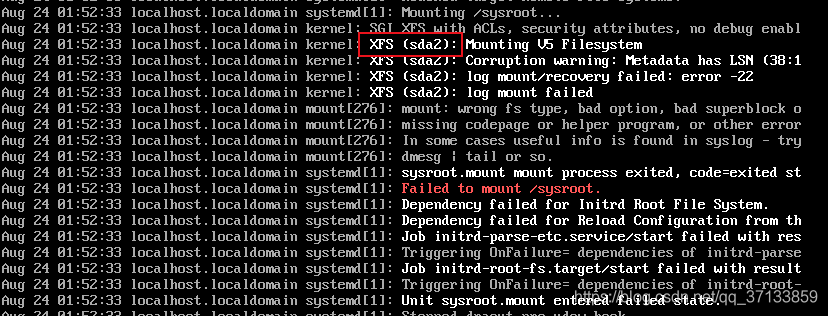
Then keep pressing the space bar to jump to the last page to see the red part in the figure below. Check the content in brackets behind XFS to see whether it is sda2 or sda3

My name is sda2

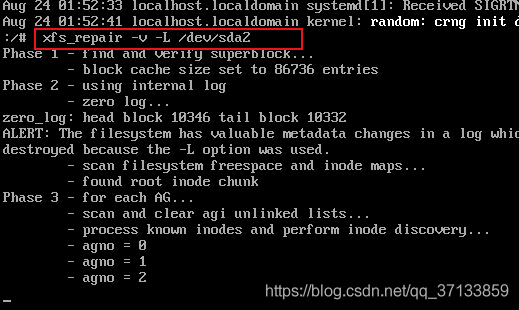
Input: XFS_ repair -v -L /dev/sda2

xfs_repair -v -L /dev/sda2

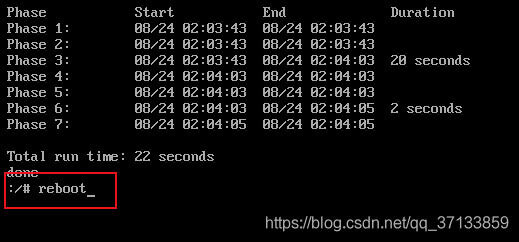
After the repair, enter reboot to restart

reboot