Category Archives: Linux

Enter passphrase for key ‘/c/Users/**/.ssh/id_rsa‘ [How to Solve]

Create SSH key first

ssh-keygen -t rsa -C "[email protected]"

When generating SSH keys, if you accidentally set the passphrase, you will be prompted Enter passphrase for key '/ C/users/gf115 /. SSH/ID every time git pull and git push are used to clone remote warehouses_ RSA ', you need to manually enter the password every time to continue the operation. You can enter SSH keygen - P on the command line to reset it. Enter directly. If it is blank, there will be no password


then add the public key in Git
here are the specific steps:

insert the ID in. SSH in drive C_ Ras.pub file can be copied to git public key

test it and find that you can clone files in a remote warehouse directly without a password

[Solved] GVM Error: rsync: connection unexpectedly closed & rsync: read error: Connection reset by peer (104)

Kali 2021.2 installation of GVM (original OpenVAS) stepping pit record post

In another post, I encountered many Rsync errors during the installation of GVM

rsync: read error: Connection reset by peer (104)
rsync error: error in socket IO (code 10) at io.c(794) [receiver=3.1.3]
rsync: connection unexpectedly closed (1047 bytes received so far) [generator]
rsync error: error in rsync protocol data stream (code 12) at io.c(235) [generator=3.1.3]

At the beginning, I didn’t pay attention. When this error occurs, I repeat the command again, try it several times, and finally install it. Finally, I can see the comforting it sees like your gvm-21.. 1 installation is OK.

As a result, it is not expected that there will still be many bugs when using. For example, when creating new targets, the port list will not be selected, and the built-in default scanning policy will not be empty.

the reason should be that some built-in policy files are not downloaded completely, that is, the above errors occur halfway through the download, resulting in the interruption of the download

However, during the GVM check setup check, the integrity check is probably not performed, which leads to that although it sees like your gvm-21.. 1 installation is OK. , our installation is not complete

terms of settlement:

    1. on the one hand, the volume of files that need to be synchronized is too large, so too slow download speed may lead to timeout, so it is best to let the terminal shell download through an agent. For details, please refer to my another article: implement the terminal agent with proxychains, and add

proxychains

    1. before the command to let the terminal download through an agent. On the other hand, in order to avoid Rsync errors, We add

-- Rsync

    1.  after each command

In this way, our installation command becomes:
sudo proxychains GVM setup -- Rsync
sudo GVM check setup
the same is true if fix is required during check. For example, when synchronizing SCAP:
sudo proxychains runuser - U_ gvm -- greenbone-feed-sync --type SCAP --rsync

Tips: if there are any inexplicable errors in the runtime, it is mostly because the synchronization is incomplete (even if the check passes). At this time, you can sudo proxychains GVM setup -- Rsync carefully see which files are not downloaded completely in the process, and then find a way to finish it

Nginx Startup Error: Job for nginx.service failed because the control process exited with error code

When we use systemctl     restart   When the nginx command restarts the service, an error is found as follows:

Job for nginx.service failed because the control process exited with error code. See "systemctl status nginx.service" and "journalctl -xe" for details.

First, we can use systemctl     status   nginx   View current nginx status

systemctl status nginx
● nginx.service - nginx - high performance web server
   Loaded: loaded (/usr/lib/systemd/system/nginx.service; disabled; vendor preset: disabled)
   Active: failed (Result: exit-code) since Fri 2021-08-06 15:04:33 CST; 4min 10s ago
     Docs: http://nginx.org/en/docs/
  Process: 2099 ExecStop=/bin/sh -c /bin/kill -s TERM $(/bin/cat /var/run/nginx.pid) (code=exited, status=0/SUCCESS)
  Process: 2131 ExecStart=/usr/sbin/nginx -c /etc/nginx/nginx.conf (code=exited, status=1/FAILURE)
 Main PID: 1498 (code=exited, status=0/SUCCESS)

Aug 06 15:04:33 localhost.localdomain systemd[1]: Starting nginx - high performance web s.....
Aug 06 15:04:33 localhost.localdomain nginx[2131]: nginx: [warn] the "ssl" directive is d...:5
Aug 06 15:04:33 localhost.localdomain nginx[2131]: nginx: [emerg] cannot load certificate...e)
Aug 06 15:04:33 localhost.localdomain systemd[1]: nginx.service: control process exited, ...=1
Aug 06 15:04:33 localhost.localdomain systemd[1]: Failed to start nginx - high performanc...r.
Aug 06 15:04:33 localhost.localdomain systemd[1]: Unit nginx.service entered failed state.
Aug 06 15:04:33 localhost.localdomain systemd[1]: nginx.service failed.
Hint: Some lines were ellipsized, use -l to show in full.

The first method: we find that the port is occupied, and use the command to view the process of the occupied port: netstat – anltp |  grep   eighty

View the occupied process number   Then kill   – nine   Process number   Restart after killing the process

The second method: we may have configuration errors when modifying the/etc/nginx/conf.d/default.conf or/etc/nginx/nginx.conf file. Recheck the editing. If we really can’t find the error, we can enter the error log of nginx to check: Tail – F/var/log/nginx/error.log     Specific modifications can be made according to the error file of nginx

Error: EACCES: permission denied, unlink ‘xxxx/xxxx/xxxx‘ [How to Solve]

Scenario: on the Mac, if you want to use the code command to open vs code, (CMD + Shift + P) search the shell, find this:

Results Click to find:

	Error: EACCES: permission denied, 
	unlink '/usr/local/bin/code'

In fact, I don’t have read-write permission, and it’s ineffective to search a lot on the Internet. However, I’m used to using the command line to open vs code. The final solution is:

Enter at the command line

sudo chown -R [yourusername] [filePath]

Yourusername: user preferences – & gt; Users and groups – & gt; Current user
filepath: the path displayed when an error is reported

Tips: if not, try to move the path forward. Take me as an example:

sudo chown -R xxx /usr/local/bin

Linux accesses the shared directory of windows, pysmb (parameter remote)_Name (defined)

Scheme I

net use this command is only available under windows.

Scheme II

sudo mount -t cifs -o username=administrator,password=password //remote_ share_ server_ ip/share_ Dir./data
this command must use root permission. It cannot be implemented for applications that cannot use root permission. If there is no sudo, an error will be reported:
mount: only root can use "-- options" option

Programme III

Python package pysmb

def check_unc_source(self, unc_path, username, password):
    conn = SMBConnection(username, password, '', remote_name, is_direct_tcp=True)
    result = conn.connect('remote_share_server_ip', 445)
    with open("local_file", "wb") as local_file:
        conn.retrieveFile("share_dir", "file", local_file)

The 4th parameter of SMBConnection, remote_name:

The NetBIOS machine name of the remote server.
On windows, you can find out the machine name by right-clicking on the “My Computer” and selecting “Properties”.
This parameter must be the same as what has been configured on the remote server, or else the connection will be rejected.

You can actually fill in the IP address of the server where the Windows remote shared directory is located, i.e. the same as the first parameter remote_share_server_ip of conn.connect, if it is empty, an error will be reported:
smb.smb_structs.OperationFailure: Failed to retrieve [file] on share_dir: Unable to connect to shared device

[Solved] Exception in replication between CentOS virtual machine and host

Exception in replication between CentOS virtual machine and host

Question:

Error copying file from host to virtual machine:

Error when getting information for file “//tmp/VMwareDnD/p6v6B6/.”: No such file or directory

It was found that there was a problem with vmtools

resolvent:

1. Uninstalled packages

yum remove open-vm-tools

Prompt after success:

Delete:
  open-vm-tools.x86_64 0:11.0.5-3.el7                                           

Deleted as a dependency:
  open-vm-tools-desktop.x86_64 0:11.0.5-3.el7                                   

Done!

2. Restart

3. Install VMware Tools
return to the main interface of VMware application and click the “install VMware Tools” menu item in the “virtual machine” menu
4. Mount the CD-ROM to the specified directory

Usually, the device directory/dev/CDROM is mounted to the/MNT/CDROM directory.
if the CDROM directory does not exist in the/MNT directory, it is created

Check for CDROM

[root@centos7 /]# ll /mnt/cdrom/
Total 56849
-r-xr-xr-x. 1 xxxx xxxx     1976 3月  25 2020 manifest.txt
-r-xr-xr-x. 1 xxxx xxxx     4943 3月  25 2020 run_upgrader.sh
-r--r--r--. 1 xxxx xxxx     56414224 3月  25 2020 VMwareTools-10.3.22-15902021.tar.gz
-r-xr-xr-x. 1 xxxx xxxx     872044 3月  25 2020 vmware-tools-upgrader-32
-r-xr-xr-x. 1 xxxx xxxx     918184 3月  25 2020 vmware-tools-upgrader-64

Create if/MNT/CDROM does not exist

[root@centos7 /]# mkdir /mnt/cdrom

Mount directory

[root@centos7 /]# mount -t auto /dev/cdrom /mnt/cdrom
mount: /dev/sr0 Write-protected, will mount as read-only
mount: /dev/sr0 is mounted or /mnt/cdrom is busy
       /dev/sr0 has been mounted on /run/media/xxxx/VMware Tools
       /dev/sr0 is already mounted on /mnt/cdrom

Copy the installation package to the user’s home directory

[root@centos7 /]# cp /mnt/cdrom/VMwareTools-10.3.22-15902021.tar.gz /

Unmount

[root@centos7 /]# umount /dev/cdrom

Unzip the installation package

[root@centos7 /]# tar -zxvf VMwareTools-10.3.22-15902021.tar.gz

Installing VMware Tools

Enter the unzipped source directory

[root@centos7 /]# cd vmware-tools-distrib

run vmware-install.pl 文件

[root@centos7 vmware-tools-distrib]# ./vmware-install.pl

Then enter all the way and 0 yes
the last successful prompt

Generating the key and certificate files.
Successfully generated the key and certificate files.
The configuration of VMware Tools 10.3.22 build-15902021 for Linux for this 
running kernel completed successfully.

You must restart your X session before any mouse or graphics changes take 
effect.

To enable advanced X features (e.g., guest resolution fit, drag and drop, and 
file and text copy/paste), you will need to do one (or more) of the following:
1. Manually start /usr/bin/vmware-user
2. Log out and log back into your desktop session
3. Restart your X session.

Found VMware Tools CDROM mounted at /run/media/tong/VMware Tools. Ejecting 
device /dev/sr0 ...
Enjoy,

--the VMware team

[Solved] Snap Error: snap-confine has elevated permissions and is not confined but should be. Refusing to continue

I wanted to log in to the micro transmission point file with snap, but the error came suddenly. Baidu couldn’t find a solution.

Finally, I found a perfect solution on GitHub!!!

Just run the command. Note that you should use root permission!

systemctl enable --now apparmor.service

Note: if there is no AppArmor, use apt to install it!

Post the source of the solution:

https://github.com/ubuntu/microk8s/issues/249

Push to origin/Master was rejected [How to Solve]

Today, the leader created a new git warehouse for me, and a file readme. MD
already exists in the GIT warehouse. As usual, I operate locally as follows:

git init //Initialize the repository
git add . (file name) //add the file to the local repository
git commit -m "first commit" //add file description information
git remote add origin + remote repository address //link the remote repository and create a master branch
git push -u origin master //Push files from the local repository to the remote repository

But tip:

Reason: readme.md already exists in the new git warehouse, but the files of the local warehouse and the remote warehouse have not been associated. Therefore, we first associate the files of the two warehouses and then submit them
enter the commands in the terminl window of idea

git pull
git pull origin master
git pull origin master --allow-unrelated-histories

Then push the project again to succeed
if you still report an error, you can delete the local. Git folder and re associate the file:


git init //Initialize the repository
git add . (file name) //add the file to the local repository
git commit -m "first commit" //add file description information
git remote add origin + remote repository address //link remote repository, create master branch
#Associate files
git pull
git pull origin master
git pull origin master --allow-unrelated-histories
#push the code to the remote branch
git push -u origin master //Push files from the local repository to the remote repository

The Linux setroubleshootd process occupies too much memory [How to Solve]

Question:

The server found a problem: the memory is full, and even swap is completely occupied.

Solution:

The system has 8g memory, and the setroubleshootd process occupies 4G. This process is the daemon of SELinux. Just close SELinux.

vi /etc/selinux/config
#Comment out
#SELINUX=enforce
#Comment out
#SELINUXTYPE=targeted 
#Add
SELINUX=disabled 

Modify the configuration file and restart to take effect

Docker Run ‘echo core > /proc/sys/kernel/core_pattern‘ Error

1、 Background

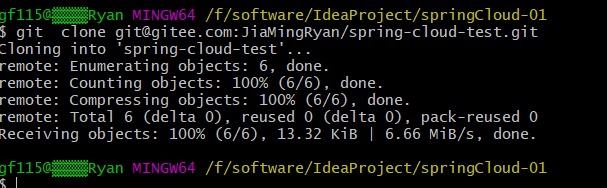
In the previous article, the research group needs to encapsulate AFL as a web API with docker in order to make a visual display of AFL on the web side. When the script is redeployed, the AFL boot fails when calling AFL for fuzzing. Because before executing AFL fuzzy , if the system is configured to send core dump file (core) notification to external programs, the delay between sending crash information to fuzzer will increase, and the crash may be falsely reported as timeout. So you have to modify the core temporarily_ Pattern file, as follows:

echo core > /proc/sys/kernel/core_pattern

However, an error occurs when executing the above command in the docker container:

bash: /proc/sys/kernel/core_pattern: Read-only file system

Core_ Pattern is a system read-only file and cannot be modified

2、 Doubt

When docker is executed, the root user executes various commands internally. Why can’t you change the files with read-only permission?With this question, baidu found it again and again, but it didn’t find one. Therefore, it checked a machine turned post, which is also ambiguous.

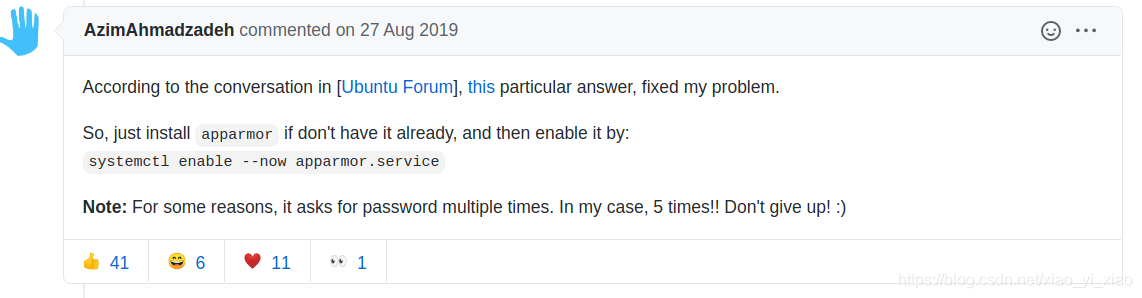
Since Baidu can’t, then Google. After checking for two minutes, I found a blog of compatriots across the Strait and found a solution.

3、 Solution

Direct code:

# Add the --privileged parameter when building the container
docker run -idt -p xx:xx --privileged afl-api:0.0.3

As with the above command, the problem can be solved by adding an additional -- privileged parameter when building the container.

4、 Cause

About version 0.6, privileged was introduced into docker
with this parameter, the root in the container has real root permissions
otherwise, the root in the container is only an external ordinary user permission
with the container started by privileged, you can see many devices on the host and execute mount
it even allows you to start the docker container in the docker container

That is, the container with the -- privileged parameter can really execute root permission.