Tag Archives: jmeter

[Solved] JMeter Save Testing File Error: Error loading results file – see file log

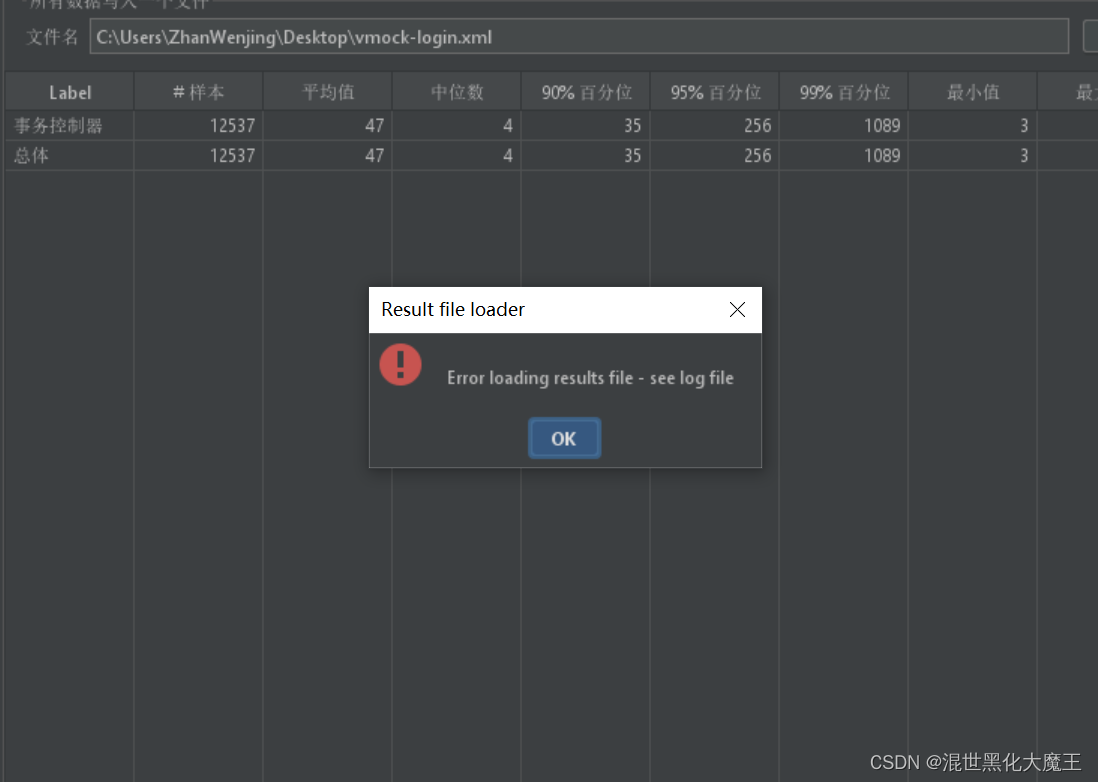
When saving a test file with JMeter, an error occurs: Error loading results file – see file log

Solution:
Create a new text file anywhere and add:

<?xml version="1.0" encoding="UTF-8"?>
<testResults version="1.2">
</testResults>

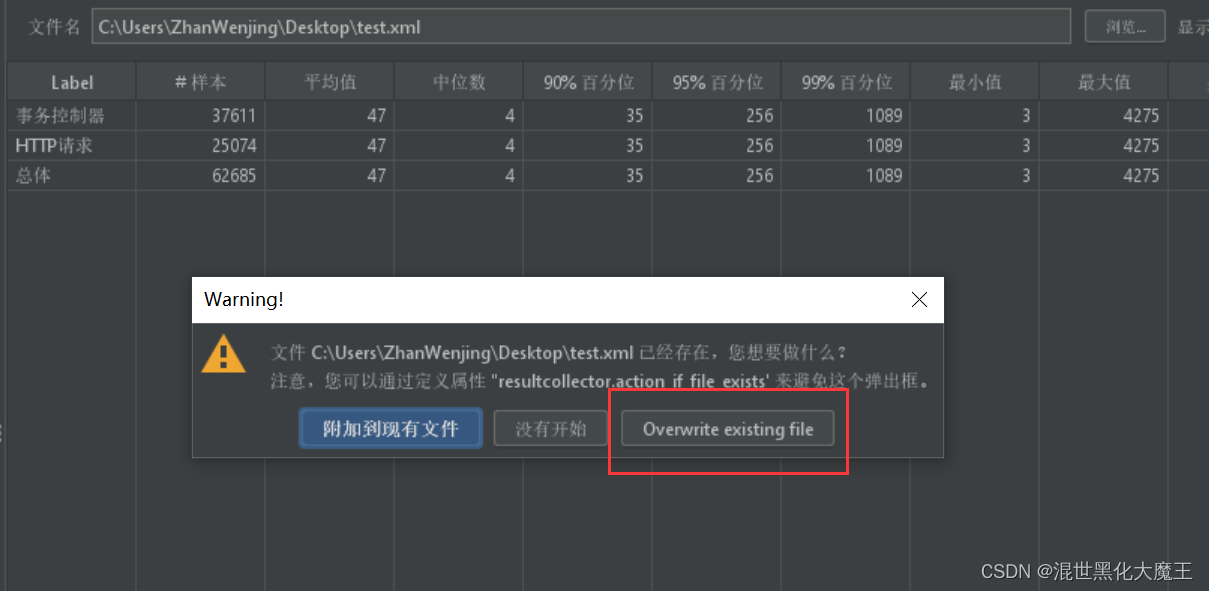
After saving the text file, change the suffix of the text file to .jmx and select the .jmx file when saving the test file. Run the script file in JMeter, a pop-up box will appear, select “overwrite existing file”.

[Solved] JMeter Server Command line pressure measurement: Error in NonGUIDriver java.lang.IllegalArgumentException

The whole environment has been built and operated before, and everything is normal.

After debugging the script locally, upload it to the server for pressure test, report an error and prompt:

Error in NonGUIDriver java.lang.IllegalArgumentException: Problem loading XML from:'/usr/local/jscripts/yth.jmx'.
Cause:
CannotResolveClassException: com.github.johrstrom.listener.PrometheusListener……


According to the prompt, combine your own operation, because a prometheuslistener plug-in is added during local debugging, but it is not available on the server.

Solution:

1. Add this jar package under the plug-in package under the JMeter directory of the server

2. Re debug the script upload server in the state of no new plug-ins locally

I’ve tried both ways. It’s OK!.

But it’s usually the first one. After all, I want this jar

[Solved] Jmeter Error: Error loading results file – see file log

Error occurs when JMeter test is used to save test files concurrently: error loading results file – see file log
solution: create a new text file (any type is OK), and add <?XML version = “1.0” encoding = “UTF-8”?> to the file.

Create a new text TXT copy and paste
after modifying the suffix extension, the corresponding file name can be XXX csv

Jmeter not-GUI Run Error: Error generaing the report:java.langNullPointerException

Error generating the report: java.langnullpointerexception when JMeter runs on the command line

This error is caused by CSV. Error reading CSV file path,   The CSV set file is not found, and there is no result after running. This error will occur only when an error is reported in the generated report, so you only need to configure the correct file path to run successfully. During distributed pressure measurement, the file path on the slave machine is used and placed in the bin directory. The file paths of multiple slave machines are consistent. Problem solving.

JMeter JDBC Error: No pool found named: ‘test‘ [How to Solve]

No pool found named

JMeter JDBC error reporting: no pool found named error information reason solution

JMeter JDBC reports an error: no pool found named

Error message

No pool found named: ‘test’, ensure Variable Name matches Variable Name of JDBC Connection Configuration

Reason

The JDBC request needs to connect to the database and needs the corresponding configuration information. If the database configuration information is not found, this error will be reported, Find the configuration information through the value filled in variable name of pool declared in JDBC connection configuration JDBC connection configuration provides the configuration information through the value filled in variable name of created pool. When there are multiple database configuration information, use variable name of pool declared in JDBC connection configuration and variable name of created pool, Ensure that the query request is not confused with the connected database

Solution

Fill the variable name of pool declared in JDBC connection configuration in the JDBC request and the variable name of created pool in the corresponding JDBC connection configuration into the same value

How to Fix No default.conf file in conf.d after Installing Nginx

In the process of learning nginx, the default.conf file in the conf.d directory cannot be found after installing nginx. The reason is that the EPEL source under the operating system is downloaded by default, which is the Fedora operating system

Scheme I

resolvent

Reinstall nginx and modify the EPEL image source address of nginx

Reinstall

sudo yum install yum-utils

Create a new nginx.repo file

sudo vim /etc/yum.repos.d/nginx.repo

add to

[nginx-stable]
name=nginx stable repo
baseurl=http://nginx.org/packages/centos/$releasever/$basearch/
gpgcheck=1
enabled=1
gpgkey=https://nginx.org/keys/nginx_signing.key
module_hotfixes=true

[nginx-mainline]
name=nginx mainline repo
baseurl=http://nginx.org/packages/mainline/centos/$releasever/$basearch/
gpgcheck=1
enabled=0
gpgkey=https://nginx.org/keys/nginx_signing.key
module_hotfixes=true

By default, a stable repository of nginx packages is used. If you want to use the mainline nginx package, run the following command:

sudo yum-config-manager --enable nginx-mainline

Installing nginx

sudo yum install nginx

This is the information I found on the Internet. I see that many people have handled this problem according to this scheme, but like me, there is still no default.conf file under scheme 1 conf.d, so you can try the second method.

Scheme II

Because the default.conf itself is a configuration file, my idea is to directly create one since there is no one, and see if it works. So I created an empty file with VI default.conf, and then found the contents of the default.conf file on the Internet and put it in.

server {
    listen       80;
    server_name  localhost;


    #charset koi8-r;
    #access_log  /var/log/nginx/host.access.log  main;

    location /mystatus {
        stub_status;
    }

    location/{
        root   /usr/share/nginx/html;
        index  index.html index.htm;
    }


    #error_page  404              /404.html;


    # redirect server error pages to the static page /50x.html
    #
    error_page   500 502 503 504  404 /50x.html;//Modify the 404 status code of the corresponding pointed to the access directory, and restart the server after modification.
    location = /50x.html {
        root   /usr/share/nginx/html;
    }


    # proxy the PHP scripts to Apache listening on 127.0.0.1:80
    #
    #location ~ \.php$ {
    #    proxy_pass   http://127.0.0.1;
    #}


    # pass the PHP scripts to FastCGI server listening on 127.0.0.1:9000
    #
    #location ~ \.php$ {
    #    root           html;
    #    fastcgi_pass   127.0.0.1:9000;
    #    fastcgi_index  index.php;
    #    fastcgi_param  SCRIPT_FILENAME  /scripts$fastcgi_script_name;
    #    include        fastcgi_params;
    #}


    # deny access to .htaccess files, if Apache's document root
    # concurs with nginx's one
    #
    #location ~ /\.ht {
    #    deny  all;
    #}
}

Finally, we changed the configuration according to the project requirements we deployed. Let’s also start nginx to have a look. We can see that there is no error after starting nginx, and we can also see the process of nginx, which shows that this method is feasible and simpler than scheme 1.

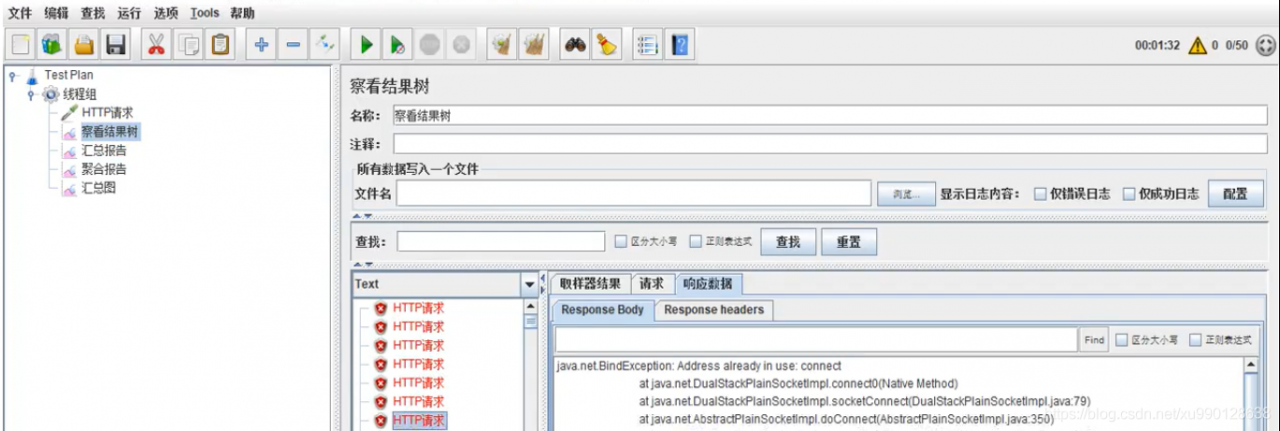
JMeter: java.net.bindexception: address already in use: connect solution

The operating system will reserve a temporary port for TCP/IP services, and JMeter will start every thread (new operation) when running concurrency test

reason:

Windows reserves a temporary port for TCP/IP service. When JMeter runs concurrency test, every thread (new socket operation) will occupy a temporary port. If the TCP/IP port is occupied and not released in time (socket. Close() operation can not release the bound port immediately, but set the port to time_ Wait status, it will be released after a period of time, the default is 240s), and java.net.bindexception: address already in use: connect will appear.

resolvent:

To increase the number of ports reserved for TCP/IP service, it is necessary to operate on the system installed with JMeter. This paper introduces the solution on Windows system.

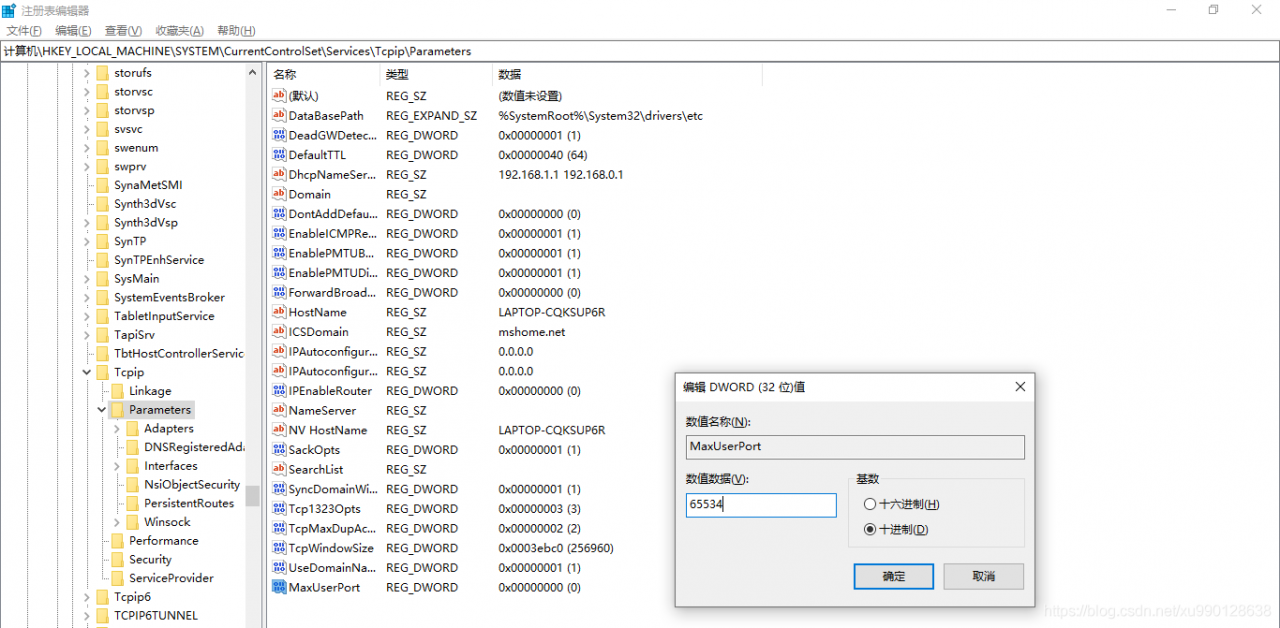
1. Key win + R, enter regedit to open the registry, or enter regedit command in CMD to open the registry;

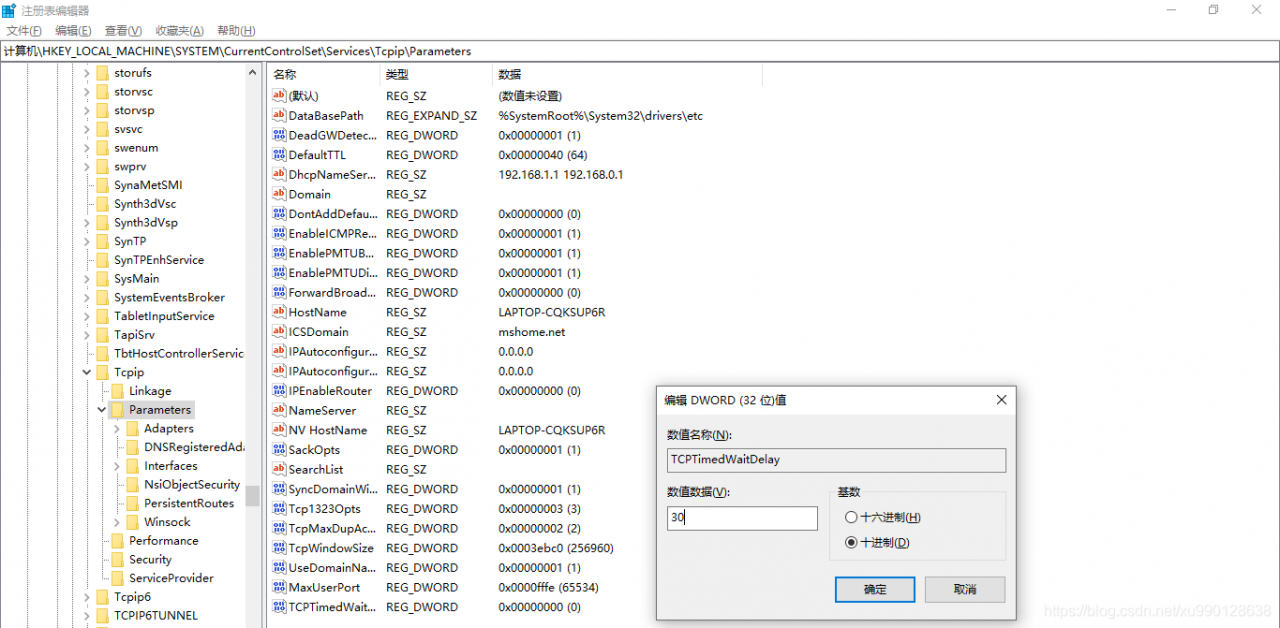
2. Choose HKEY_ LOCAL_ MACHINE\SYSTEM\CurrentControlSet\Services\Tcpip\Parameters;

3. Right click parameters to create a new DWORD named maxuserport;

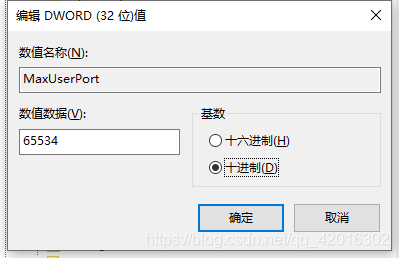
4. Then double-click maxuserport, select decimal base, input value data as 6553465534, which is the maximum value, exceeding     The system uses the closest effective value (min 5000 or max 65534);

5. Right click parameters to create a new DWORD named   TCPTimedWaitDelay;

6. Double click tcptimed waitdelay, select decimal base, input numerical data as 30, set time as 30 seconds, default is 240 seconds;

7. Restart the computer to take effect!!


jemter java.net.BindException:Address alreardy in use [How to Solve]

Phenomenon:

reason:

Windows itself provides port access mechanism.

Windows provides TCP/IP link ports of 1024 ~ 5000, and it takes 4 minutes to recycle these ports. At this time, if we run a large number of requests in a short time, the ports will be full.

Solution:

win + r   Enter regedit to open the registry   Find the following path

Computer_ LOCAL_ MACHINE\SYSTEM\CurrentControlSet\Services\Tcpip\Parameters

Right click parameters to create a new DWORD   The name is maxuserport   The value is 65534 (maximum 65535, set 65534 to prevent all ports from being occupied)

Right click parameters to create a new DWORD   The name is   TCPTimedWaitDelay   Value is 30 (default unit is seconds)

Reference: HTTPS://support.microsoft.com/zh-cn/help/196271/when-you-try-to-connect-from-tcp-ports-greater-than-5000-you-recover-t

Jmeter Error java.net.BindException: Address already in use: connect

resolvent:

1. Open the registry: Ctrl + R, enter regedit
2, enter – Computer \ HKEY_ LOCAL_ 3. Create a new DWORD value, name:TcpTimedWaitDelay , value:30 (decimal) set to 30 seconds
4. Create a new DWORD value, name:MaxUserPort , value:65534 (decimal) maximum number of connections 65534

If there is still a problem after modification, restart the machine and the problem disappears.

Error: JMeter monitors Linux system performance java.net.ConnectException : Connection timed out: connect

Question:

JMeter monitors Linux system performance and reports an error:

ERROR: java.net.ConnectException : Connection timed out: connect

reason:

Before the Linux system firewall opened

terms of settlement:

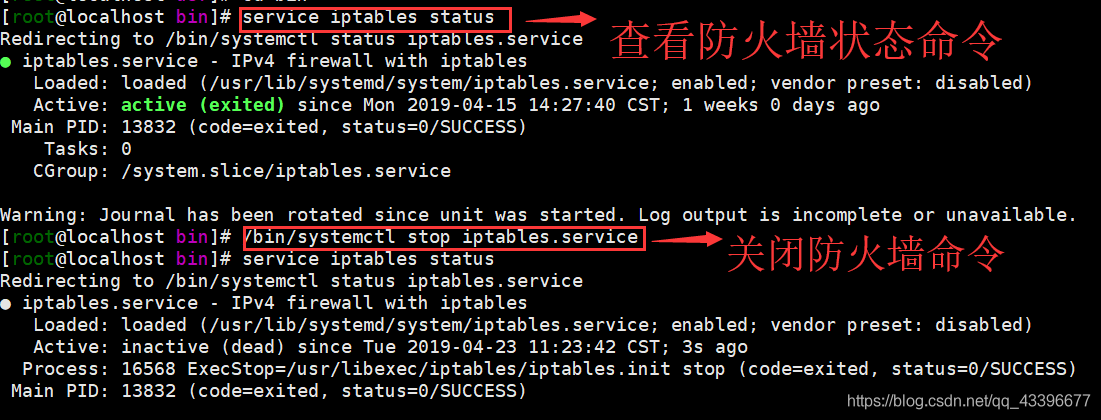
Enter the/usr/bin directory and execute the command/bin/systemctl stop iptables.service Turn off firewall

Problem solving

Note: this method is only for the above problems, other reasons please find other methods, thank you.