Tag Archives: ubuntu

How to Solve Xmind Install Error in Ubuntu System

1. Download the zip package from the official website.

2. After decompression, enter the directory to execute the script:

sudo sh setup.sh

If the following error is encountered, the corresponding dependency package is missing and cannot be found by the current system:

E: Package 'libwebkitgtk-1.0-0' has no installation candidate

Solution:

sudo getdit /etc/apt/sources.list  # Open the list of mirror sources


deb http://cz.archive.ubuntu.com/ubuntu bionic main universe  # Add the following image source to the file

sudo apt-get update  # update

sudo sh setup.sh  # re-execute

3. Run

Enter the XMind_amd64 directory and execute the script “./xmind” to run successfully

[Solved] gawk: error while loading shared libraries: libreadline.so.4

While cross-compiling, I encountered gawk: error while loading shared libraries: libreadline.so.4: cannot open shared object file: No such file or directory. The current build environment is x86_64, Ubuntu 20.04, the target runtime environment is mips32. The first thing I thought of when I encountered this problem was to install this lib.

On Ubuntu, we can use the apt-file program to find out where this library is installed. If you don’t have apt-file installed on your system, you need to install apt-file first, and then run it as follows:

$sudo apt-file update
$sudo apt-file search libreadline.so.4   #find no results
$sudo apt-file search libreadline.so    #returns the following
lib32readline-dev: /usr/lib32/libreadline.so

lib32readline8: /lib32/libreadline.so.8

lib32readline8: /lib32/libreadline.so.8.0

libreadline-dev: /usr/lib/x86_64-linux-gnu/libreadline.so

libreadline-gplv2-dev: /usr/lib/x86_64-linux-gnu/libreadline.so

libreadline5: /lib/x86_64-linux-gnu/libreadline.so.5

libreadline5: /lib/x86_64-linux-gnu/libreadline.so.5.2

libreadline5-dbg: /usr/lib/debug/libreadline.so.5

libreadline5-dbg: /usr/lib/debug/libreadline.so.5.2

libreadline8: /lib/x86_64-linux-gnu/libreadline.so.8

libreadline8: /lib/x86_64-linux-gnu/libreadline.so.8.0

libreadline.so.4 is a very old library and is no longer available on Ubuntu’s library sources, but try the later versions. Since the source code is developed and compiled on 32bit centos, choose the 32bit library: lib32readline8.

Run as below:

$sudo apt install lib32readline8

After installation, enter the /lib32 directory and you can see libreadline.so.8 and libreadline.so.8.0.

lrwxrwxrwx 1 root root     18 Feb 25  2020 /lib32/libreadline.so.8 -> libreadline.so.8.0
-rw-r--r-- 1 root root 311884 Feb 25  2020 /lib32/libreadline.so.8.0

Then run:

$ sudo ln -sv /lib32/libreadline.so.8.0 /lib32/libreadline.so.4

In $ls -l you can see that the symbolic link has been created.

However, running the cross-compilation task still reports the same error. After posting this issue on stack overflow, someone left a comment below reminding me to fix not libreadline.so.4, but the gawk version being too old.

I ran $gawk which prompted no such command, so

$sudo apt install gawk

Then Enter $gawk –version to check the other version, and return

GNU Awk 5.0.1, API: 2.0 (GNU MPFR 4.0.2, GNU MP 6.2.0)

Enter $whereis gawk to find its installation path:

gawk: /usr/bin/gawk /usr/lib/x86_64-linux-gnu/gawk /usr/share/man/man1/gawk.1.gz

The path is /usr/bin, and running the cross-compile job again still gives the same error, which means that there is another gawk installed in a directory that is called first when running the cross-compile. And this directory is not in the $PATH, or if it is, it is after /usr/bin.

I found the possible installation directory of gawk in the configuration file of the source code to be compiled, cd to that directory, run $gawk, and report the same error, and here it is. Run the following command:

$cp /usr/bin/gawk gawk

Run gawk in the current directory again to confirm that it has been updated to the latest version.

Run cross compilation again without error. The problem has been solved.

[Solved] make menuconfig Error: recipe for target ‘menuconfig‘ failed

when using make menuconfig to configure Linux corl error: target ‘menuconfig’ failed to recipe.


Solution:

1. Check whether the libncurses5-dev library is installed

If it’s not installed, install with the command: sudo apt-get install libncurses5-dev

2. If it’s installed, it’s because the terminal window is too small. It’s solved by enlarging the window


How to Solve dyn_small_obs_avoidance Compile Error (eigen version Issue)

Problem description

While Compiling dyn_small_obs_avoidance, catkin_make report an error:

/home/xcs/catkin_ws_dyn/src/dyn_small_obs_avoidance/path_searching/src/kinodynamic_astar.cpp:919:61: error: ‘const class Eigen::ArrayWrapper<const Eigen::CwiseUnaryOp<Eigen::internal::scalar_multiple_op<double>, const Eigen::CwiseBinaryOp<Eigen::internal::scalar_difference_op<double>, const Eigen::Matrix<double, 3, 1>, const Eigen::Matrix<double, 3, 1> > > >’ has no member named ‘floor’
   Vector3i idx = ((pt - origin_) * inv_resolution_).array().floor().cast<int>();
                                                             ^~~~~
/home/xcs/catkin_ws_dyn/src/dyn_small_obs_avoidance/path_searching/src/kinodynamic_astar.cpp:919:74: error: expected primary-expression before ‘int’
   Vector3i idx = ((pt - origin_) * inv_resolution_).array().floor().cast<int>();
   dyn_small_obs_avoidance/path_searching/CMakeFiles/path_searching.dir/build.make:62: recipe for target 'dyn_small_obs_avoidance/path_searching/CMakeFiles/path_searching.dir/src/kinodynamic_astar.cpp.o' failed
make[2]: *** [dyn_small_obs_avoidance/path_searching/CMakeFiles/path_searching.dir/src/kinodynamic_astar.cpp.o] Error 1
CMakeFiles/Makefile2:1260: recipe for target 'dyn_small_obs_avoidance/path_searching/CMakeFiles/path_searching.dir/all' failed
make[1]: *** [dyn_small_obs_avoidance/path_searching/CMakeFiles/path_searching.dir/all] Error 2
Makefile:140: recipe for target 'all' failed
make: *** [all] Error 2
Invoking "make -j8 -l8" failed                                                 

Cause analysis:

By modifying the location where the error occurs, it is found that the error still exists, and the judgment error has nothing to do with the code itself
referring to other posts, I found that the previously installed version of eigen is eigen3.2.1, which may be too low
try upgrading the eigen version.


Solution:

1. Uninstall the  eigen

sudo updatedb  
locate eigen3 
sudo rm -rf /usr/include/eigen3 /usr/lib/cmake/eigen3 /usr/share/doc/libeigen3-dev /usr/share/pkgconfig/eigen3.pc /var/lib/dpkg/info/libeigen3-dev.list /var/lib/dpkg/info/libeigen3-dev.md5sums

2. Installation dependency

sudo apt-get install libopenblas-dev
sudo apt-get install --no-install-recommends libboost1.58-all-dev
sudo apt-get install libx11-dev
sudo apt-get install libgl1-mesa-dev 
sudo apt-get install libglu1-mesa-dev 
sudo apt-get install freeglut3-dev
sudo apt-get install doxygen
sudo apt-get install cmake
sudo wget https://nchc.dl.sourceforge.net/project/glew/glew/2.1.0/glew-2.1.0.tgz --no-check-certificate
sudo tar -xzvf glew-2.1.0.tgz
cd glew-2.1.0/
sudo make 
sudo make install
sudo ldconfig -v

Some may not be installed. I will ignore them and continue with the following steps.

3. Download eigen3.3.7, and extract it to the home directory
download address: eigen3.3.7

4. Installing eigen3.3.7

mkdir build
cd build
cmake ..
make
sudo make install
sudo ldconfig -v

5. Map the path of eigen3 to the /usr/include path.

sudo cp -r /usr/local/include/eigen3 /usr/include/eigen3 
sudo ln -s /usr/include/eigen3/Eigen /usr/include/Eigen

6. Re-enter dyn_small_obs_avoidance workspace catkin_make, compiled successfully.

[ 79%] Building CXX object dyn_small_obs_avoidance/path_planning/CMakeFiles/goal_transform.dir/src/goalpoint_transformer.cpp.o
[ 81%] Building CXX object dyn_small_obs_avoidance/path_planning/CMakeFiles/path_planning_node.dir/src/path_planning.cpp.o
[ 93%] Built target livox_ros_driver_node
[ 95%] Linking CXX executable /home/xcs/catkin_ws_dyn/devel/lib/path_planning/goal_transform
[ 95%] Built target goal_transform
[ 97%] Linking CXX executable /home/xcs/catkin_ws_dyn/devel/lib/path_planning/path_planning_node
[ 97%] Built target path_planning_node
[100%] Linking CXX executable /home/xcs/catkin_ws_dyn/devel/lib/fast_lio/loam_laserMapping
[Solved] Ubuntu18.04 Px4 (xtdrone) gazebo joint simulate error

Ubuntu 18.04 installs gazebo9.0 by default and starts indoor1 of Px4 Launch will report an error:

gzserver: symbol lookup error: /usr/lib/x86_64-linux-gnu/libsdformat.so.4: undefined symbol: _ZN8igniti

The reason is that the version of gazebo 9.0 is too low and needs to be upgraded to 9.13, 9.14 or 9.15 (I can use it when upgrading to 9.19) Upgrade method:

1 Uninstall the original gazebo
sudo apt-get remove gazebo* 
sudo apt-get remove libgazebo*
sudo apt-get remove ros-melodic-gazebo* #kinetic noetic Corresponding changes
2 Set up the computer to accept software from package.osrfoundation.org
sudo sh -c 'echo "deb http://packages.osrfoundation.org/gazebo/ubuntu-stable `lsb_release -cs` main" > /etc/apt/sources.list.d/gazebo-stable.list'
cat /etc/apt/sources.list.d/gazebo-stable.list
#If deb http://packages.osrfoundation.org/gazebo/ubuntu-stable xenial main appears, it means no problem
xenial should be 20.04 18.04 for bio
3 Set the key
wget https://packages.osrfoundation.org/gazebo.key -O - | sudo apt-key add -
sudo apt-get update
4 Install gazebo9.1 command.
sudo apt-get install gazebo9=9.1*
//If after executing the commands sudo apt install ros-melodic-gazebo9-* sudo apt install ros-melodic-gazebo-*, gazebo starts with an error like symbol (e.g. gzserver: symbol lookup error: /usr/lib/x86_64-linux-gnu/libsdformat.so.4: undefined symbol: _ZN8igniti). You can solve this problem by running sudo apt upgrade libignition-math2 first
5 sudo apt upgrade libignition-math2
If you type gazebo in the terminal after installation, Gazebo will open and the installation will be successful.
6 Gazebo itself is independent of ROS, so you need to install the Gazebo plugin for ROS
sudo apt install ros-melodic-gazebo9-*
sudo apt install ros-melodic-gazebo-*

[Solved] failed to start remount root and kernel file system

1. The problem that appears, this problem comes from the file system is backed up out. The problem does not occur if you install it yourself using the CD

failed to start remount root and kernel file system

What it means is: Failed to mount root and kernel. 2.

2. the cause of the problem:

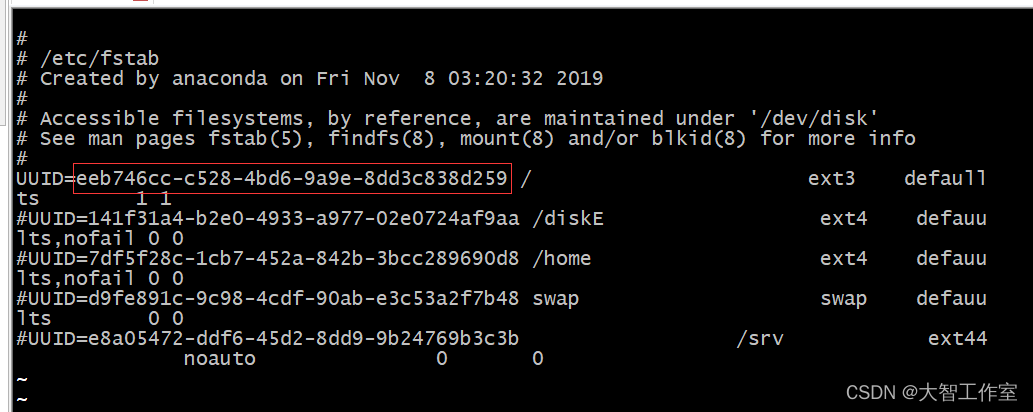
The uuid in /etc/fatab is different from the actual uuid.

It is better to comment the unused disk mount

When system boots, it will mount the file system in the order specified in fatab.

3. how to solve:

(1) Go to live cd (the disk where you install Ubuntu) or other linux system

(2) Open terminal, type sudo blkid, check the uuid of all partitions

(3) Go to the /etc folder under the root partition where you normally enter the system, open a terminal in the folder, and type sudo gedit fstab (or sudo vim fstab ) to modify fstab

Change it to your own and comment out the rest

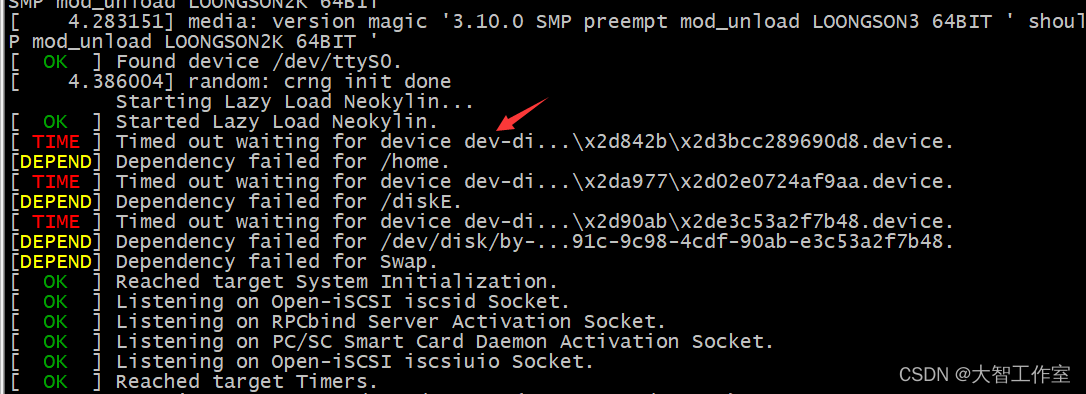
In addition to the above problems, it also causes the system to wait overtime:

The problem of waiting timeout can be solved by adding the above unused mount notes.

The timeout here is still caused by the file mount in the fstab.

[Solved] Ubuntu Eclipse C/C++ Error: launch failed.binary not found

Questions

Running on windows, there is either a problem with the installation of mingw64, or the header file cannot be found. Anyway, it is to verify whether the simulator can be used. What is the trouble? Just switch to Linux. The following are the results of running on Ubuntu.

Process

To run the square studio export project, follow the readme of the exported project,

    1. install gcc
sudo apt-get install gcc g++ gdb build-essential
    2. install sdl
sudo apt-get install libsdl2-dev

3. Install eclipse c/c++
4. Select the parent folder of the exported project as “Workspace”
5. Select File->Import->General->Exisiting project into Workspace click “Next” and browse the project
6. Build the project with Project->Build
7. Run the project with Run->Run.
Then report an error: could not found lpng


Solution:

    1Install lpng
sudo apt-get install libpng-dev

2. install CDT

help-> Check for updates

check CDT and install 

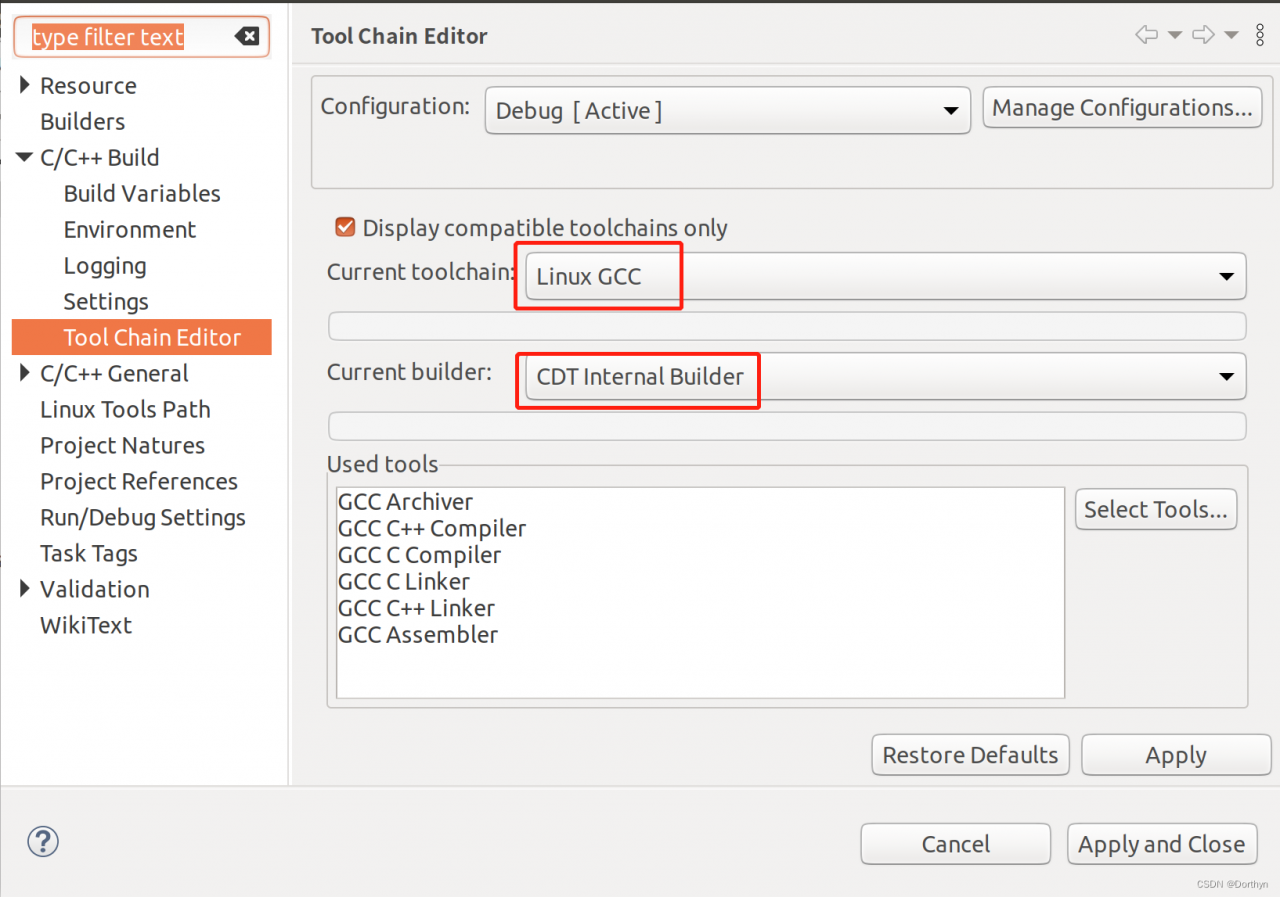
3. Modify the compiler

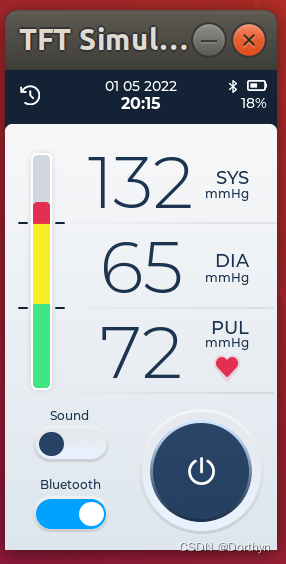
4. Just follow steps 6 and 7 above. The effect drawing is as follows

[Solved] IDA Start Error: Unexcepted fatal error while intitailizing Python runtime…

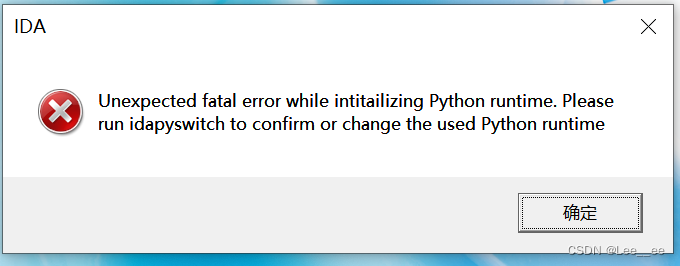
When I opened IDA today, It suddenly appeared:

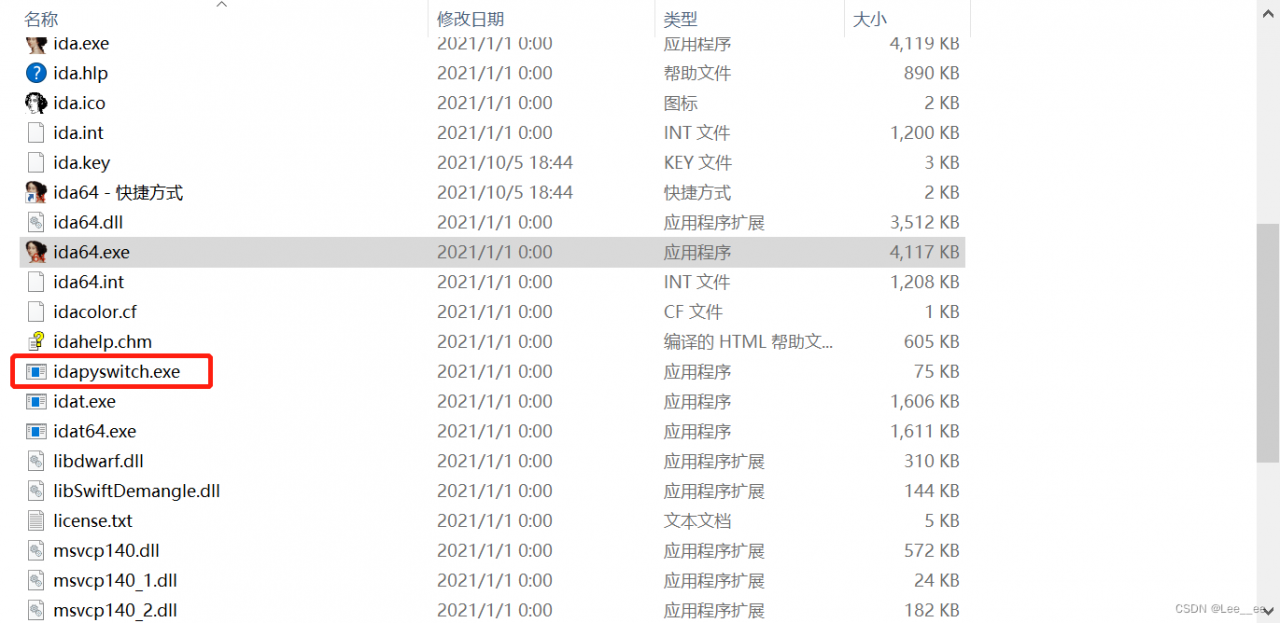
it startled me. What’s going on? Calm down and analyze it. I’m going to open it in the same directory as IDA. See what error reports:

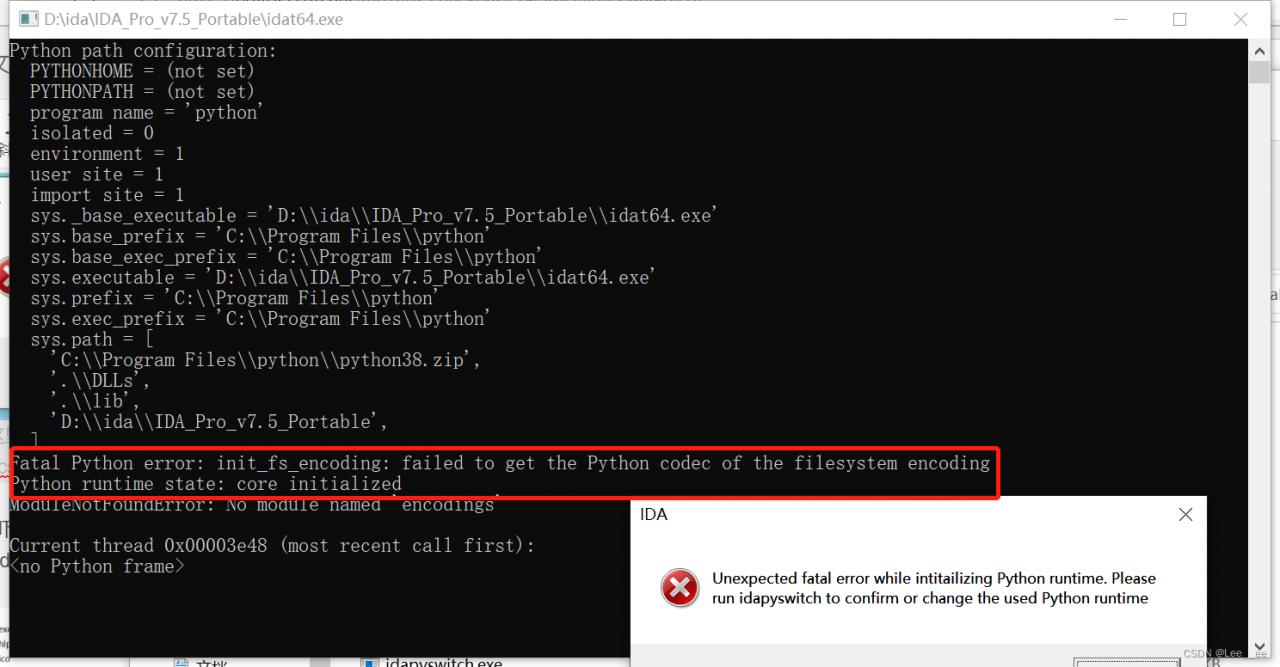
the result can’t be opened, and then I directly open idat64.exe,

there should be a problem with the python path. Open the environment variable and add the following to the user environment variable:

PYTHONHOME  #EVI PATH
C:/Program File/python  #PATH

Then save and open IDA to use

[Solved] spdlog reports an error After updating Ubuntu 22.04

After updating Ubuntu 22, spdlog and FMT report errors, mainly due to some unclear problems in the FMT library

Solution:

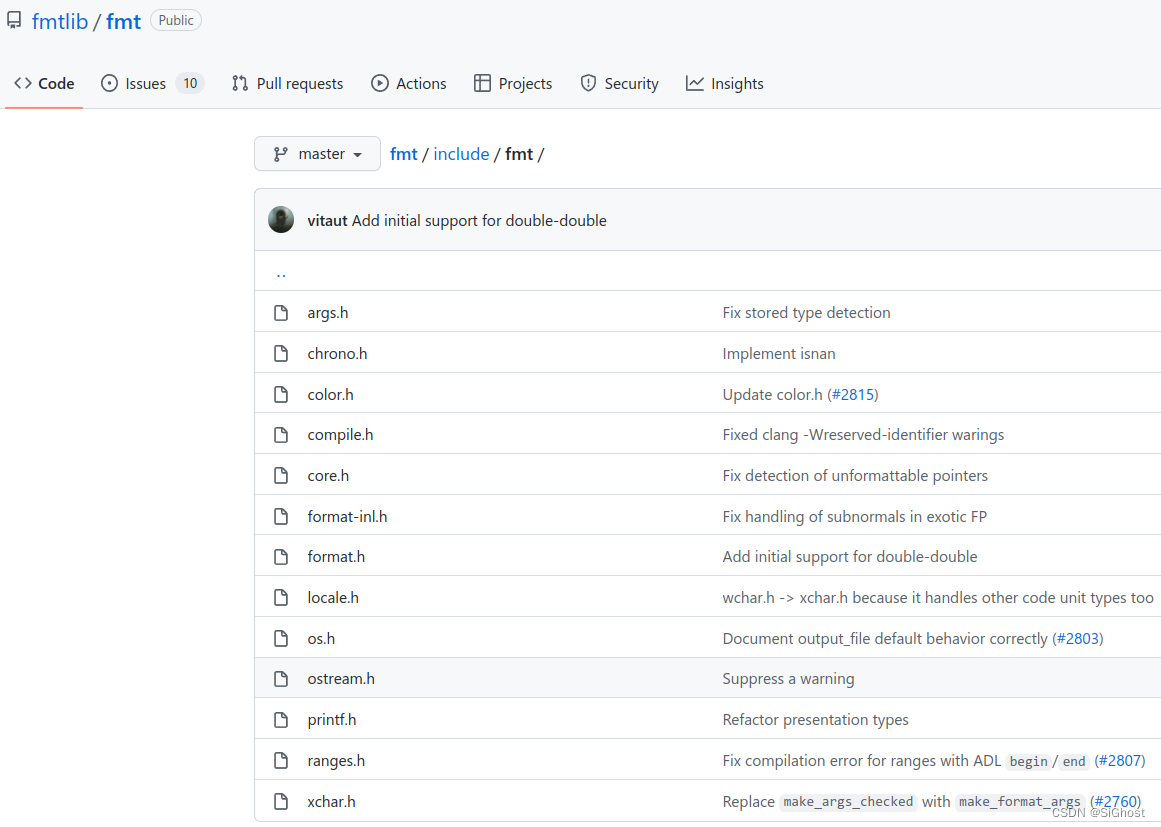
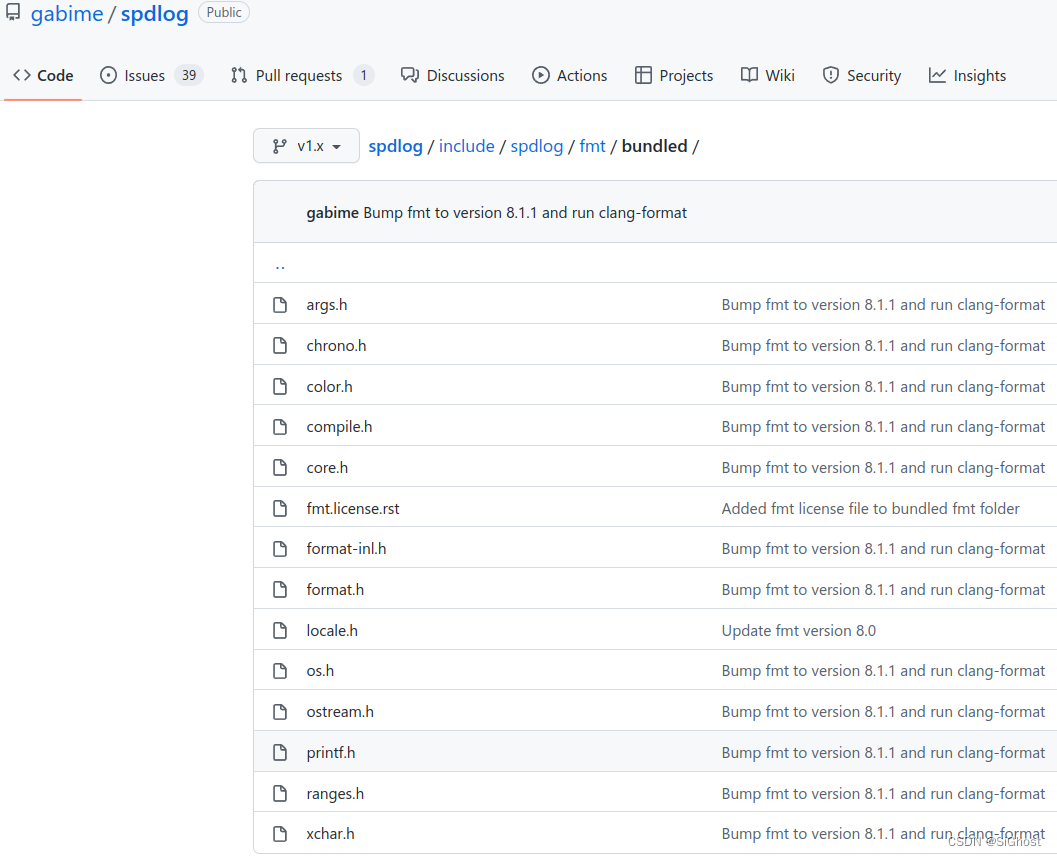
1. Copy the header file under include/FMT of FMT Library

to this directory

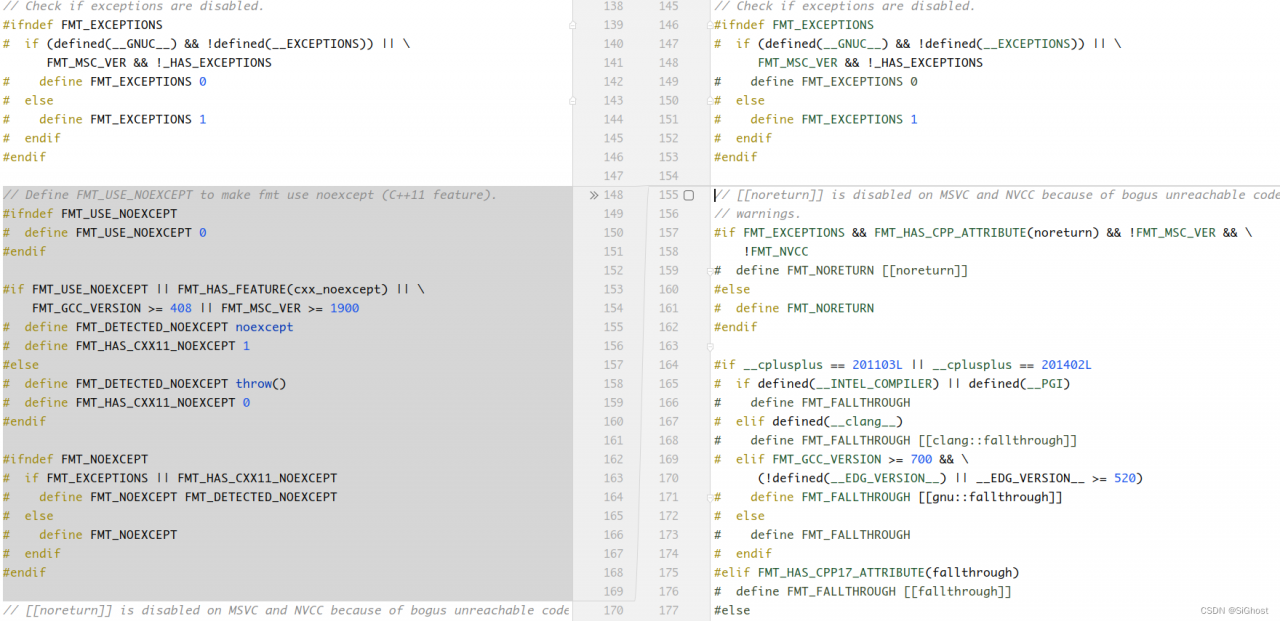
2. In spdlog/include/spdlog/fmt/bundled/core.h add a macro definition of FMT_NOEXCEPT near line 154, which is the following code

// Define FMT_USE_NOEXCEPT to make fmt use noexcept (C++11 feature).
#ifndef FMT_USE_NOEXCEPT
#  define FMT_USE_NOEXCEPT 0
#endif

#if FMT_USE_NOEXCEPT || FMT_HAS_FEATURE(cxx_noexcept) || \
    FMT_GCC_VERSION >= 408 || FMT_MSC_VER >= 1900
#  define FMT_DETECTED_NOEXCEPT noexcept
#  define FMT_HAS_CXX11_NOEXCEPT 1
#else
#  define FMT_DETECTED_NOEXCEPT throw()
#  define FMT_HAS_CXX11_NOEXCEPT 0
#endif

#ifndef FMT_NOEXCEPT
#  if FMT_EXCEPTIONS || FMT_HAS_CXX11_NOEXCEPT
#    define FMT_NOEXCEPT FMT_DETECTED_NOEXCEPT
#  else
#    define FMT_NOEXCEPT
#  endif
#endif

3. Recompile and install spdlog Library

cmake -S spdlog -B /tmp/build/
cd /tmp/build && make
sudo make install