Tag Archives: linux

Failed to download package files error after re installing Ubuntu

:

afternoon after reinstalling the Ubuntu virtual system, the “failed to download package files” error

appeared when downloading the software or updating the package

address:

modify the download source Settings

  1. press Alt+ F2 and enter softwa-property-gtk.
  2. changes the download location to “master server” or another server near your country of residence.
    select other select good Chinese site. If you’re in a university, tsinghua or another university is the.edu. Cn suffix. Choose Ali in China can also, or click choose the best server to let the system choose.

Reference

https://askubuntu.com/questions/73997/how-do-i-fix-a-failed-to-download-package-files-error

Mounting HGFs shares: [failed] solution

LInux system was installed in 0 1 VMware Tools1 3, the following error was reported: 4 5
6
7

8 VMLInux LInux0 1 VMware Tools1 3 3>4 5
6> [FAILED]
7

8

Linux 0 1
Mounting local filesystems: [FAILED]
Linux0 1 1>
Linux0 1 1 1>
1 1 1 1 1 0 1 1>
this is due to VMware Guest(VM) host( )0 1 1 Help Shared Folders Settings Panel0 1. In the VM – & gt; page, set SharedFolders, make it 0 1 enable 3. Mount Guest0 1 3/MNT/HGFS 4 5

the full transcription: http://wateraabb.blog.sohu.com/158879529.html

Kafka connection abnormal org.apache.kafka . common.errors.TimeoutException : Failed to update metadata after 60000 ms.

Introduction: there are many problems about hosts on the Internet. After testing, I found out that it is not. After testing by myself, I introduced three solutions to most problems:

1. Firewall port not opened or closed

firewall generally local test will be closed, the line is generally open, it is recommended to add port

add port:

# --permanent 为永久添加,不指定此参数重启后失效
firewall-cmd --zone=public --add-port=9092/tcp --permanent

delete port:

firewall-cmd --zone=public --remove-port=80/tcp --permanent

view all ports:

 firewall-cmd --zone=public --list-ports

view specified port:

firewall-cmd --zone= public --query-port=9092/tcp

view port status:

netstat -tunlp

overload:

firewall-cmd --reload

firewall command:

#开启防火墙 
service firewalld start
#启用防火墙 
service firewalld enable (永久生效)
#关闭防火墙 
service firewalld stop (重启后失效)
#禁用防火墙 
service firewalld disable (永久生效)
#重启防火墙 
service firewalld restart
#查看状态 
service firewalld status

2. Kafka service entry address not specified

edit the server.properties in the config directory of kafka, and add the address of the service entry to the external service:

注意:此ip为kafka所在主机的ip地址
listeners=PLAINTEXT://192.168.5.228:9092

3. The kafka version in the project is inconsistent with the kafka version installed on the server

modify maven pom. XML file, specify the corresponding kafka coordinates,
I installed kafka_2.12-2.1.0, the corresponding coordinates are:

<dependency>
      <groupId>org.apache.kafka</groupId>
      <artifactId>kafka_2.11</artifactId>
      <version>0.10.0.0</version>
</dependency>

Failed to start Remote desktop service (VNC)

problem: after setting up the VNC, restart has been failed

[root@gaia system]# systemctl status vncserver@:1.service
● vncserver@:1.service - Remote desktop service (VNC)
   Loaded: loaded (/usr/lib/systemd/system/vncserver@:1.service; disabled; vendor preset: disabled)
   Active: failed (Result: resources) since Fri 2020-03-27 16:27:34 CST; 14s ago
  Process: 12500 ExecStart=/usr/sbin/runuser -l root -c /usr/bin/vncserver %i (code=exited, status=0/SUCCESS)
  Process: 12496 ExecStartPre=/bin/sh -c /usr/bin/vncserver -kill %i > /dev/null 2>&1 || : (code=exited, status=0/SUCCESS)

Mar 27 16:27:30 gaia systemd[1]: Starting Remote desktop service (VNC)...
Mar 27 16:27:34 gaia systemd[1]: PID file /root/.vnc/gaia:1.pid not readable (yet?) after start.
Mar 27 16:27:34 gaia systemd[1]: Failed to start Remote desktop service (VNC).
Mar 27 16:27:34 gaia systemd[1]: Unit vncserver@:1.service entered failed state.
Mar 27 16:27:34 gaia systemd[1]: vncserver@:1.service failed.


address:
rm - rf/TMP /. * X

[root@gaia data]# systemctl daemon-reload
[root@gaia data]# systemctl restart vncserver@:1.service
[root@gaia data]# systemctl status vncserver@:1.service

About the problem I encountered: 226 transfer done but failed to open directory

encountered this problem in the following cases:

1, selinux is not disable.

setenforce 0 will not work either, mainly because selinux is still running and will protect network ports, whereas the ports of the FTP service are restricted by selinux.

Between the

the best solution is to the configuration file (/ etc/selinux/config), will be enforcing to disabled

2, user permissions, what user did you log in with, and then folder permissions allow this user to see the files in the folder

USES ls or dir to view folder permissions. If you do not have permissions to view this folder, you cannot view its contents.

, just like
,


Installing opencv and Linux Makefile:160 : recipe for target ‘all’ failed problem resolution

system used: MAC, remote server: Linux (UBuntu).

installing opencv to the server can accelerate the training speed and enhance the test function to a certain extent. Look up a few methods on the net all write too complex, oneself close test after feasible use the simplest language description record at this.

connect to the server with a terminal on the macbook and download opencv package from github:

git clone https://github.com/Itseez/opencv.git
git clone https://github.com/Itseez/opencv_contrib.git

download completed, opencv and opencv_contrib folders can be seen in your download directory, move opencv_contrib directory to opencv directory.

add the required dependency libraries:

sudo apt-get install build-essential
sudo apt-get install cmake git libgtk2.0-dev pkg-config libavcodec-dev libavformat-dev libswscale-dev
sudo apt-get install python-dev python-numpy libtbb2 libtbb-dev libjpeg-dev libpng-dev libtiff-dev libjasper-dev libdc1394-22-dev

done, use the CD command to enter the opencv directory, and then create a new folder:

mkdir build

goes into the build directory and starts compiling —

1. If your server has no anaconda pre-installed, execute:

cmake -D CMAKE_INSTALL_PREFIX=/usr/local -D CMAKE_BUILD_TYPE=Release -D OPENCV_EXTRA_MODULES_PATH=../opencv_contrib/modules ..

2. If you have anaconda on your server, there may be some conflicts. If you use the command above, a Makefile:160: recipe for target ‘all’ failed with an error. Just change it to:

cmake -D CMAKE_BUILD_TYPE=RELEASE -D CMAKE_INSTALL_PREFIX=/usr/local -D WITH_TBB=ON -D BUILD_SHARED_LIBS=OFF -D WITH_OPENMP=ON -D ENABLE_PRECOMPILED_HEADERS=OFF ..

is followed by:

make -j8

After

is compiled, execute:

sudo make install

this way, we can use OPencv in Ubuntu for all languages. You can see the results of the opencv compilation under /usr/local/lib.

cd /usr/local/lib
ls

you can see that there is a large number of lib oepncv, on the stable!

Open virtuakbox and failed to acquire the VirtualBox com appears object.The application will now terminate.

today’s sayings: knowledge lies in sharing, give rose, hand has fragrance.

problem description:

computer suddenly freezes, that is, VirtualBox is closed abnormally. After restarting the computer, opening VirtualBox presents the following error:

Failed to acquire the VirtualBox COM object.

The application will now terminate.

Details:

Failed to acquire the VirtualBox COM object.

The application will now terminate.

Document is empty.

Location: ‘C:\Users\Fred\.VirtualBox\VirtualBox.xml’, line 1 (0), column 1.

F: \ tinderbox, win – 5.1 \ SRC \ VBox, Main \ SRC – server \ VirtualBoxImpl CPP [550] (long __cdecl VirtualBox: : init (void)).

Result Code: E_FAIL (0x80004005)
Component: VirtualBoxWrap
Interface: IVirtualBox {0169423f-46b4-cde9-91af-1e9d5b6cd945}
Callee: IVirtualBoxClient {d2937a8e-cb8d-4382-90ba-b7da78a74573}

search on the Internet did not find a good solution, mostly said uninstall. Compelled by the thirst for solving the problem, I couldn’t help myself. Fortunately, it was done with the sixth sense of a codebreaker. In order to serve as a reference for the companion who encountered the same problem and to facilitate their own reference, I hereby make a record. Without further ado, go straight to the dry goods.

solution:

‘C:\Users\Fred\.virtualbox \ virtualbox.xml ‘, line 1 (0), column 1

I don’t know exactly what the virtualbox.xml file does, but if VirtualBox is enabled properly, it should be a management file or log. Virtualbox. XML file. If you restart VirtualBox, you can open it, but if you open it, there is nothing left. Like this,

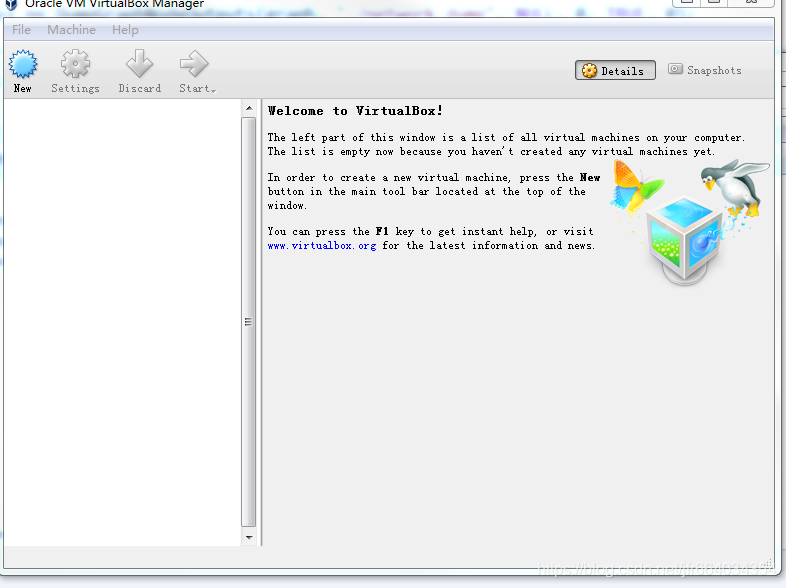
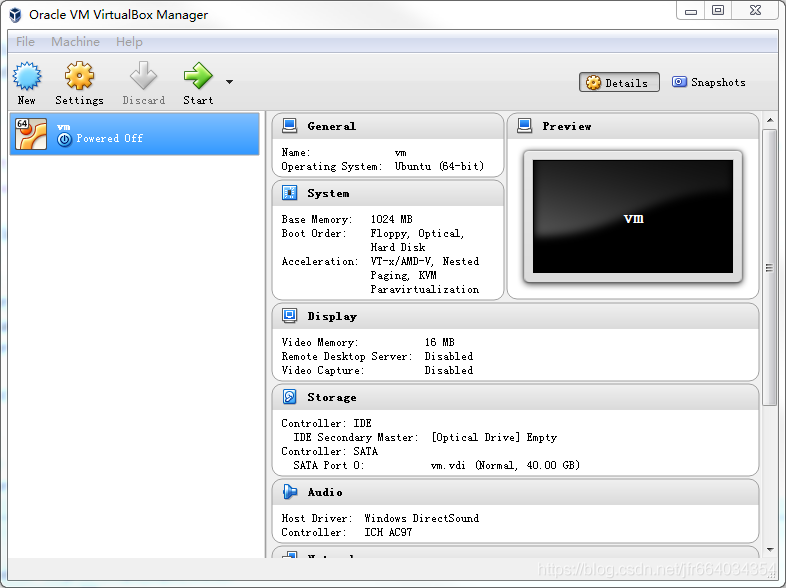
click on the menu bar: Machine-> Add

found before the VirtualBox configuration folder, that is, the folder with the suffixes. Vbox and. Vdi, I added

under C:\Users\Fred\VirtualBox VMs\vm

vm. Vbox file (my vm name is vm, you want to add the suffix . Vbox file), So easy! You will be configured before the virtual machine added to the normal use!

Failed to access perfctr MSR appears when CentOS is installed

failed to access perfctr MSR problem analysis and solution:

about this error: failed to access perfctr MSR there are a lot of places that occur. The problem I had was that after installing android in the virtual machine, the failed to access perfctr MSR error occurred on startup!

after multiple data and check, the reason is the CPU problem, to put it simply: AMD CPU does not support the virtual android, so it cannot start.

found on the network, when installing some Linux systems, will also appear this problem, in fact is similar, is the CPU problem, or need to turn on some of the CPU support functions in the BIOS!

Resolved failed call to cuinit: CUDA_ ERROR_ NO_ DEVICE

can’t connect to the NVIDIA driver after restarting the server. At this point, TensorFlow is still running, but only on the CPU. When installing the GPU version of TensorFlow, it also shows that it is installed.

first enter at the terminal nvidia-smi

appears nvidia-smi has failed because it couldn't communicate with the NVIDIA driver. Make sure that the latest NVIDIA driver is installed and running.
1 input in the terminal nvcc-v driver is also

nvcc: NVIDIA (R) Cuda compiler driver
Copyright (c) 2005-2016 NVIDIA Corporation
Built on Tue_Jan_10_13:22:03_CST_2017
Cuda compilation tools, release 8.0, V8.0.61

solution takes only two steps, without restarting

step1:sudo apt-get install dkms

step2: sudo dkms install -m nvidia -v 410.73

enter nvidia-smi again, return to normal.

where 410.73 in step2 is the version number of NVIDIA. When you do not know the version number, enter the directory /usr/ SRC, you can see that there is a folder of NVIDIA inside, the suffix is its version number

cd /usr/src

another: how to check whether TensorFlow is gpu version or CPU version

from tensorflow.python.client import device_lib
print(device_lib.list_local_devices())

https://blog.csdn.net/hangzuxi8764/article/details/86572093