Tag Archives: ProgrammerAH
Related configuration of mybatis project
Note: the development environment used is IDEA
- import dependency
enter relevant dependency information in pom.xml
<!--导入依赖-->
    <dependencies>
        <!--mysql驱动-->
        <dependency>
            <groupId>mysql</groupId>
            <artifactId>mysql-connector-java</artifactId>
            <version>5.1.47</version>
        </dependency>
        <!--mybatis-->
        <!-- https://mvnrepository.com/artifact/org.mybatis/mybatis -->
        <dependency>
            <groupId>org.mybatis</groupId>
            <artifactId>mybatis</artifactId>
            <version>3.5.2</version>
        </dependency>

        <!--junit-->
        <dependency>
            <groupId>junit</groupId>
            <artifactId>junit</artifactId>
            <version>4.12</version>
        </dependency>
    </dependencies>
MyBatis config. XML
<!--核心配置文件-->
<configuration>
<environments default="development">
<environment id="development">
<transactionManager type="JDBC"/>
<dataSource type="POOLED">
<property name="driver" value="com.mysql.jdbc.Driver"/>
<property name="url" value="jdbc:mysql://localhost:3306/mybatis?useSSL=true&useUnicode=true&characterEncoding=UTF-8"/>
<property name="username" value="root"/>
<property name="password" value="123456"/>
</dataSource>
</environment>
</environments>
<!--每一个Mapper.xml都需要在Mybatis核心配置文件中注册!-->
<mappers>
<mapper resource="com/liu/mapper/UserMapper.xml"/>
</mappers>
</configuration>
MyBatis tool class
MybatisUtils
package com.liu.utils;

import org.apache.ibatis.io.Resources;
import org.apache.ibatis.session.SqlSession;
import org.apache.ibatis.session.SqlSessionFactory;
import org.apache.ibatis.session.SqlSessionFactoryBuilder;

import java.io.IOException;
import java.io.InputStream;

/**
 * @author liucong
 * @date 2020/9/8 - 15:08
 */
//sqlSessionFactory --> sqlSession
public class MybatisUtils {

    private static SqlSessionFactory sqlSessionFactory;

    static{
        try {
            //使用Mybatis 第一步:获取sqlSessionFactory
            String resource = "mybatis-config.xml";
            InputStream inputStream = Resources.getResourceAsStream(resource);
            sqlSessionFactory = new SqlSessionFactoryBuilder().build(inputStream);
        } catch (IOException e) {
            e.printStackTrace();
        }
    }

    //既然有了 SqlSessionFactory,顾名思义,我们可以从中获得 SqlSession 的实例。
    // SqlSession 提供了在数据库执行 SQL 命令所需的所有方法。
    public static SqlSession getSqlSession(){
        SqlSession sqlSession = sqlSessionFactory.openSession();
        return sqlSession;
    }
}
- create entity class
package com.liu.pojo;

/**
 * @author liucong
 * @date 2020/9/8 - 15:24
 */
//实体类
public class User {
    private int id;
    private String name;
    private String pwd;

    public User() {
    }

    public User(int id, String name, String pwd) {
        this.id = id;
        this.name = name;
        this.pwd = pwd;
    }

    public int getId() {
        return id;
    }

    public void setId(int id) {
        this.id = id;
    }

    public String getName() {
        return name;
    }

    public void setName(String name) {
        this.name = name;
    }

    public String getPwd() {
        return pwd;
    }

    public void setPwd(String pwd) {
        this.pwd = pwd;
    }

    @Override
    public String toString() {
        return "User{" +
                "id=" + id +
                ", name='" + name + '\'' +
                ", pwd='" + pwd + '\'' +
                '}';
    }
}
- write Mapper interface class
package com.liu.mapper;

import com.liu.pojo.User;

import java.util.List;

/**
 * @author liucong
 * @date 2020/9/8 - 15:31
 */
public interface UserMapper {
    //查询全部用户
    List<User> getUserList();

    //根据ID查询用户
    User getUserById(int id);

    //增加一个用户
    int addUser(User user);

    //修改用户
    int updateUser(User user);

    //删除一个用户
    int deleteUser(int id);
}
- write mapper. XML configuration file
<?xml version="1.0" encoding="UTF-8" ?>
<!DOCTYPE mapper
        PUBLIC "-//mybatis.org//DTD Mapper 3.0//EN"
        "http://mybatis.org/dtd/mybatis-3-mapper.dtd">
<!--namespace:绑定一个对应的Dao/Mapper接口-->
<mapper namespace="com.liu.mapper.UserMapper">
    <select id="getUserList" resultType="com.liu.pojo.User">
        select * from user
    </select>

    <select id="getUserById" parameterType="int" resultType="com.liu.pojo.User">
        select * from mybatis.user where id=#{id}
    </select>

    <insert id="addUser" parameterType="com.liu.pojo.User">
        insert into mybatis.user (id, name, pwd) VALUES (#{id},#{name},#{pwd})
    </insert>

    <update id="updateUser" parameterType="com.liu.pojo.User">
        update mybatis.user set name = #{name},pwd=#{pwd} where id=#{id};
    </update>

    <delete id="deleteUser" parameterType="int">
        delete from mybatis.user where id=#{id}
    </delete>

</mapper>
- write test class
package com.liu.mapper;

import com.liu.pojo.User;
import com.liu.utils.MybatisUtils;
import org.apache.ibatis.session.SqlSession;
import org.junit.Test;

import java.util.List;

/**
 * @author liucong
 * @date 2020/9/8 - 15:54
 */
//org.apache.ibatis.binding.BindingException: Type interface com.liu.mapper.UserMapper is not known to the MapperRegistry.
//java.lang.ExceptionInInitializerError
public class UserMapperTest {
    @Test
    public void test(){
        //第一步:获得SqlSession对象
        SqlSession sqlSession = MybatisUtils.getSqlSession();
        //执行SQL
        //方式一:getMapper
        UserMapper mapper = sqlSession.getMapper(UserMapper.class);
        List<User> userList = mapper.getUserList();

        //方式二:
//        List<User> userList = sqlSession.selectList("com.liu.mapper.UserMapper.getUserList");

        for(User user:userList){
            System.out.println(user);
        }

        //关闭SqlSession
        sqlSession.close();
    }

    @Test
    public void test2(){
        SqlSession sqlSession = MybatisUtils.getSqlSession();

        UserMapper mapper = sqlSession.getMapper(UserMapper.class);
        User user = mapper.getUserById(1);
        System.out.println(user);

        sqlSession.close();
    }

    //增删改需要提交事务
    @Test
    public void test3(){
        SqlSession sqlSession = MybatisUtils.getSqlSession();
        UserMapper mapper = sqlSession.getMapper(UserMapper.class);
        int res=mapper.addUser(new User(4,"王五","123456"));
        if(res>0){
            System.out.println("插入成功");
        }
        //提交事务
        sqlSession.commit();
        sqlSession.close();
    }

    @Test
    public void test4(){
        SqlSession sqlSession = MybatisUtils.getSqlSession();
        UserMapper mapper = sqlSession.getMapper(UserMapper.class);
        mapper.updateUser(new User(4,"wangwu","1234"));
        sqlSession.commit();

        sqlSession.close();
    }

    public void test5(){
        SqlSession sqlSession = MybatisUtils.getSqlSession();
        UserMapper mapper = sqlSession.getMapper(UserMapper.class);
        mapper.deleteUser(4);
        sqlSession.commit();
        sqlSession.close();
    }
}
possible problem note: Maven static resource filtering problem
adds
to the pom. XML file
<!--在build中配置resources,来防止我们资源导出失败的问题-->
    <build>
        <resources>
            <resource>
                <directory>src/main/java</directory>
                <includes>
                    <include>**/*.properties</include>
                    <include>**/*.xml</include>
                </includes>
                <filtering>false</filtering>
            </resource>
            <resource>
                <directory>src/main/resources</directory>
                <includes>
                    <include>**/*.properties</include>
                    <include>**/*.xml</include>
                </includes>
                <filtering>false</filtering>
            </resource>
        </resources>
    </build>
Error 0x00003 occurred during tableau installation. The system cannot find the specified path
Tableau installation error 0x00003, the system can not find the specified path
solution
to the C ProgramData directory, the reason is that the Package Cache directory has become a shortcut, directly delete the Package Cache, install again;
Cisco ASA prompt modifies the display name hostname priority state context
ASA#Conf t
ASA(config)# prompt hostname priority state
CN-BJ-WAN-FW01-ASA/pri/act(config)#
也显示上下文
CN-BJ-WAN-FW01-ASA#conf terminal
CN-BJ-WAN-FW01-ASA(config)# prompt hostname priority state context
CN-BJ-WAN-FW01-ASA/pri/act(config)#
CN-BJ-WAN-FW01-ASA/pri/act(config)# changeto context BJ- PRDO
CN-BJ-WAN-FW01-ASA/pri/act/BJ-PRODO(config)#
Ida batch processes virus share samples to obtain ASM files and bytes files
recently needed asm file and bytes file samples for analysis, see the see snow forum can have IDA batch mode! It smells so good!
without further ado code
import sys
import os
import subprocess

global idcScriptFileName
global ida32tFilePath
global ida64tFilePath
#global ida32wFilePath
#global ida64wFilePath

# File these feilds with ur own ida file path and the idc file u want to execute!

idcScriptFileName = "batchmod.idc"
ida32tFilePath ='"D:\IDA 7.0\idat.exe"'
ida64tFilePath = "D:\IDA 7.0\idat64.exe"


#the binary file list text
TargetList = "D:\\batch_disassemble\\target_file_list.txt"
TargetFile_object = open(TargetList,"r").readlines()
for eachline in TargetFile_object:
    eachline = eachline.replace('\n','').replace('\r','')
    print(eachline)
    if os.path.exists(eachline):
        tmpExecStr = ida32tFilePath +" -A -c -S" + idcScriptFileName + " " + eachline
        os.system(tmpExecStr) #single process with cmdwindow
print ("All Process have been started!")
Note:
so if you’re using IDA, let’s look at what’s in your IDA directory. Exe, some of them are idaw on the web, for example, I only have idat.exe.
The idc files used in the
code are as follows (I put them in the same directory)
//by obaby
#include <idc.idc>

static main()
{
	// turn on coagulation of data in the final pass of analysis
	SetShortPrm(INF_AF2, GetShortPrm(INF_AF2) | AF2_DODATA);
	Message("Waiting for the end of the auto analysis...\n");
	Wait();
	Message("\n\n------ Creating the output file.... --------\n");
	auto path = GetIdbPath()[0:-3] + "asm";  //change the data to the length of the file path
	auto byteFilePath = GetIdbPath()[0:-3] + "bytes";//change the data to the length of the file path
	auto file = fopen(path,"w");
	auto byteFile = fopen(byteFilePath,"w");
	GenerateFile(OFILE_LST,file,0,-1,0);
	auto addr = MinEA();
	auto i=0;
	for( addr; addr != BADADDR; addr = NextAddr(addr) ){
    		fprintf(byteFile,"%02X",IdbByte(addr));
    		if (i == 15){
        		fprintf(byteFile,"\n");
        		i=0;
    		} else {
        		fprintf(byteFile," ");
        		i++;
    		}
	}
	fclose(file);
	fclose(byteFile);
	Message("All done, exiting...\n");
	Exit(0); // exit to OS, error code 0 - success
}
The file name in the
code is the path to my file that I got myself, as follows:
import os
file_path='D:\\traindata_1\\bancos'
file_list=[i for i in os.listdir(file_path)]
fw=open('target_file_list.txt','a')
for file in file_list:
    fw.write('%s\\%s\n'%(file_path,file))
fw.close()
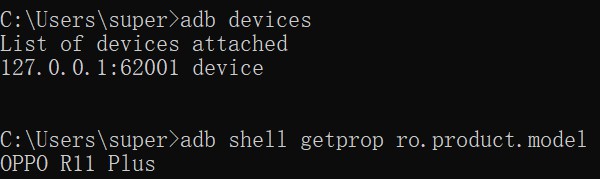
Solve the problem that the connection between ADB and nocturnal God cannot be solved
win10, nightgod simulator v6.6.0.9, adb v1.0.41.
CMD opens the command line window, run adb devices display List of devices attached, could not get emulator device information . After trying many methods online, was finally solved by replacing the nox_adb.exe file with adb.exe.
steps are as follows:
1. Close adb software and nightgod simulator software, and the two exe processes can be closed directly through the task manager.
2. I install the adb.exe path: D:\Program Files (x86)\android-sdk-windows\platform-tools, copy the adb.exe file to the nightgod directory, replace the nox_adb.exe file, and rename the copied adb.exe to nox_adb.exe of course.
copy to night god’s bin directory: D:\Program Files\Nox\bin
start the simulator, run adb devices again,
display:
List of devices attached
127.0.0.1:62001 device
Linux shell loop in a line for while
for loop instance
query whether the tomcat process exists in 5 seconds interval, if there is out of the loop, loop at most 20 times, wait 100 seconds
for i in $(seq 1 20); do ps aux| grep tomcat | grep -v grep && break;sleep 5;done
while loop instance
query whether the tomcat process exists, if there is out of the loop, if not will wait
while true; do ps aux | grep tomcat | grep -v grep && break;sleep 5; done
How to install cuda10.01in Ubuntu18.04
1. https://developer.nvidia.com/cuda-downloads
download base installer
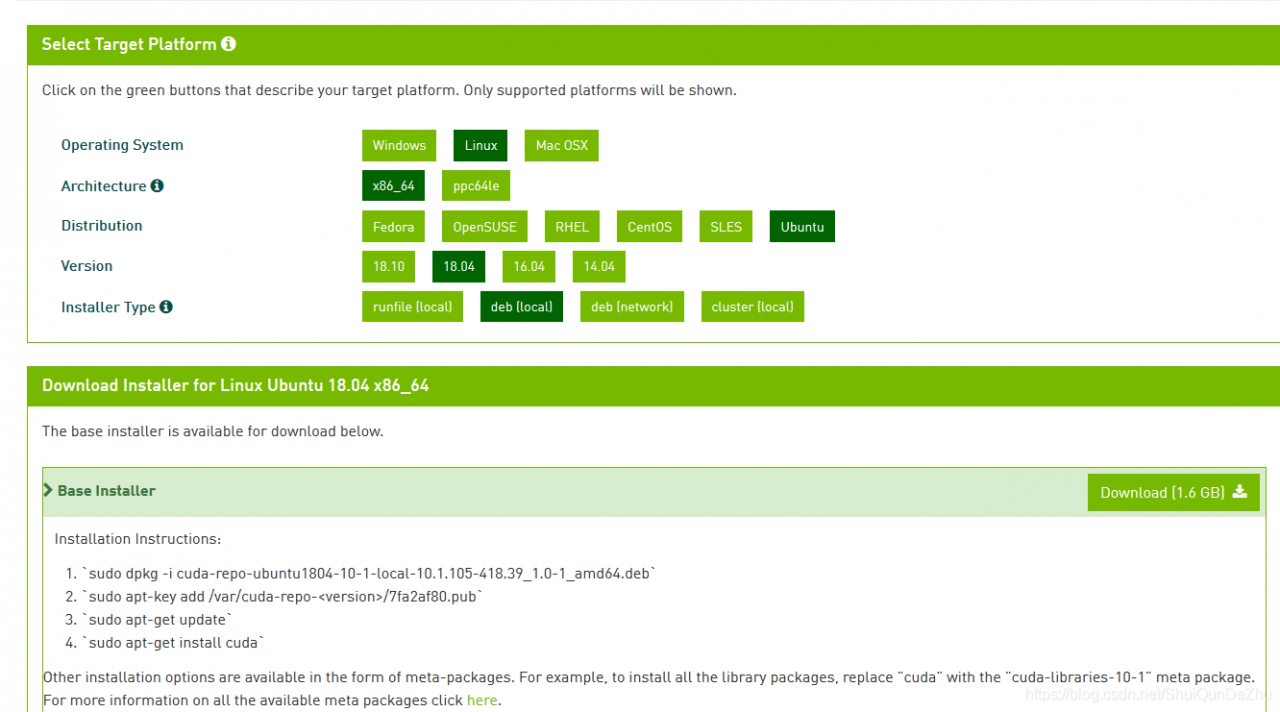
2. Execute the following code
- sudo dpkg-i cuda-repo-ubuntu1804-10-1-local-10.1.105-418.39_1.0-1_amd64.deb
- sudo apt-key add /var/cuda-repo-< version> Pub (for success in the previous step)
- sudo apt-get update
- sudo apt-get install cuda
3. Add environment variable
opens in ~ directory. Bashrc file: gedit ~/. Bashrc
Add two lines to the end of the file:
the export PATH =/usr/local/cuda – 10.1/bin: $PATH </ p>
export LD_LIBRARY_PATH =/usr/local/cuda – 10.1/lib64: $LD_LIBRARY_PATH </ p>
finally execute: source ~/. Barshrc
4. Check whether
has been installed successfully
nvcc -V
if output
nvcc: NVIDIA…..
Copyriht …
Built on…
Cuda version information, etc.
installed successfully
Attributeerror: module tensorflow no attribute app solution
is due to the tensorflow version, if you guessed right you should be using tensorflow2.0 and the source code is tensorflow1. A few versions. So there are errors.
solution :(1) change the import tensorflow as tf to import tensorflow.compat.v1 as tf
(2) use tf.com pat. V1. The flags replace tf. The app. The flags
either way. I personally recommend the first one.
Download pycharm, select python version, and create a corresponding virtual environment for python in pycharm. If the original tensorflow2.0 version is uninstalled, install tensorflow 1.x version. Remember to check specific Version to install.
Datagrip import & export table structure and data
right click directly next to the database you want to export and select dump with ‘mysqldump’

mysqldump是mysql用于转存储数据库的实用程序。
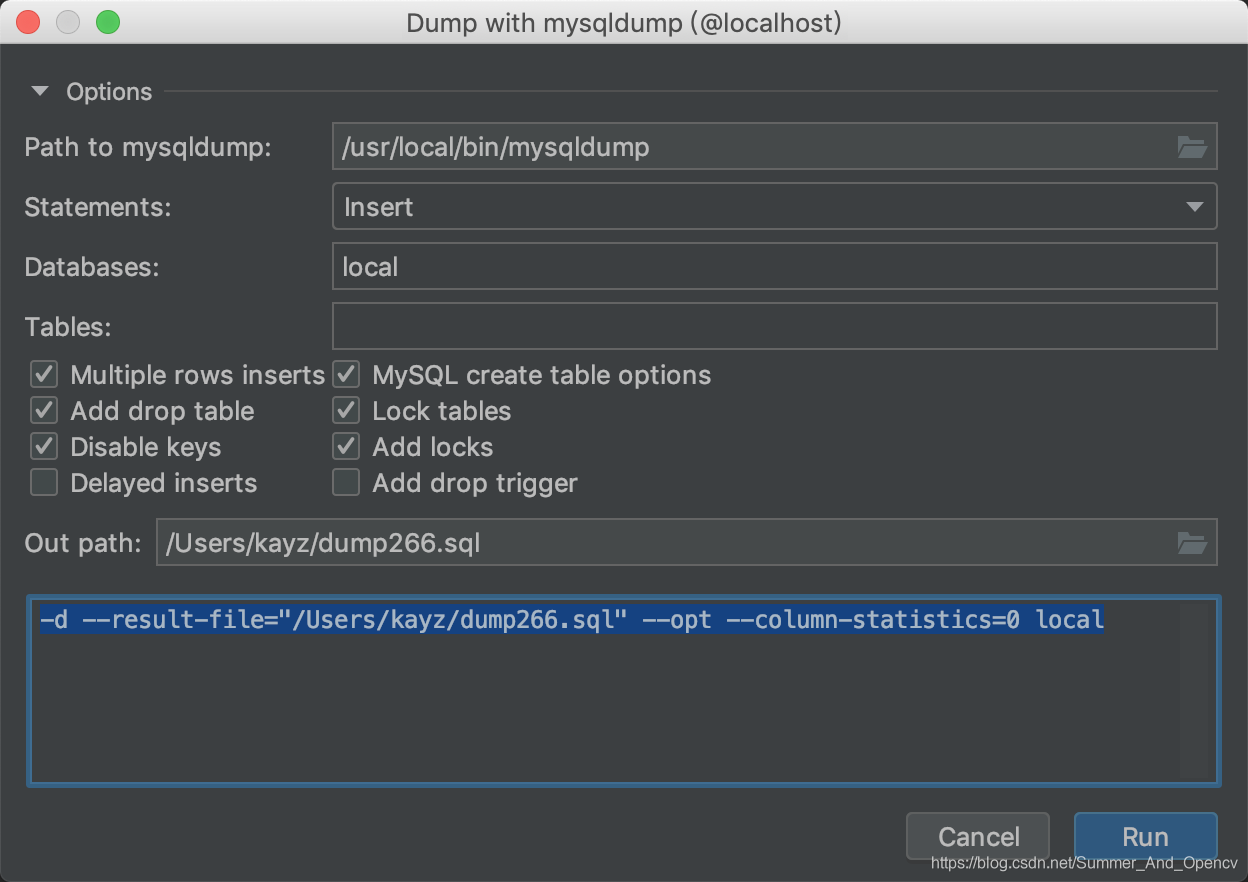
add the -d argument to the automatically generated command to export only the table structure without the data! if you want to export a file containing data, plus the -d parameter can be broken…
if the local mysqldump version is higher, for example, my local version is 8.0 and the target data source version is lower, the export will fail :
mysqldump: Couldn't execute 'SELECT COLUMN......
solution: add –column-statistics=0 to solve the problem
if you want to export the entire database that contains the data; Alternatively, use the command
at terminal
mysqldump -u root -p source1 > source2.sql
where source1 is the name of the database to be exported and
is the data name of the exported source.sql
import the exported source2.sql into the database using the following command :
/source/XXX XXX source2. SQL
where source2.sql is the data to be imported
before import , first to enter mysql, then to build a database, such as database, then into the database, finally execute the above command can be
Resolve importerror: cannot import name ‘TF_ utils’
run with keras times cannot import name ‘tf_utils’
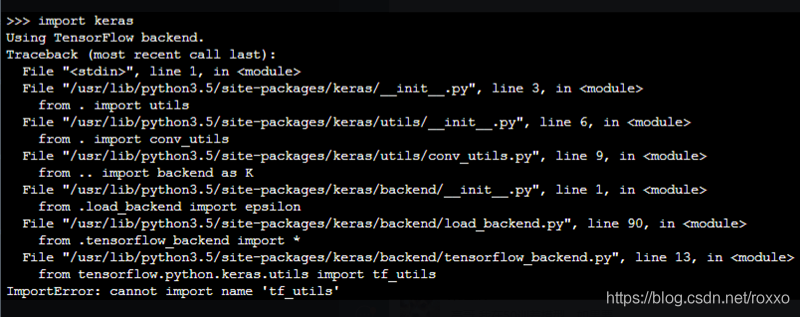
keras default version is high, pip3 install keras==2.2.0 solve
Python raspberry pie starts sending IP address to mailbox
#/bin/env python
# -*-coding:utf8-*-
import socket
import fcntl
import time
import struct
import smtplib
import urllib
import datetime
from email.mime.multipart import MIMEMultipart
from email.mime.text import MIMEText
from email.mime.image import MIMEImage


#发送邮件的基本函数,参数依次如下
# smtp服务器地址、邮箱用户名,邮箱秘密,发件人地址,收件人地址(列表的方式),邮件主题,邮件html内容
def sendEmail(smtpserver, username, password, sender, receiver, subject, msghtml):
  msgRoot = MIMEMultipart('related')
  msgRoot["To"] = ','.join(receiver)
  msgRoot["From"] = sender
  msgRoot['Subject'] =  subject
  msgText = MIMEText(msghtml,'html','utf-8')
  msgRoot.attach(msgText)
  #sendEmail
  smtp = smtplib.SMTP()
  smtp.connect(smtpserver)
  smtp.login(username, password)
  smtp.sendmail(sender, receiver, msgRoot.as_string())
  smtp.quit()


# 检查网络连同性
def check_network():
  # 试验5次ping 百度,如果连通就返回True,否则返回False
  for i in range(0, 5):
    try:
      result=urllib.urlopen('http://baidu.com').read()
      #print result
      print "Network is Ready!"
      break
    except Exception , e:
      print e
      print "Network is not ready,Sleep 5s...."
      time.sleep(5)
  else:
    print "Sorry that pi isn't connectted to Internet now"
    return False
  return True


# 获得本级制定接口的ip地址
def get_ip_address():
  s = socket.socket(socket.AF_INET, socket.SOCK_DGRAM)
  s.connect(("1.1.1.1",80))
  ipaddr=s.getsockname()[0]
  s.close()
  return ipaddr


if __name__ == '__main__':
  if check_network():
    ipaddr = get_ip_address()
    now = datetime.datetime.now()
    time_info = now.strftime('%Y-%m-%d %A %H:%M:%S')
    send_text = "Boot time: %s\nIP addr: %s" % (time_info, ipaddr)
    sendEmail('smtp.sina.com','you email username ','your email password ','your emial address',['[email protected]'], 'Raspberry Pi boot status', send_text)
  else:
    print "Sorry that I can't help without network"