CV ::ColorMap only supports source images of type CV_8UC1 or CV_8UC3 in function cv2.applycolormap () error
recently used cv2.cv2.applycolormap () to convert a 2-d ndarray into a pseudo-color image. It is found that an error message “CV ::ColorMap only supports source images of type CV_8UC1 or CV_8UC3 in function” is frequently popped. It is found that the 2-d nDARray element data type must be converted to NP. uint8 type.
import numpy as np
import cv2
a = np.ones((2,3))
b = a.astype(np.uint8)
img1 = cv2.applyColorMap(a, cv2.COLORMAP_JET)  # 报错
img2 = cv2.applyColorMap(b, cv2.COLORMAP_JET)  # 正常
Python how does a. Py file call classes and functions in another. Py file
in the same folder
calls the function:
A.py file:
def add(x,y):
    print('和为:%d'%(x+y))
B.py file:
import A
A.add(1,2)
or
from A import add
add(1,2)
call class:
Amy polumbo y file:
class A:
    def __init__(self,xx,yy):
        self.x=xx
        self.y=yy
    def add(self):
        print("x和y的和为:%d"%(self.x+self.y))
B.py file:
from A import A
a=A(2,3)
a.add()
or
import A
a=A.A(2,3)
a.add()
in different folders
The file path for the a.python file: E:\PythonProject\winycg
P. y file:
import sys
sys.path.append(r'E:\PythonProject\winycg')
'''python import模块时, 是在sys.path里按顺序查找的。
sys.path是一个列表,里面以字符串的形式存储了许多路径。
使用A.py文件中的函数需要先将他的文件路径放到sys.path中'''
import A

a=A.A(2,3)
a.add()
Mongodb start error: child process failed, exited with error number 1
mongodb startup ERROR ERROR: child process failed, exited with ERROR number 1
is usually a problem of permissions, or there is no corresponding path
check step: add a parameter after startup to export the log to a writable directory :
./mongod –fork –logpath=/tmp/mongod.log
then check the problem as follows :
2017-02-22 T01:33:34. 229 + 0800 I CONTROL [main] ERROR: always write a pid file to/var/run/mongo/mongod. Pid: No to the file or directory
means there is no such directory (/var/run/mongodb/)
and I’m just going to create a new mkdir -p /var/run/mongodb/
starts normally again as follows:
root@sz:~/soft/mongodb342/bin#./mongod -f /etc/mongodb/mongod. Conf
about to fork child process, waiting until server is ready for connections.
forked process: 7482
child process started successfully, parent exiting
Ubuntu 16.04 modify jupyter default path
- view the path to the configuration file
jupyter notebook --generate-config --allow-root
- modify the configuration file (enter I to edit normally)
vim 上一步看到的路径/.jupyter/jupyter_notebook_config.py
open jupyter_notebook_config.py and find the following text:
-
## The default URL to redirect to from `/` -
#c.NotebookApp.default_url = '/tree'
change it to:
-
## The default URL to redirect to from `/` -
c.NotebookApp.default_url = '/tree/Coding'
at this time, Jupyter’s default directory path becomes /home/Coding, namely Users/lab/Coding
then, open the terminal and type the following command directly:
jupyter notebook
Principle and usage of feof ()
1. What is feof()?
feof() is a function that detects the end of a file on the stream, and returns a non-zero value if the file ends, or 0
if not
is commonly used in file operations, where feof() is often used to determine whether a file is finished.
two, feof() classic error
according to the definition of this function, everyone is so commonly used, but such use, regardless of whether there is content in file, will be judged as “file isn’t empty.”
#include<stdio.h>
int main(void)
{
    FILE *p;
    p = fopen("open.txt", "r");
    if (feof(p))
    {
        printf("文件为空。");
    }
    else
    {
        printf("文件不为空。");
    }
    return 0;
 }
3. Principle of feof()
1.EOF
EOF is a computer term, short for End Of File, which in the operating system means that the source has no more data to read. Data sources are often referred to as files or streams. This character usually exists at the end of the text to indicate the end of the data.
The
definition means that the end of the document has a hidden character “EOF”, and when the program reads it, it knows that the file has reached the end. The while loop plus the EOF judgment is usually used as a marker for the end of the read.
The value
EOF is usually -1, but it varies depending on the system.
2.feof()
- feof() principle:
The- feof() function does not evaluate whether the file is empty by reading the EOF.
- for feof(), it works by standing at the cursor and looking backwards to see if there are any characters left. If so, return 0; If not, return non-0. It doesn’t read the information, it just checks to see if there’s anything left behind the cursor.
- use error analysis:
- for an empty file, when the program opens it, its cursor stops at the beginning of the file, but since nothing is stored in the file (but EOF does exist), the entire file is stored as an EOF. When the program opens the file and calls Feof () directly, the function looks over its head from the cursor, sees EOF, and of course returns 0.
4. How to use properly
now that we understand the principle, how do we use it correctly?
#include<stdio.h>
int main(void)
{
    FILE *p;
    p = fopen("open.txt", "r");
    getc(p);
    if (feof(p))
    {
        printf("文件为空。");
    }
    else
    {
        rewind(p);//将光标跳回到文件开头
        int a;
        fscanf(p,"%d",&a);
        printf("%d", a);
    }
    return 0;
 }
analysis:
- for files, whether empty files or files with information, when the file is opened and the cursor is at the default beginning, there is information behind the cursor. At this time, calling feof() to see if there is any content behind the cursor, it makes no sense.
- so we need to find the difference from the same, first use getc(), read a character from the file, move the cursor back one character. The cursor of the space-time file has been moved to the end of EOF, and using Feof () returns 1. This is the correct use of feof().
- note that the cursor must be returned to the beginning of the file, because the cursor was moved forward one bit when deciding whether the file was empty. The cursor must be restored to the beginning, so as to ensure the normal reading of the file.
Problem in configuring Maven error: Java_ HOME not found in your environment.
Please set the JAVA_HOME variable in your environment to match the
location of your Java installation.
I solve the path:
Added JAVA_HOME=D:\Program Files\Java\jdk1.6.0_10 (JDK path)
Use Python to insert the specified content in the specified line of the specified file
#! /usr/bin/python

fp = file('data.txt')           #指定文件
s = fp.read()                   #将指定文件读入内存
fp.close()                      #关闭该文件
a = s.split('\n')
a.insert(LINE, 'a new line')    #在第 LINE+1 行插入
s = '\n'.join(a)                #用'\n'连接各个元素
fp = file('data.txt', 'w')
fp.write(s)
fp.close()
fp = file('data.txt')
lines = []
for line in fp:                  #内置的迭代器, 效率很高
    lines.append(line)
fp.close()

lines.insert(LINE, 'a new line') #在第 LINE+1 行插入
s = '\n'.join(lines)
fp = file('data.txt', 'w')
fp.write(s)
fp.close()error: Eigen does not name a type Eigen::Matrix
file reference order error,
must include “opencv2/core/eigen.hpp” or #include< eigen3/ eigen /Dense” before include “opencv2/core/eigen.hpp”; Eigen/Dense> Both types of inclusion are related to where the EIGEN file was installed, please visit the related blog.
Reset power on password of lightning simulator
**
lightning simulator reset boot password
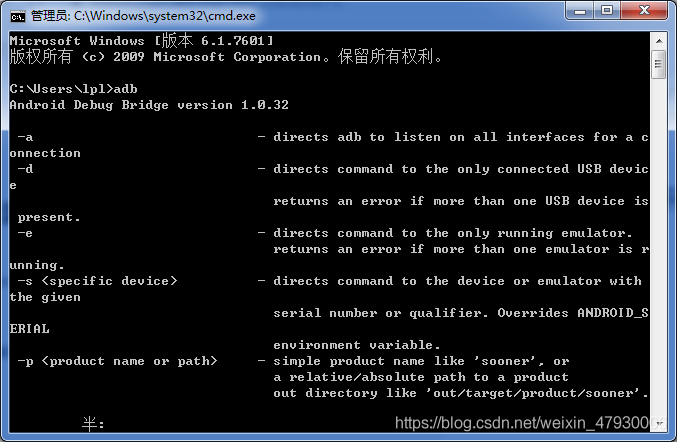
download the adb
clear the password
1, we open the CMD window (Ctrl+R)
2. Open the terminal, we first link the simulator and input
, adb connect ****** (device name and IP). If you can’t remember the IP, restart the simulator, and then proceed directly to the third step
3, use devices to view the device
adb devices
4. Use the following command to get the root permission of the simulator
adb root
5. After obtaining root permission, use remount name to login
adb remount
6. After successful login, enter into the shell side
adb shell
and enter into the shell side under /data/system directory
7, finally delete the password operation
rm *. Key
8. After deletion, close the emulator and reopen it. The password is gone
mkdir: Call From hadoop102/192.168.6.102 to hadoop102:8020 failed on connection exception: java.net.
the mkdir: Call the From hadoop102/192.168.6.102 to hadoop102:8020 failed on connection exception: java.net.ConnectException: rejected the connection. For more details see: http://wiki.apache.org/hadoop/ConnectionRefused
the engaged in it is this BUG you HDFS not rev… This BUG is brain-dead, ha ha
Two ways of fuzzy query in mybatis
can be added % in the test class or % in the SQL of the configuration file in two ways:
the first way is to add:
test class:
 public void findByName(){
        List<User> users = userDao.findByName("王");
        for (User user:users){
            System.out.println(user);
        }
    }
profile:
<selectid="findByName"parameterType="string"resultType="com.itheima.daomain.User">
            select * from user where username like '%${value}%';
 </select>
the second test class adds %
test class:
 public void findByName(){
       List<User> users = userDao.findByName("%王%");
        for (User user:users){
            System.out.println(user);
        }
    }
profile:
<selectid="findByName"parameterType="string"resultType="com.itheima.daomain.User">
        select * from user where username like #{username};
</select>
Encapsulation of Axios and management of API interface in Vue
first of all we need to understand why we want to encapsulate API
- here is mainly code reuse, encapsulation, call again, directly to call the line, save a lot of repeated code, greatly reduce the amount of code
followed by the encapsulation of the API
interacts with the background to retrieve data in vue projects. We usually use the axios library, which is a promise-based HTTP library that runs on the browser side and in node.js. It has many nice features, such as intercepting requests and responses, canceling requests, converting JSON, client-side defense XSRF, and so on.
if you’re not familiar with axios you can check out the axios website oh, honey!
Js
I usually create a new folder in my project’s SRC directory, and then I create a new http.js and an api.js file. The HTTp.js file is used to encapsulate our AXIOS and APi.js files to manage our interfaces uniformly. 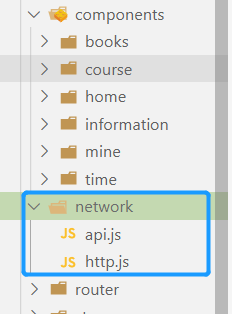
let’s take a look at the code in action, dear!
- http.js code operation
//第一步:引入axios
import axios from 'axios';

//在这里设置开发环境和生产环境的默认路径
//development是开发环境 production是生产环境
if(process.env.NODE_ENV=='development'){
    axios.defaults.baseURL='http://120.53.31.103:84/api/app/'
}
if(process.env.NODE_ENV=='production'){
    axios.defaults.baseURL='https://wap.365msmk.com'
}

//这里是设置请求超时时间 时间为5秒(可以自己进行设置)
axios.defaults.timeout=5000;
//在请求拦截可以设置权限
//如果不设置数据会请求失败或为空数据,在这里也可以用来判断token
axios.interceptors.request.use(
    config=>{
        config.headers={DeviceType:"H5"}	//在这里写的是H5
        return config;
    }
)

//封装get请求
export function get(url,params){
    return new Promise((resolve,reject)=>{
        axios.get(url,{
            params:params
        }).then(res=>{
            resolve(res)
        }).catch(err=>{
            reject(err)
        })
    })
}

//封装post请求
export function post(url,params){
    return new Promise((resolve,reject)=>{
        axios.post(url,
         params
        ).then(res=>{
            resolve(res.data)
        }).catch(err=>{
            reject(err.data)
        })
    })
}
- API. Js code operation
//引入http.js
import {get,post} from './http.js'

// 设置get或者post请求
export function getList(){
	return get('api/app/recommend/appIndex?')
}

//讲师详情的主讲课程
//在里面可以传递id,参数等
export function getTeacherXiang(params){
	return post('api/app/teacher/mainCourse',params)
}
One of the advantages of
API interface management is that we have centralized the API. If we need to modify the interface later, we can directly find the corresponding modification in api.js, instead of going to every page to find our interface and then modify it again. The key is, in case of modification the quantity is quite big, specification GG. In addition, if we modify the interface directly in our business code, it is easy to touch our business code and cause unnecessary trouble.
friendly tip : in order to avoid careless mistakes, it is best to write comments for each interface.
- use the encapsulated method
in the vue file
//引入封装好的方法
import { getBanner} from "../../api/api.js";

async mounted() {
    var data= await getBanner();
  //获取完数据就可以直接打印出来了
    console.log(data);
}
friendship tips : the person who wrote this blog is not true. If there are any mistakes, please kindly put forward