Tag Archives: ProgrammerAH

Opencv’s imread() function returns null when reading images

program code is as follows:

		// 导入图像
		std::stringstream ss;
		ss <<  "/home/wang/桌面/LearningVO-master/build/dataset/00/image_0/"
			<< std::setw(6) << std::setfill('0') << img_id << ".png";

		cv::Mat img(cv::imread(ss.str().c_str(), 0));
		assert(!img.empty());

picture path is as follows:

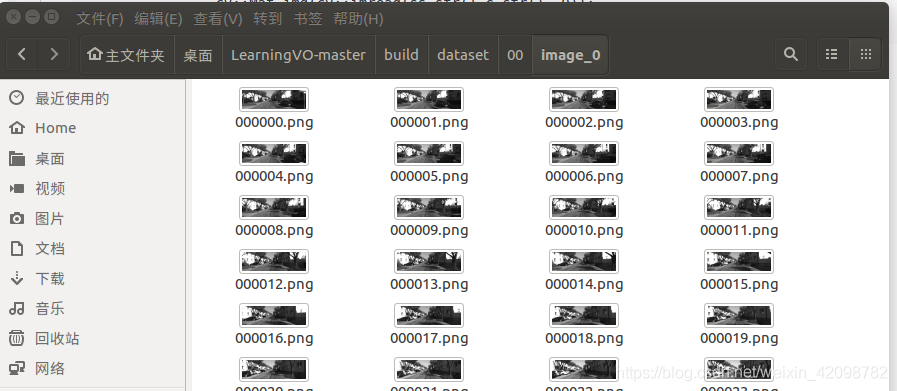
but the program will assert failed.

my solution:

OpenCV absolute path seems to be a problem, change the absolute path to relative path:

		// 导入图像
		std::stringstream ss;
		ss <<  "./dataset/00/image_0/"
			<< std::setw(6) << std::setfill('0') << img_id << ".png";

		cv::Mat img(cv::imread(ss.str().c_str(), 0));
		assert(!img.empty());

note that this relative path is relative to the path to execute the command in the terminal; Also write “/Home/ XXX/” instead of” ~/ XXX/” in the Home directory, otherwise an error will occur.

modified, the program runs normally.

The difference of. Pt,. PTH,. Pkl and the way to save the model

we often see pytorch model files with the suffixes.pt,.pth,.pkl. Is there any format difference between these model files?It’s not really a difference in format, it’s just a difference in suffix (that’s all), some people prefer the.pt suffix to the.pth or.pkl suffix when using the torch. Save () function to save model files. There is no difference in the model files saved with the same torch.save () statement.

in pytorch’s official documentation/code, useful. Pt, useful. PTH. The general practice is to use.pth, but there seems to be more.pt in the official documentation, and officials don’t care much about using one.

save:

torch. Save (model.state_dict(), mymodel.pth)# only saves model weight parameters, not model structure

call:

model = My_model(*args, **kwargs) # My_model
model.load_state_dict(torch. Load (mymodel. PTH))#
model.eval()

)

save:

torch. Save (model, mymodel.pth)# save the entire model state

call:

model=torch. Load (mymodel.pth)# there is no need to reconstruct the model structure, just load
model.eval()

Linux edit save file command

1, vi and vim two working modes

command mode: the default mode after opening a file is

edit mode: open the file keyboard input “I” into the insert edit mode, a mode of operation to add, delete and change.

2, the keyboard input “I” into the edit mode, you can write the file

how do I save the file after I write it?

1) press “esc” to exit edit mode, switch to command mode, and then enter the following command to

these operations must be done in command mode.

2) save and exit file: “:wq”

3) if you only want to save the file: “:w”

4) discard all file modifications: “:q!”

Three methods of JavaScript jump to new page

1. A tag

a tag : & lt; A href=”http://www.jb51.net” title=” Home of scripts “& GT; Welcome< /a>

< A href = “javascript: history. The go (1)” & gt; : : the previous page

< A href = “javascript: history. The go (1)” & gt; : the next page is

< A href=”http://www.jb51.net” title=” script house “target=”_blank”> Welcome< /a>

2. The location object href attributes:

window.location.href=”http://www.jb51.net”; // open a window


3.open :

Windows open ( http://www.w3schools.com , _blank ) ; // in another new window open the window

FAILED: Execution Error, return code 1 from org.apache.hadoop.hive.ql.exec.DDLTask. MetaException(me

FAILED: Execution Error, return code 1 from org.apache.hadoop.hive.ql.exec.DDLTask. MetaException(message:org.apache.hadoop.hbase.client.RetriesExhaustedException: Can't get the locations
	at org.apache.hadoop.hbase.client.RpcRetryingCallerWithReadReplicas.getRegionLocations(RpcRetryingCallerWithReadReplicas.java:312)
	at org.apache.hadoop.hbase.client.ScannerCallableWithReplicas.call(ScannerCallableWithReplicas.java:153)
	at org.apache.hadoop.hbase.client.ScannerCallableWithReplicas.call(ScannerCallableWithReplicas.java:61)
	at org.apache.hadoop.hbase.client.RpcRetryingCaller.callWithoutRetries(RpcRetryingCaller.java:200)
	at org.apache.hadoop.hbase.client.ClientScanner.call(ClientScanner.java:320)
	at org.apache.hadoop.hbase.client.ClientScanner.nextScanner(ClientScanner.java:295)
	at org.apache.hadoop.hbase.client.ClientScanner.initializeScannerInConstruction(ClientScanner.java:160)
	at org.apache.hadoop.hbase.client.ClientScanner.<init>(ClientScanner.java:155)
	at org.apache.hadoop.hbase.client.HTable.getScanner(HTable.java:811)
	at org.apache.hadoop.hbase.MetaTableAccessor.fullScan(MetaTableAccessor.java:602)
	at org.apache.hadoop.hbase.MetaTableAccessor.tableExists(MetaTableAccessor.java:366)
	at org.apache.hadoop.hbase.client.HBaseAdmin.tableExists(HBaseAdmin.java:303)
	at org.apache.hadoop.hbase.client.HBaseAdmin.tableExists(HBaseAdmin.java:313)
	at org.apache.hadoop.hive.hbase.HBaseStorageHandler.preCreateTable(HBaseStorageHandler.java:205)
	at org.apache.hadoop.hive.metastore.HiveMetaStoreClient.createTable(HiveMetaStoreClient.java:747)
	at org.apache.hadoop.hive.metastore.HiveMetaStoreClient.createTable(HiveMetaStoreClient.java:740)
	at sun.reflect.NativeMethodAccessorImpl.invoke0(Native Method)
	at sun.reflect.NativeMethodAccessorImpl.invoke(NativeMethodAccessorImpl.java:62)
	at sun.reflect.DelegatingMethodAccessorImpl.invoke(DelegatingMethodAccessorImpl.java:43)
	at java.lang.reflect.Method.invoke(Method.java:498)
	at org.apache.hadoop.hive.metastore.RetryingMetaStoreClient.invoke(RetryingMetaStoreClient.java:173)
	at com.sun.proxy.$Proxy36.createTable(Unknown Source)
	at org.apache.hadoop.hive.ql.metadata.Hive.createTable(Hive.java:852)
	at org.apache.hadoop.hive.ql.metadata.Hive.createTable(Hive.java:867)
	at org.apache.hadoop.hive.ql.exec.DDLTask.createTable(DDLTask.java:4356)
	at org.apache.hadoop.hive.ql.exec.DDLTask.execute(DDLTask.java:354)
	at org.apache.hadoop.hive.ql.exec.Task.executeTask(Task.java:199)
	at org.apache.hadoop.hive.ql.exec.TaskRunner.runSequential(TaskRunner.java:100)
	at org.apache.hadoop.hive.ql.Driver.launchTask(Driver.java:2183)
	at org.apache.hadoop.hive.ql.Driver.execute(Driver.java:1839)
	at org.apache.hadoop.hive.ql.Driver.runInternal(Driver.java:1526)
	at org.apache.hadoop.hive.ql.Driver.run(Driver.java:1237)
	at org.apache.hadoop.hive.ql.Driver.run(Driver.java:1227)
	at org.apache.hadoop.hive.cli.CliDriver.processLocalCmd(CliDriver.java:233)
	at org.apache.hadoop.hive.cli.CliDriver.processCmd(CliDriver.java:184)
	at org.apache.hadoop.hive.cli.CliDriver.processLine(CliDriver.java:403)
	at org.apache.hadoop.hive.cli.CliDriver.executeDriver(CliDriver.java:821)
	at org.apache.hadoop.hive.cli.CliDriver.run(CliDriver.java:759)
	at org.apache.hadoop.hive.cli.CliDriver.main(CliDriver.java:686)
	at sun.reflect.NativeMethodAccessorImpl.invoke0(Native Method)
	at sun.reflect.NativeMethodAccessorImpl.invoke(NativeMethodAccessorImpl.java:62)
	at sun.reflect.DelegatingMethodAccessorImpl.invoke(DelegatingMethodAccessorImpl.java:43)
	at java.lang.reflect.Method.invoke(Method.java:498)
	at org.apache.hadoop.util.RunJar.run(RunJar.java:323)
	at org.apache.hadoop.util.RunJar.main(RunJar.java:236)

take a look at the hadoop hive hbase above lib below guava jar, make sure the version is the same

Installing the image J plug-in

1. Download the imageJ, https://imagej.net/Fiji/Downloads

2. Unzip the

3. Installing a plug-in
(1) https://imagej.nih.gov/ij/plugins/index.html download plug-in you need. Open Toolsets or tools.

![在这里插入图片描述](https://img-blog.csdnimg.cn/20201013153831165.png?x-oss-process=image/watermark,type_ZmFuZ3poZW5naGVpdGk,shadow_10,text_aHR0cHM6Ly9ibG9nLmNzZG4ubmV0L3dlaXhpbl80MTI0MjEyOA==,size_16,color_FFFFFF,t_70#pic_center)


(2) click to open the required plug-in: copy content;

(3) create a.txt file under macros folder;

open image j, click on the top plugins-new-macro,
in the macro interface open. TXT file
copy the TXT content before opening to the open. TXT blank interface

(4)ImageJ菜单栏单击 Plugins-Macros-Install;选择刚刚创建的.txt文件,打开,安装完毕!


Removing duplicate lines from Linux shell files

original text file

$ cat test              
jason
jason
jason
fffff
jason

Method 1: sort -u

after removal of repetition

sort -u test
fffff
jason

notice that the order is disrupted

sort test|uniq

after removal of repetition

$sort test |uniq 
fffff
jason

note that the order is disrupted, the principle and method are the same

method three: awk ‘! A [$0] + + ‘

after removal of repetition

$ awk '!a[$0]++' test
jason
fffff

order remains the same, file deduplication example

awk '!a[$0]++' test.txt >test.txt.tmp && mv -f test.txt.tmp test.txt

where awk USES a temporary file to overwrite the result

specific principle is as follows:

awk’s program instructions consist of patterns and actions, in the form of Pattern {Action}. If the Action is omitted, print $0 will be executed by default.

Pattern:

can be used here to remove repetition

!a[$0]++

In awk, for uninitialized array variables, an initial value of 0 is assigned to them during numerical operations, so a[$0]=0, and the ++ operator is characterized by first value and then 1, so Pattern is equivalent to

!0

and 0 is false,! In order to get the reverse, the final result of the whole Pattern is 1, which is equivalent to if(1). The Pattern matching is successful, and the current record is output. For the DUP file, the processing method of the first three records is the same.

when the data “Jason” in line 2 is read, a[$0]=1, and the result after taking the reverse is 0, that is, the Pattern is 0, and the Pattern matching fails, so this record is not output, and the subsequent data is followed by the same, and the duplicate lines in the file are finally removed successfully.

Installing GCC reduced version GCC 4.4.6 under Linux

is recorded as follows:

1. Download the appropriate version of GCC from the official website, http://gcc.gnu.org.

2. Unpack the

# sudo tar ZXFV GCC – 4.4.6. Tar. Gz

3. Go to the unzip directory, mine is ~/local/gcc-4.4.6, and I have an executable called configure, with the following configuration:

#./configure — prefix =/usr/bin/GCC – 4.4.6 – enable – language = c, c + +, Java

(where /usr/bin/gcc-4.4.6 is the directory to install GCC, followed by –enable-language=c,c++, Java is set to install compilable language)

Notice that the configure success sign shows that the makefile was successfully generated and that you’ll have an additional makefile in your directory so you can proceed to the next


error: said GMP and MPFR

cannot be found

to download and install dependencies:
ftp://gcc.gnu.org/pub/gcc/infrastructure

GMP – 4.3.2. Tar..bz2

MPFR – 2.4.2. Tar..bz2

unzip installation dependency:

tar -jxvf gmp-4.3.2.tar.bz2

mkdir /usr/local/gmp-4.3.2

cd ./gmp-4.3.2

./configure --prefix=/usr/local/gmp-4.3.2

make

make install


tar -jxvf mpfr-2.4.2.tar.bz2

mkdir /usr/local/mpfr-2.4.2

cd ./mpfr-2.4.2

./configure --prefix=/usr/local/mpfr-2.4.2 --with-gmp=/usr/local/gmp-4.3.2

make

make install

error: m4

cannot be found
Install GMP under ubuntu

. Configure :error:no usable m4 in$path or /user/5bin solution

is easy, because you don’t have m4, just install it.

sudo apt-get install m4

4.#make

this is the longest step, so long that I couldn’t wait to go back to sleep last night…

note: error may also occur in make. Generally, it is also necessary to configure the environment or missing files. It is OK to install whatever is needed directly

5. # make install

6. After the end, establish the connection of gcc4.4.6 version, command:

# ln -s/usr/bin/GCC – 4.4.6/bin/GCC/usr/bin/GCC
Check out the current version of GCC:

#gcc –version

Git removes the content of stash

delete stash content, feel the whole world is clean ::

is just a few lines :

git stash list // view the stash list

if you get this result it means that your stash is nothing

this means that there is a queue

then you can execute git stash clear: note that this clears all your content

$ git stash drop stash@{0}  这是删除第一个队列