PHP7 or above has abolished the mysql function library, so the mysql_connect() function is no longer available. The new function libraries MySQli and PDO can completely replace this library. This article mainly introduces two kinds of library functions, PHP and mysql connection and encountered problems.
experiment, all content in ubuntu18.04.3 can also be fully run.
installation problem
PHP is connected to mysql using apache+PHP+mysql, as each part has been pre-installed in kali, see resources for details: kali installs apache, mysql, PHP. Here I want to talk about the installation need to pay attention to the problem, apache and mysql installation generally will not have problems, focus on PHP installation. After the configuration of resources is completed, create a new file index.php under /var/www. HTML folder. The content is as follows:
<?php

phpinfo();

?>
opens apache, which is enabled by default. If you are not sure, you can run the following command:
/etc/init.d/apache2 start
the following results:

the server has opened, the browser input address: http://localhost/index.php, appeared normal PHP configuration information:
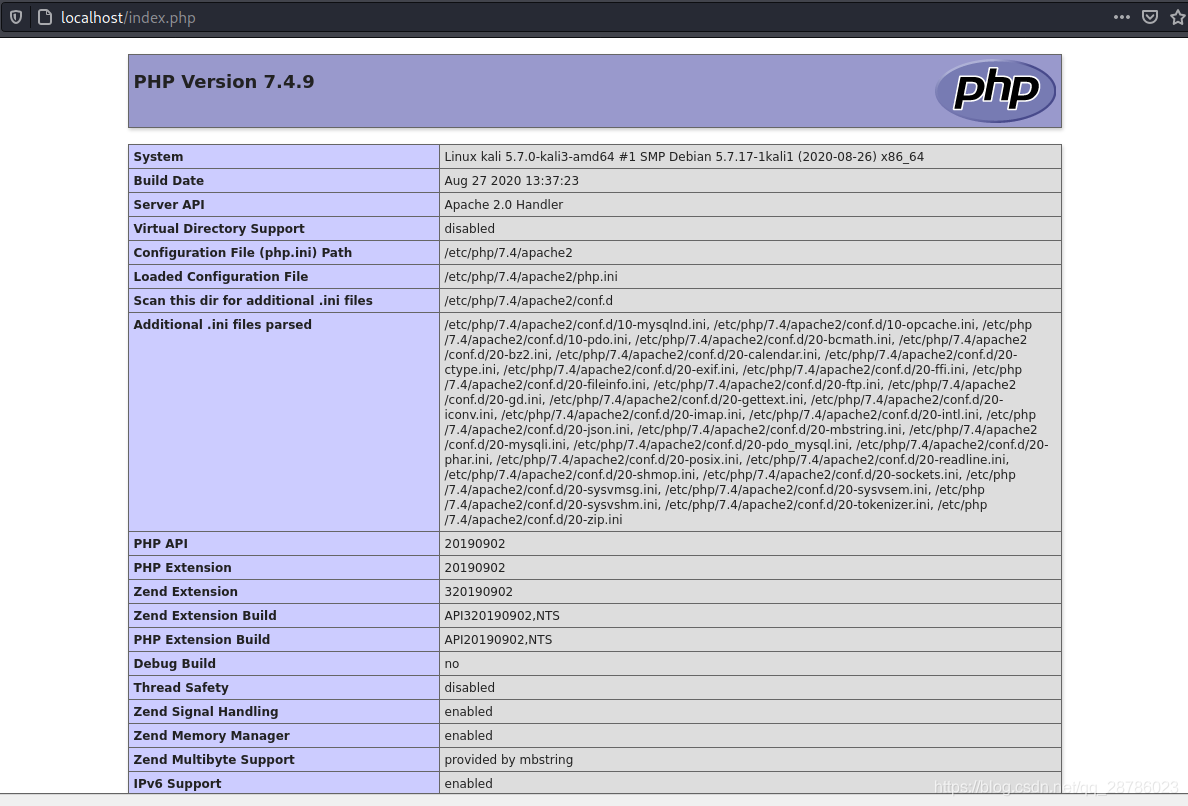 page provides PHP configuration details and extension module has been installed, need to emphasize the extension module!!!!!! This can cause a very common problem: the PHP information page displays normally, the static PHP page can be displayed, but the dynamic interactive page is blank! , which is often the result of PHP’s corresponding extension module not being installed. For example, the modules needed this time are MySQli and PDO (these two libraries are independent, but the two libraries are used to realize the connection between PHP and mysql respectively). However, in the latest VERSION of PHP, mySQli library will not be installed by default, which causes the mysqli functions in the PHP page will not be executed, forming a blank page.
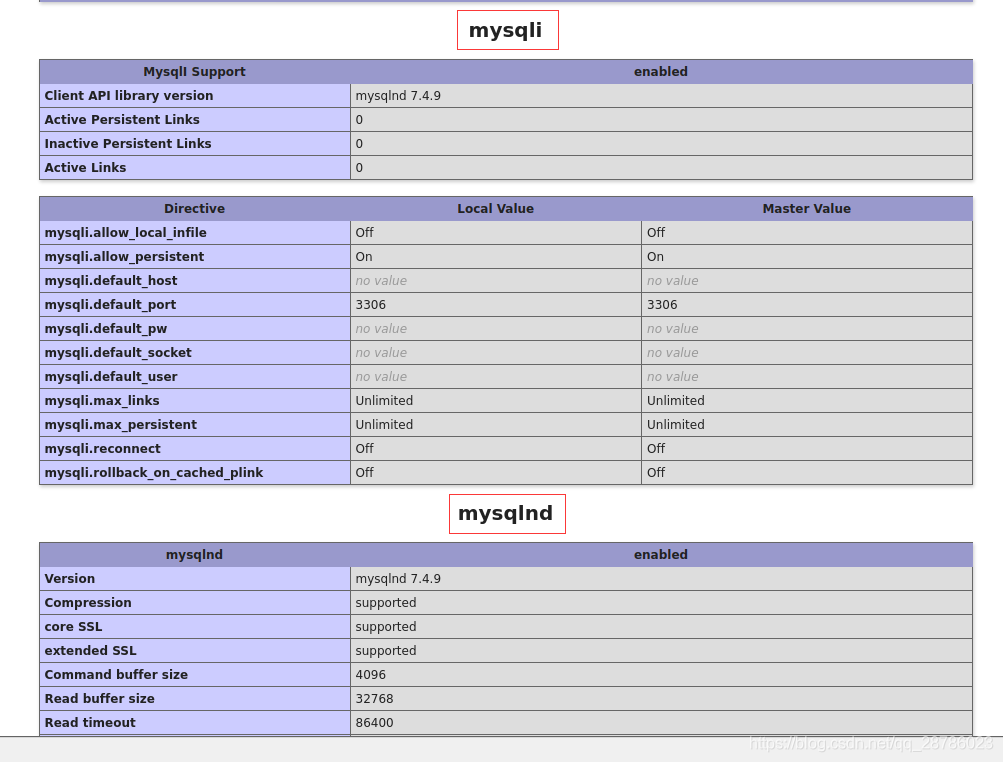

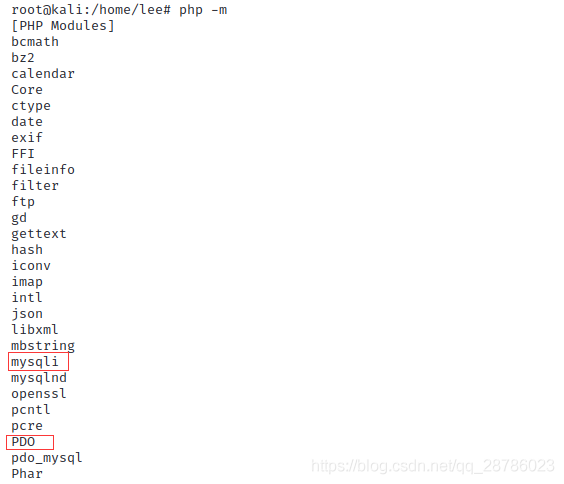
direct command line input:
php -m
lists the extensions that have been installed:

I have now installed them. If you do not have these modules, you can install them with the following command (see reference 2 for more details) :
sudo apt-get install php7.4-mysqli //这里我的php版本是7.4.9
sudo apt-get install php7.4-PDO
at this point, all configuration is complete.
MySQL create user with authorization
Mysql can log in confidentially under
kali and default to root, while ubuntu requires a more detailed command:
mysql  #kali下
--------------------------------
mysql -u root -p #kali下和ubuntu下均可,更正式
kali>
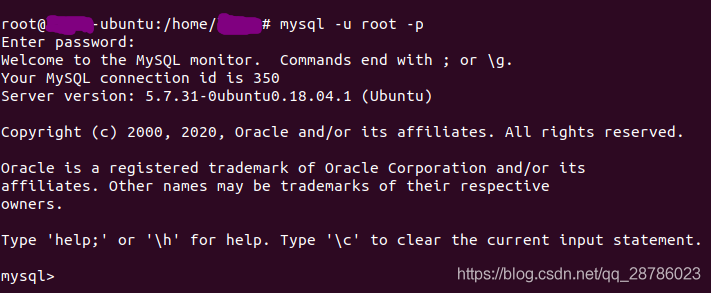
or ubuntu kali is recommended
one of the most common problems here is to report an error:
ERROR 2002 (HY000) : Can ‘t connect to local MySQL server through socket’/var/run/mysqld/mysqld. The sock ‘
there are all kinds of solution to the problem, sometimes only restart MySQL Can solve the problem:
systemctl restart mysql
create user
database operation commands are case sensitive.
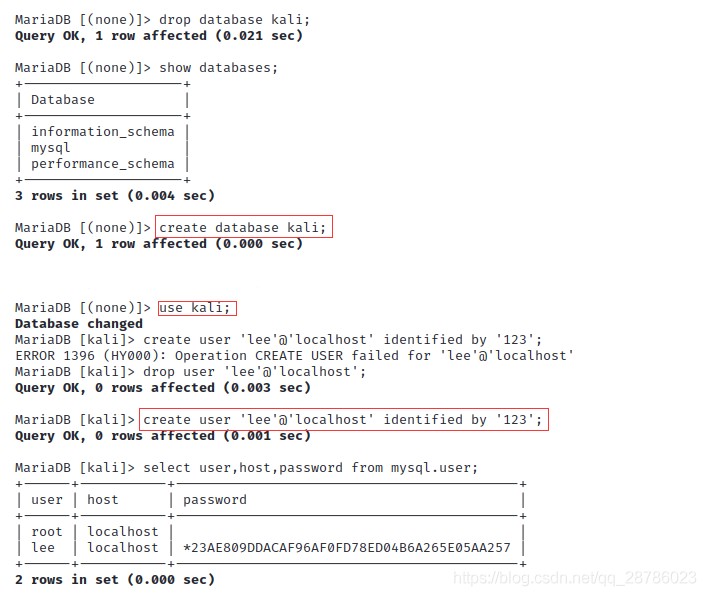
into Mysql, the relevant user creation and authorization commands are as follows:
#drop database kali; #由于已经完成数据库的操作,数据库已经存在,这里将其删除,重新演示
show databases; #列出当前存在的数据库
create database kali;  #创建数据库kali
use kail;  #使用kali
#drop user 'lee'@'localhost';  #删除当前用户lee
create user 'lee'@'localhost' identified by '123';  #创建新用户,这条命令涉及PHP代码,下面详细说
select user,host,password from mysql.user; #列出所有用户、所属主机、密码(默认经过加密)
identified by ‘123’; **create user ‘lee’ @’ localhost ‘identified by’ 123 ‘;
create user ‘username’ @’ host ‘identified by’ password ‘;
username: created username;
host: specify which host the user can log in on. If it is a local user, use localhost. If you want the user to log in from any remote host, use the wildcard %;
password: the user’s login password, the password can be empty, if empty, the user can log in the server without the password;
The user information created by
is placed in mysql.user.
user authorization
authorizes the new user created. Authorization refers to the operation that the user can perform on the database, such as adding, deleting, modifying, checking, etc. The command is:
grant all privileges on kali.* to 'lee'@'localhost' identified by '123' with grant option;
flush privileges;  #权限刷新
grant privileges on databasename. Tablename to ‘username’ @’ host ‘
privileges: privileges on the user, such as SELECT, INSERT, UPDATE, etc. ALL
databasename: databasename
tablename: Table name, represented by * if you want to grant the user permission to operate on all databases and tables.
for more detailed permissions, see resources 3: MySQL create users and authorizations. As a matter of fact, the connection between PHP and mysql can already be detected at this point. For a clearer representation, the contents of the database can be printed on the page. First create the content.
database content creation
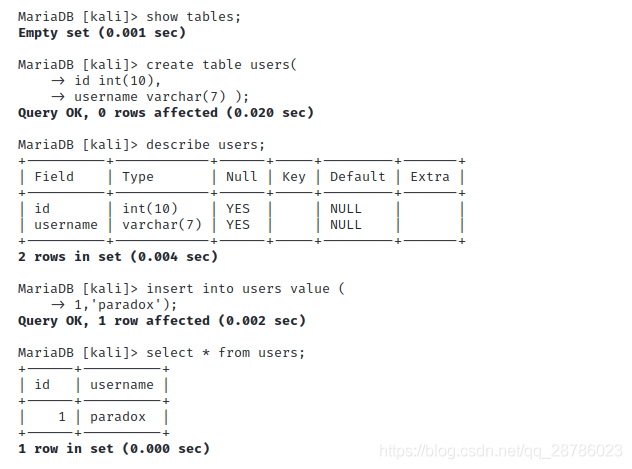
basic database operation, command as follows:
show tables;  #显示当前数据库下所有列表
create table users(
    -> id int(10),
    -> username varchar(7) );  #创建table,赋予属性
describe users;  #描述表
insert into users value (1,'paradox');  #插入数据
select * from users;  #显示数据

PHP7 connection mysql
PHP7 has abolished the mysql library. If you want to establish PHP and mysql interaction, you can do it through mysqli and PDO library functions. This article does not elaborate on the differences and USES of mysql, MySQli and PDO. You can read Resources 4-6 for details.
PHP mysqli interacts with mysql
mysqli is object-oriented and process-oriented. Set up mysqli.php in the folder /var/www. HTML /. The content is as follows:
<?php
    /*
    面向对象风格,格式及参数说明:
    $mysqli = new Mysqli($serve,$username,$password,$dbname);
    $serve:所使用的用户主机名称,这里是本地用户localhost
    $username: 数据库用户名,上面设置为lee
    $password:用户对应的密码
    $dbname:所使用的数据库。默认的话,会调用上一个打开的数据库
    */
    $mysqli = new mysqli("localhost", "lee", "123", "kali");
    if(!$mysqli)  {
        echo"database error";
    }else{
        echo"php env successful";
    }
    $mysqli->close();
?>
your browser input address: http://localhost/mysqli.php, the connection is successful.

PHP PDO interacts with mysql
PDOPDO’s biggest advantage over MySQLi is that PDO supports a wide variety of databases, while MySQLi only supports MySQLi. PDO’s advantages will come into play when a program wants to switch from mysql to SQL Server or Oracle in the future, because the database switch is transparent to the interface, the PHP code changes very little, and if you’re using MySQLi, you’ll have to rewrite everything you use for the database.
PDO can establish a connection in three ways: connects to the database in the form of parameters; Connect to the database through A URI; Connect to the database in the form of a configuration file. The latter two require configuration files, the first of which is used here. Similarly, under /var/www. HTML/create a file called pdo.php that reads as follows:
<?php
$dbms='mysql';
$dbName='kali';
$user='lee';
$pwd='123';
$host='localhost';
$dsn="$dbms:host=$host;dbname=$dbName";
$pdo=new PDO($dsn,$user,$pwd);
echo "PDO连接MySQL成功";
?>
, the parameter here has the same meaning, just pay attention to the format of $DSN. Enter the address http://localhost/pdo.php in the browser and the connection is successful as follows:

Of course,
can also output the contents of the database, create a file pdoo.php, the content is as follows:
<?php
header("Content-type:text/html;charset=utf-8");
$dns = 'mysql:host=localhost;dbname=kali';
$username = 'lee';
$password = '123';

try{ // PDO连接数据库若错误则会抛出一个PDOException异常
	$PDO = new PDO($dns,$username,$password);
	$result = $PDO->query('select * from users');
	$data = $result->fetchAll(PDO::FETCH_ASSOC);
	// PDO::FETCH_ASSOC表示将对应结果集中的每一行作为一个由列名索引的数组返回
	print_r($data);
} catch (PDOException $error){
	echo 'connect failed:'.$error->getMessage();
}

?>
your browser input: http://localhost/pdoo.php, shows the database content:
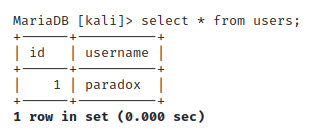
this is the front insert data in the database:


 page provides PHP configuration details and extension module has been installed, need to emphasize the extension module!!!!!! This can cause a very common problem: the PHP information page displays normally, the static PHP page can be displayed, but the dynamic interactive page is blank! , which is often the result of PHP’s corresponding extension module not being installed. For example, the modules needed this time are MySQli and PDO (these two libraries are independent, but the two libraries are used to realize the connection between PHP and mysql respectively). However, in the latest VERSION of PHP, mySQli library will not be installed by default, which causes the mysqli functions in the PHP page will not be executed, forming a blank page.


