Run TensorFlow using Pycharm, and Virtualenv installs TensorFlow
@(Machine Learning with Python)
System: MacOS 10.13
This section focuses on two issues:
Create a virtual environment with virtualenv and install TensorFlow in this environment to configure the interpreter under Pycharm and run the training code under Pycharm
Virtualenv + Tensorflow
TensorFlow can be installed under the Virtualenv virtual environment, or under the Anaconda virtual environment, or under Docker. The specific installation can be found on the TF official website, but the TF official website can be accessed only by scientific surfing on the Internet.
Here’s an excerpt of how Virtualenv is installed.
virtualenv --system-site-packages ~/tensorflow # Create a new virtual environment called tensorflow in your personal home directory.

source tensorflow/bin/activate # Enter the virtual environment.

easy_install -U pip # This step can be omitted if you already have a pip tool.

pip install --upgrade tensorflow # pip install tensorflow

deactivate # Exit the virtual environment
Pycharm configuration
Python script code needs to be executed under the interpreter, so we need to perform the following steps:
Pycharm -> Preference -> Project: Project Interpreter below Project Name click the lower triangle arrow to the right of the selection bar -> show all -> Click on the “+” – & gt; Add Local selects “~/tensorflow /bin/Python” and waits for loading
After loading, the red wavy line below the import tensorflow as tf in the code disappears, but the buttons in the column where the code runs are all gray.
Don’t understand why at first, then understand, the most critical place is here…
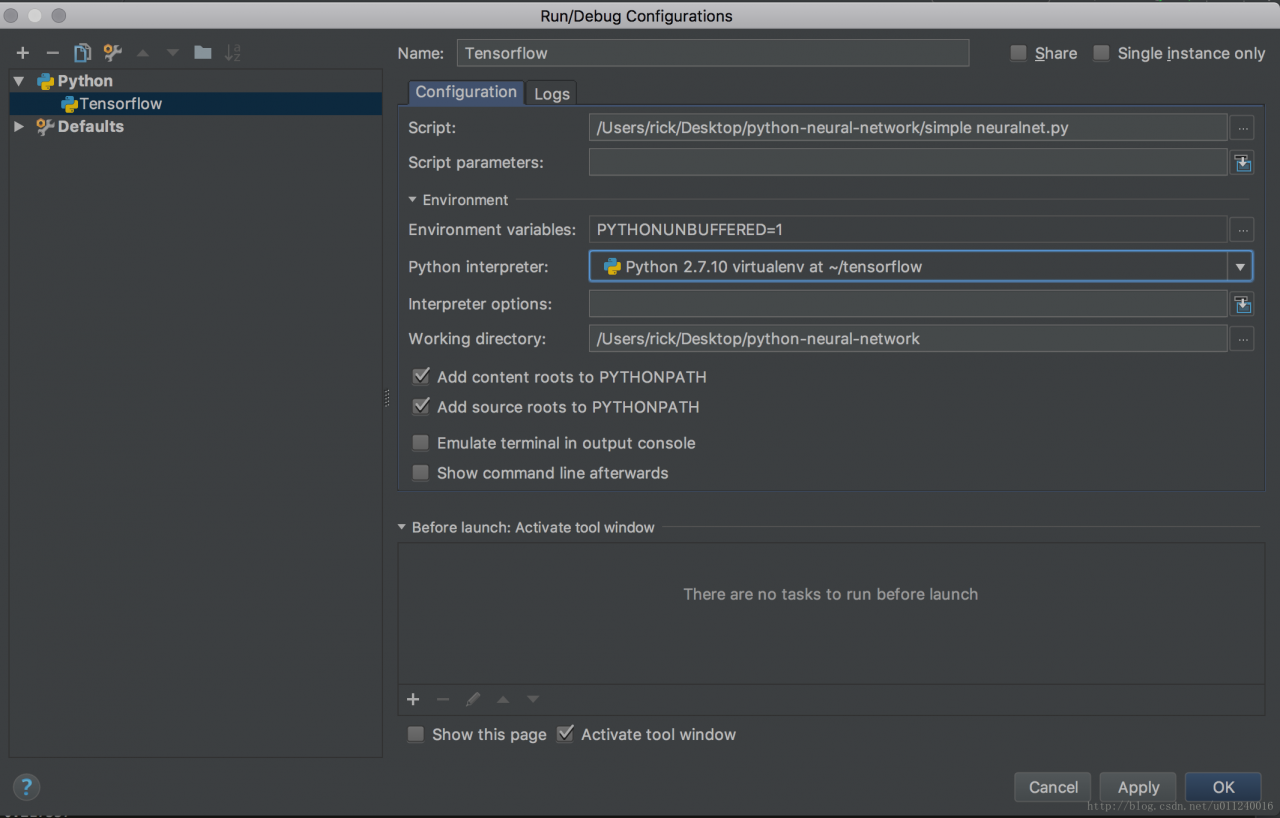
This is because there is no optional execution configuration, so you need to manually edit it.

If there is no configuration, there is a Default. Clicking the “+” at the top will generate an interpretation environment configuration that can be used to execute the code based on the Default configuration.
Specifies that the script to be executed (entry) selects the interpreter
The previous set of the interpreter, here can also be re-selected, choose not installed TF interpreter, the code containing TF code will not be interpreted correctly.
As for the choice of the Python interpreter under the Anaconda virtual environment, there is no difference between Virtualenv and Virtualenv.
For example, I use Virtualenv in ~/</ code> to create the virtual environment, called tensorflow Anaconda is /Applications/Anaconda envs/python27 </ code>, as well as the choice of approach: is to find the bin/python </ code>.
As I understand it, the Python interpreter in the virtual environment is configured independently, but you can also use some of the tools of the global installation. With this independent interpreter, you can isolate the installation of some differentiated things, such as different versions of software packages, etc.
conda env list
Lists the virtual environment installed by Anaconda.
source activate envname
source deactivate